👩🏼 “The chlorophyll inside the leaves makes them green.”
👦🏻 “Chloro….what did you say???”
👩🏼 “Chlorophyll sweet boy, chlorophyll. “
HA! Not an easy word to say but it is super fun to demonstrate!
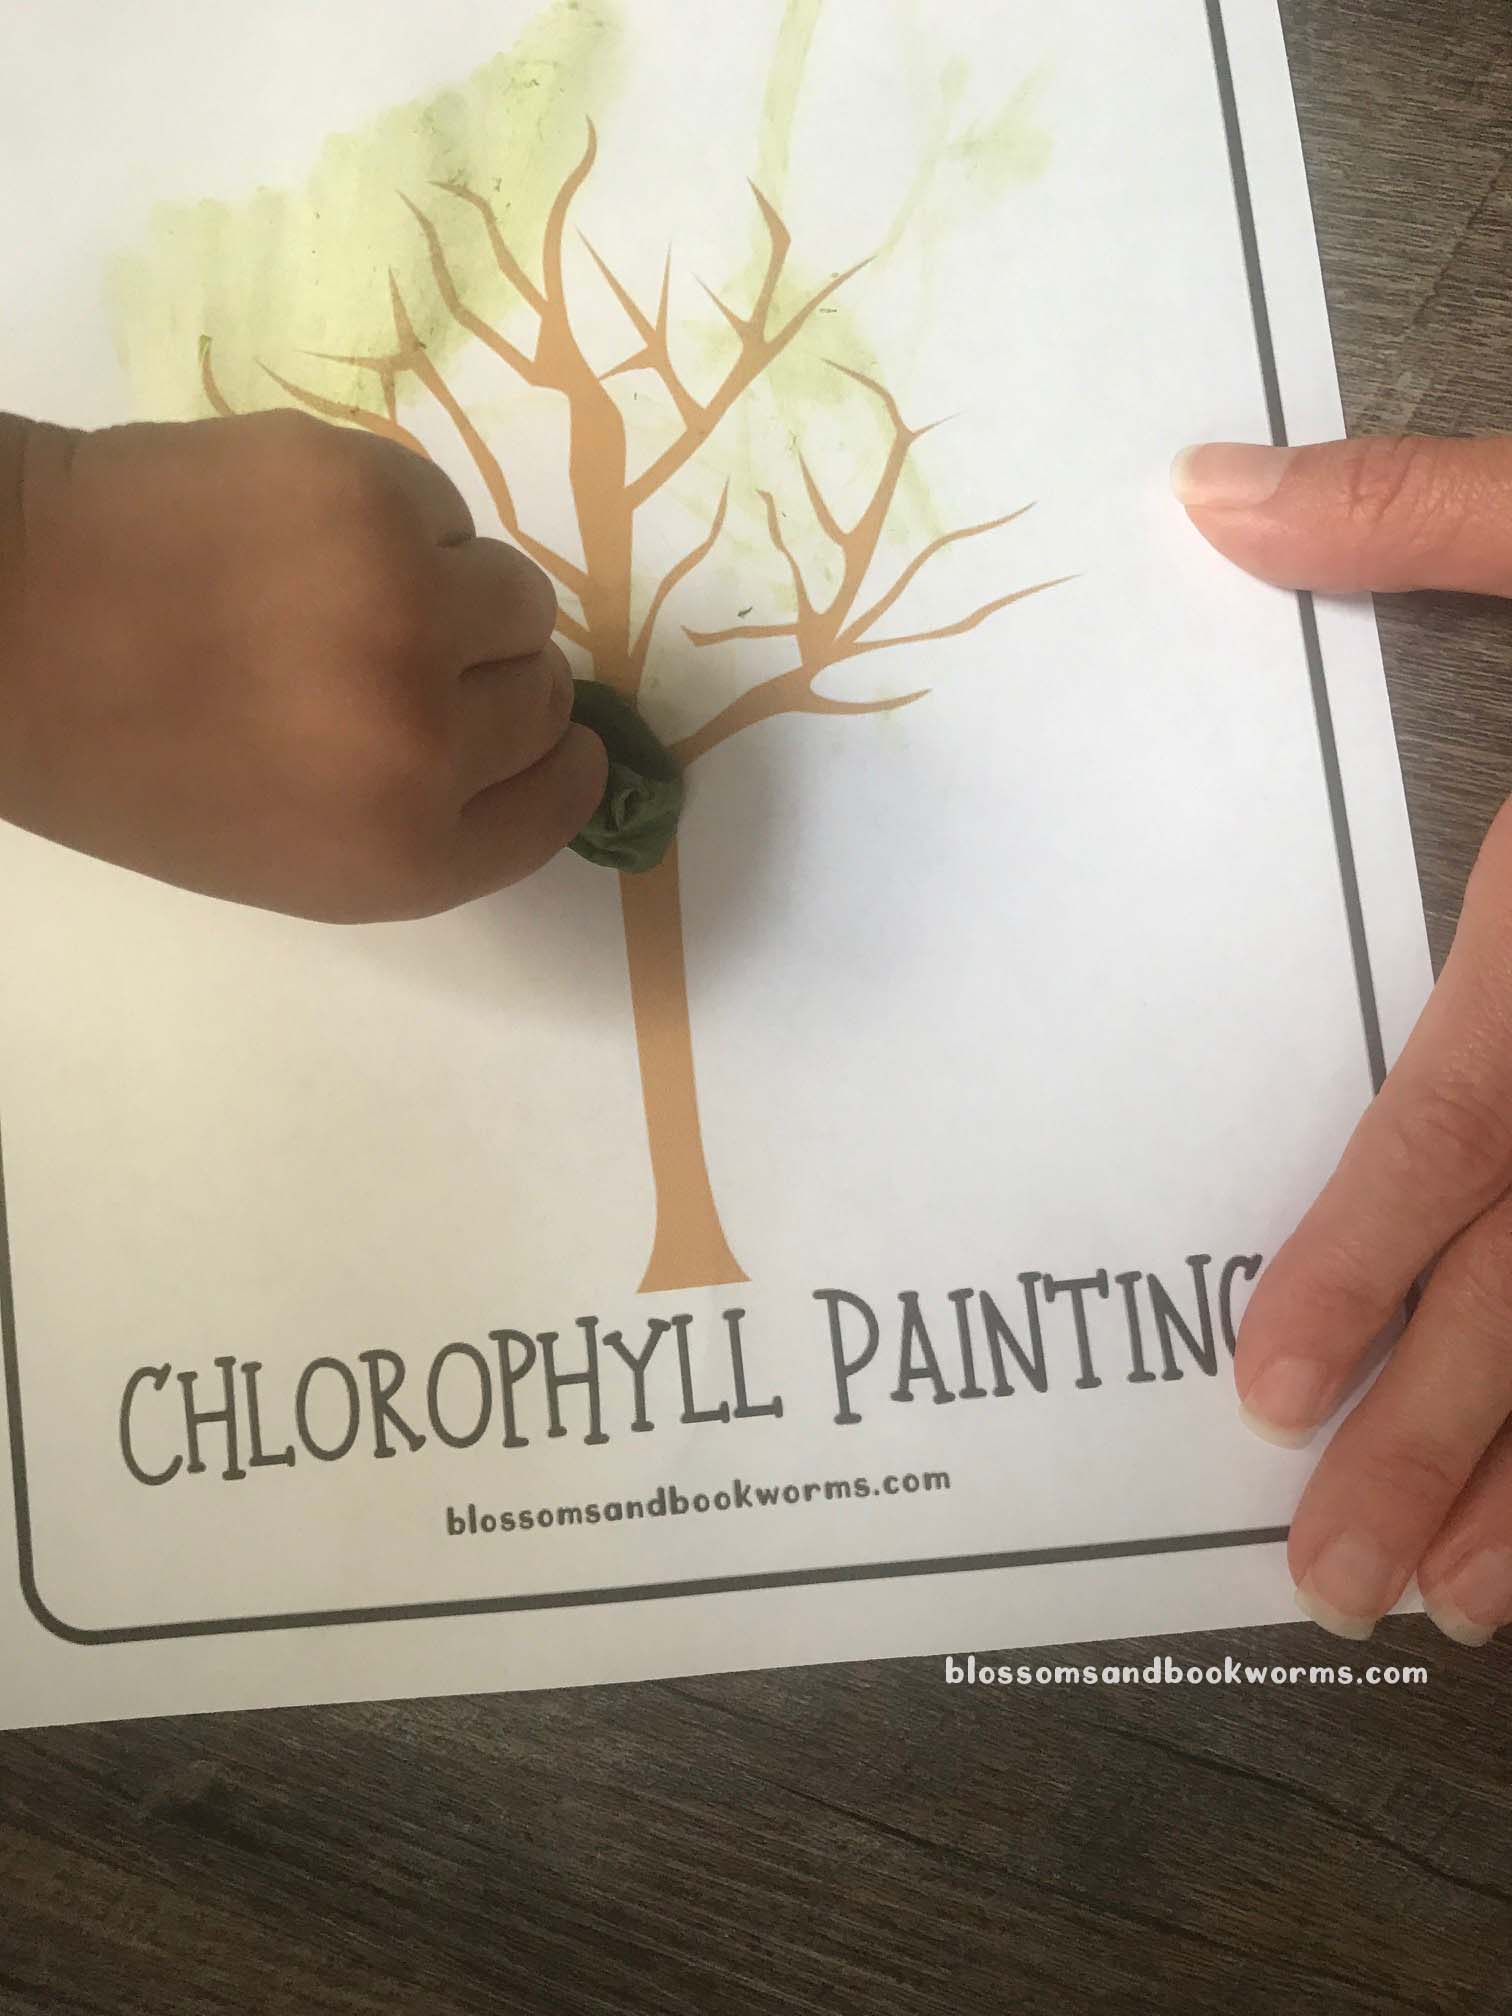
Gather up some leaves to test the chlorophyll inside. Kiddos can gather them up from outside or even from your refrigerator! Spinach has a very high concentration of chlorophyll and it is easy to get it to release, making it perfect for this project.
Note – leaves with a waxy or tough feel will not release the chlorophyll as easily as a soft leaf like spinach.
Print out the Chlorophyll Painting page and tape it securely or hold it down firmly as you work with the leaves.
Now get to work! My kiddos found it easiest to bunch or bundle up the leaf and then press firmly to scrub across the page. The spinach was soft enough that even my 3-year old had no trouble participating in this activity.
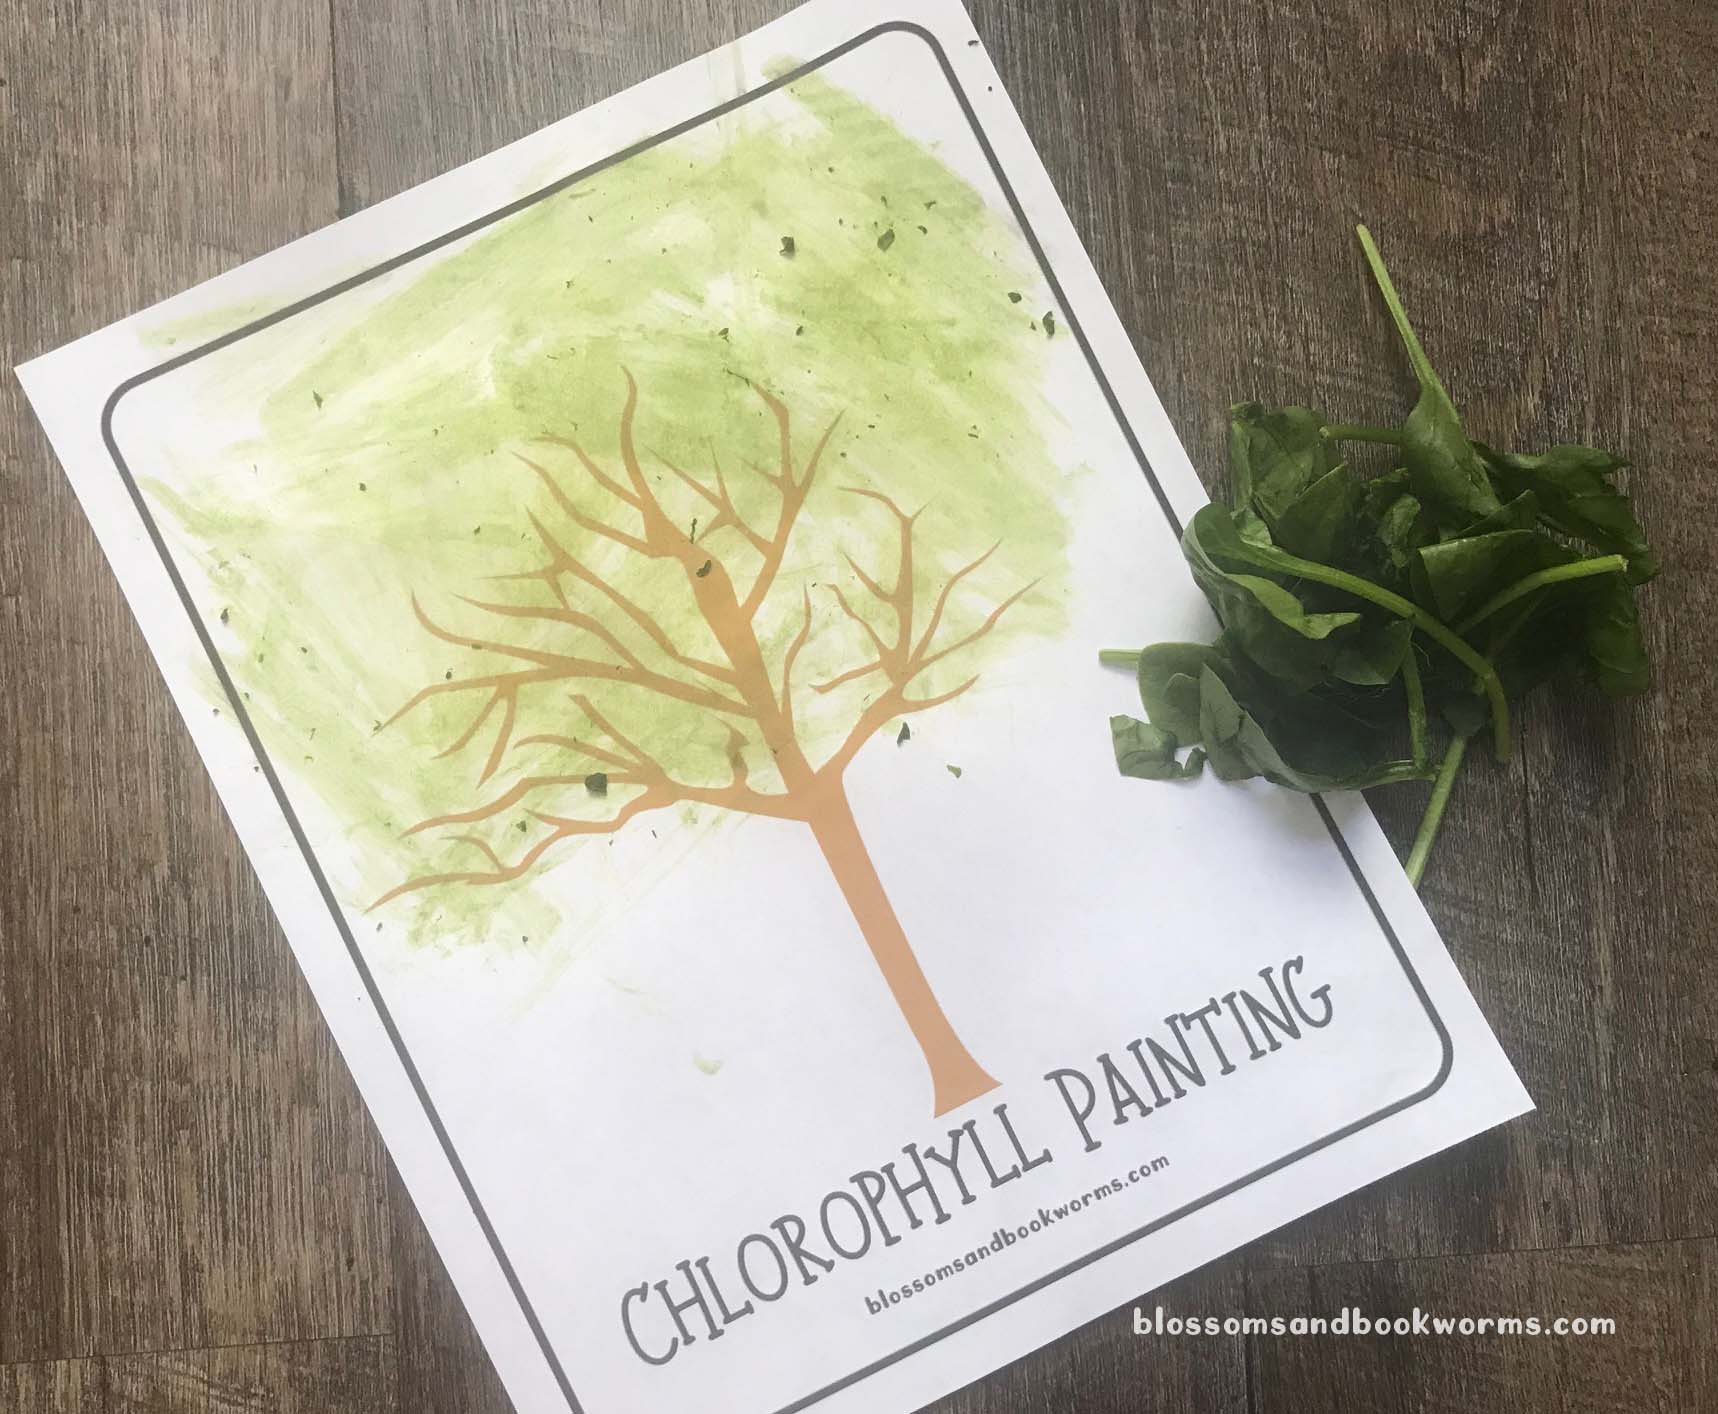
It is fun to see how their chlorophyll painting adds leaves to the tree on the worksheet!
The final product – a fun little tree and a crumbled up pile of leaves!
This project is great at home, but it would be even better in a classroom setting. Have each child bring in a small bag of leaves and then see what different designs and paintings they come up with!
Don’t forget to grab your FREE Printable Chlorophyll Painting page HERE!
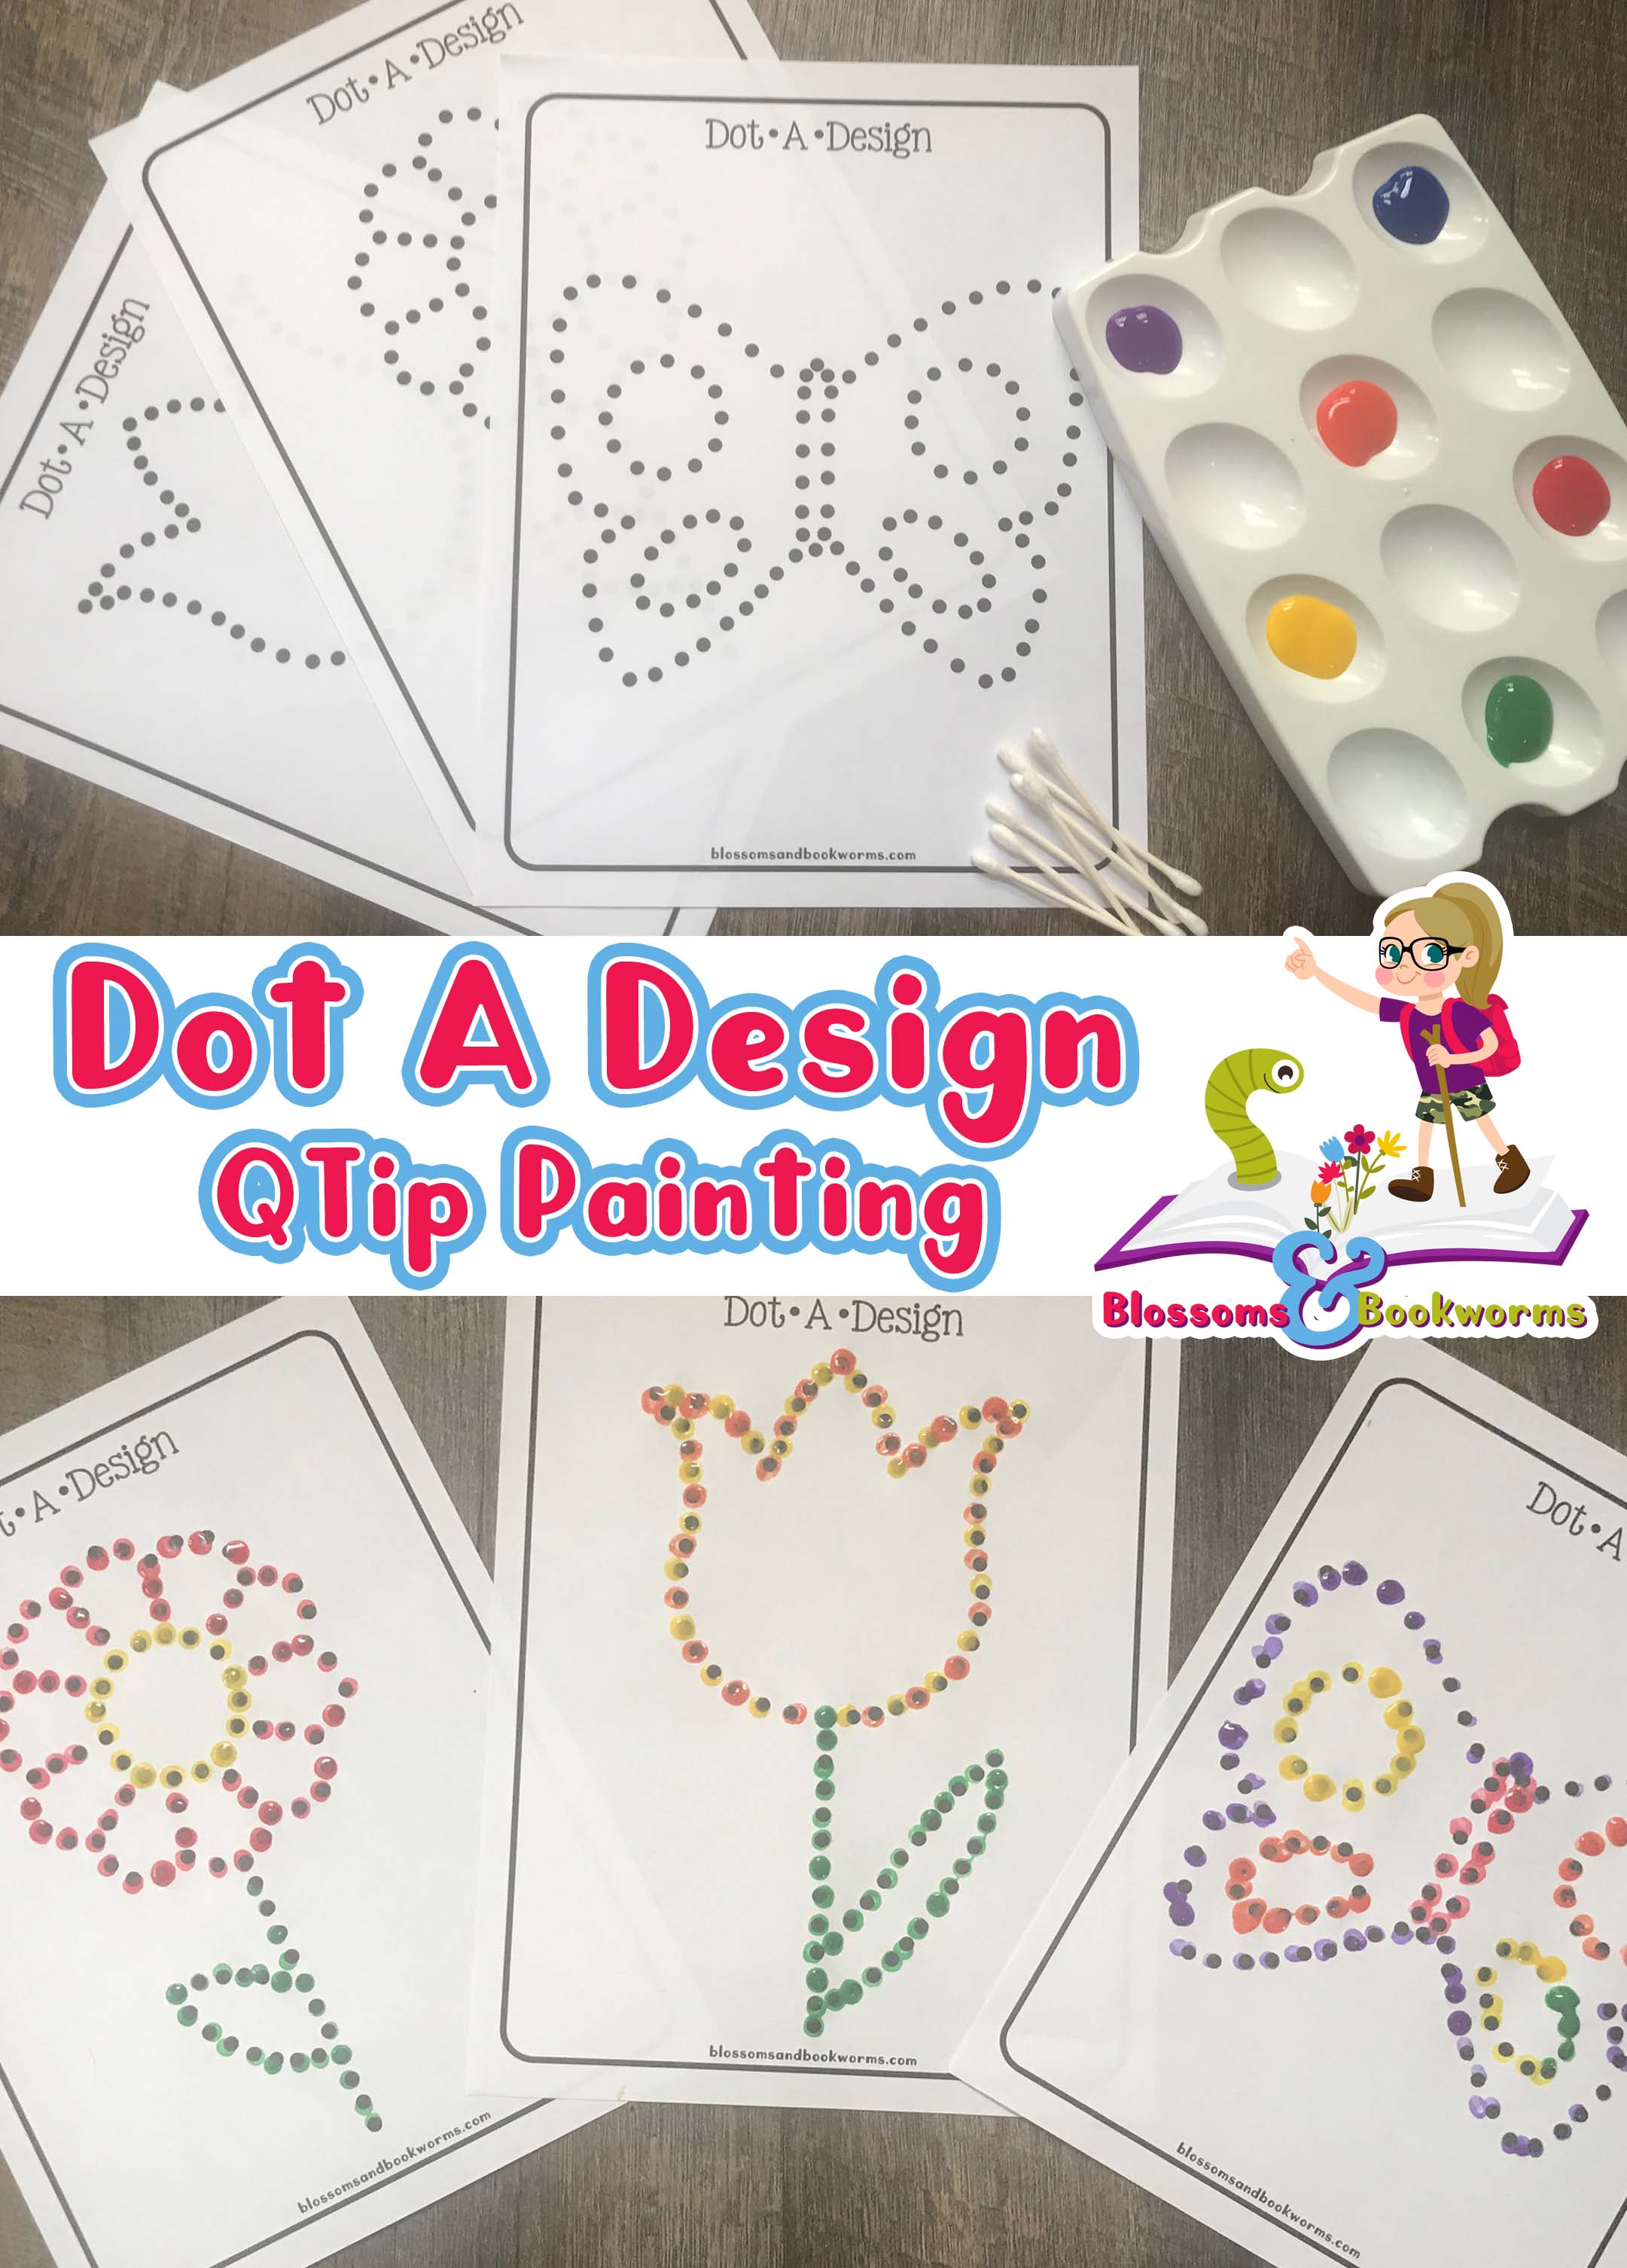
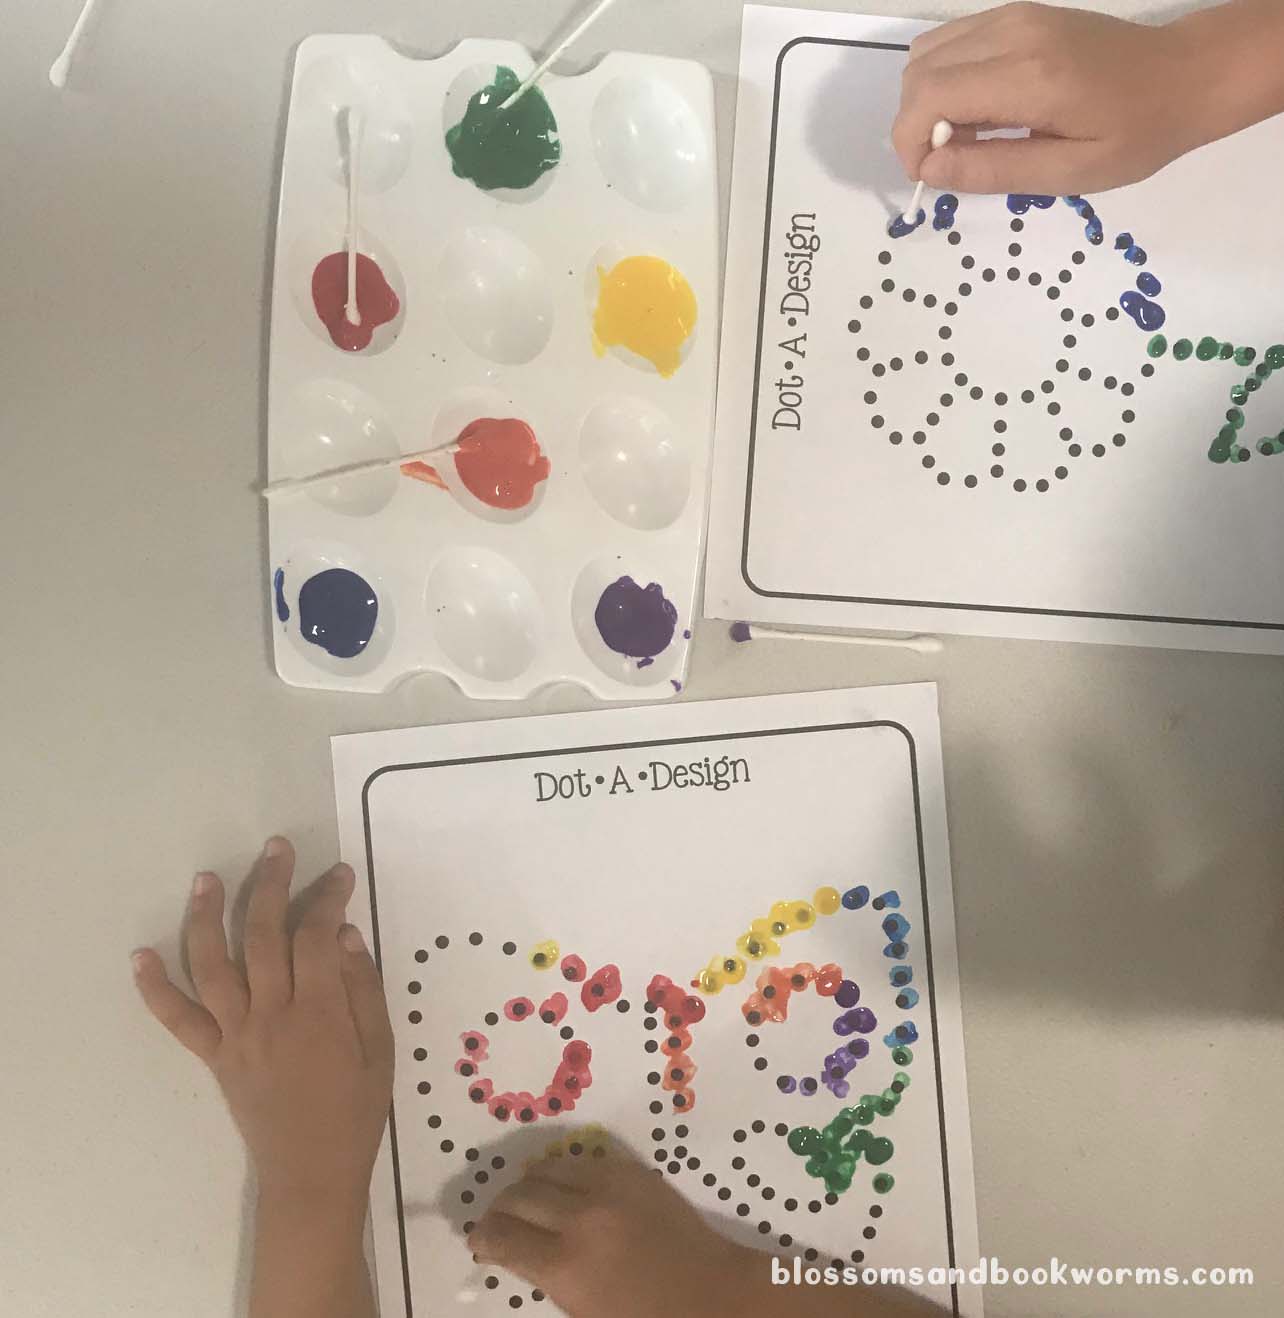
My son is a GREAT reader, but his handwriting…. oh his handwriting…. its mediocre at best. Its not that he can’t write well, he just doesn’t care enough to work at it. This summer I wanted to find ways to encourage him to work on his writing without making him write his alphabet 573 times a day. I am so glad I stumbled upon Q-Tip painting. It combines art, which my daughter LOVES, and pen control practice, which my son NEEDS! So its a WIN for both kiddos!
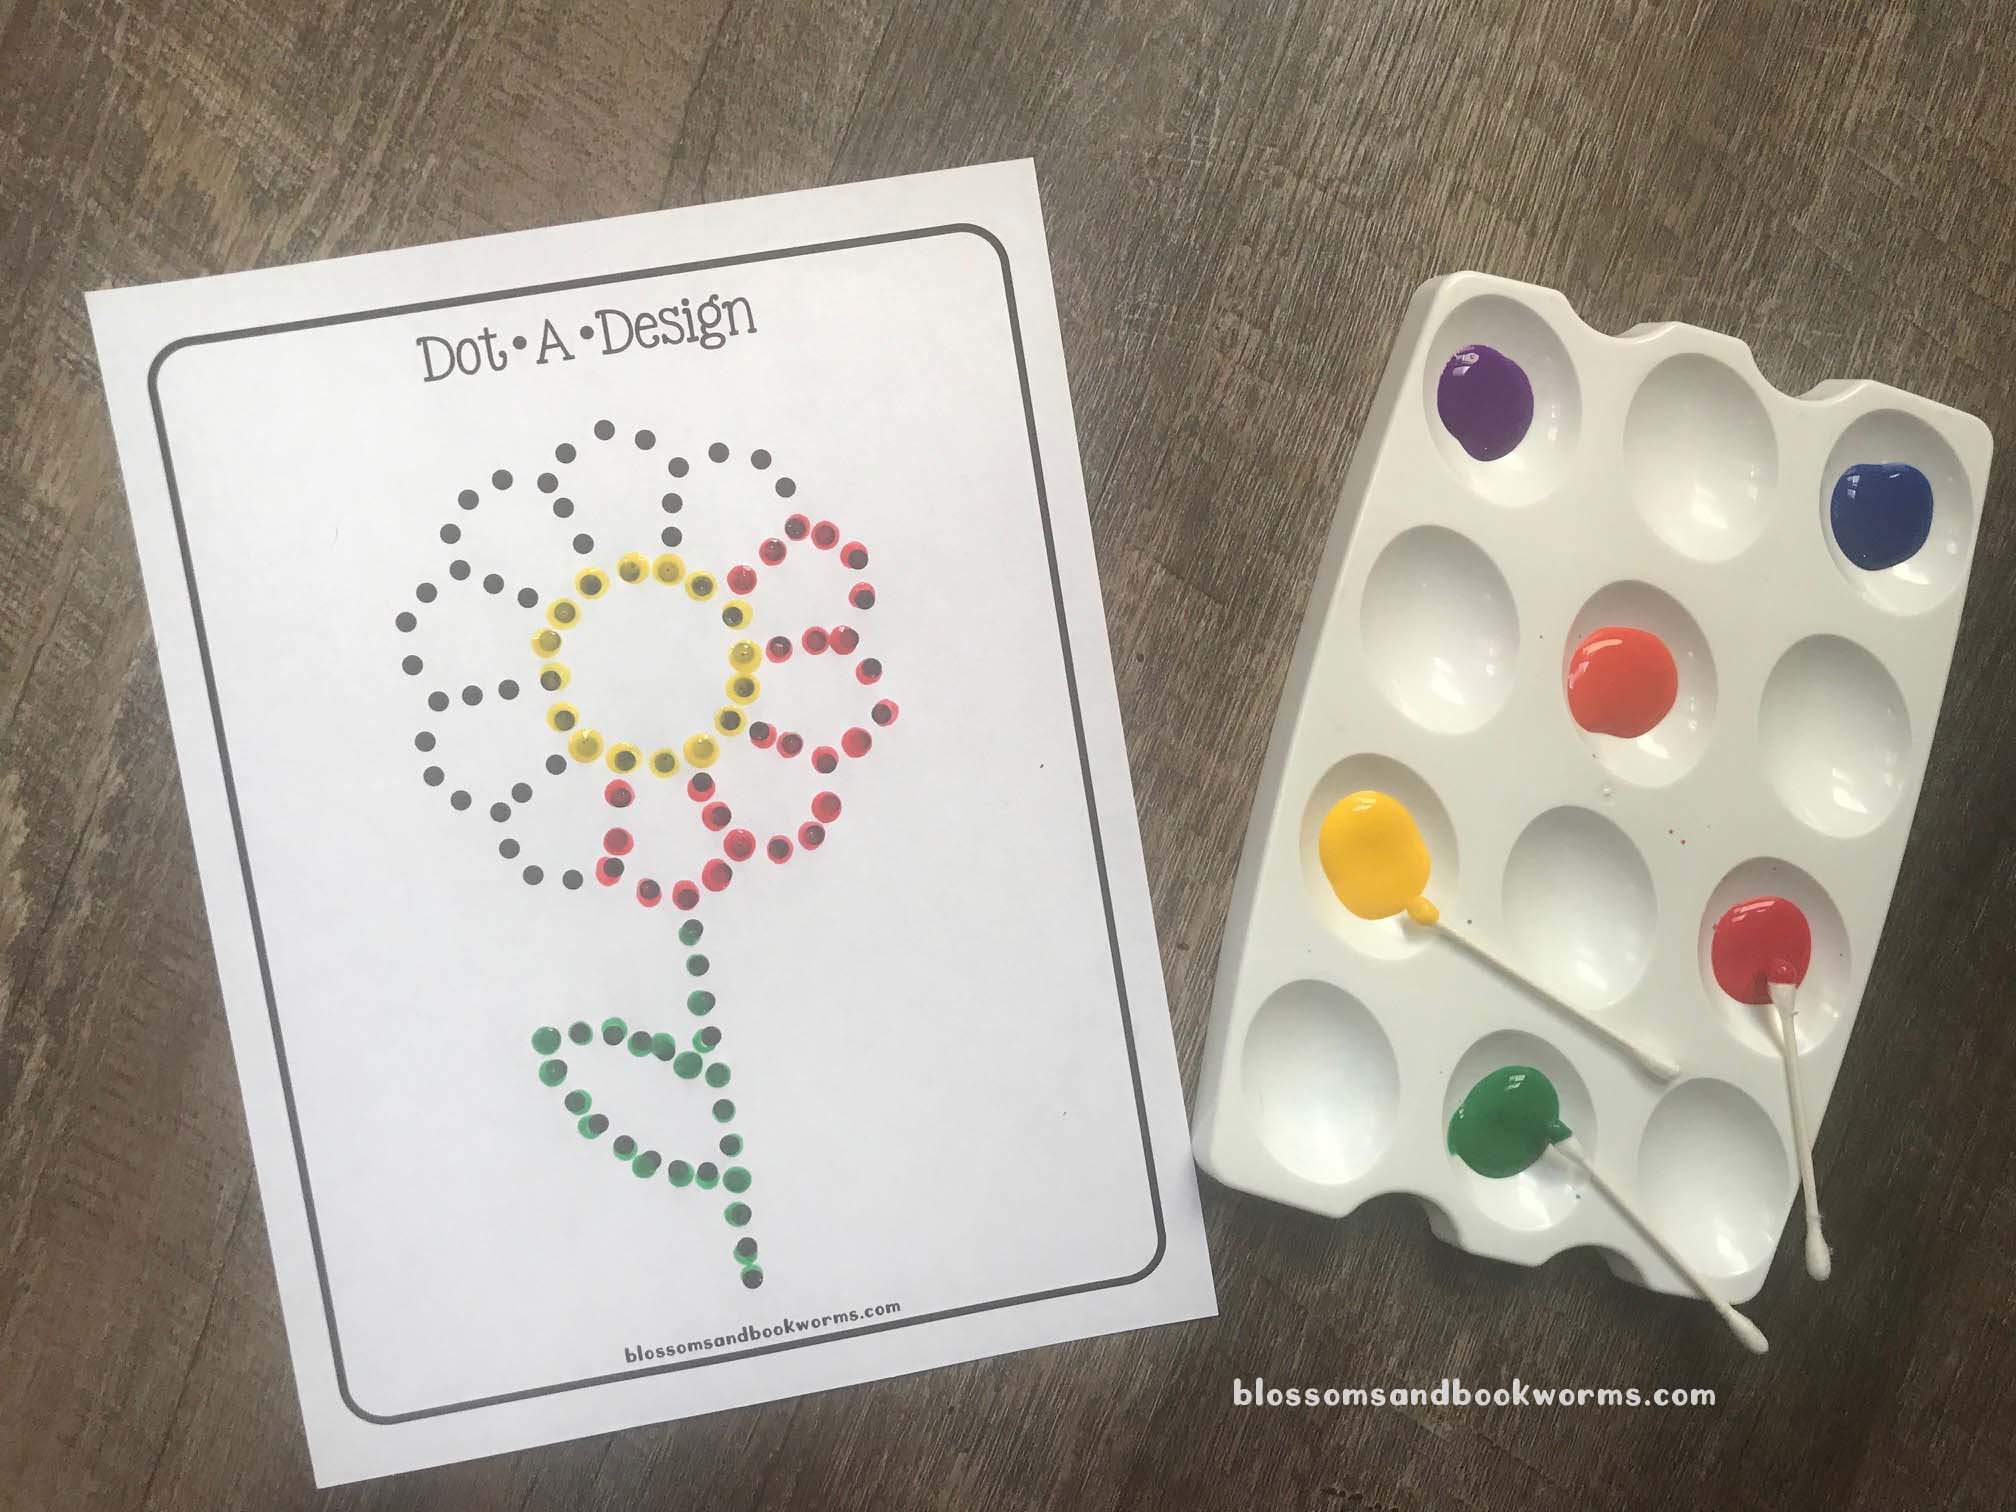
Grab yourself the FREE printable worksheets, some q-tips, and paint (we used washable paint!). Then get to work! I love that these designs invite them to explore colors, while also helping my son slow down enough to “dot each dot”.
We added one q-tip to each paint color and then began dotting. My kids tried scooping big globs of paint, but it really works best if you dip the end in the paint, dot 2-3 dots on the paper, and then dip it into the paint again.
I must say, my daughter was super excited that she got to dip her own “tools” for this project!
I love seeing their work progress. My daughter is much younger than her brother, but she has much more patience and calmness. She desires to make it neat and she takes a lot of time deciding on her color choices.
My son, on the other hand, tried to rush through the sheets as quickly as possible. Though I want the art to be “them”, I also want it to be solid pen control practice. Hence, I did remind him several times to take his time and make sure he was dotting and not scribbling.
Such a fun #GardenWeek activity!
My daughter was SUPER PROUD of her butterfly (on the left) and I think it is pretty great too!
We are digging into #GardenWeek over here and we are already enjoying the fruits of our labor. 😉
I have had this amazing reference book for quite a while but this is the first time that we sat down and read through it. It is packed with great information. The text is all broken up into small pieces and the writing is conversational to make the topic interesting. My kiddos loved it!
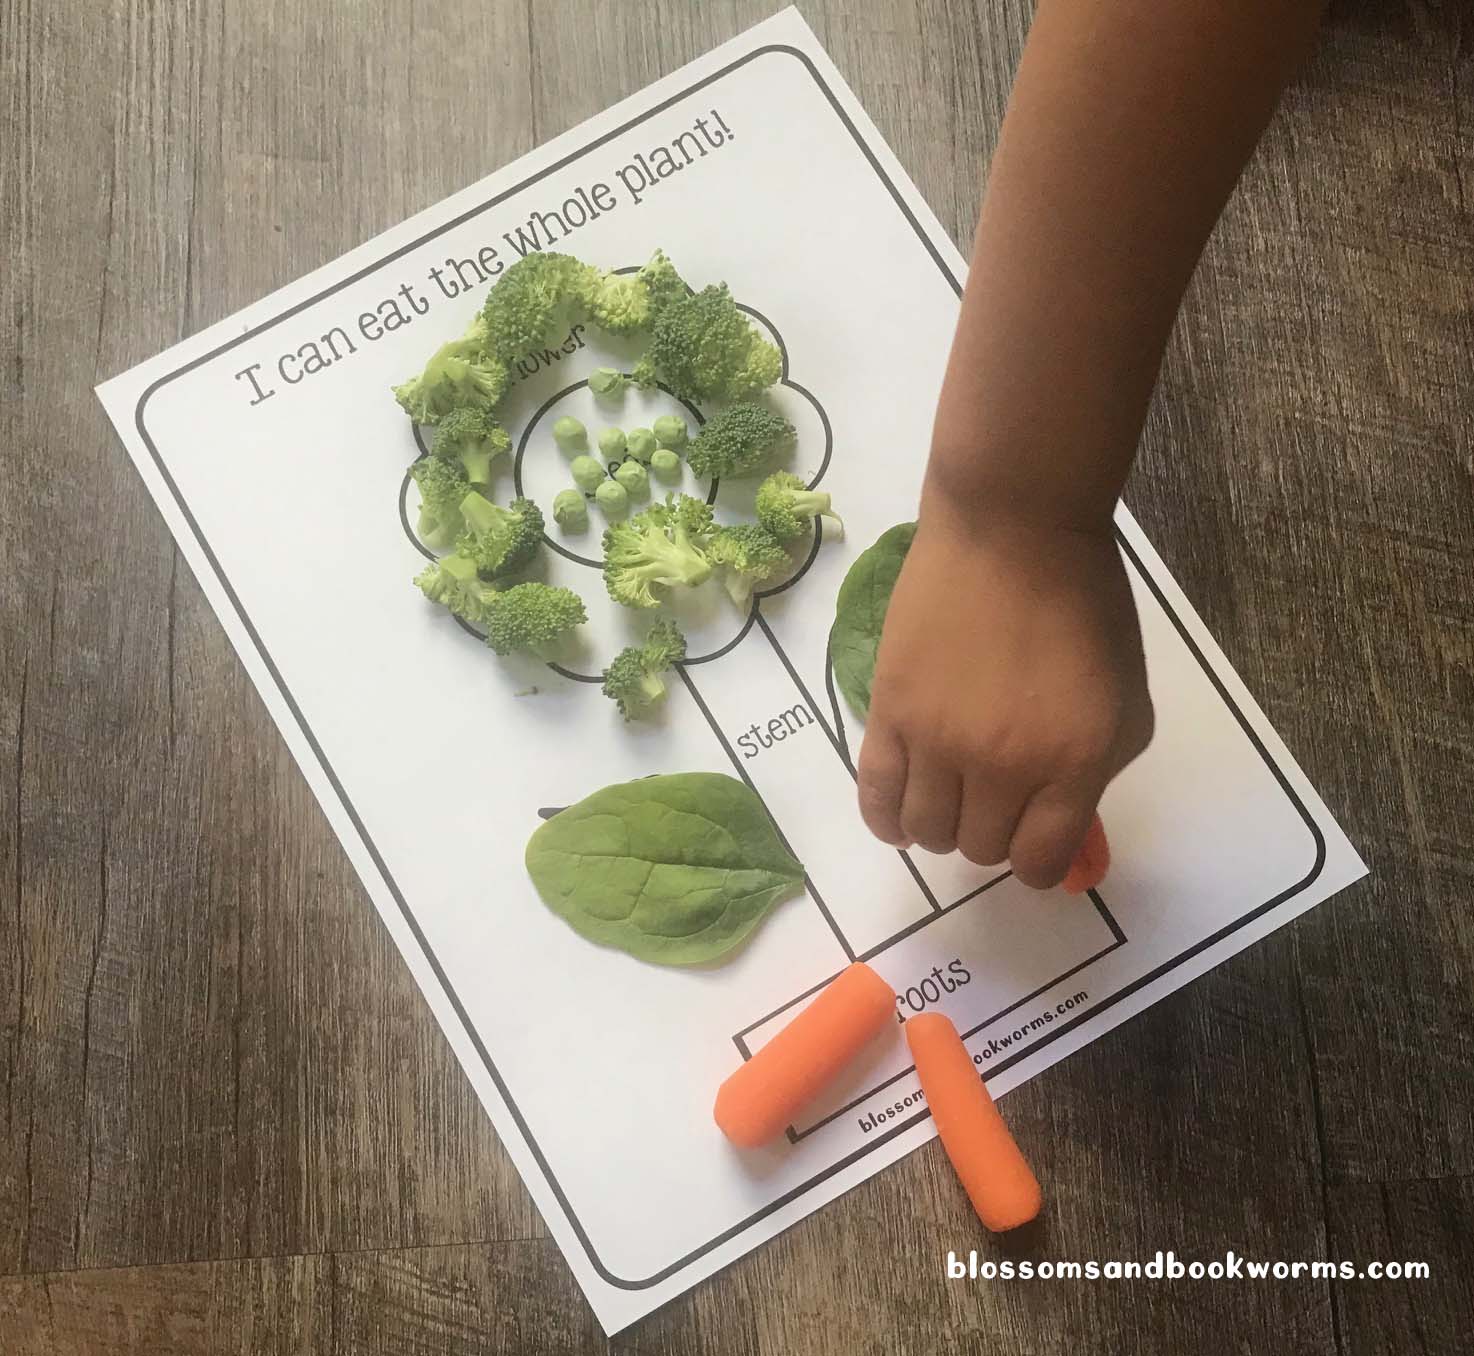
As we were reading about the parts of a plant we started talking about how different foods grow differently. Much to my surprise, we turned the page and VOILA, there was a page all about which fruits and vegetables were the different parts of the plants!
Usborne Books & More never ceases to amaze me!
I love that they covered this fun topic. It truly wowed my kiddos.
To make this fun concept really sink in, we grabbed our FREE PRINTABLE and a few veggies from the fridge and started laying everything on our diagram.
The kids took turns with my oldest reading the section of text and then my youngest picking the veggies off the plate to place on the diagram.
Look how cute our “plant” turned out! 😁 Now quickly take a photo to commemorate the occasion before sneaky fingers start stealing the veggies for a snack! 😂
See! I warned you! Those sneaky fingers are super quick! I didn’t even know he liked celery, but he was determined to taste every part of our plant!
My favorite part of this activity? My youngest told her dad at dinner, “I ate a root for a snack today, daddy”. Little ears really do hear what you teach them!!
Don’t forget to grab your FREE printable so you can try out this fun activity with your kiddos!
Our little lady is fascinated with numbers and has been “counting” everything. She can count well, but she isn’t super careful about assigning only one number to each item. I wanted to integrate what she is learning into our fun #DinosaurWeek theme.
I made this cute dinosaur number matching game for you and made it extra simple with a FREE printable! Print out the page, laminate if you choose to, then cut and enjoy!
Super simple and easy!
This is the perfect activity for a rainy day when you are stuck inside. Minimal prep and fun dinosaurs – what could be better?
Cut out all the cards around the thick black lines and then cut down the dotted line to make the pair of pieces for matching.
There are several ways to set up this game. You can line the dots up in one column and the numbers in another so your kiddo can pick out the matches.
Or you can set it up in a more traditional matching game style. To up the difficultly even farther…. turn the images face down!
Then your kiddo can make matches. I had our kiddo count the dots and then find the number match piece.
She was SUPER focused!
You can even take it a step farther and have your kiddo count out toy dinosaurs to match the number on the cards! We are totally adding this step in the next time we pull out these cards!
My kids are enthralled with dinosaurs. They know all the scientific names, what each one eats, where it lives, who is the predator and who is the prey… they are truly a bevy of information! Since I never caught the dinosaur bug as a little sprout, I am learning SO MUCH about dinosaurs right alongside my kiddos!
Their love of the subject definitely makes #DinosaurWeek even more fun!
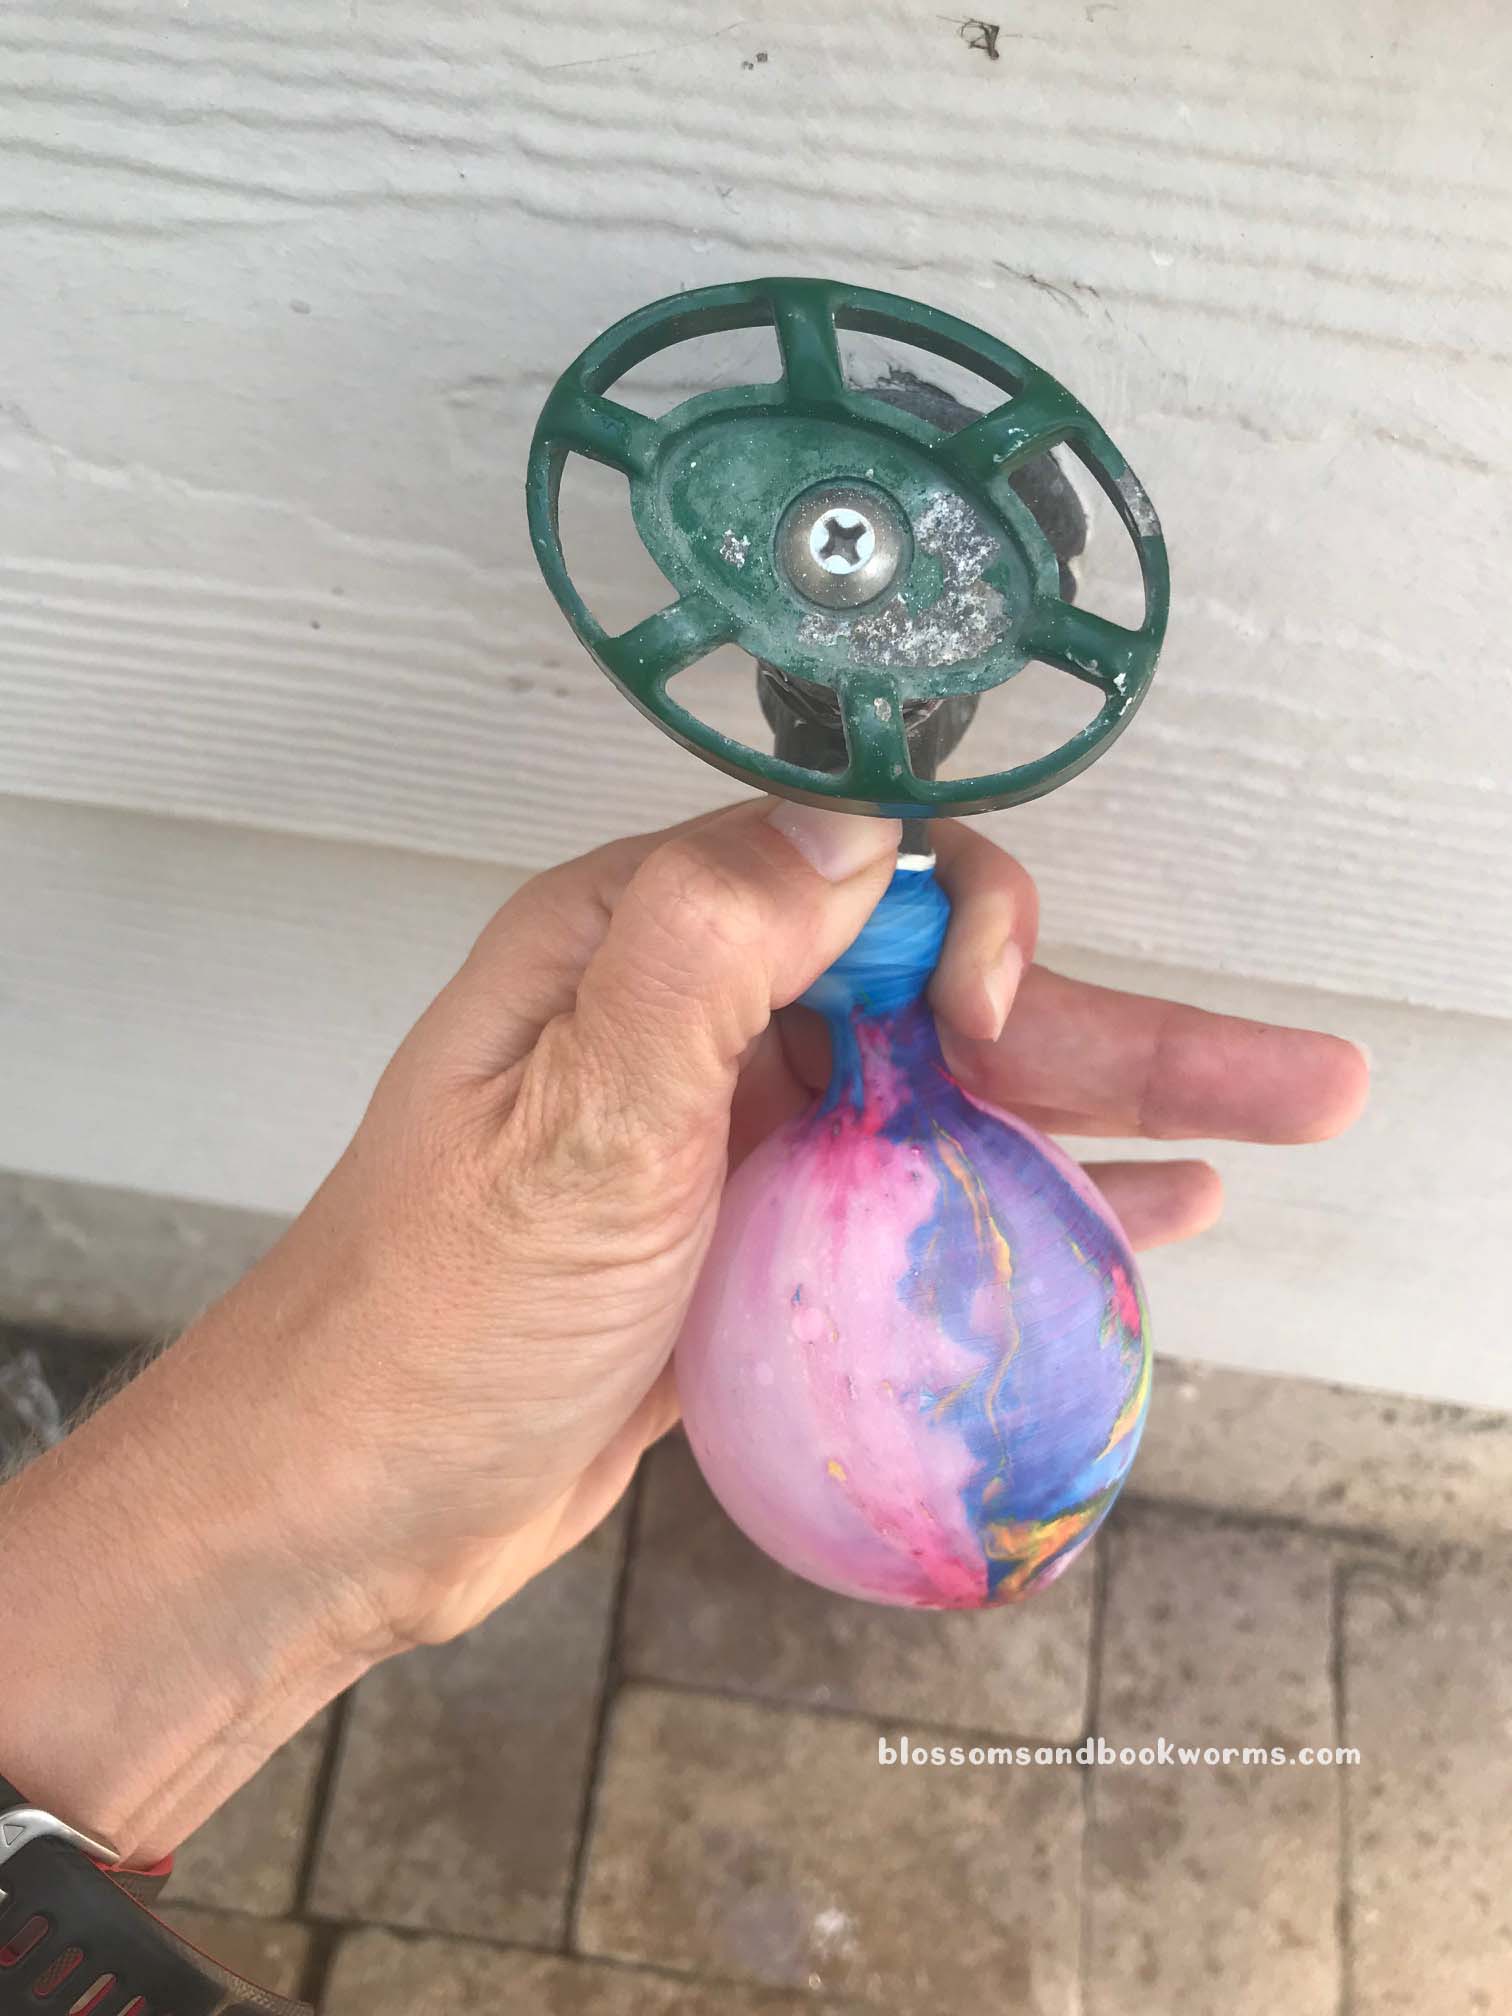
This activity is perfect for a hot summer day – it combines ice, the perfect way to cool down on a hot day, with paleontology, which might be the coolest profession ever!
You know I love an inexpensive experiment with a big WOW factor, and this one definitely fits the bill! Scrounge up some water balloons or other small balloon – I used 4 in balloons because I wanted smaller “eggs” after freezing. You could absolutely use bigger balloons, but make sure you have room to freeze them once filled with water!
You also need some toy dinosaurs. I bought these in bulk about a year ago for a very reasonable price. We have used them for all sorts of activities and they are a regular part of my kiddos’ imaginative play throughout the day.
Once you have balloons and the toy dinosaurs, you need to get the dinosaur inside the balloon. This sounds more difficult than it is, but it can be a bit tricky. Here are a couple of my #ProTips:
Blow up the balloon FIRST, before trying to stuff the dinosaur in. This will stretch out the balloon and give it a softer feel, which will allow the dinosaur to stretch and push on the balloon without breaking it.
Use a pump! If you are doing any quantity of ice eggs, using a pump to blow them up first will be so helpful. These small balloons can be super difficult to blow up with your mouth and we don’t want anyone passing out!!
Once the balloon has been blown up, stretch the end between 2 fingers. Then, tuck the dinosaur between your fingers and start working it into the balloon.
The size of the balloon matters when you are trying to tuck in the dinosaurs, so if you are concerned about being able to stretch the small balloons you can opt for a bigger round size to make it easier.
Eight little dinosaurs all tucked nicely into their balloon cocoon. AWWW!
Now you have to fill the balloon with water.
This is the part in the directions where you investigate every faucet in your house only to realize they are all “cute” but are completely WRONG for filling water balloons 🤦♀️. Oh, is that just me?? 🙋♀️ Are faucets that cannot fill water balloons even practical? 🤣🤣🤣
Outside faucet to the rescue!
Don’t overfill your balloons! You did not do all the work of tucking dinosaurs inside to have an overfilled balloon burst in your hands!
Once they are all filled and tied off, put them in a bowl and stick it in the freezer. Leave them overnight to freeze.
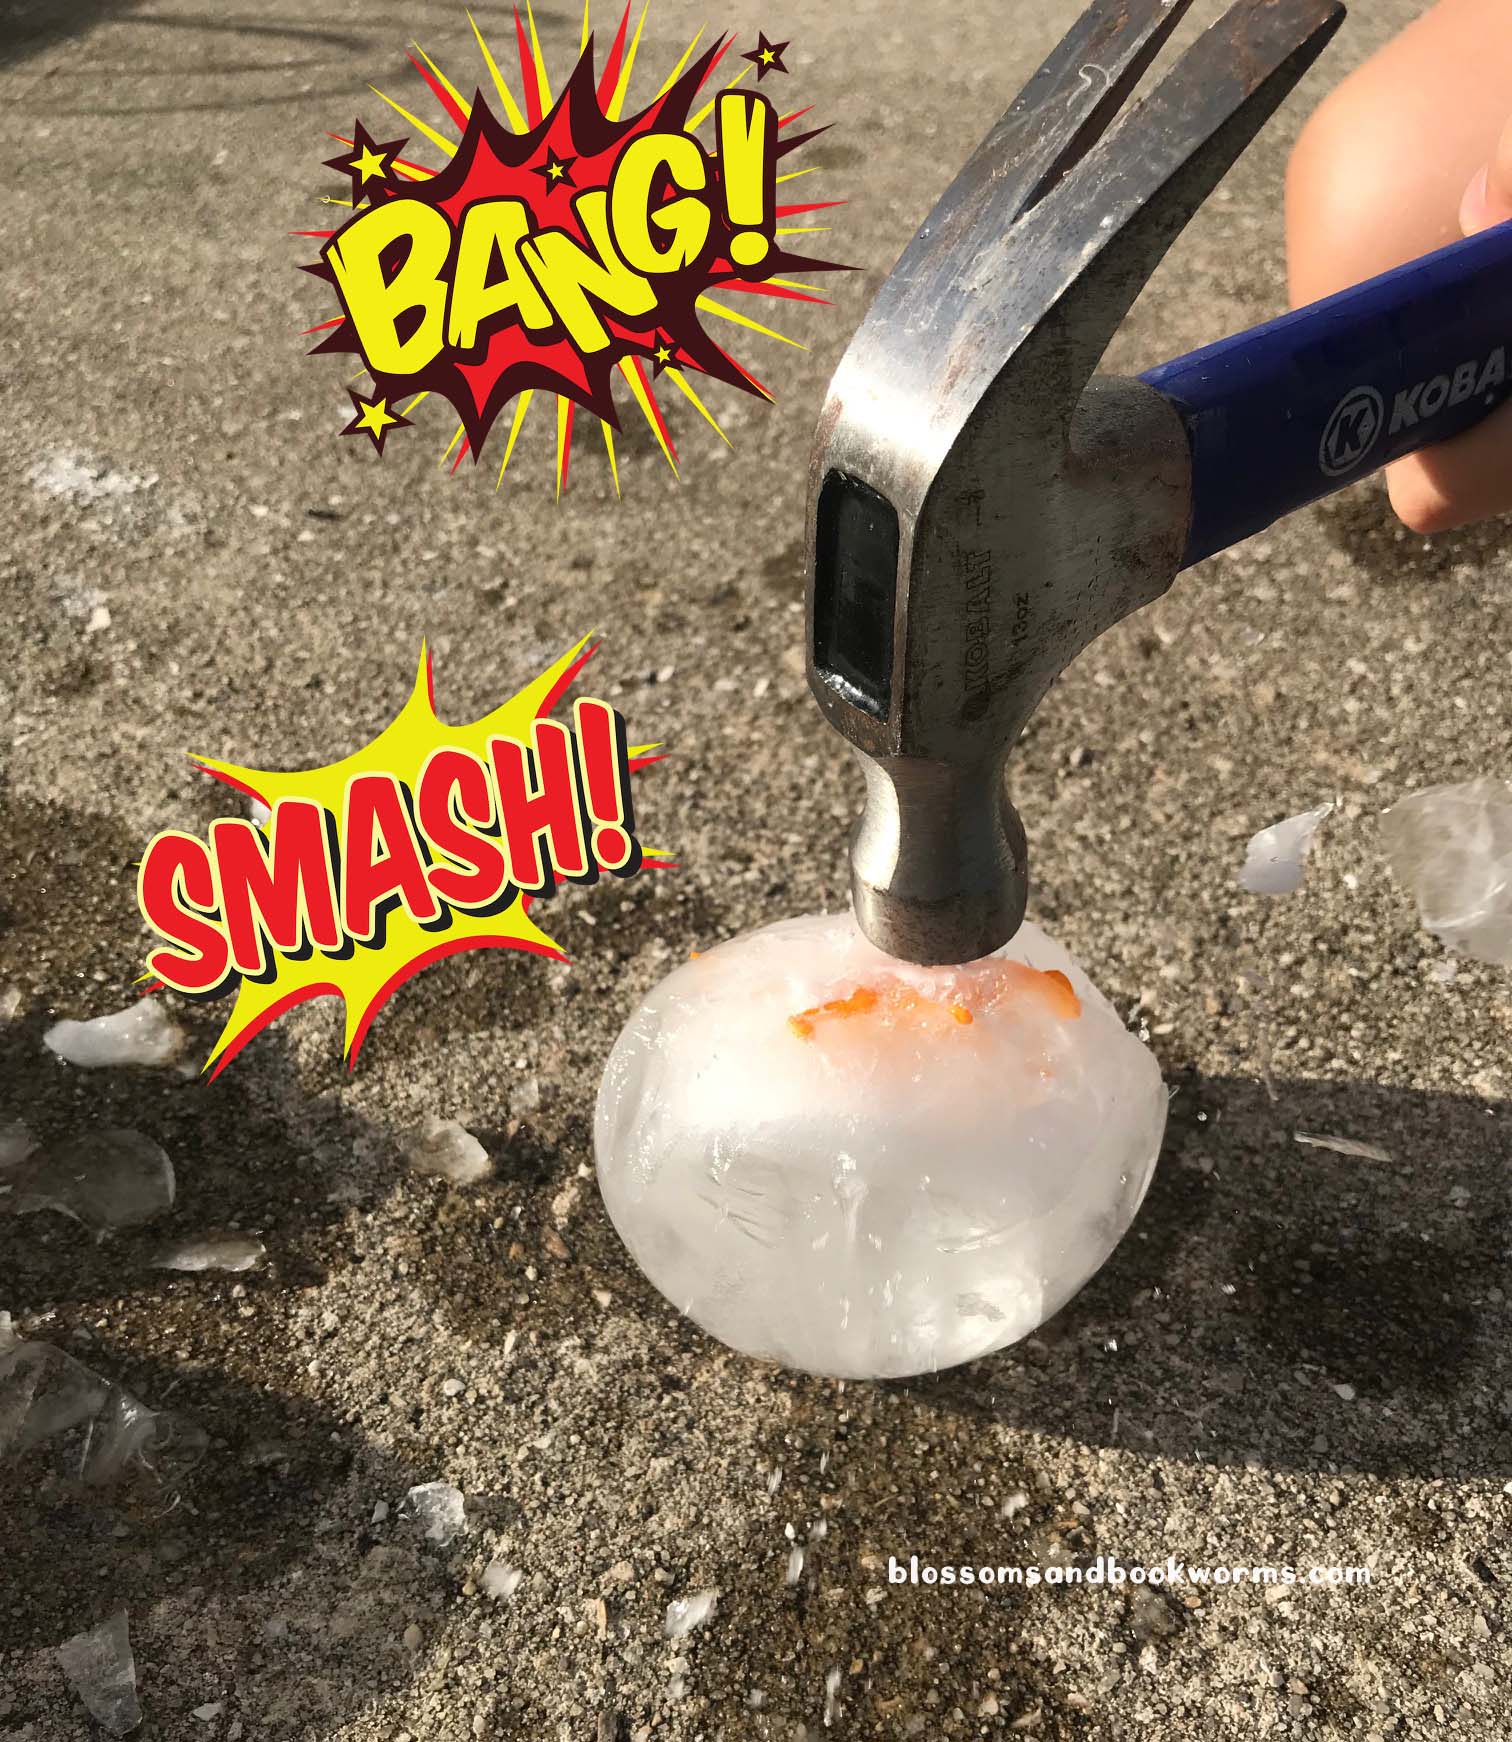
When you are ready for the WOW factor, take the balloons out of the freezer, run tap water on the frozen balloon, cut the balloon, and then peel the balloon away. You should have these remarkable, awesome dinosaurs suspended in ice!
Now for the FUN part…
…break them open!!
My oldest LOVED using a hammer to bust up his eggs – but be sure to put safety glasses on, ice shards are sharp!!
My youngest preferred a squeeze bottle of warm salt water to excavate her dinosaurs from the eggs.
I have to admit the warm salt water was my favorite method, too. You can really squeeze into the nooks and crannies, slowly melting the ice from around the dinosaur, and watch the dinosaur surface just like in a real dinosaur dig!
Then line up your dinosaurs and be amazed that you somehow used an entire rainbow of dinosaurs without even realizing it! 🤣 (Obviously, this part is optional 😉).
Ice Eggs truly is an amazing summer activity that will thrill your kiddos!
Can’t wait to try it?? Post pictures!! I cannot wait to see your kiddos breaking up their own eggs!
Did your kiddo come home from school with a GIANT list of sight words to memorize this summer? Mine totally did. And nothing makes my kiddo give me that long-suffering sigh that kids specialize in more than a humongous list of black and white words in columns.
I am so thankful that our oldest is such strong reader (and he loves to read🤩🎉), but we are still putting in some practice this summer to make sure he doesn’t forget any of the basics. Since he is not a fan of reading all 120+ words from the list, I came up with a fun way to integrate his sight words into our #DinosaurWeek theme!
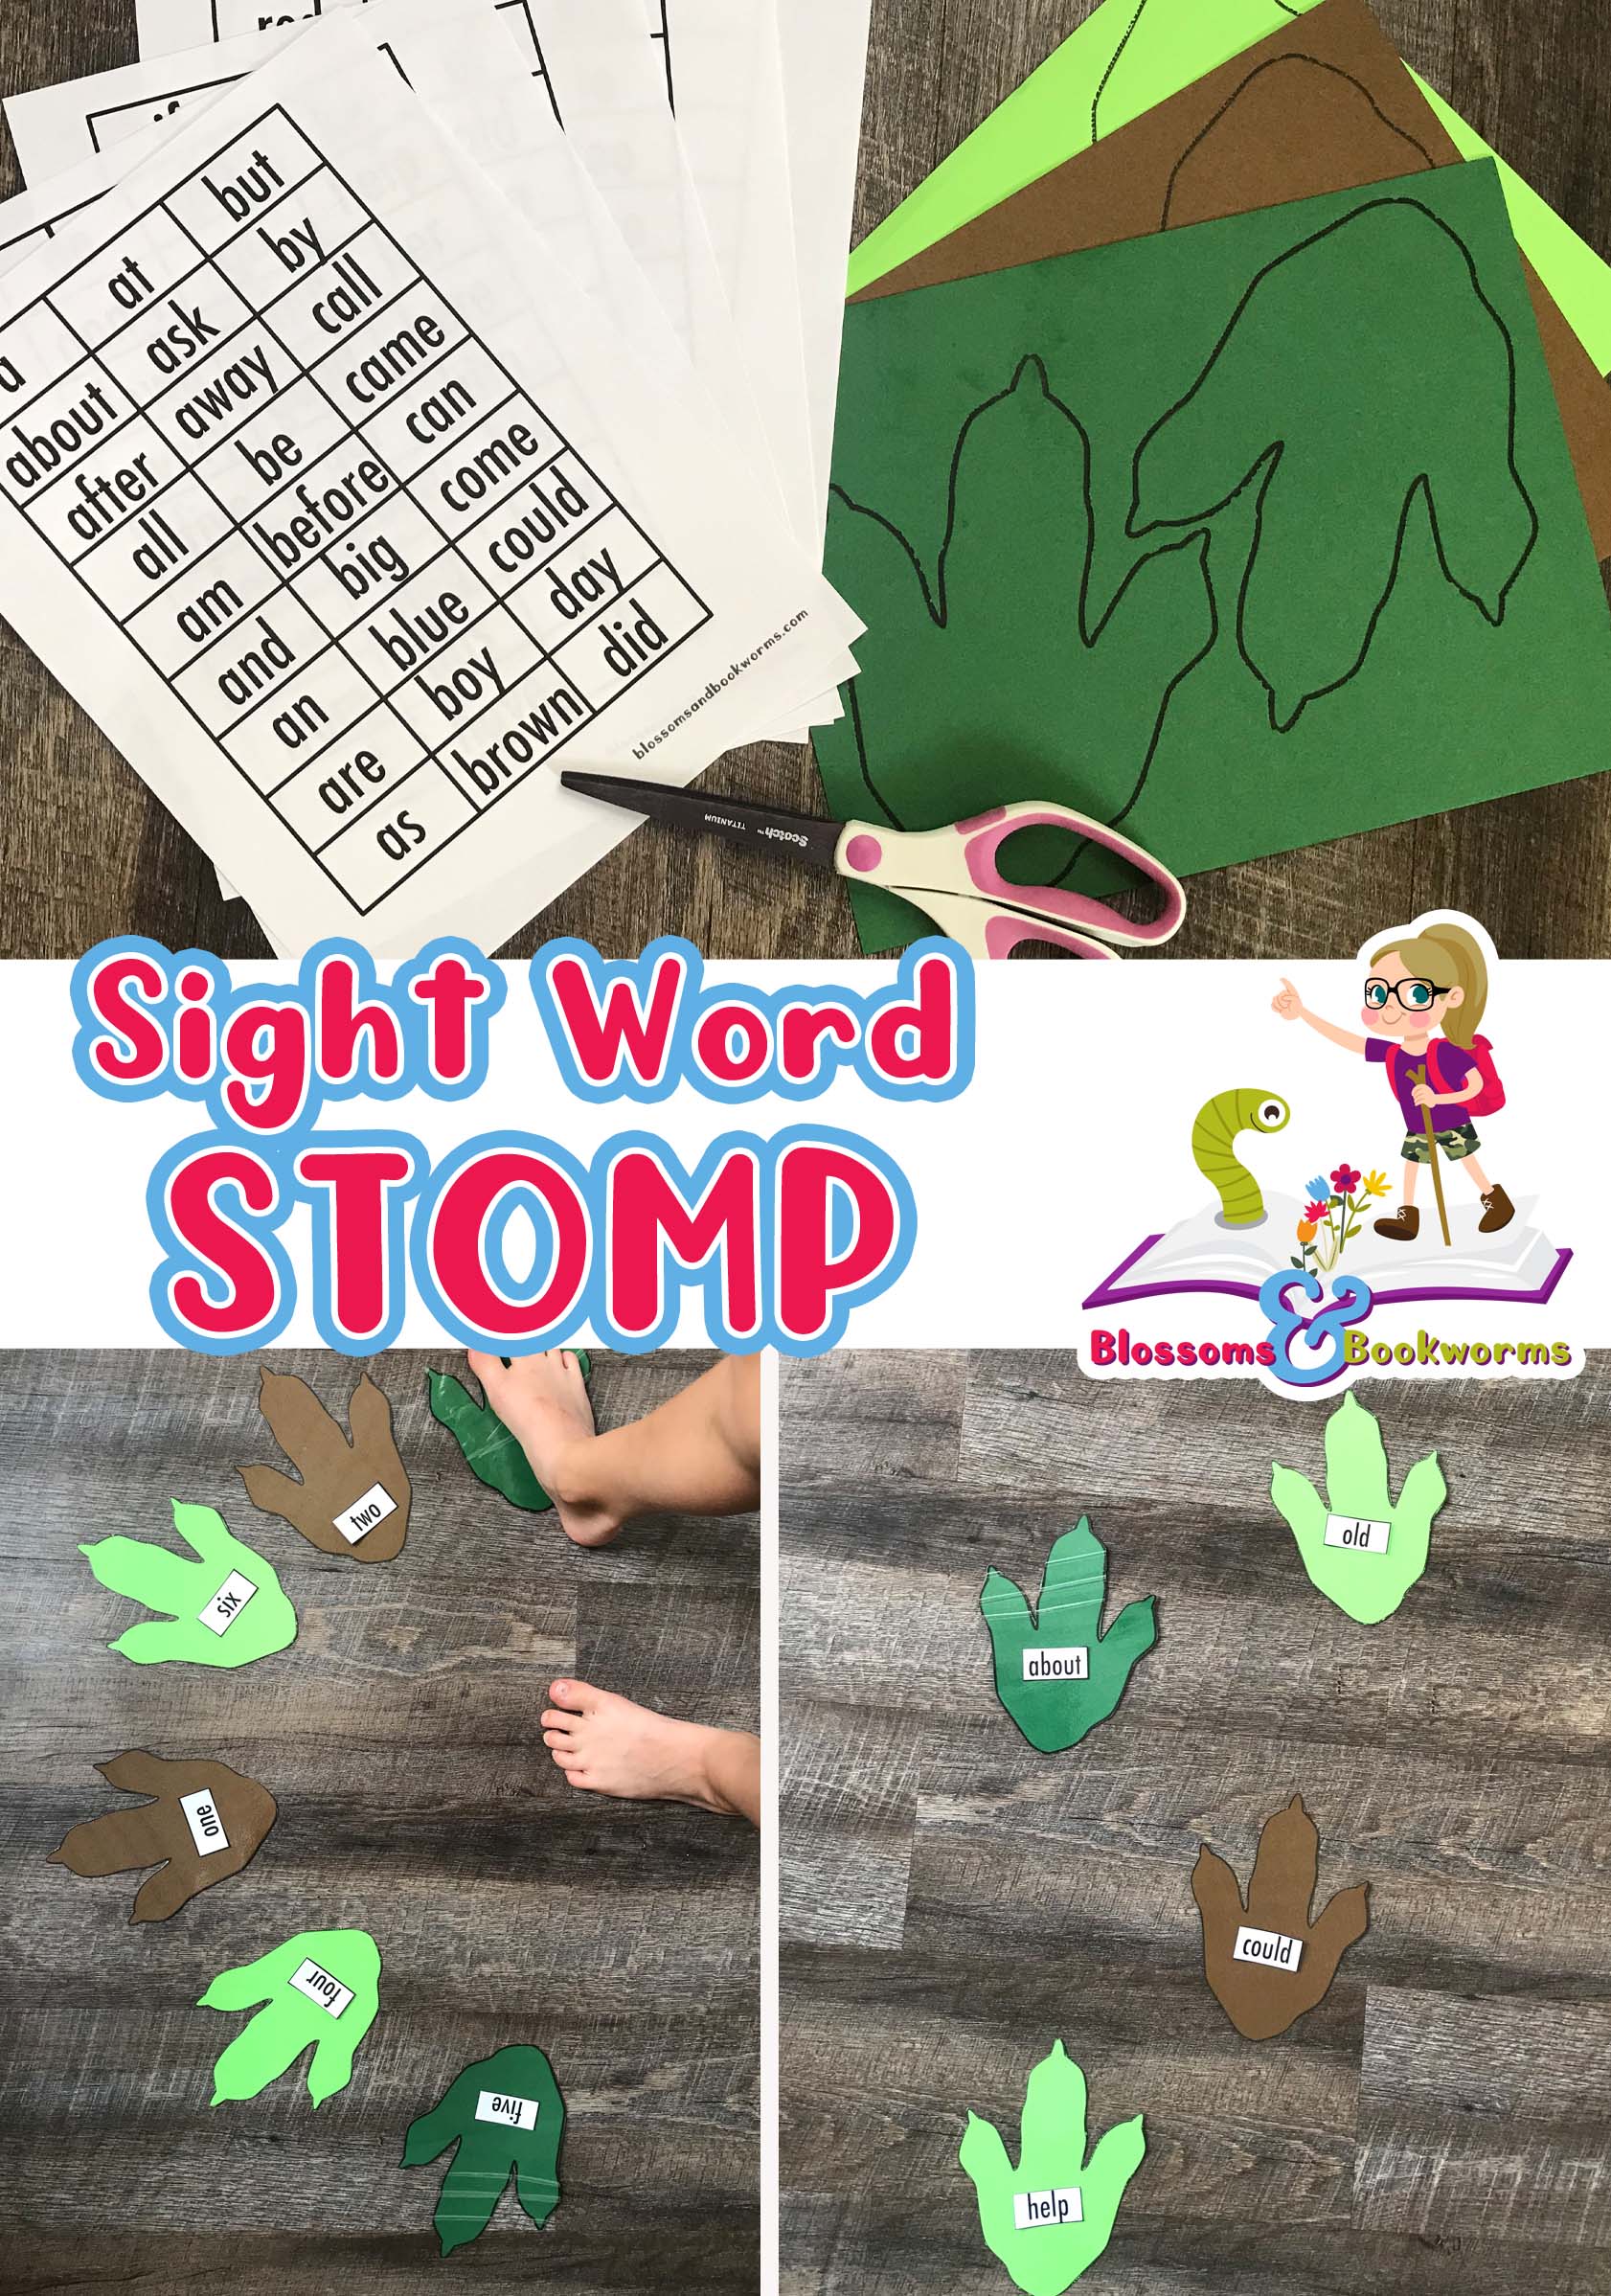
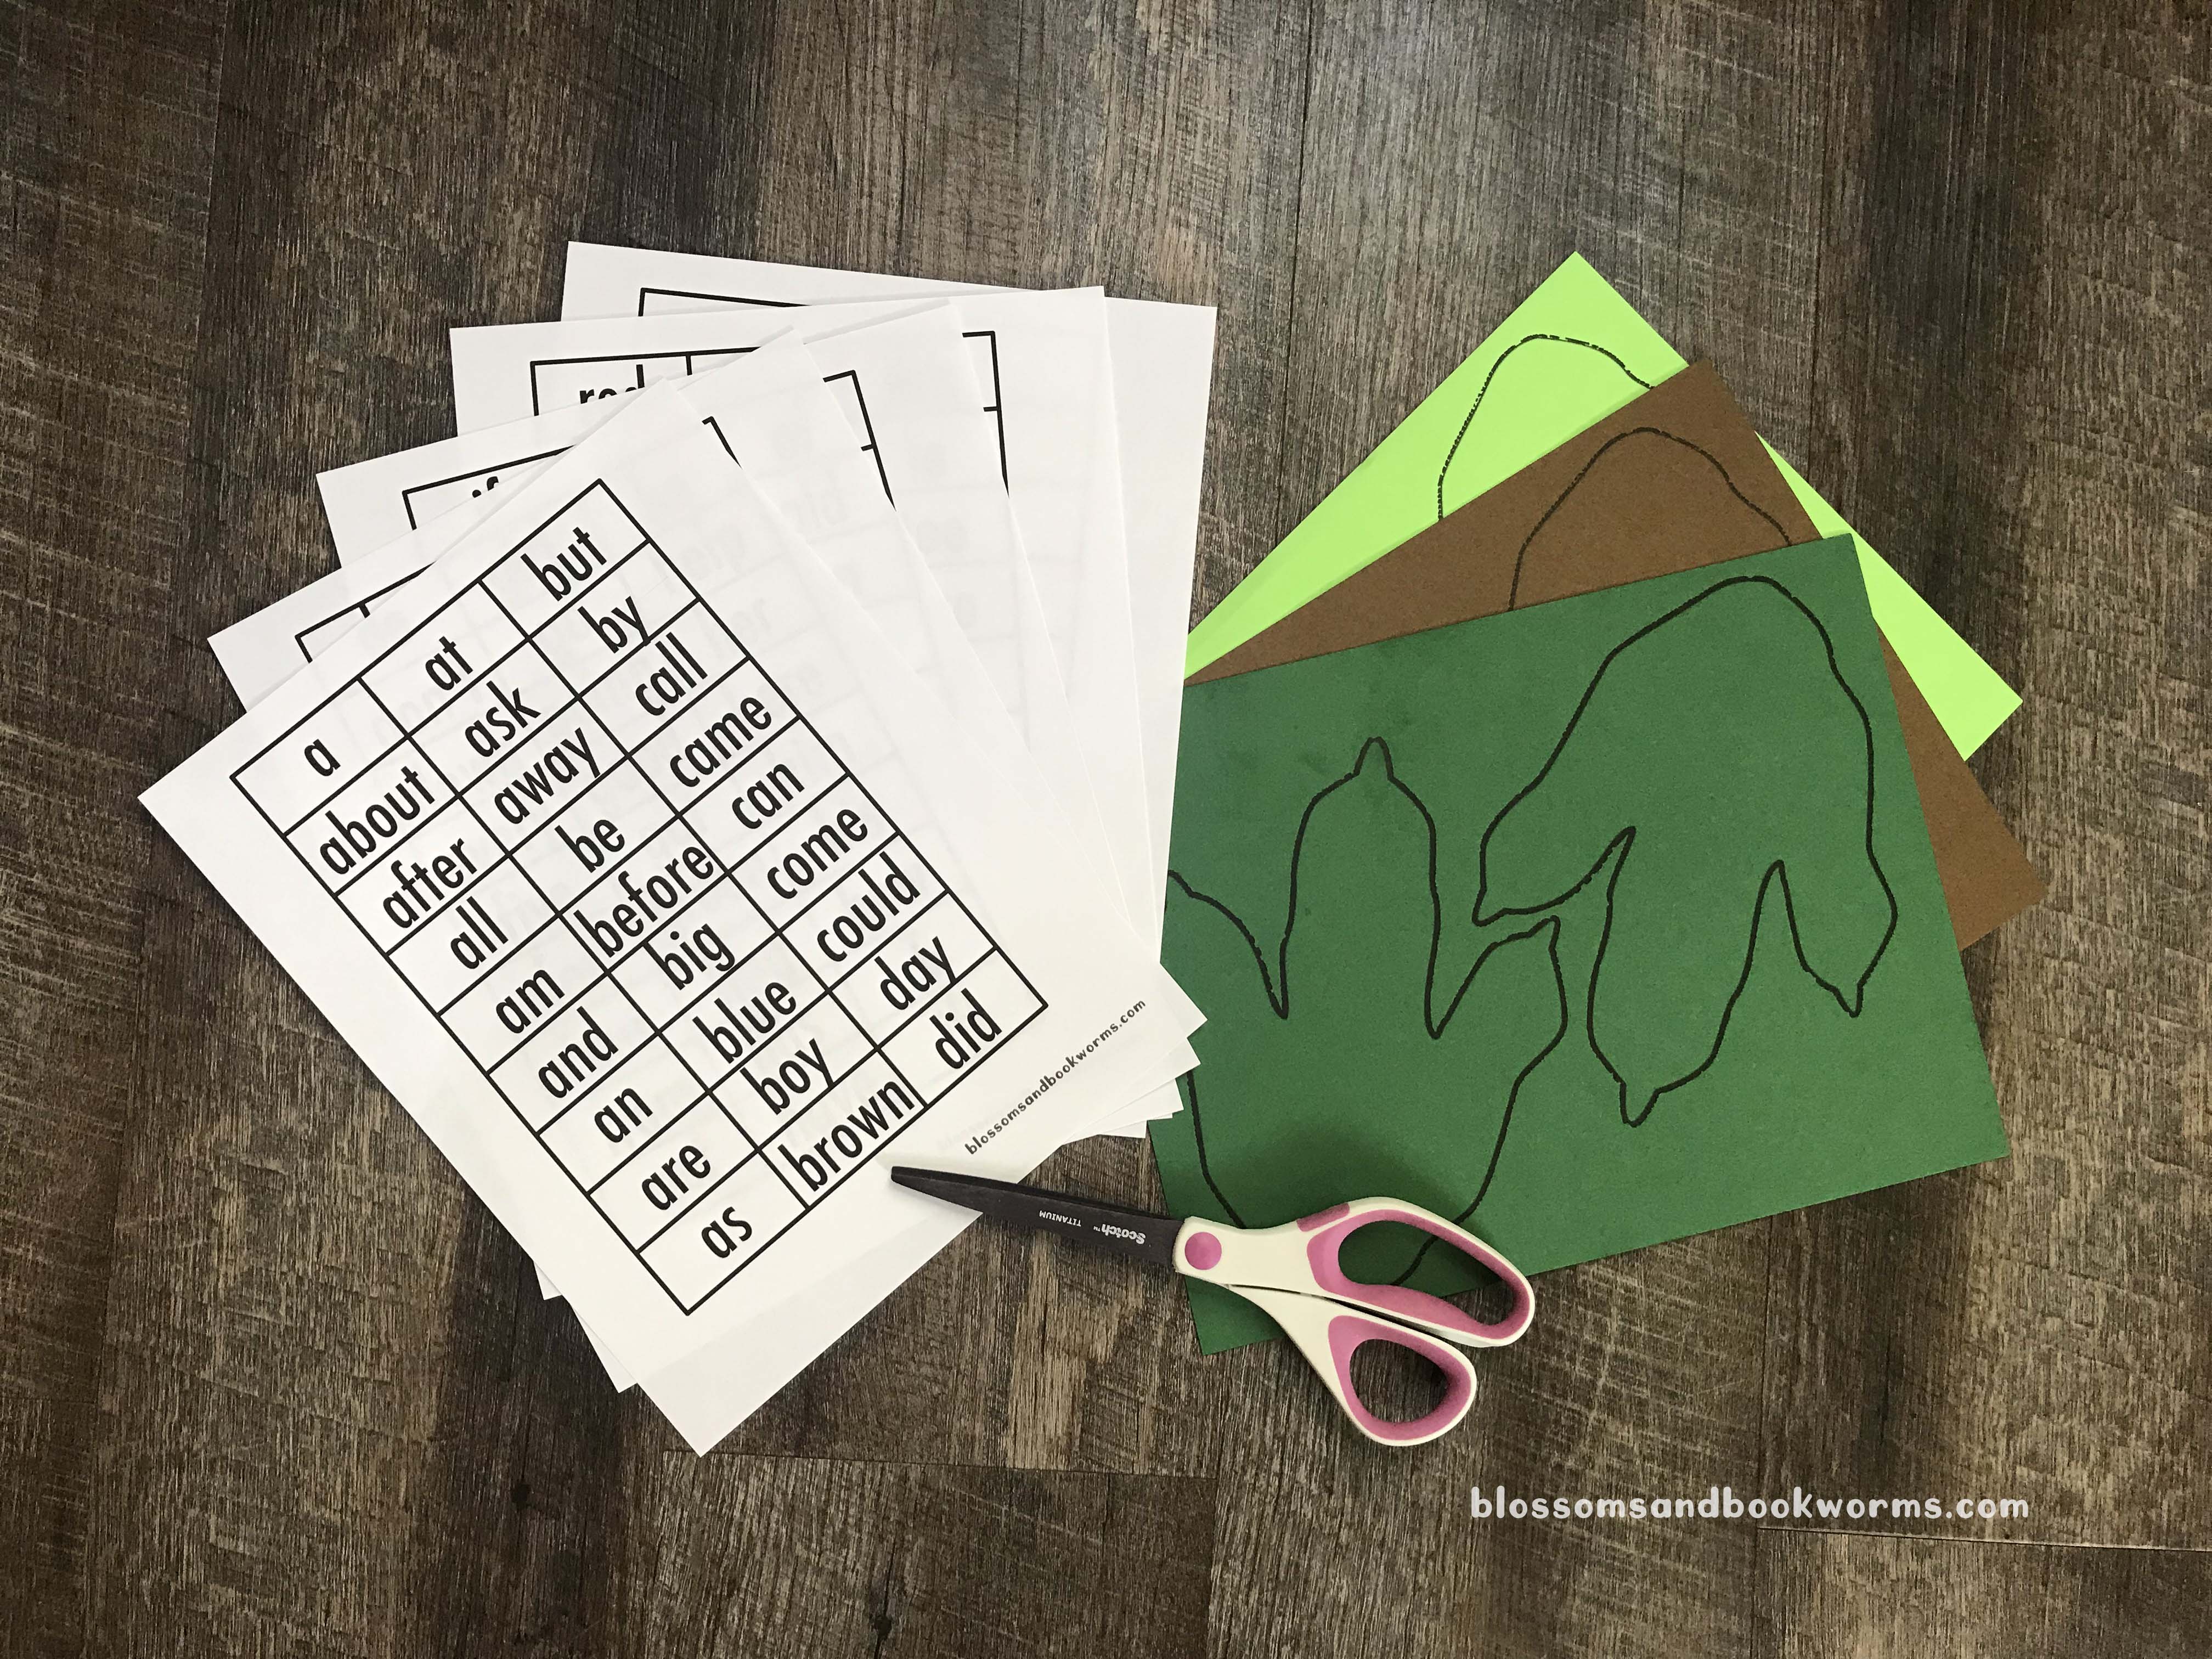
This activity was super simple to put together, especially when you download the free printable 😉. You can grab the Dinosaur Print FREE Printable HERE. You can grab the Sight Words FREE Printable HERE.
I printed the Dinosaur footprints onto colorful paper and the sight words onto plain white copy paper. I also opted to laminate the dinosaur prints because I have a feeling we will be using them for many things in our future!
One note on the sight words – I included the list of words from my son’s school, but the final page of sight words has 11 blank spots for you to add words your child is currently working on!
After you cut everything out, lay the dinosaur prints on the ground and use poster putty to adhere the sight words to the print. The poster putty is easy to use and move as you switch out the words on the prints.
Now, have fun experimenting with how to lay them out. You can lay them in a line and have your child stomp on each print while saying the sight words in a fun dinosaur voice…
… or set them in a semi-circle and make it a game – call out a word and have your child stomp on the correct one.
There are so many possibilities!
You can pick out the sight word opposites (like above)…
… or work on number words and counting….
… or even color words!
In case you missed it above – you can grab the Dinosaur Prints Printable HERE and the Sight Words Printable HERE.
There are so many ways to use these fun tools – I cannot wait to see what you come up with!
If you follow along with this blog, you know that I love simple science experiments that are easy to set up but have a big WOW factor. These Exploding Dino Eggs definitely fit the bill.
This is a play on the basic baking soda and vinegar reaction, but with the added WOW of dinosaurs hatching!
The prep isn’t difficult but it is messy and takes a bit of time. So plan your day accordingly 😉
Materials:
For the Eggs:
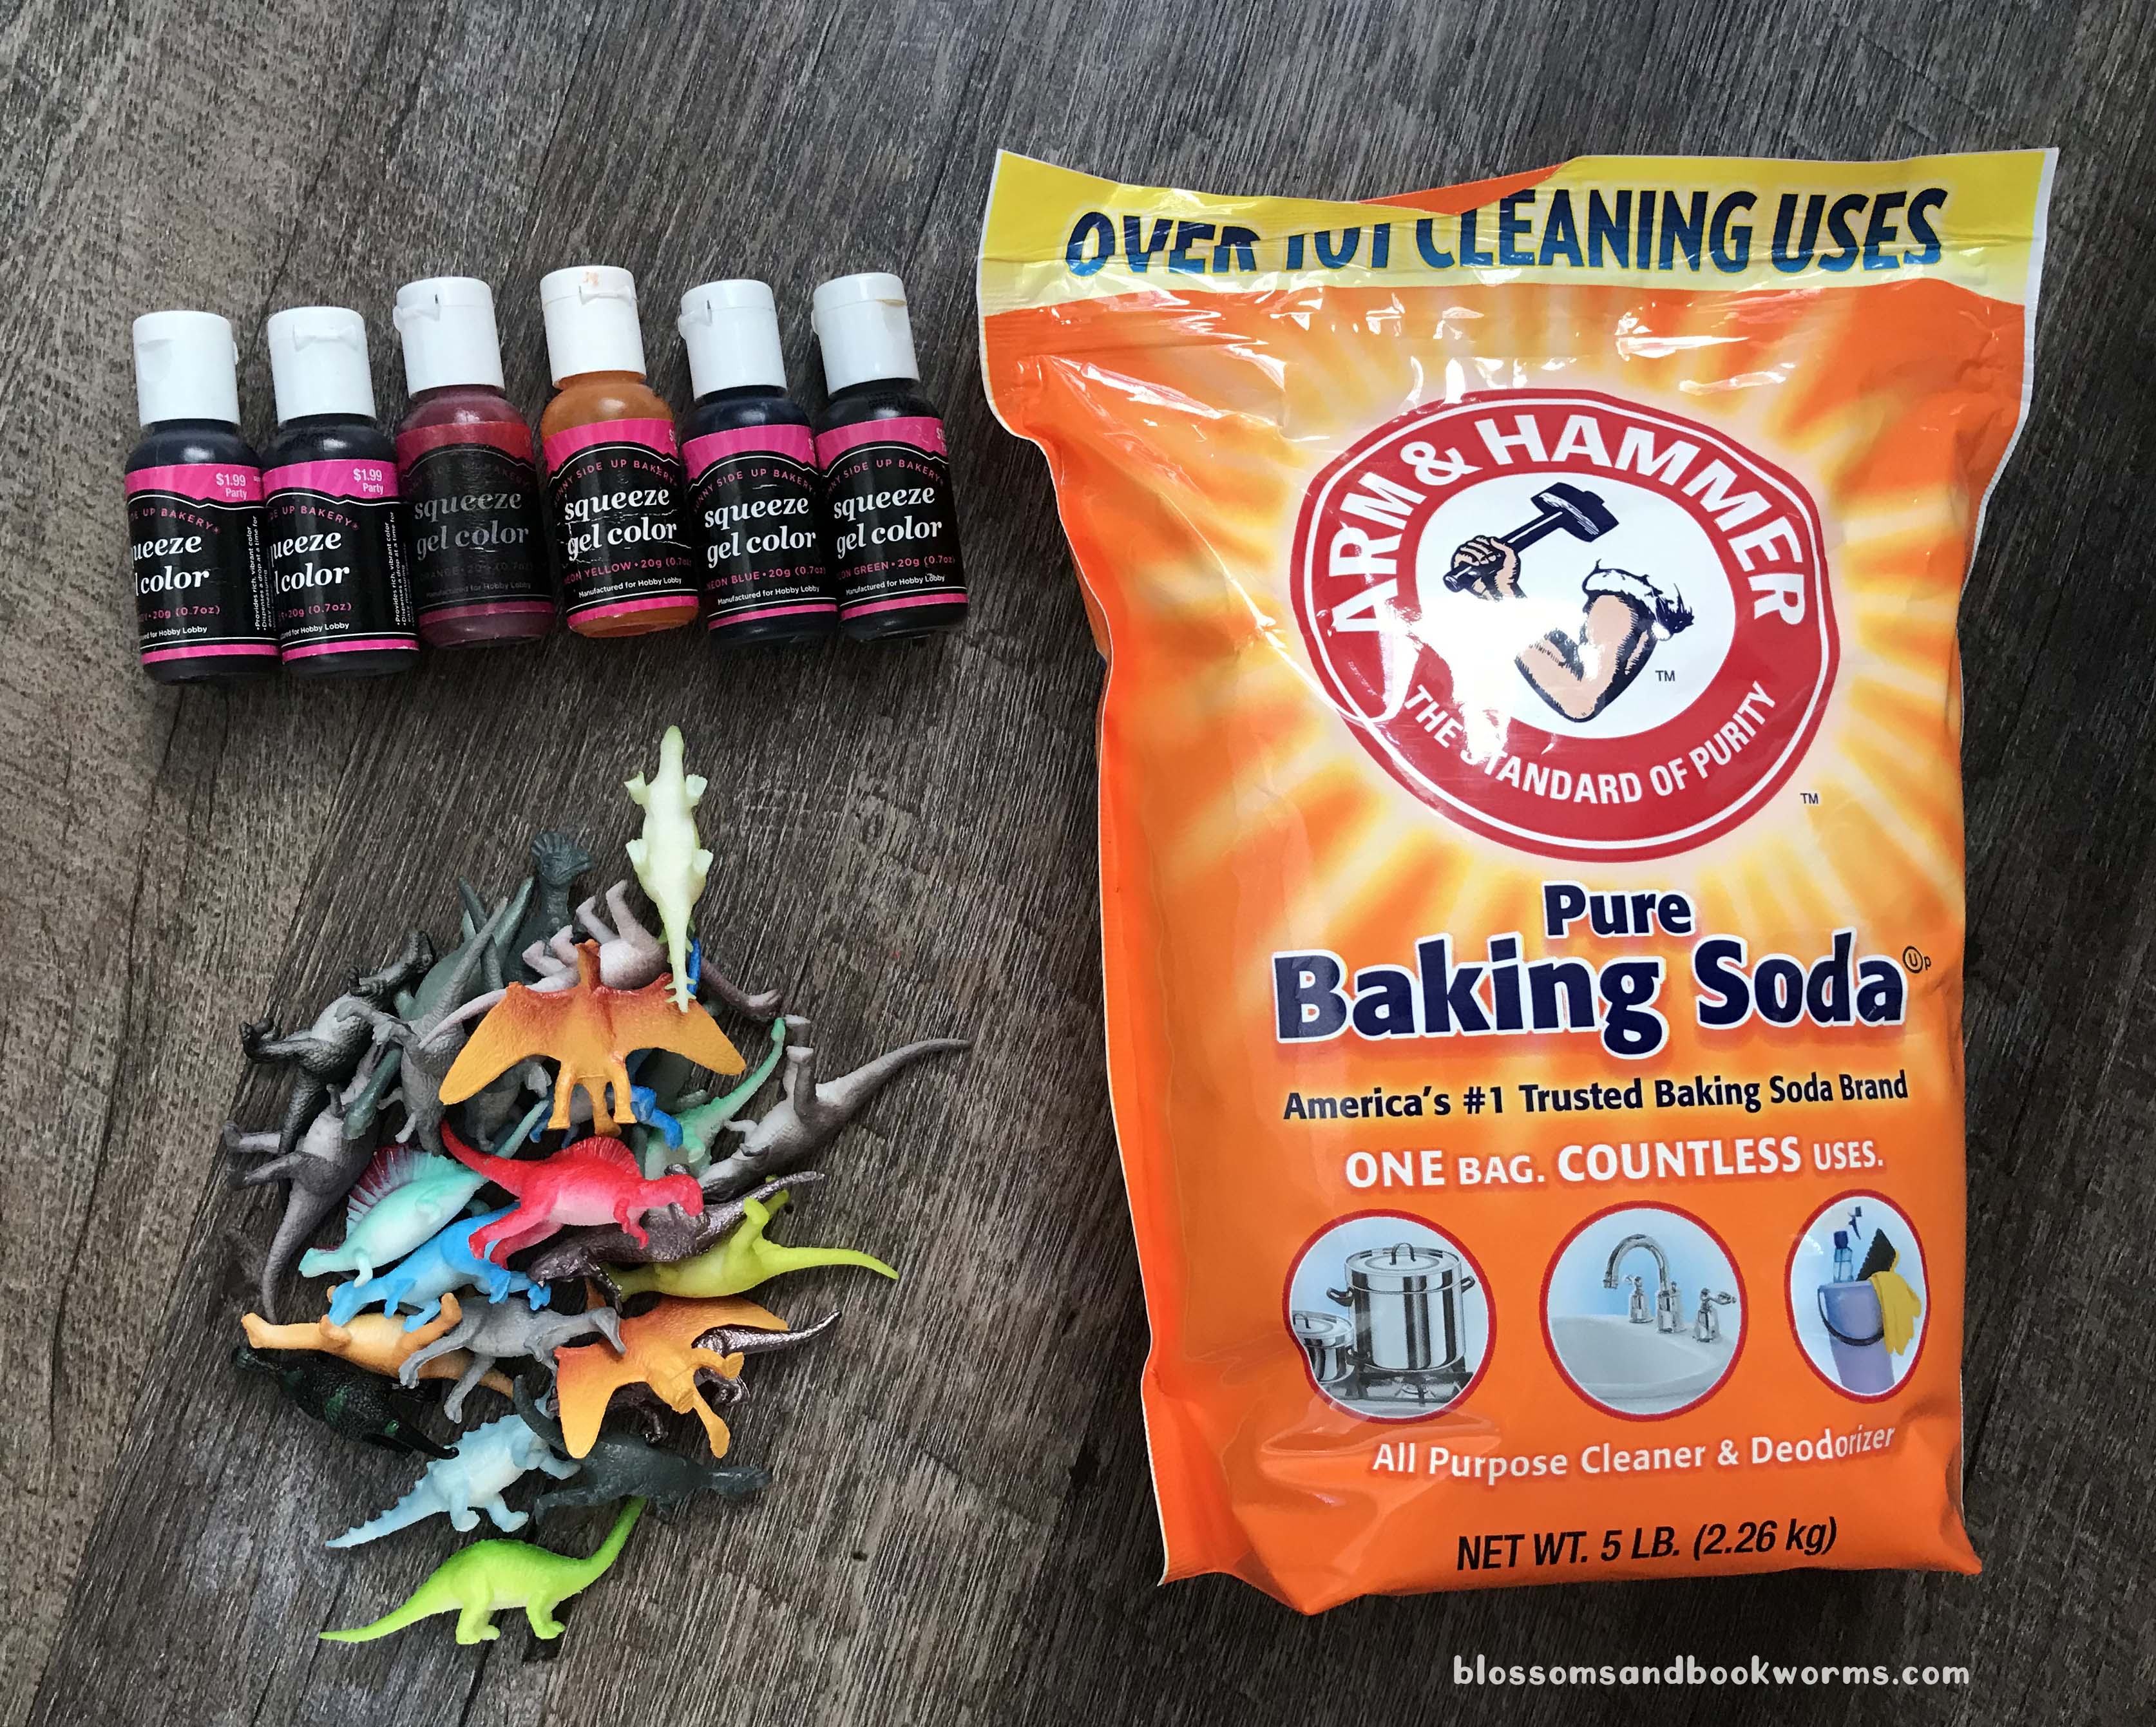
Baking Soda – opt for the big bag so you can make lots of eggs 😂
Mini Plastic Dinosaurs
Food Color – I used gel – totally optional but it ups the WOW factor!
Water
Spoons and Gloves are also super helpful!
For the Reaction:
Vinegar – again I buy vinegar in bulk so we have plenty for experiments.
Squirt bottles, spray bottles, or eye droppers
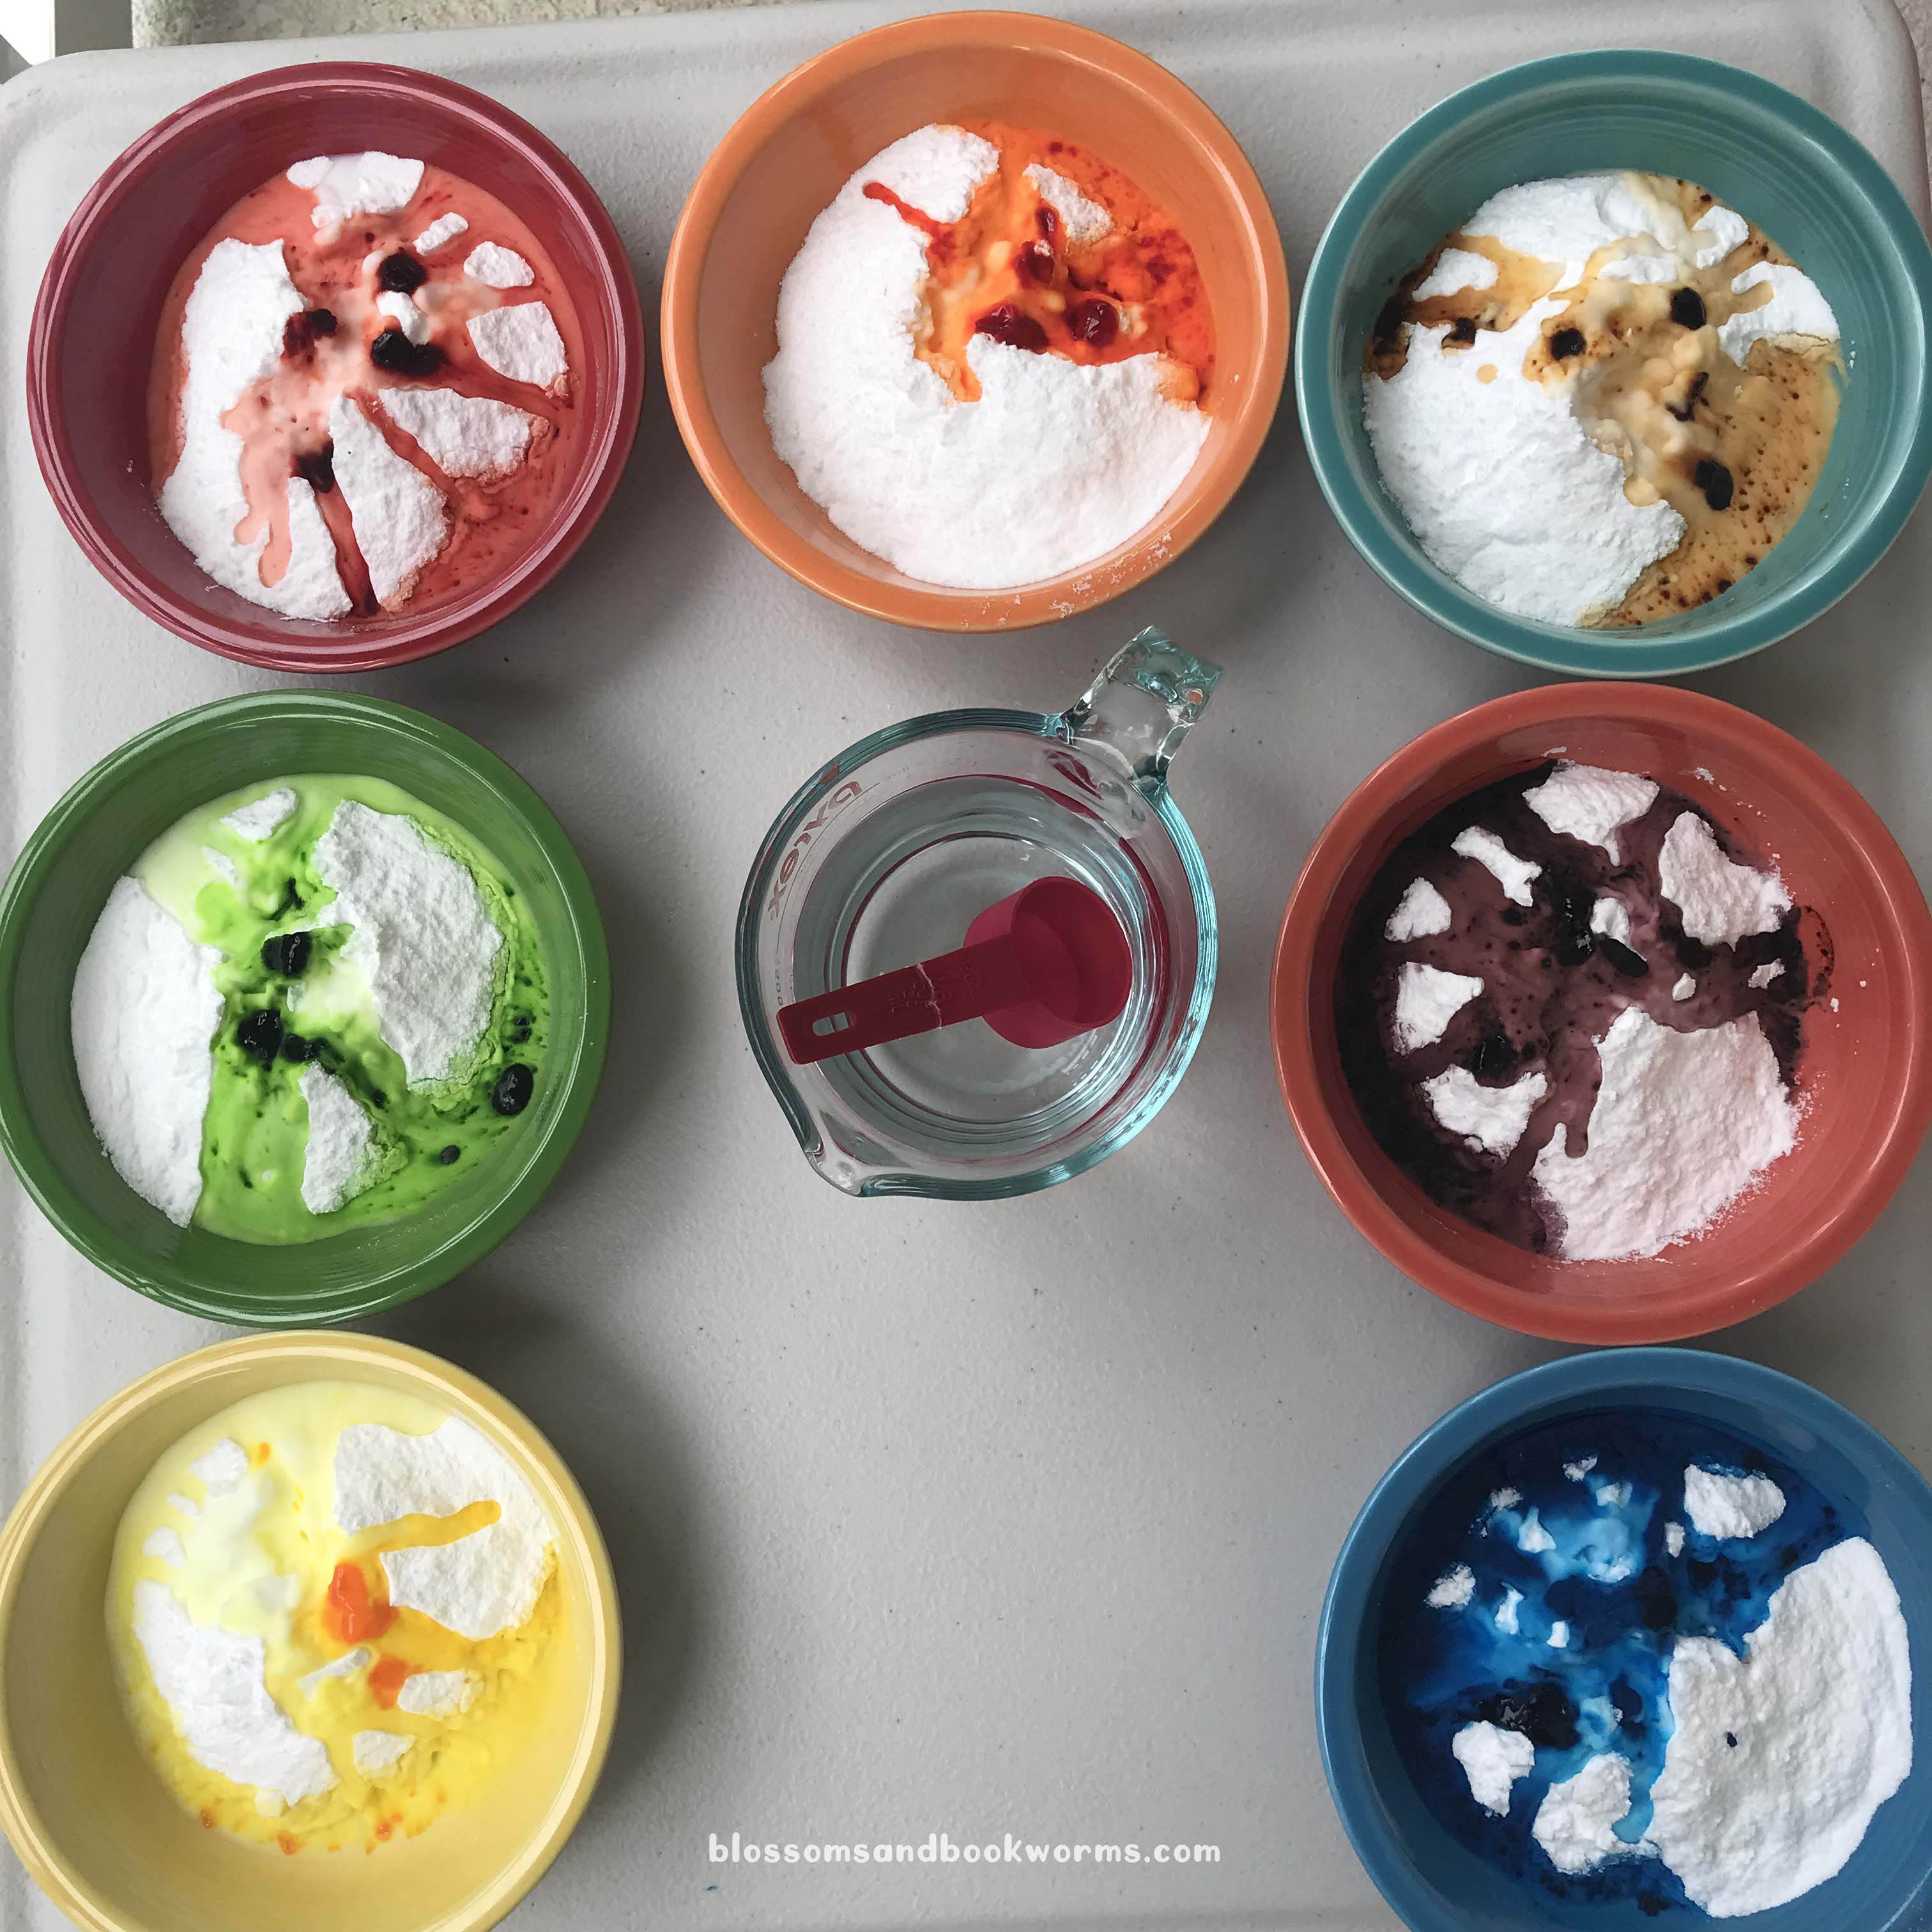
Grab a dish for each color you want to make, then measure out baking soda into the dishes. I was creating eggs for story time so I needed A LOT. Feel free to make less colors of reduce the recipe to fit your needs!
I used 1 cup of baking soda for each color. Then drop several drops of gel food coloring into the baking soda.
Add water, 2 TBS at a time, to make a thick paste. I used approximately 5 TBS water for each 1 Cup of baking soda.
Use spoons – or your hands if you’re a rebel 😉 – to mix the color, baking soda, and water into a thick paste.
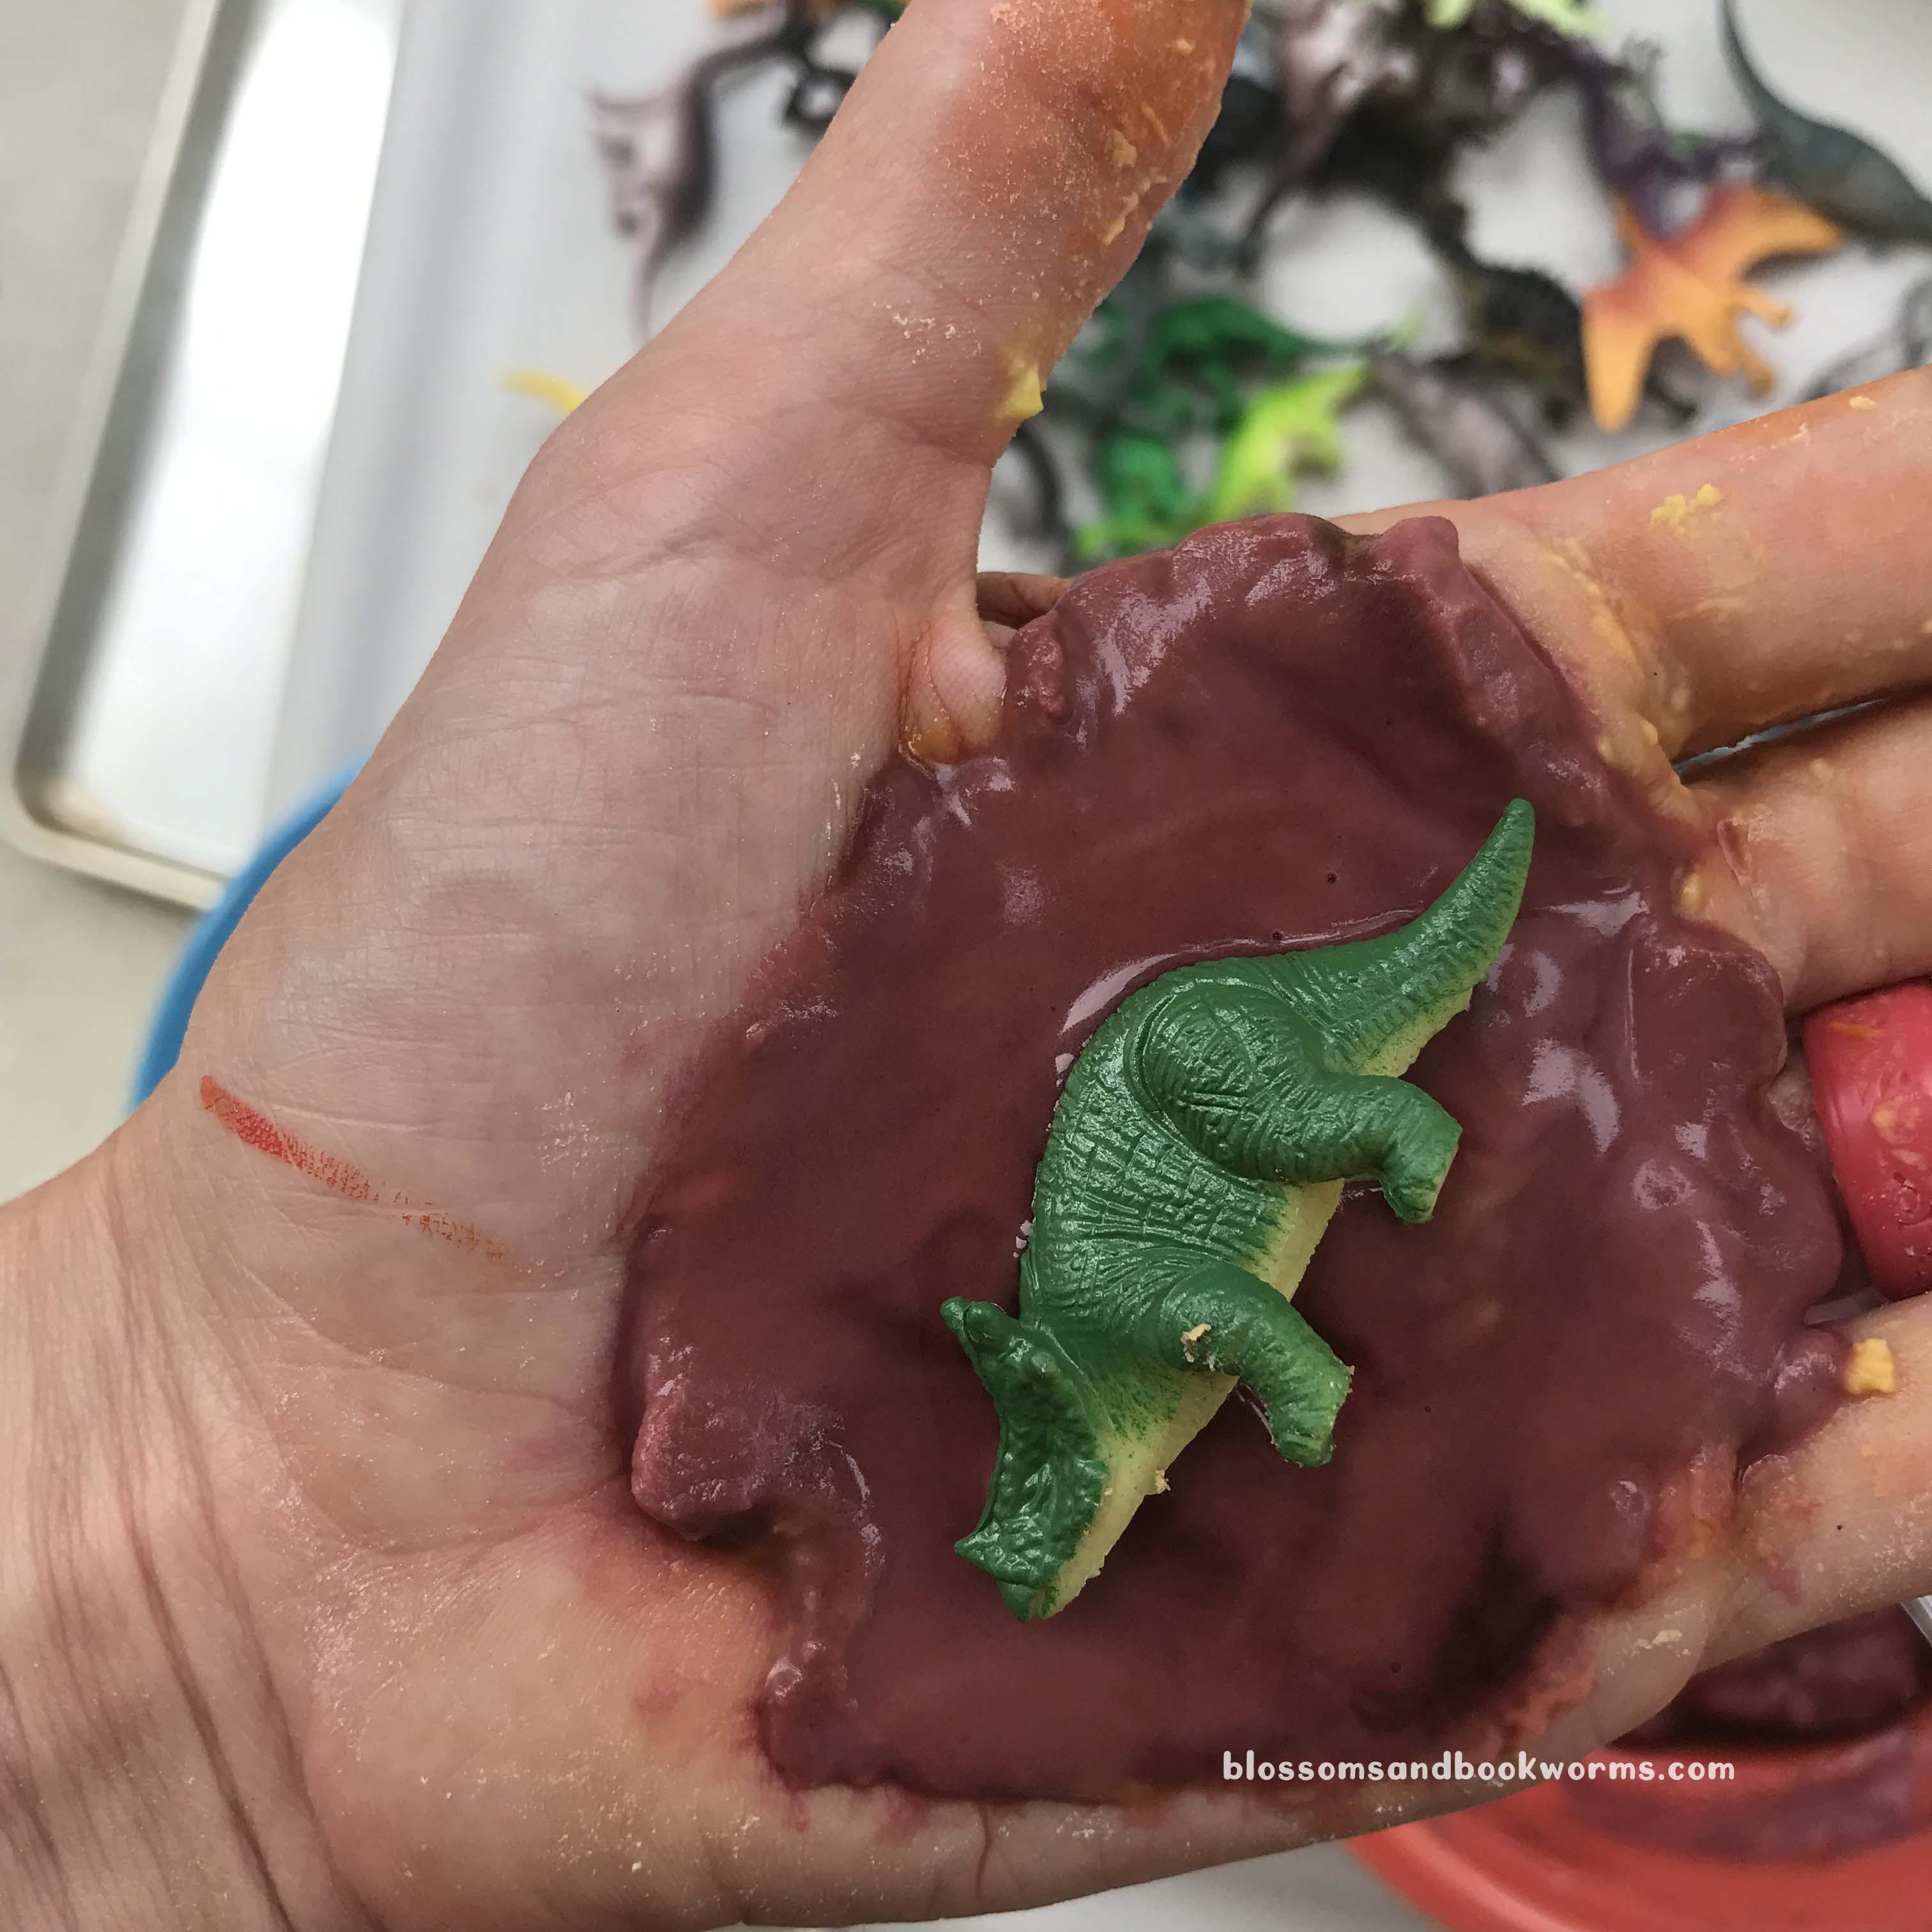
Now for the messy part – mold the paste into eggs! If you do not want your skin stained, you should definitely wear gloves for this part. Obviously, I didn’t, and my hands were a lovely shade of purplish-red for a couple days 🤣 So this is “do as I say and not as I did” situation. 🤣
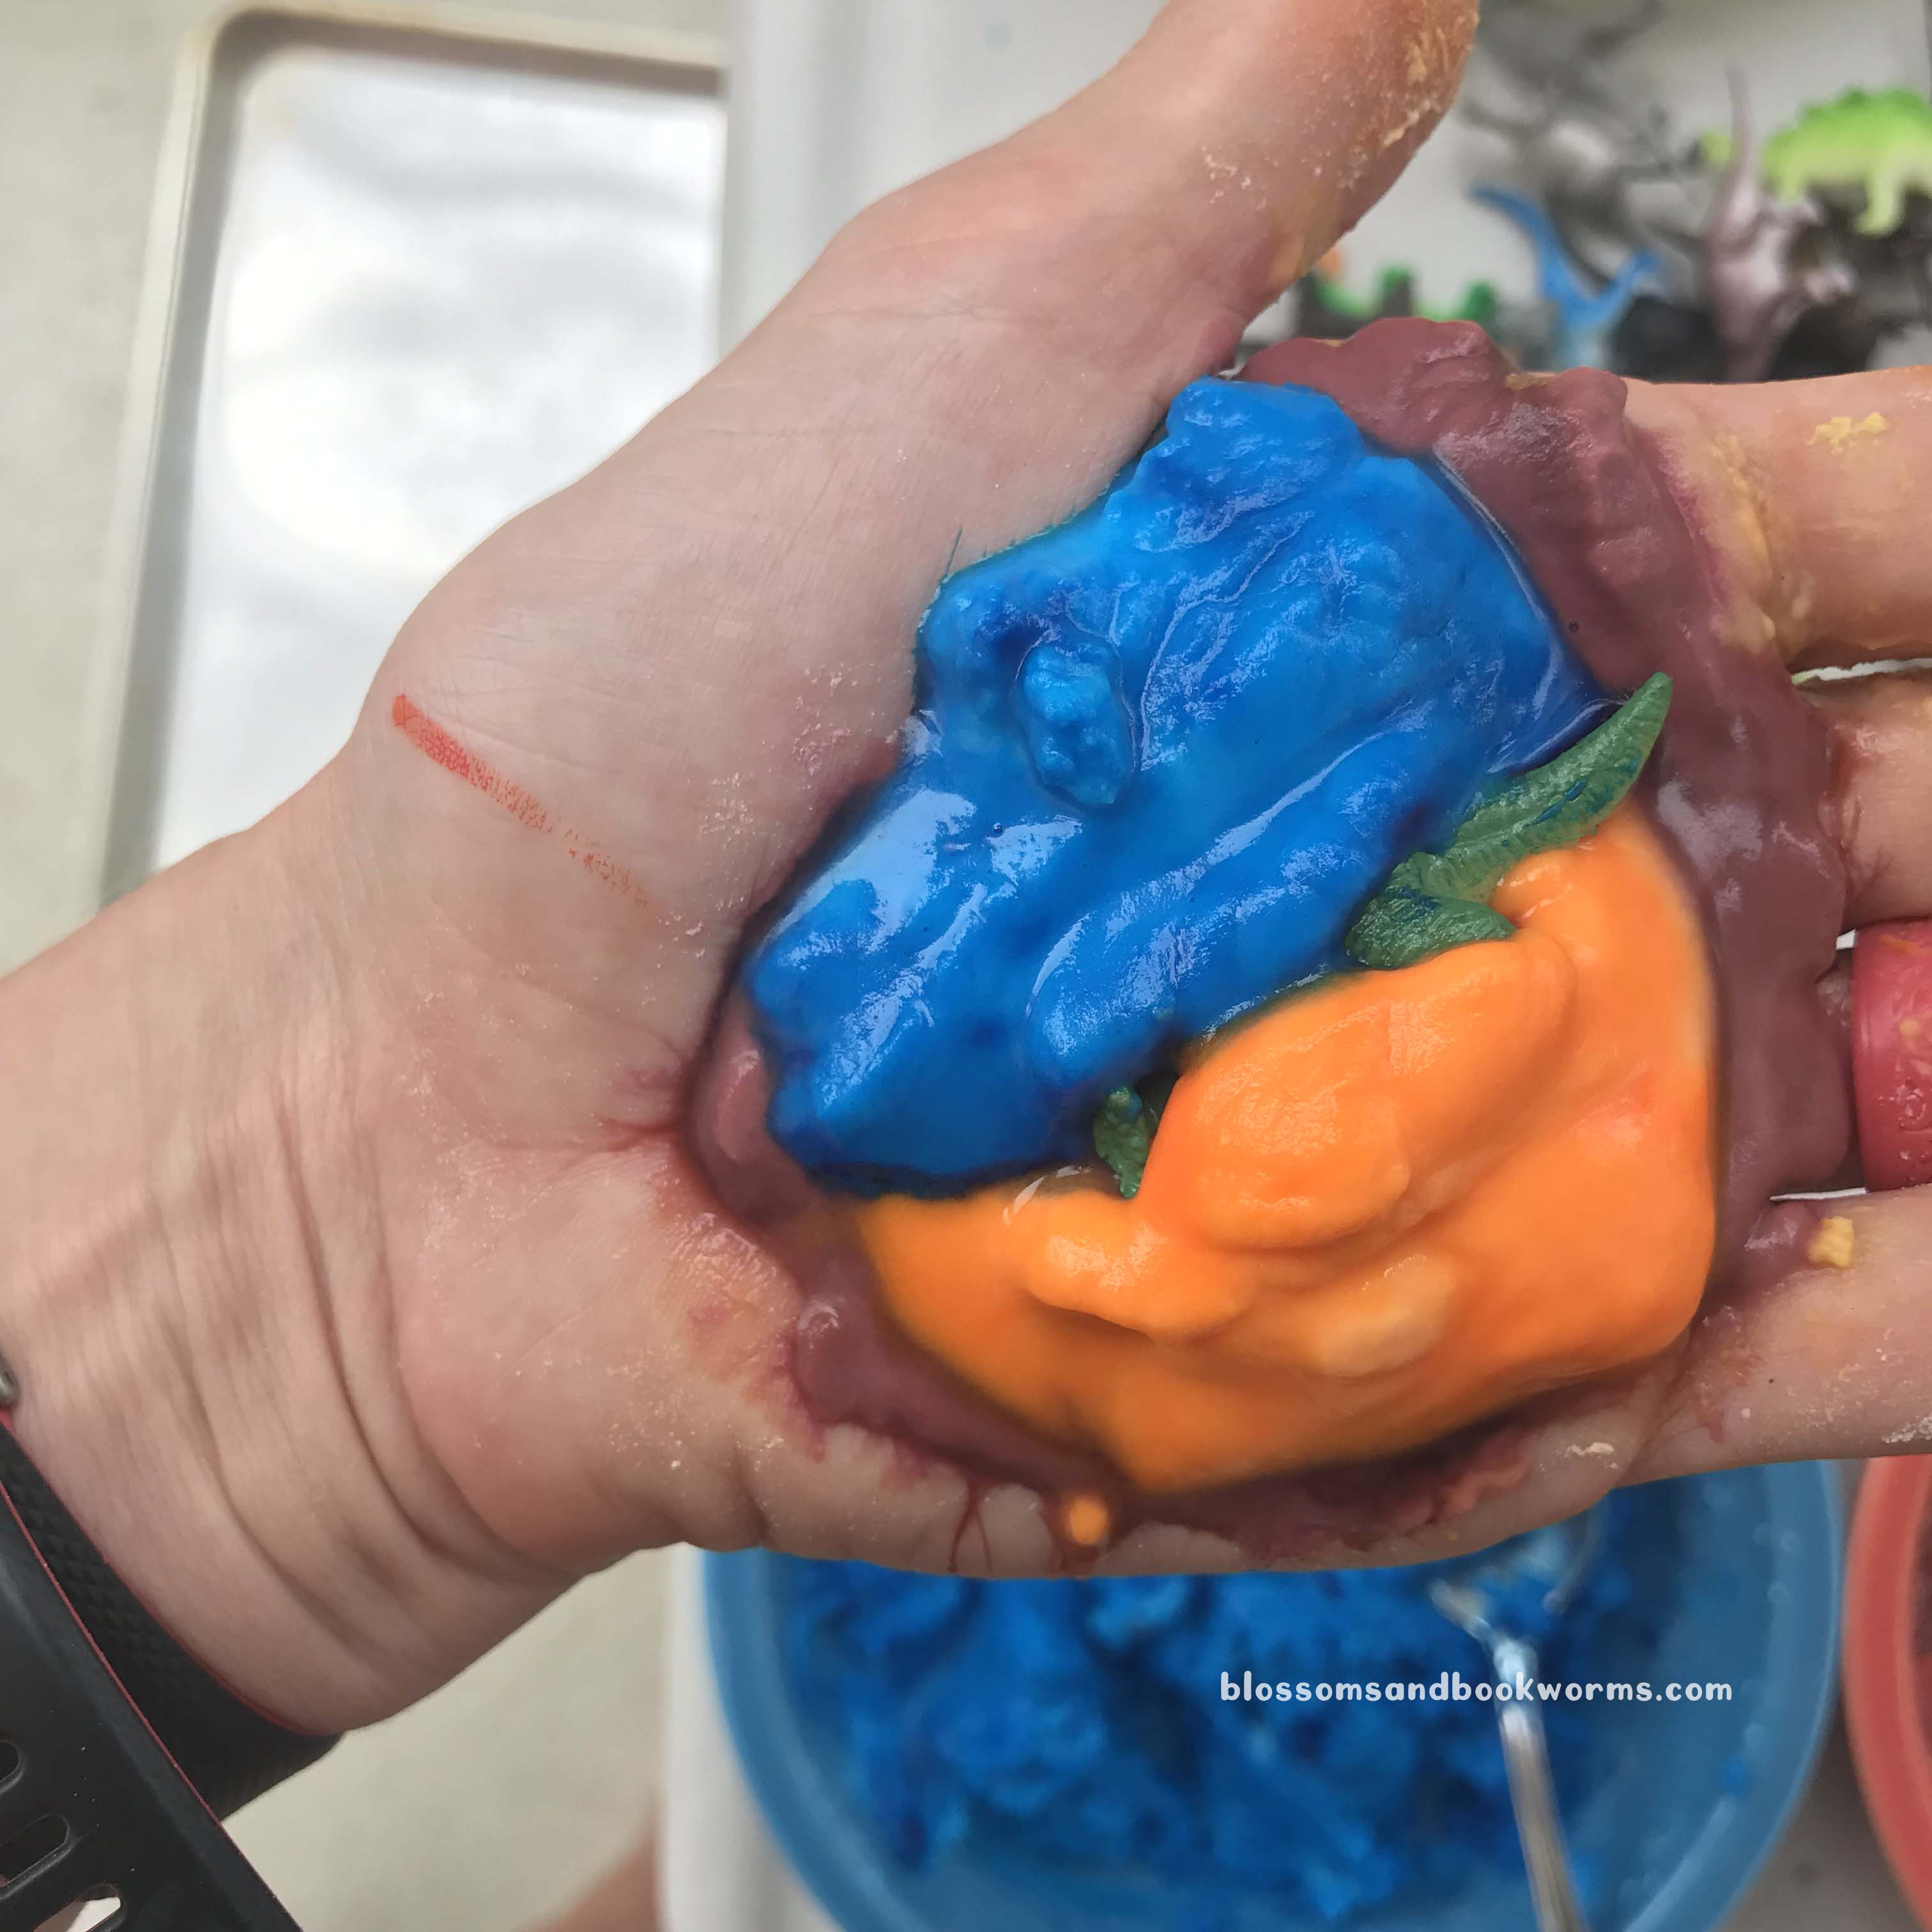
I put a TBS of paste on the palm of my hand, added a dinosaur, then added a few more dollops of paste to cover the dino. Mold it together to cover all parts of the dinosaur.
Real Talk – my paste was a bit too liquid, so when I peeled the egg from my hand, I rolled it in extra loose baking soda on a sheet tray. As soon as my sticky, gooey egg touched the loose baking soda, it set up and was easy to handle.
I absolutely love all the colors!
Notice that my eggs are not 100% smooth or oblong or anything else “perfect”. But I am totally fine with that and so were my kiddos. The fun is in the experience, not in the perfection for photos. So give yourself a little grace if they don’t come out a perfect shape!
Move your eggs to a cool, dry place for several hours – or overnight – to finish drying out. It is worth the wait, because the reaction will be better when they are fully dry!
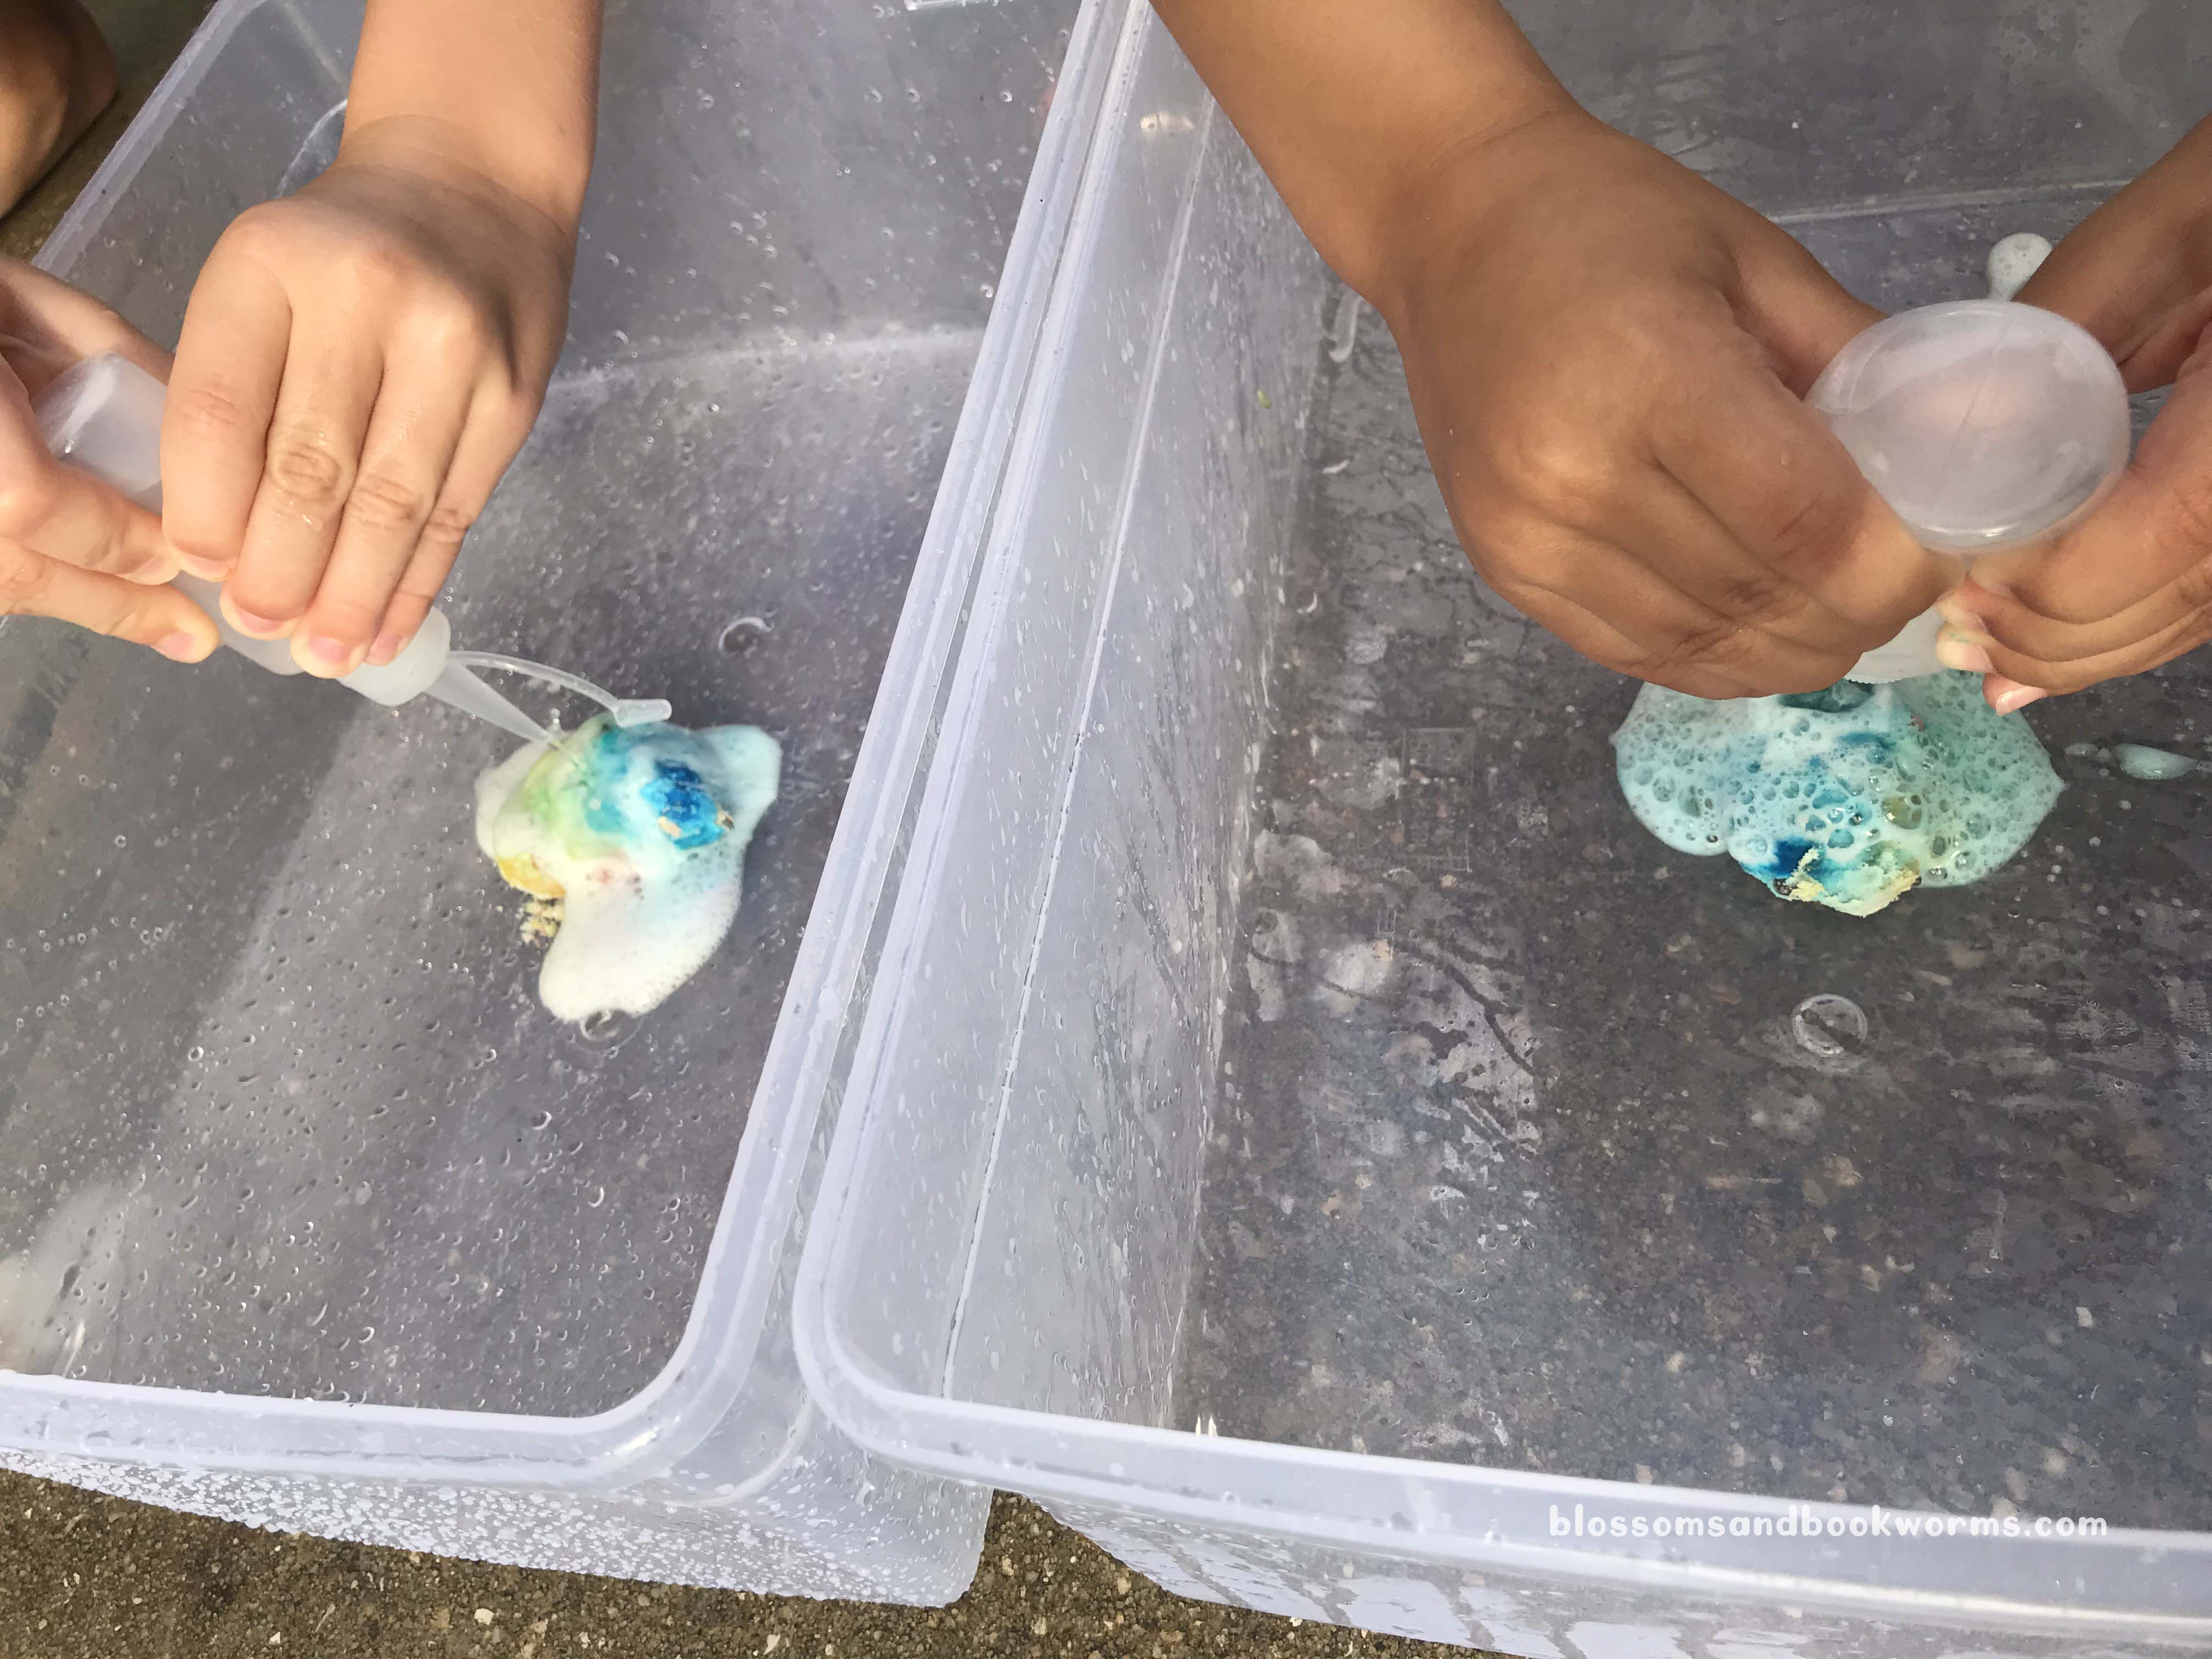
Now for the fun part! I added vinegar to squirt bottles and let my kiddos go to town. The reaction and “WOAH, its exploding” moment is totally worth it!
Since we used food coloring the reaction can make a mess. I recommend doing this part outside or in a bin – or both!
Check out that dinosaur exploding out of that egg!!
I know, I know, this looks too messy for you… but do not fear! I actually did this activity with 20 kiddos at story time – age range from 1-9 – and NONE of them ended up with stained hands or clothes.
BONUS – ALL of them LOVED the experiment!
You can totally make this work for your readers too!!
Don’t forget to have a “Dino Wash” bucket handy – plain water to rinse them off would be plenty, but bubbles amp up the fun factor! My kids loved washing the dinosaurs as much as hatching them!
I love that my youngest is working on matching, counting, and pen control all at the same time! And she loves that she is able to do it with a “special marker”! 😁
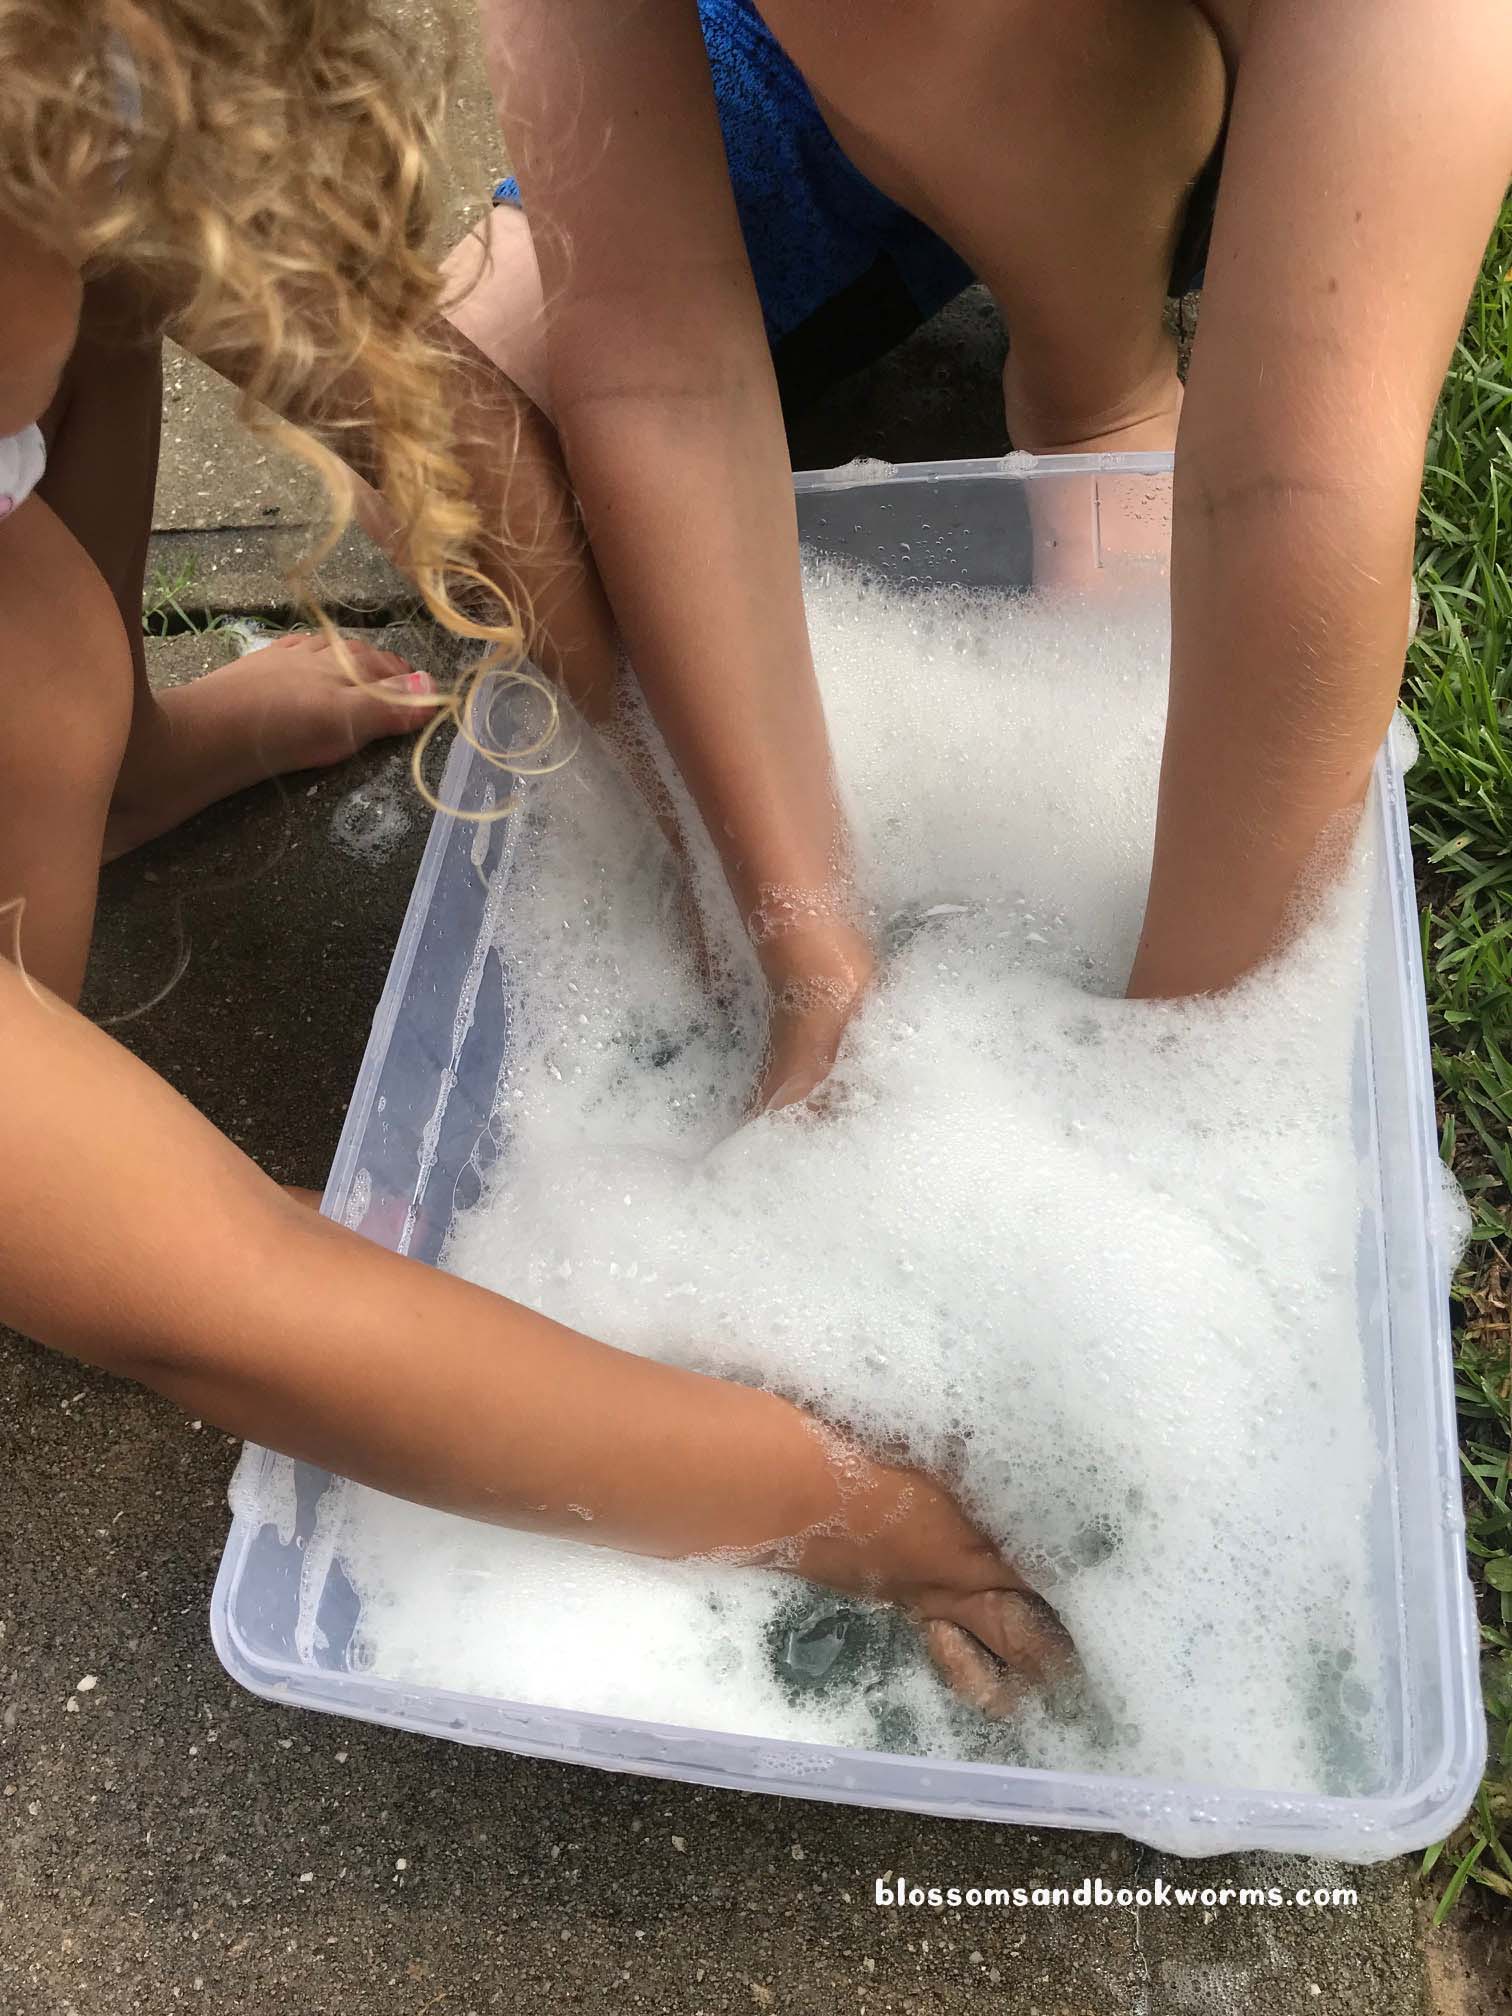
Matching games are wonderful for kiddos. They help pass the time when summer boredom sets in AND there are so many developmental benefits to these simple games.
Matching and Memory Games:
Train visual memory
Improve concentration
Increase a child’s attention to detail
Exercise and increase short term memory
Improve a child’s ability to find similarities and differences between objects
Help little ones classify objects and group by similar traits
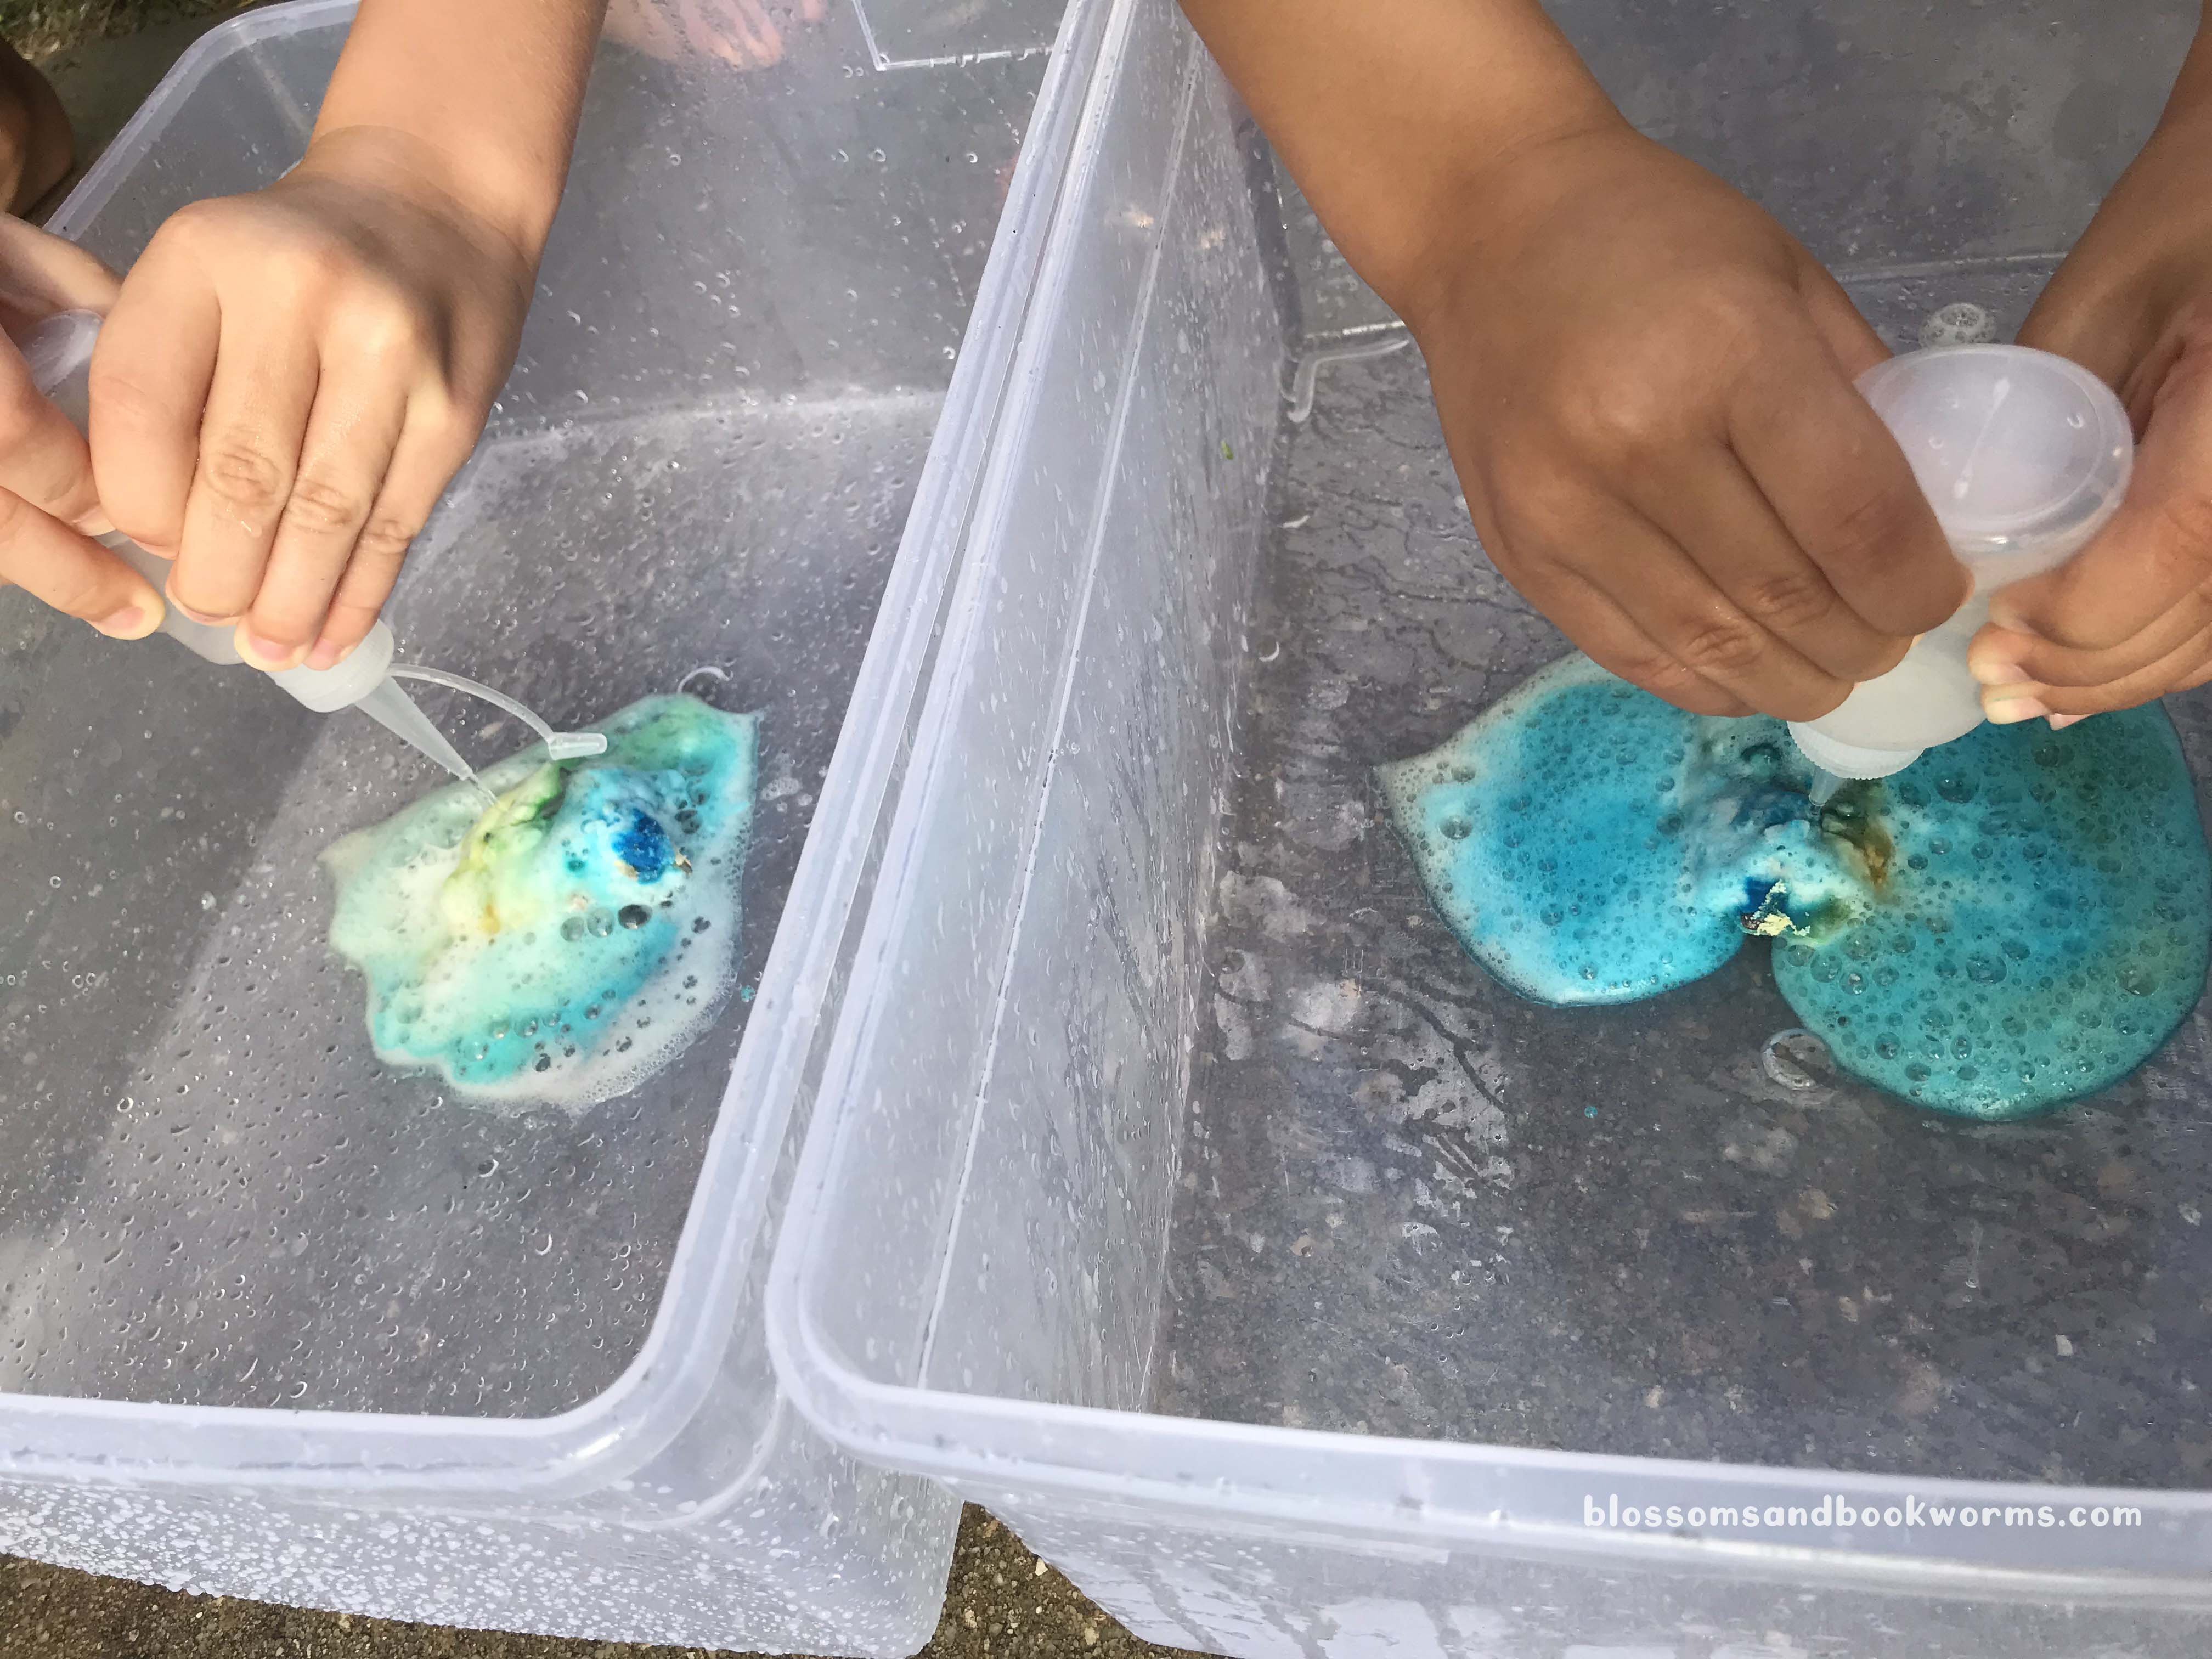
Improve vocabulary
Since it is Under the Sea Week here at our house, I created this fun themed matching game. We are getting to talk about all the creatures we have been learning about throughout the week while we play. It is fascinating to hear how much these kiddos have retained from the books we have been reading!
BONUS – my kids thought it was so fun that I am including a FREE printable in this post so you can have fun with it at your home too! You can download it HERE!
I recommend printing these cards on heavy card stock or other thick paper so no cheater can peak through the paper to see what is on the other side! Not that that has ever happened in our house… 🤪 Did I mention that this is the second set of cards I printed out? 🤣
After you print the sheets, I recommend laminating and then cutting out the cards. Yes, I know there is a great debate about laminate first and then cut OR cut first and the laminate… It is totally up to you! For the sake of time, we laminated first and then cut for this game. 😁
Obviously, laminating is optional, but it will help the cards hold up to repeated use.
With small kiddos you can have them match with all the cards face up. Then, as they become more confident, try turning just half of the sets face down for them to practice matching. With older kiddos, use all the cards face down from the start. There are endless ways to play – and learn – through this matching game!
Ready to play? Download your FREE Printable, HERE! I cannot wait to hear what memories you made while playing!
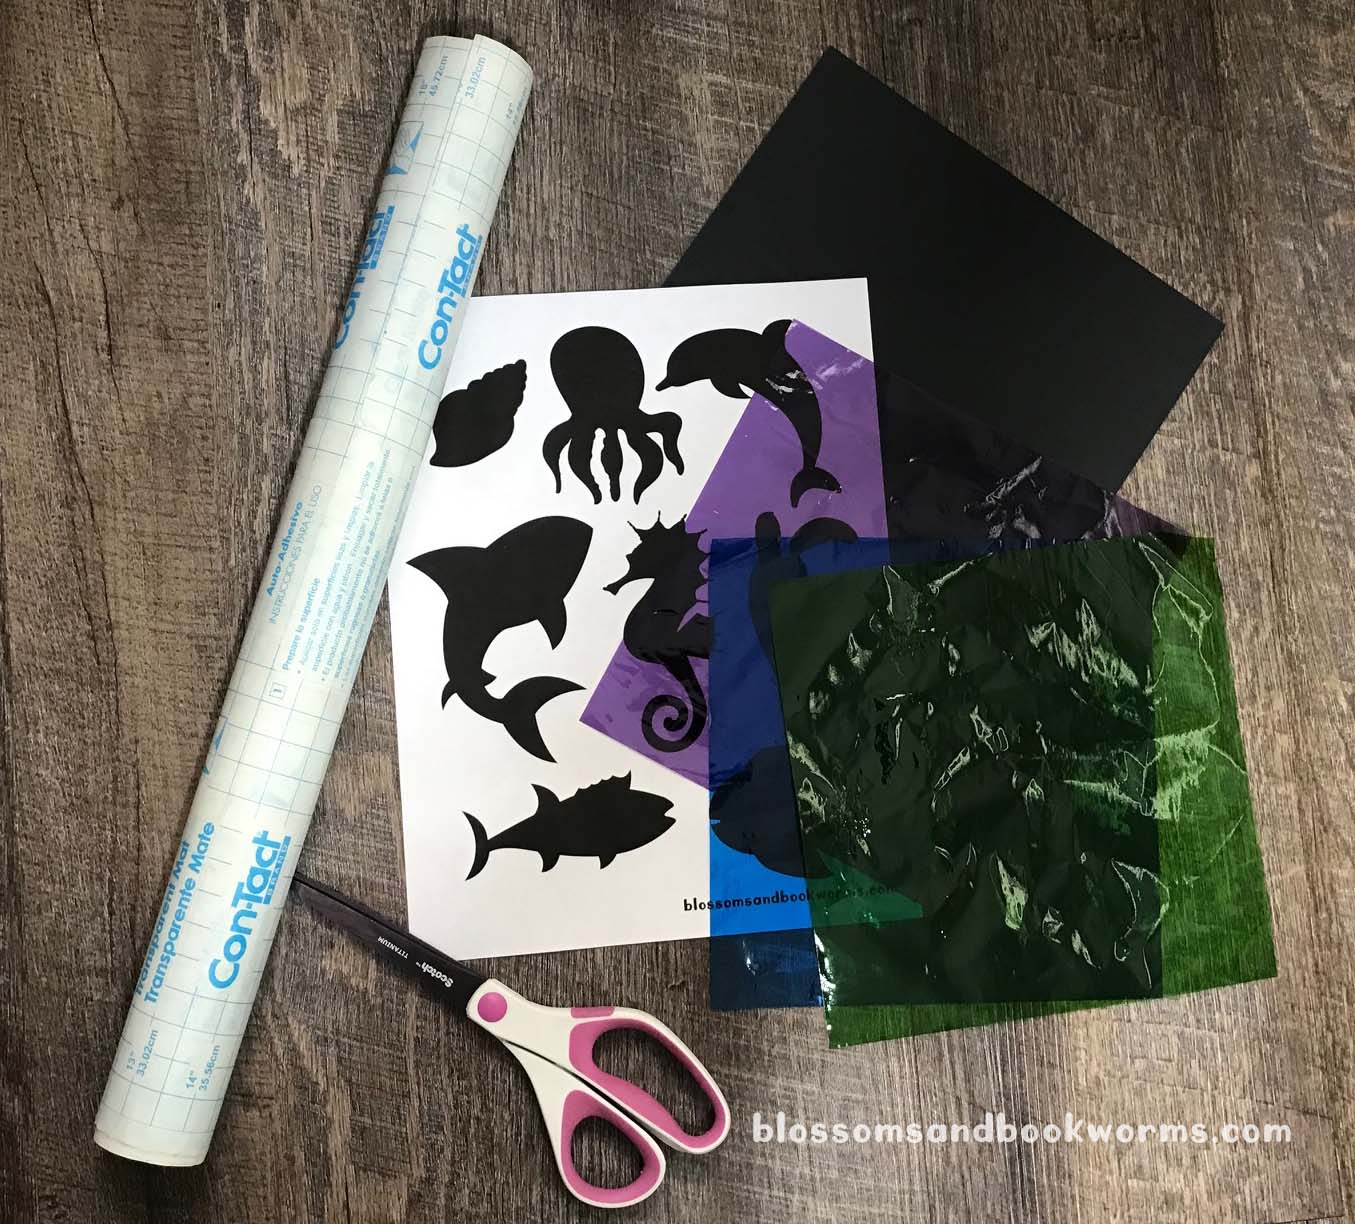
We have done a lot of “stained glass” projects in the last couple years, but the finished product of this one might be my absolute favorite (so far 😉). The colors are vibrant, translucent, and it seems to glow as the sunlight streams through! I am already thinking of ways to change the color palette and incorporate different scenes in the future…
To be fair this activity takes a bit more prep than I usually go for. If you have older kiddos who are good with scissors they can totally help with the prep. My younger kiddos waited until I had everything prepped and then jumped in to create the “stained glass” effect.
Materials:
Black Cardstock
Colored Cellophane – I love the look the cellophane gave, but you can totally do this with tissue paper too!
Glue Stick or Scotch Tape to affix the sea creatures at the end.
Start by grabbing the free printable with the ocean creatures. Print the sheet and cut out the creatures you want to use.
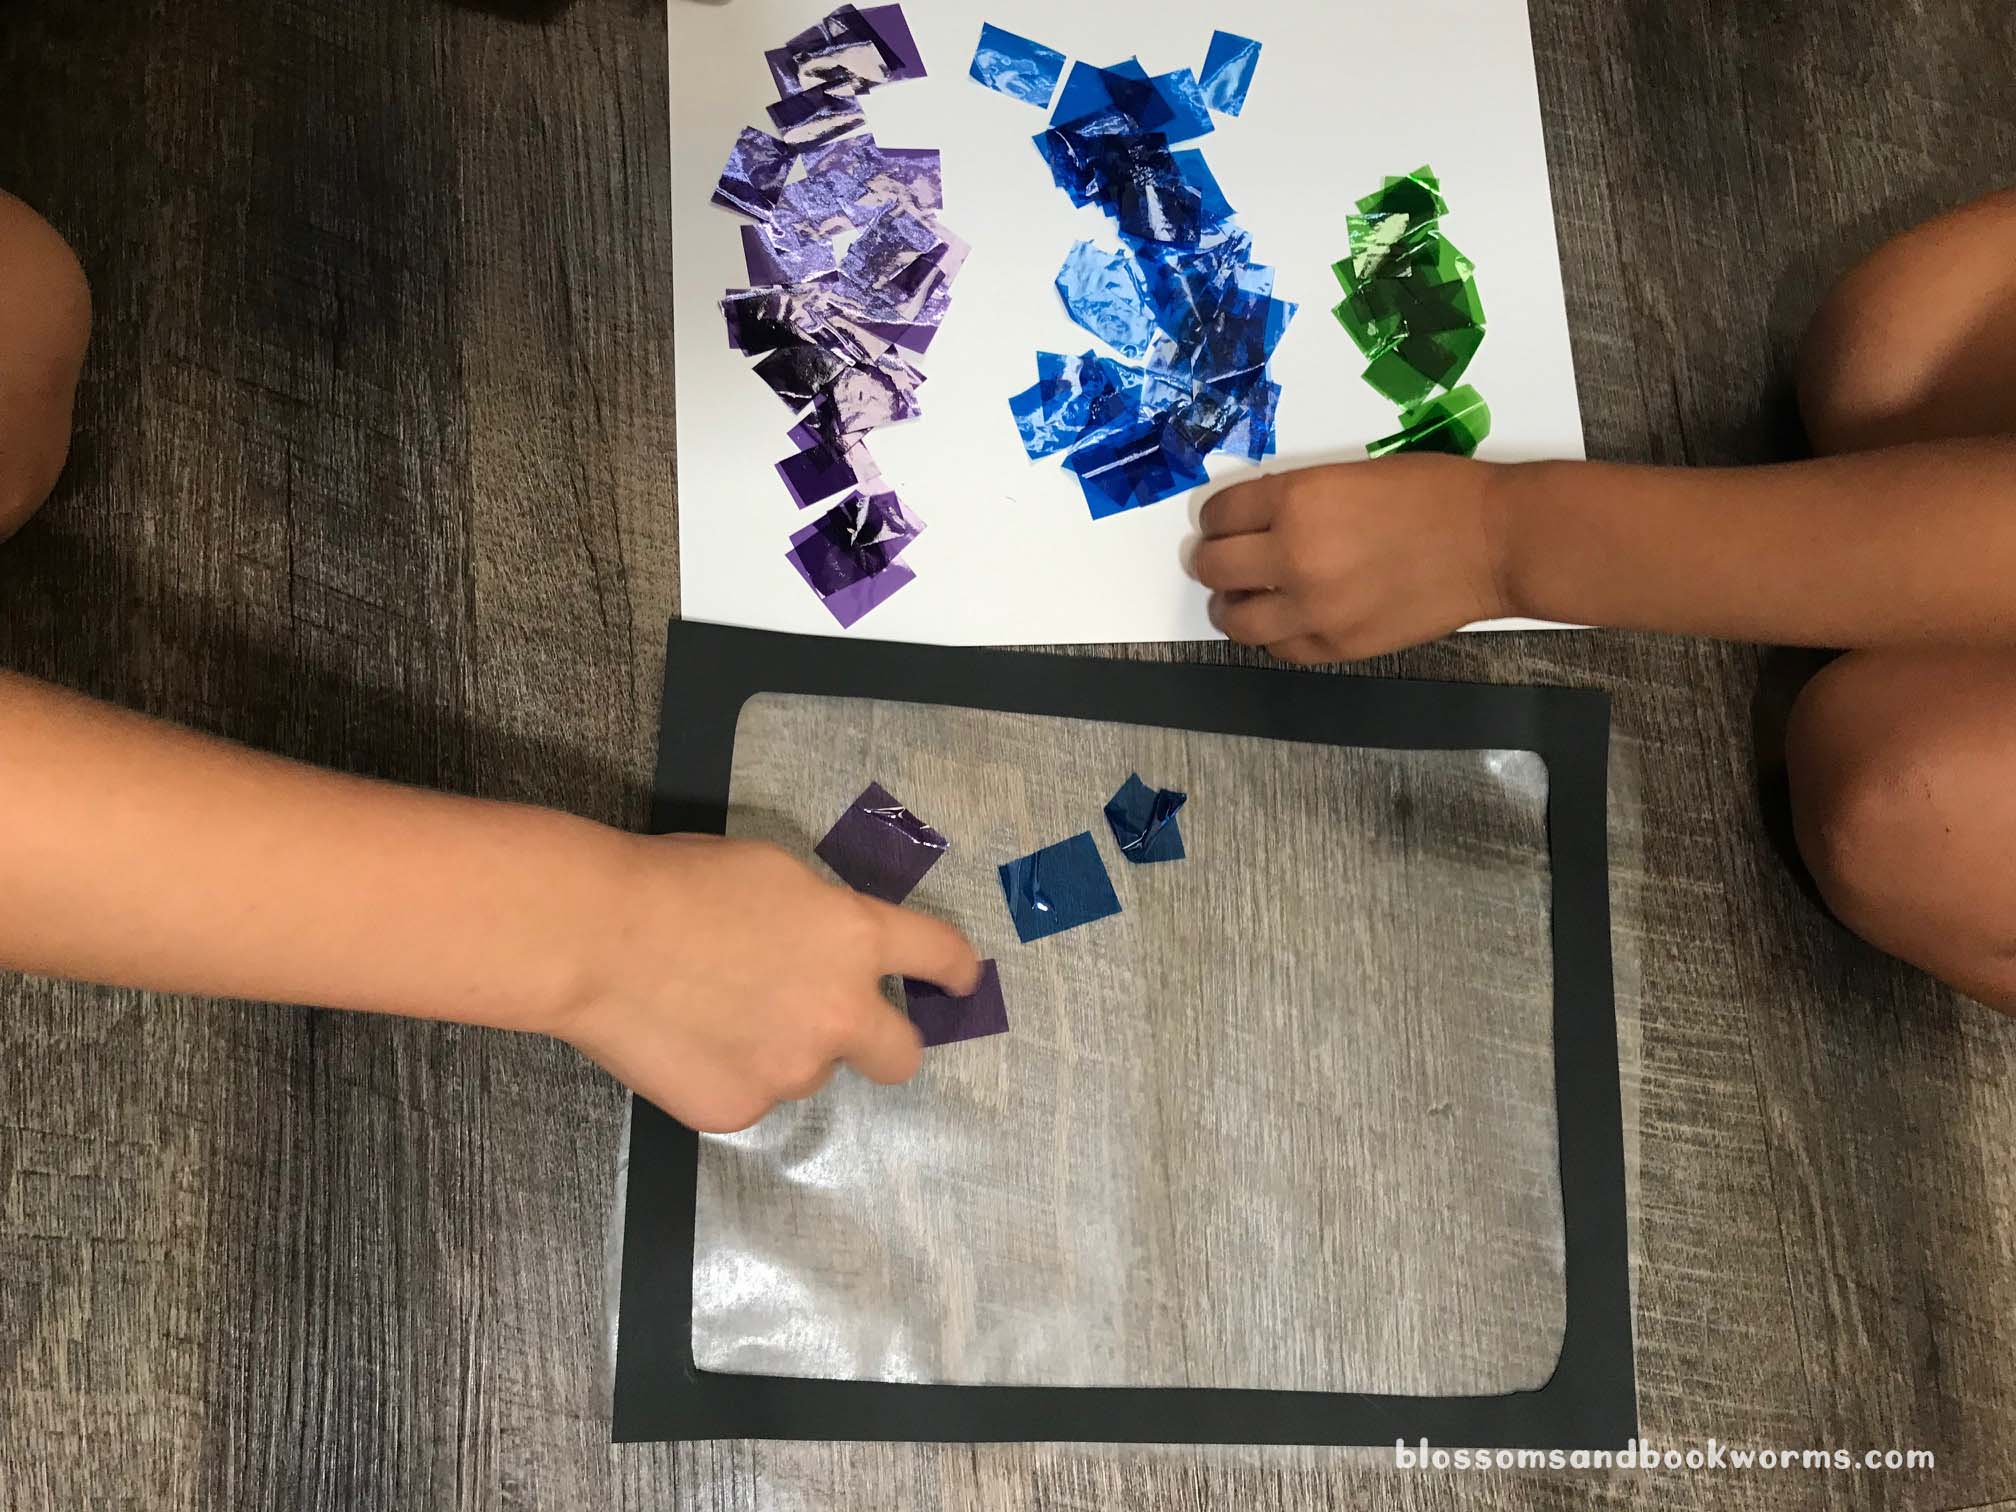
Next, cut cellophane into small squares. We used mostly 1 inch squares but random shapes and sizes makes it even more interesting!
Precision is not required in this step. However, if small children are going to arrange the stained glass color part then make sure your pieces of cellophane are big enough for them to grab.
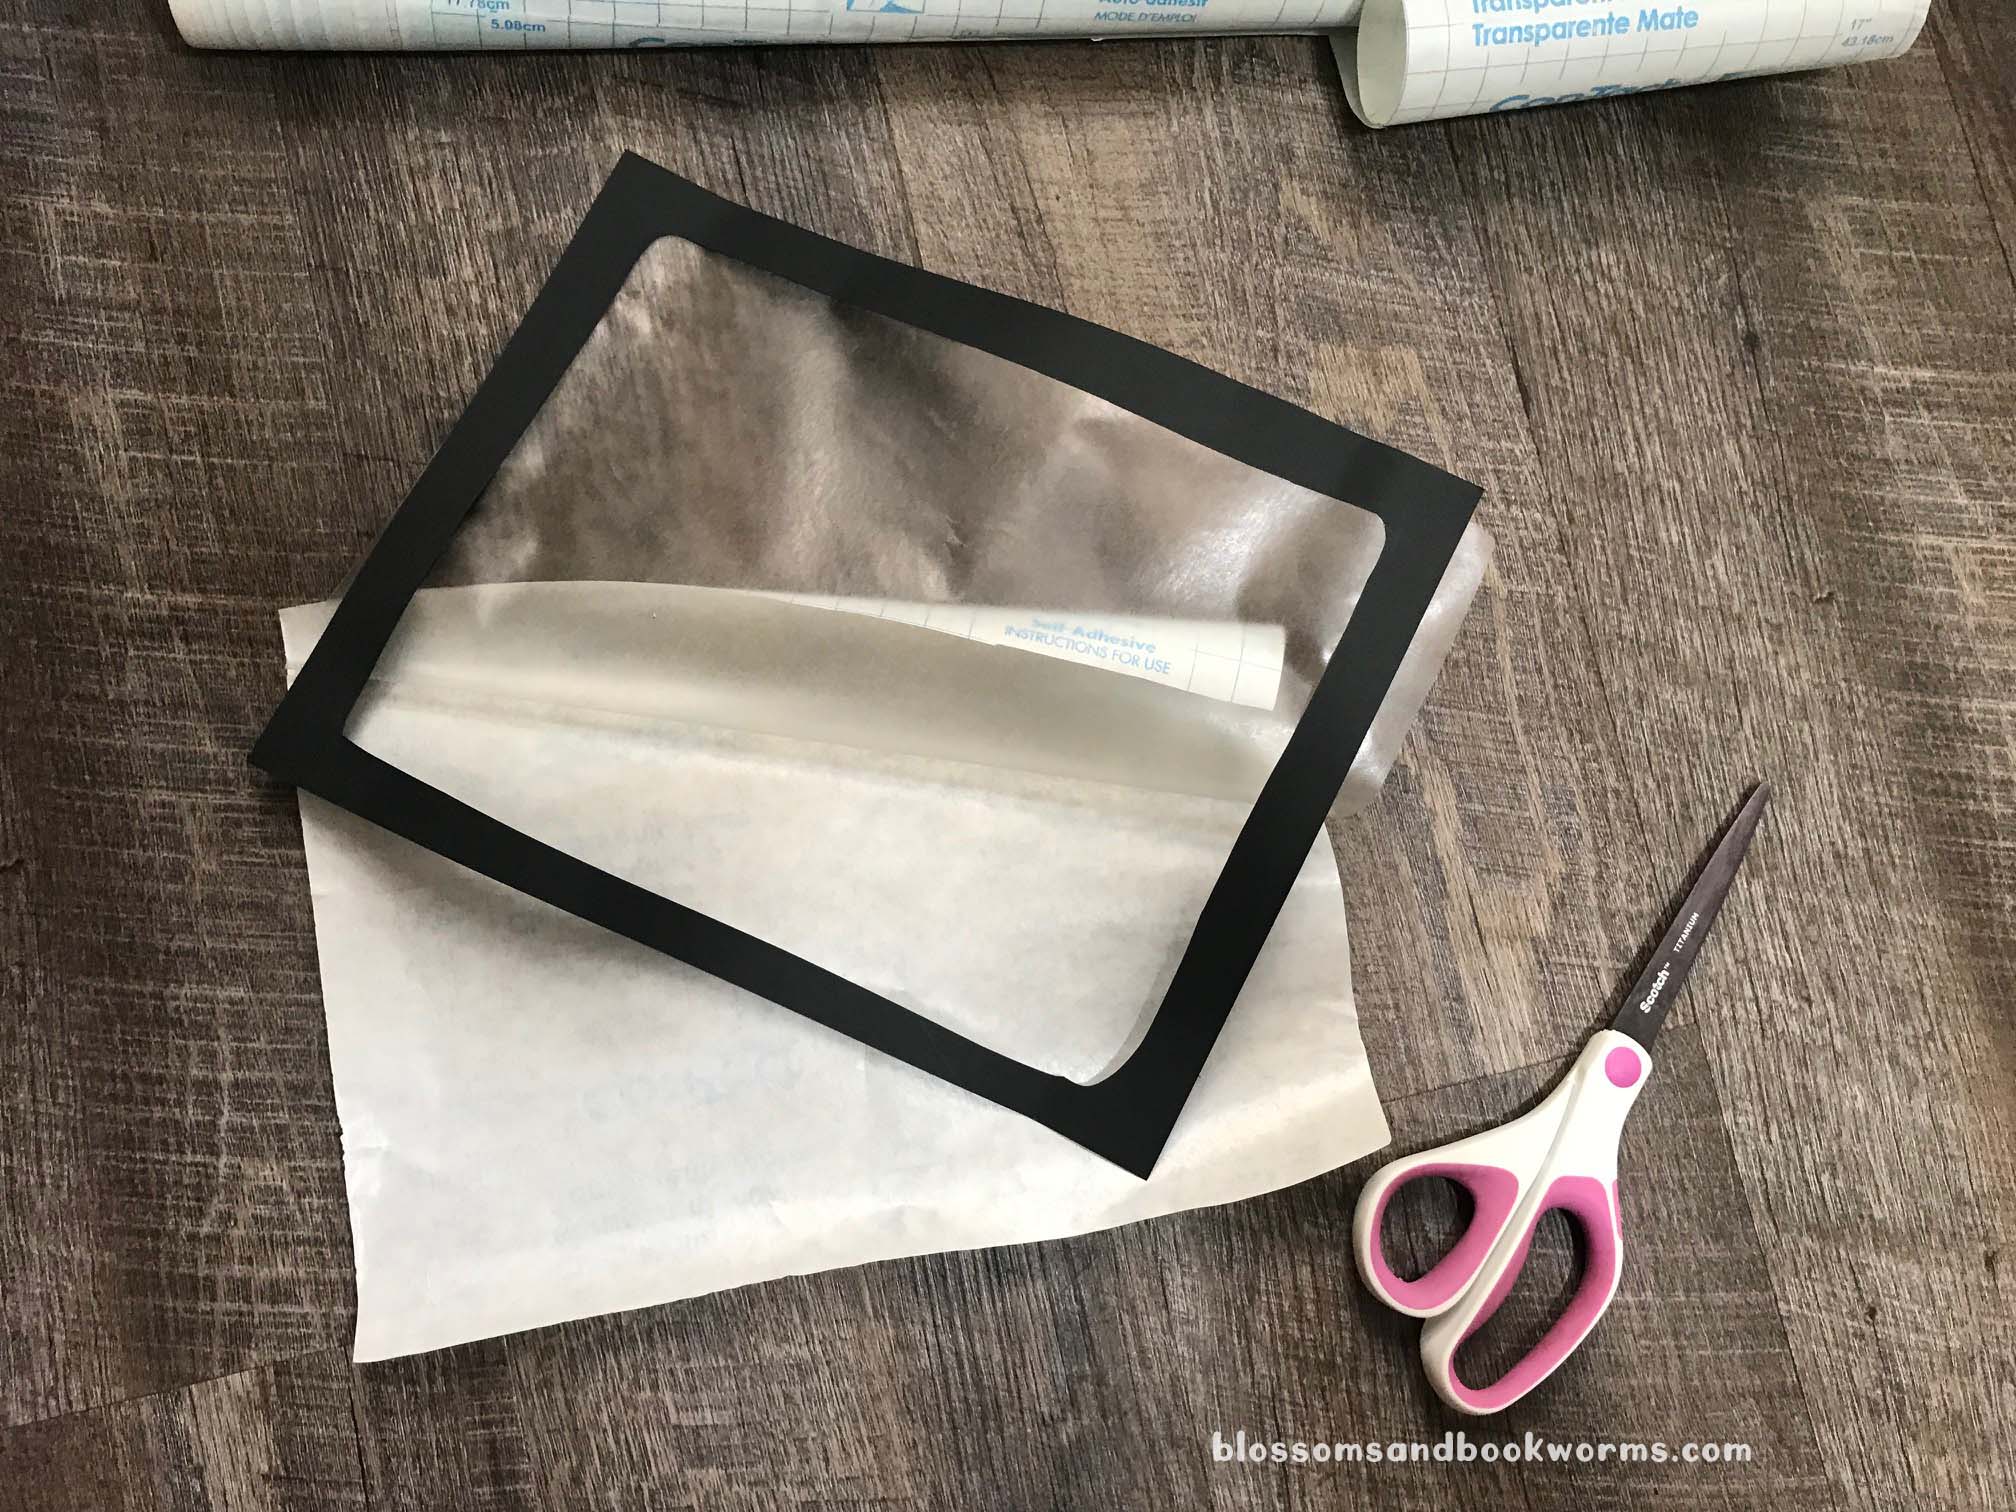
Next prep step – cut a frame out of the black card stock. The card stock is more durable than regular paper and it will give your final piece some stability.
Then cut a square of contact paper to the same size as the frame. Pull off the backing and adhere the contact paper to the back of the frame. Don’t worry if it wasn’t a perfect match. You can trim off any excess!
Lay the frame with the sticky part of the contact paper up!
Now let those little kiddos jump in to help!
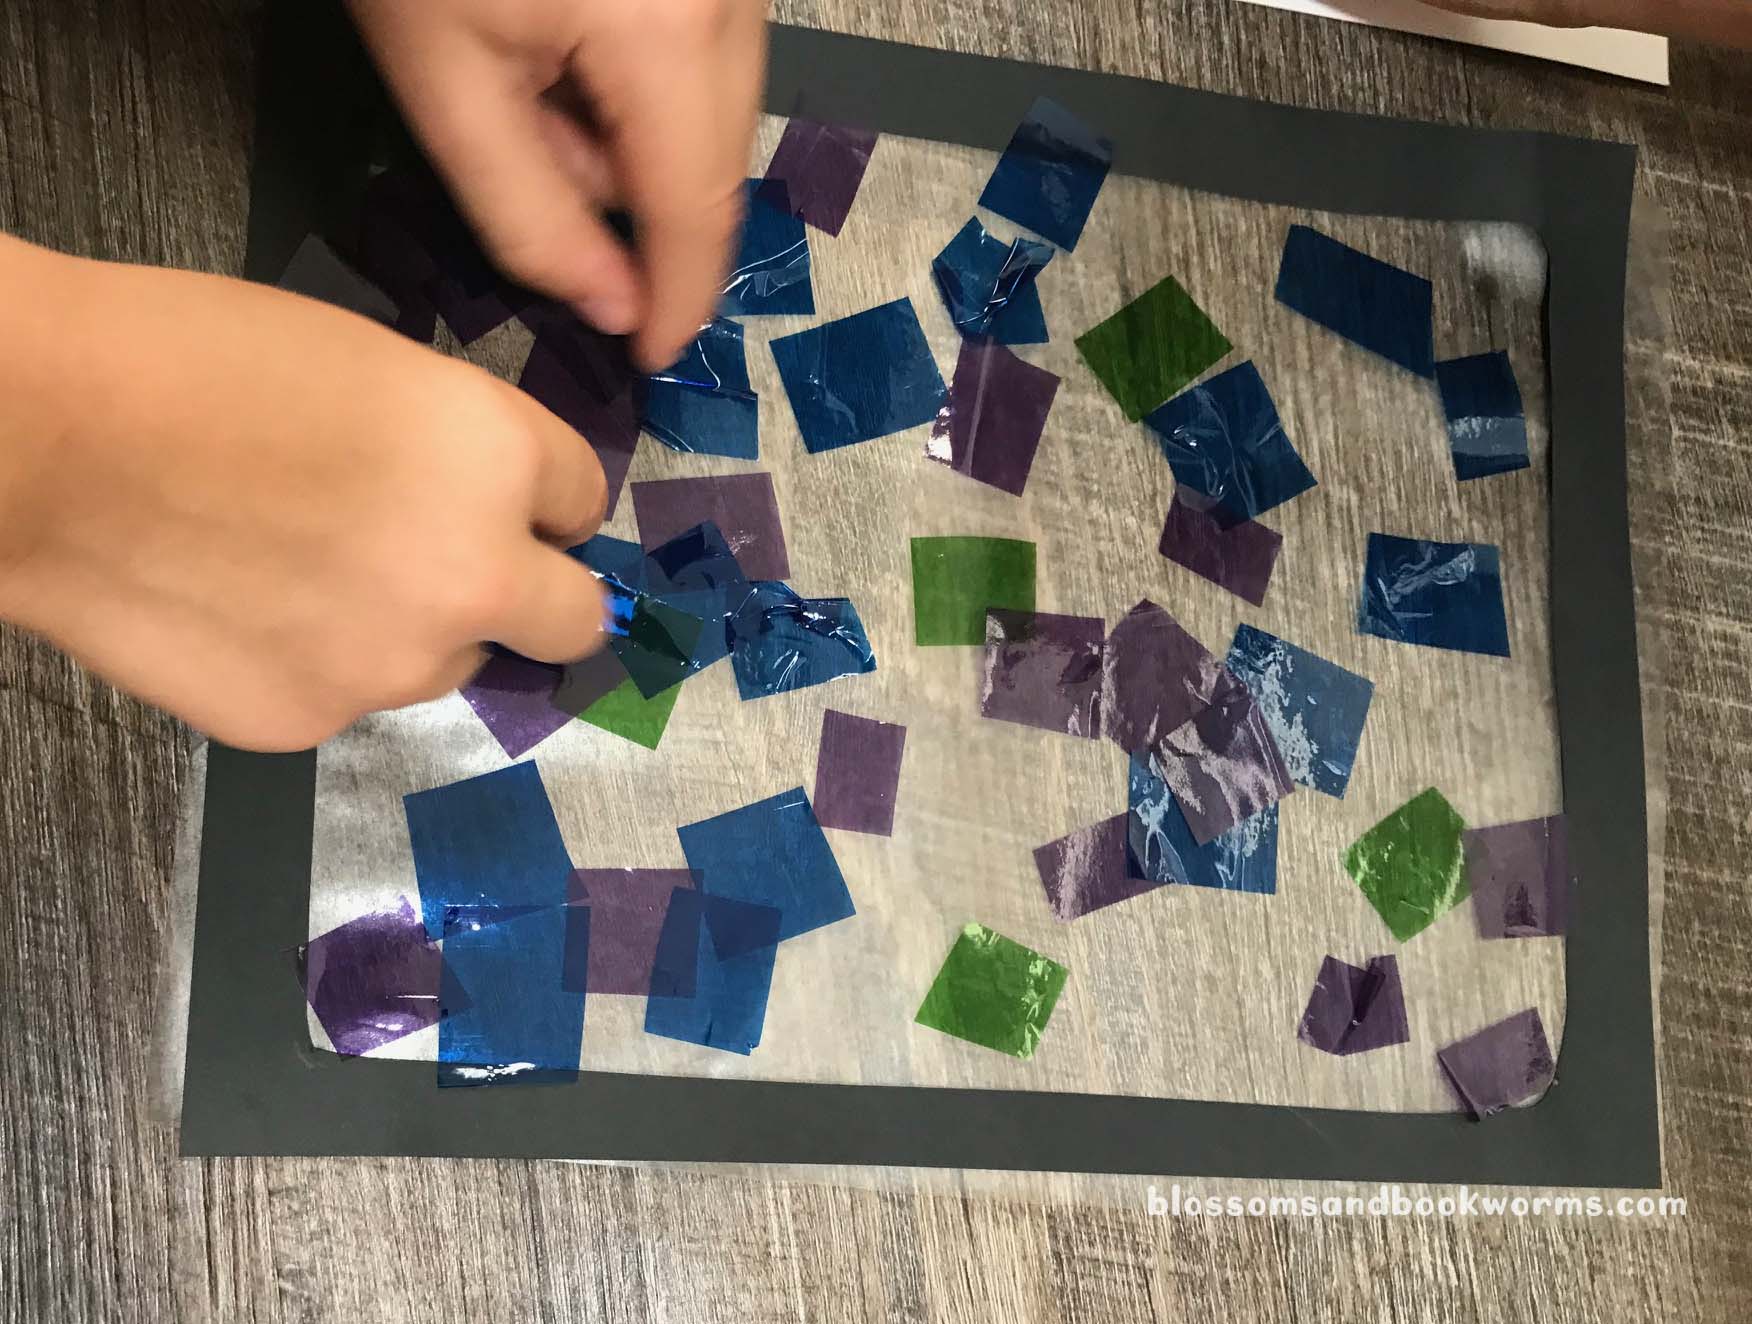
I let them arrange the cellophane as they chose. The goal is to cover all the sticky space inside the frame. There will be pieces that overlap and touch – that is totally okay! In fact, it is desired! This will give your final design depth of color and variation, making it a truly unique masterpiece.
Now grab a cup of coffee because they are going to be sticking for quite a while… 😂
You could absolutely have each kiddo make their own stained glass panel but my kids would have given up before it was finished. Working together on one beautiful stained glass piece was quite enough for us! 😁
Once all the sticky contact paper is covered – you may need to go back and make sure they got all the little bits – you will adhere your under the sea creatures. You can do this step with a glue stick or with Scotch tape. I found rolling tape and letting my little ones stick the pieces down was the best approach for us.
We didn’t put quite all the creatures on our final design, but we did end up hanging the rest on the window around the piece.
I love how vibrant the colors are!
As the sun and light changed throughout the day, the stained glass seemed to glow! I absolutely love the final effect and I cannot wait to see how yours turns out!