Ice Eggs

A Paleontologist Activity

My kids are enthralled with dinosaurs. They know all the scientific names, what each one eats, where it lives, who is the predator and who is the prey… they are truly a bevy of information! Since I never caught the dinosaur bug as a little sprout, I am learning SO MUCH about dinosaurs right alongside my kiddos!

Their love of the subject definitely makes #DinosaurWeek even more fun!

This activity is perfect for a hot summer day – it combines ice, the perfect way to cool down on a hot day, with paleontology, which might be the coolest profession ever!

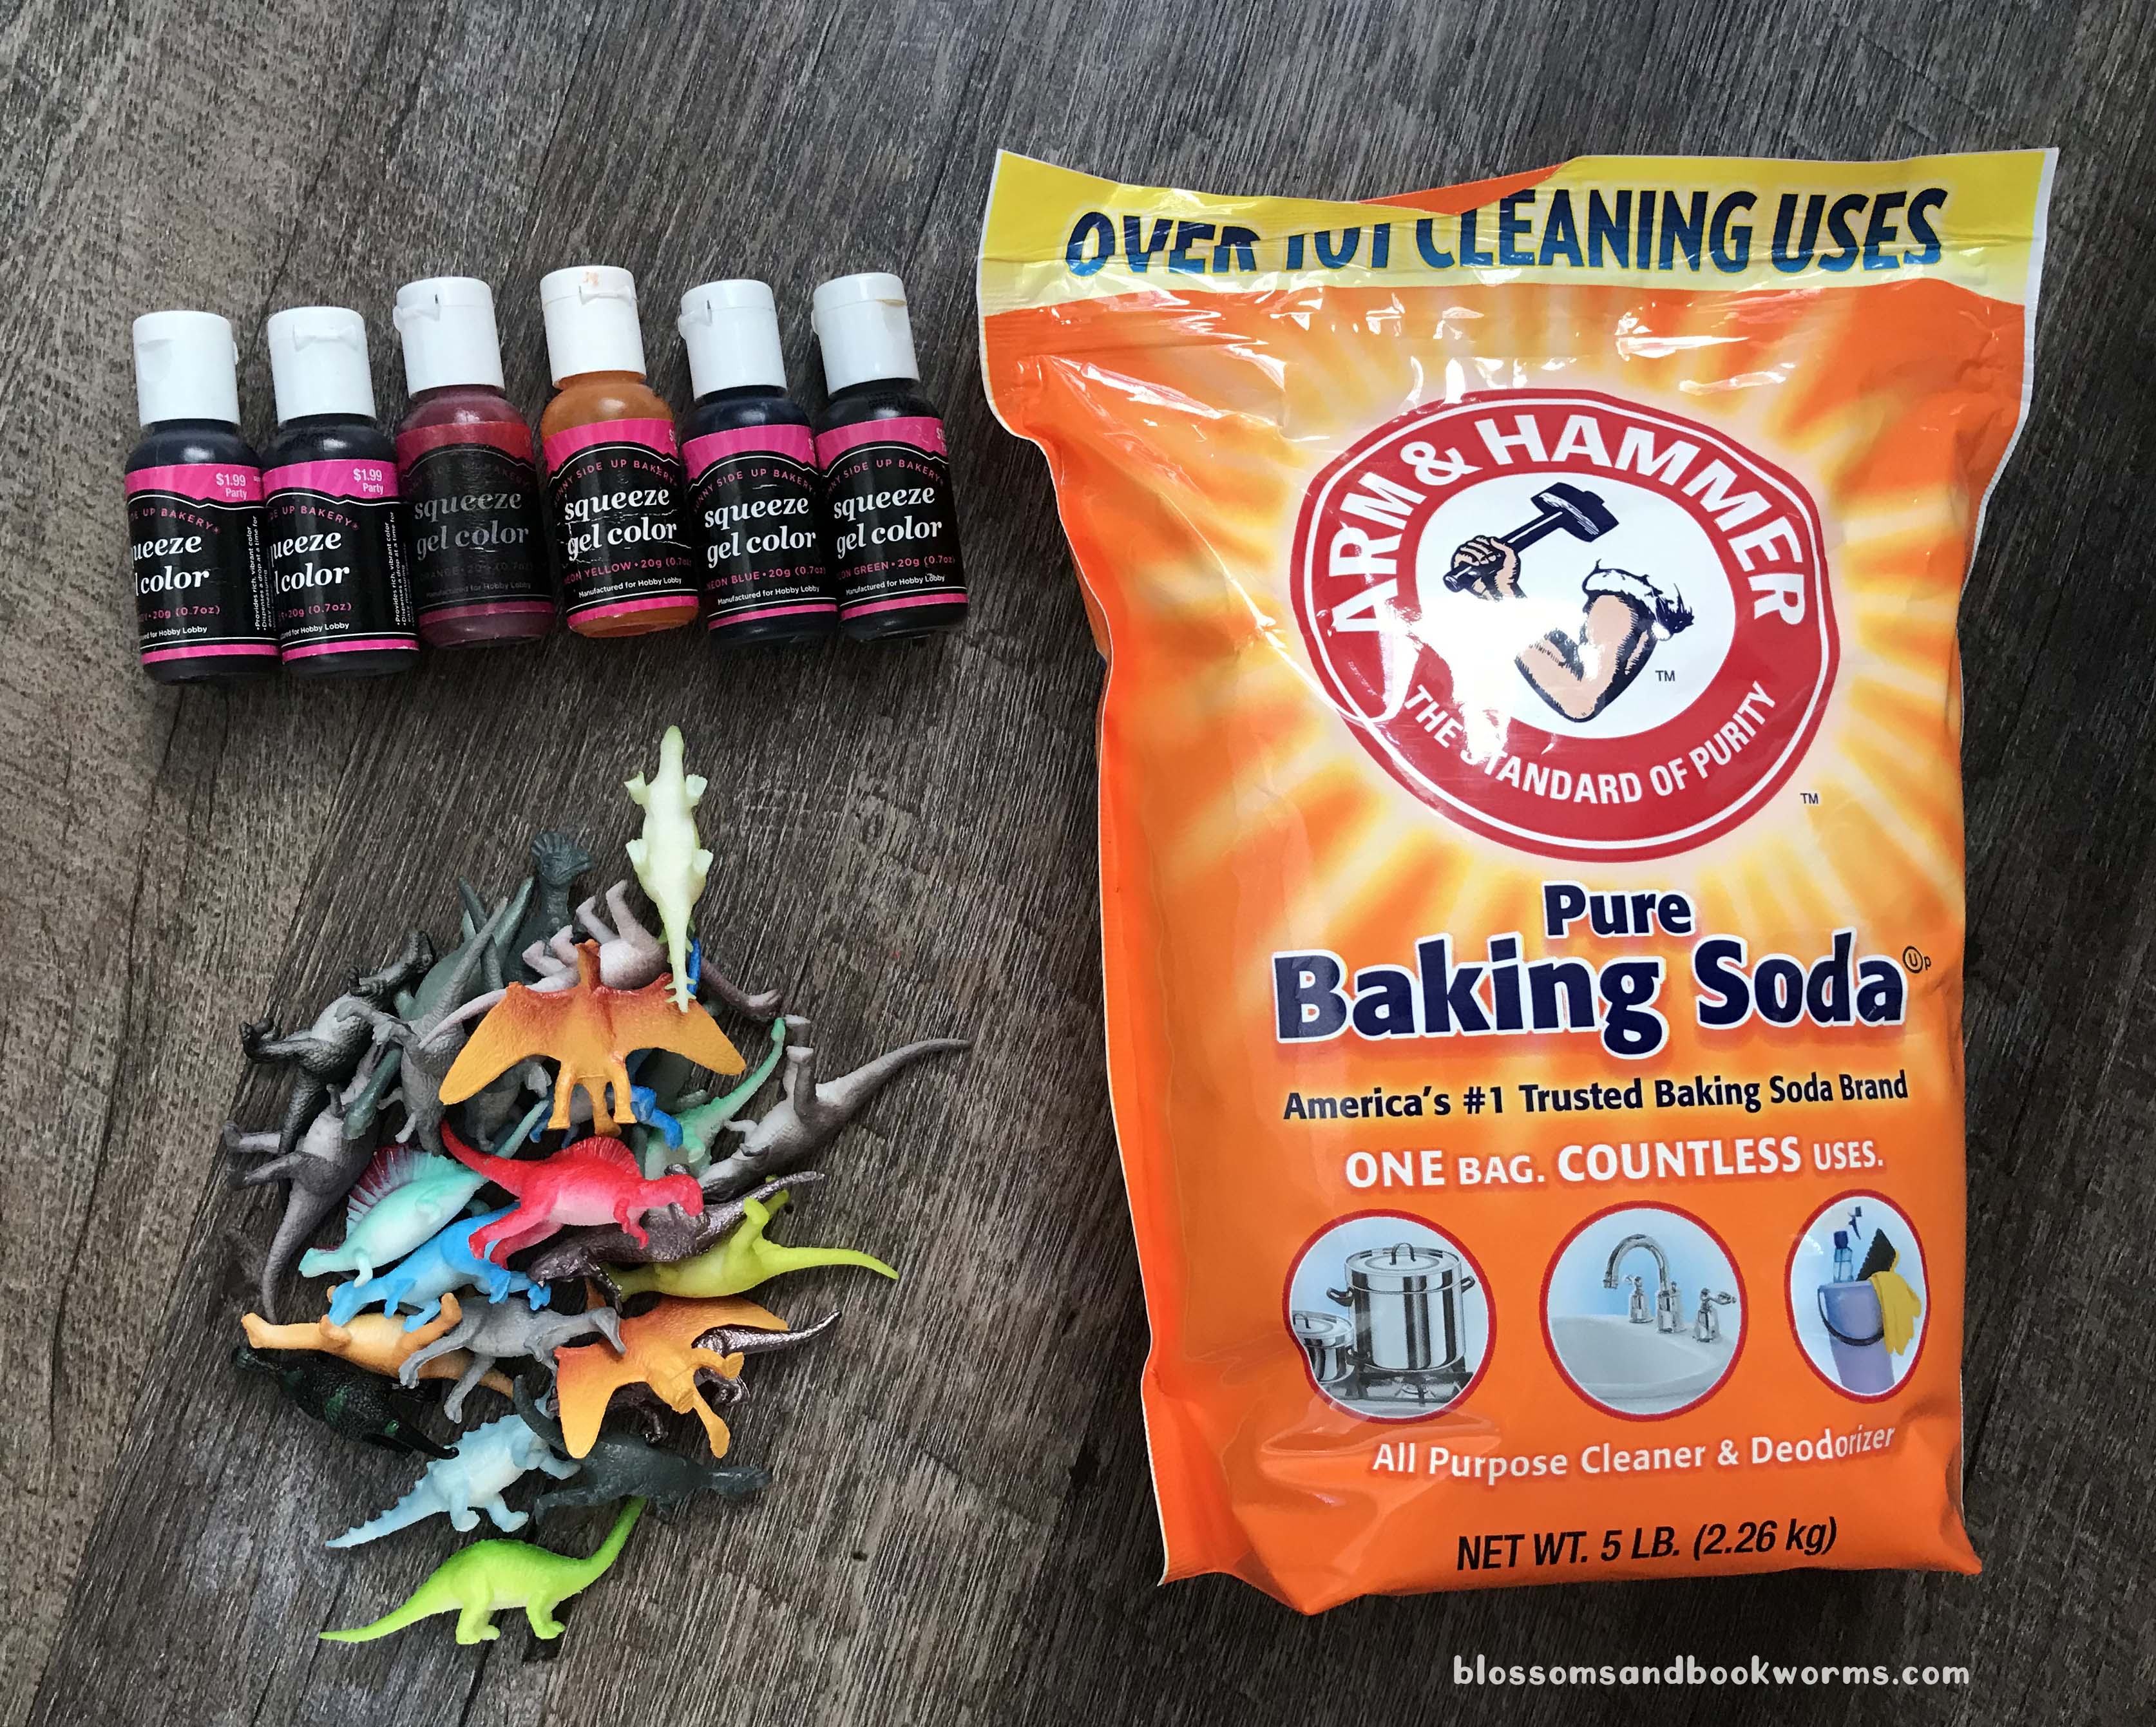
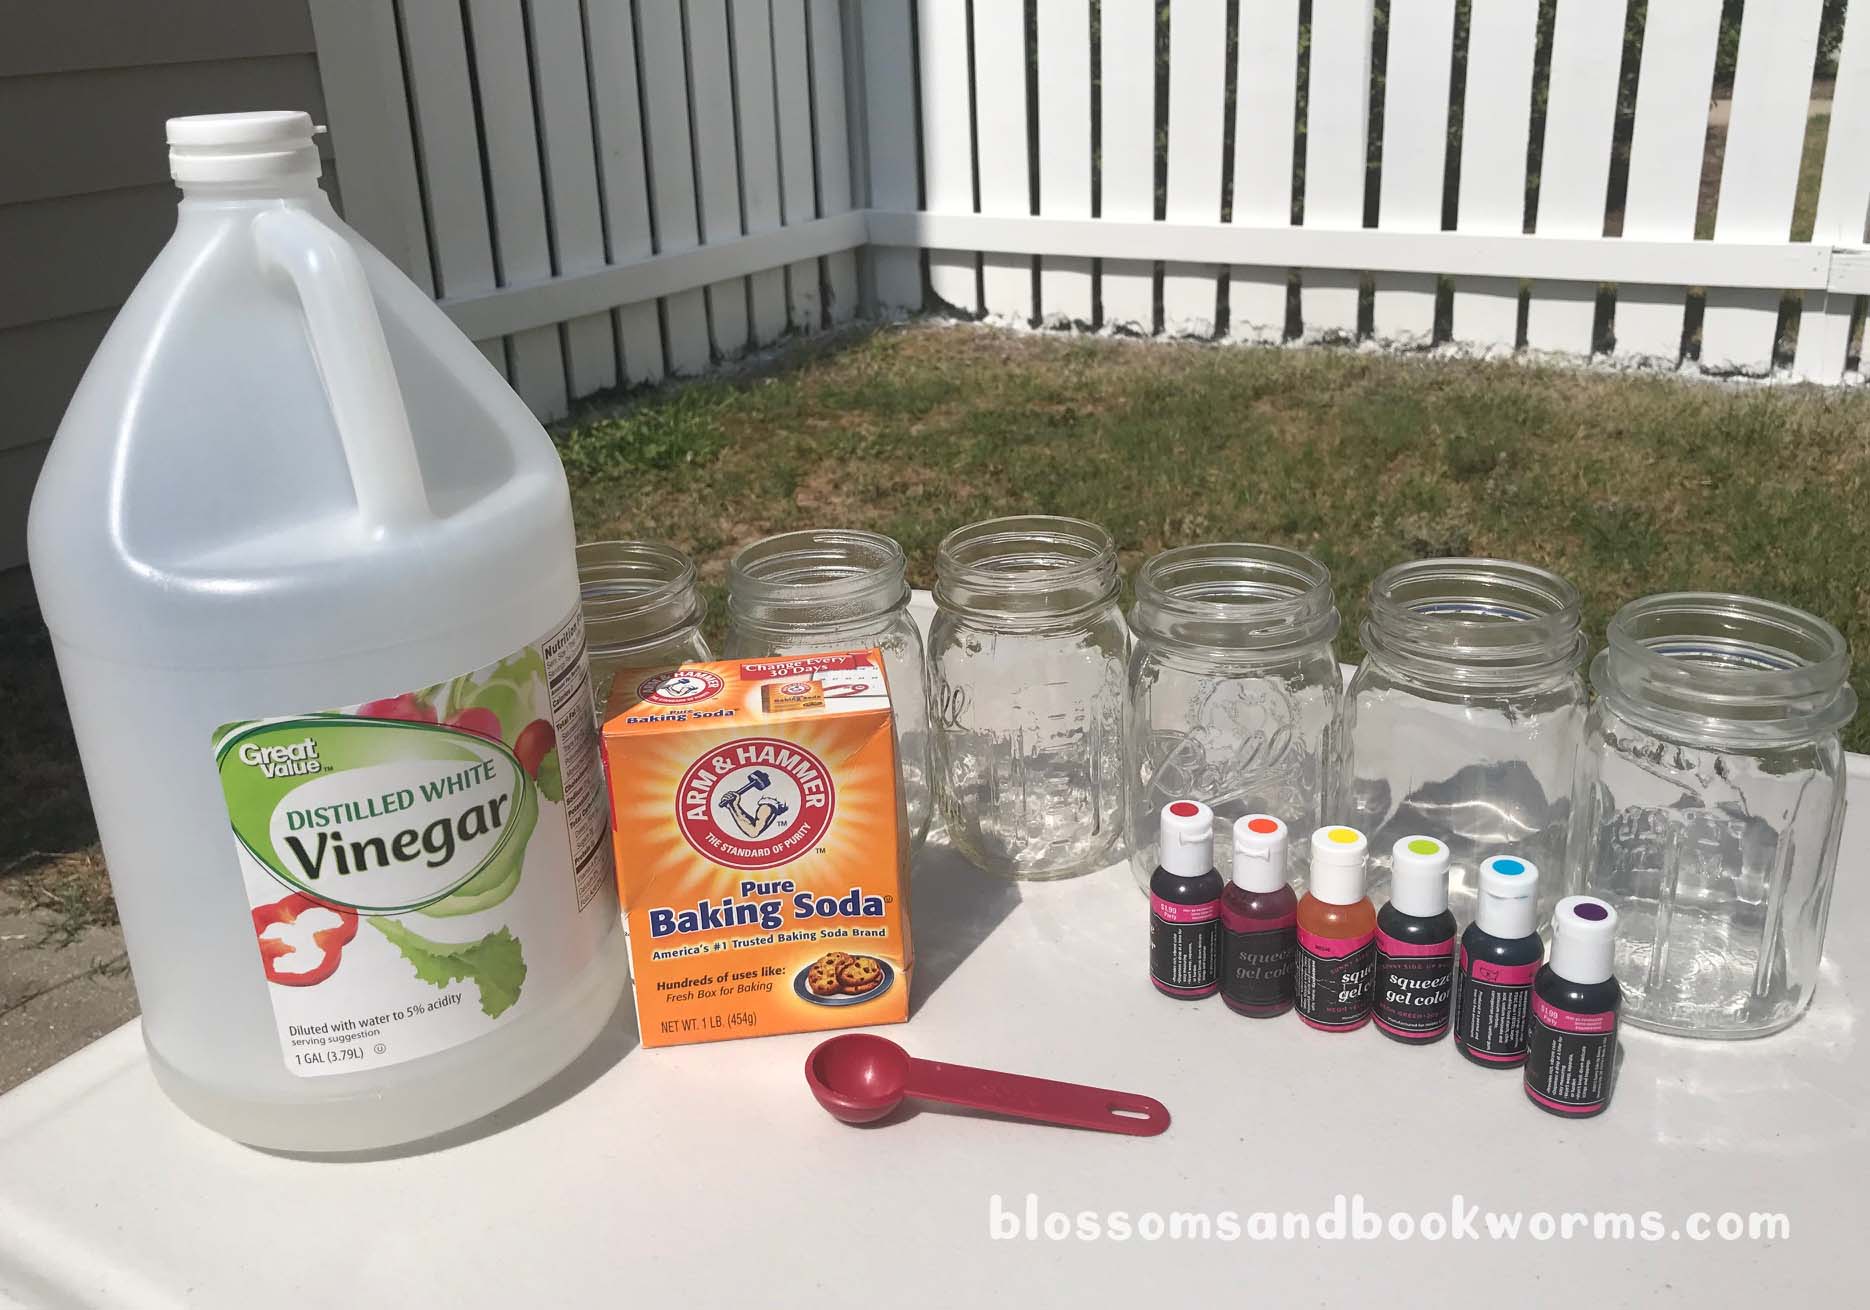
You know I love an inexpensive experiment with a big WOW factor, and this one definitely fits the bill! Scrounge up some water balloons or other small balloon – I used 4 in balloons because I wanted smaller “eggs” after freezing. You could absolutely use bigger balloons, but make sure you have room to freeze them once filled with water!

You also need some toy dinosaurs. I bought these in bulk about a year ago for a very reasonable price. We have used them for all sorts of activities and they are a regular part of my kiddos’ imaginative play throughout the day.

Once you have balloons and the toy dinosaurs, you need to get the dinosaur inside the balloon. This sounds more difficult than it is, but it can be a bit tricky. Here are a couple of my #ProTips:

  • Blow up the balloon FIRST, before trying to stuff the dinosaur in. This will stretch out the balloon and give it a softer feel, which will allow the dinosaur to stretch and push on the balloon without breaking it.
  • Use a pump! If you are doing any quantity of ice eggs, using a pump to blow them up first will be so helpful. These small balloons can be super difficult to blow up with your mouth and we don’t want anyone passing out!!
  • Once the balloon has been blown up, stretch the end between 2 fingers. Then, tuck the dinosaur between your fingers and start working it into the balloon.
  • The size of the balloon matters when you are trying to tuck in the dinosaurs, so if you are concerned about being able to stretch the small balloons you can opt for a bigger round size to make it easier.

Eight little dinosaurs all tucked nicely into their balloon cocoon. AWWW!

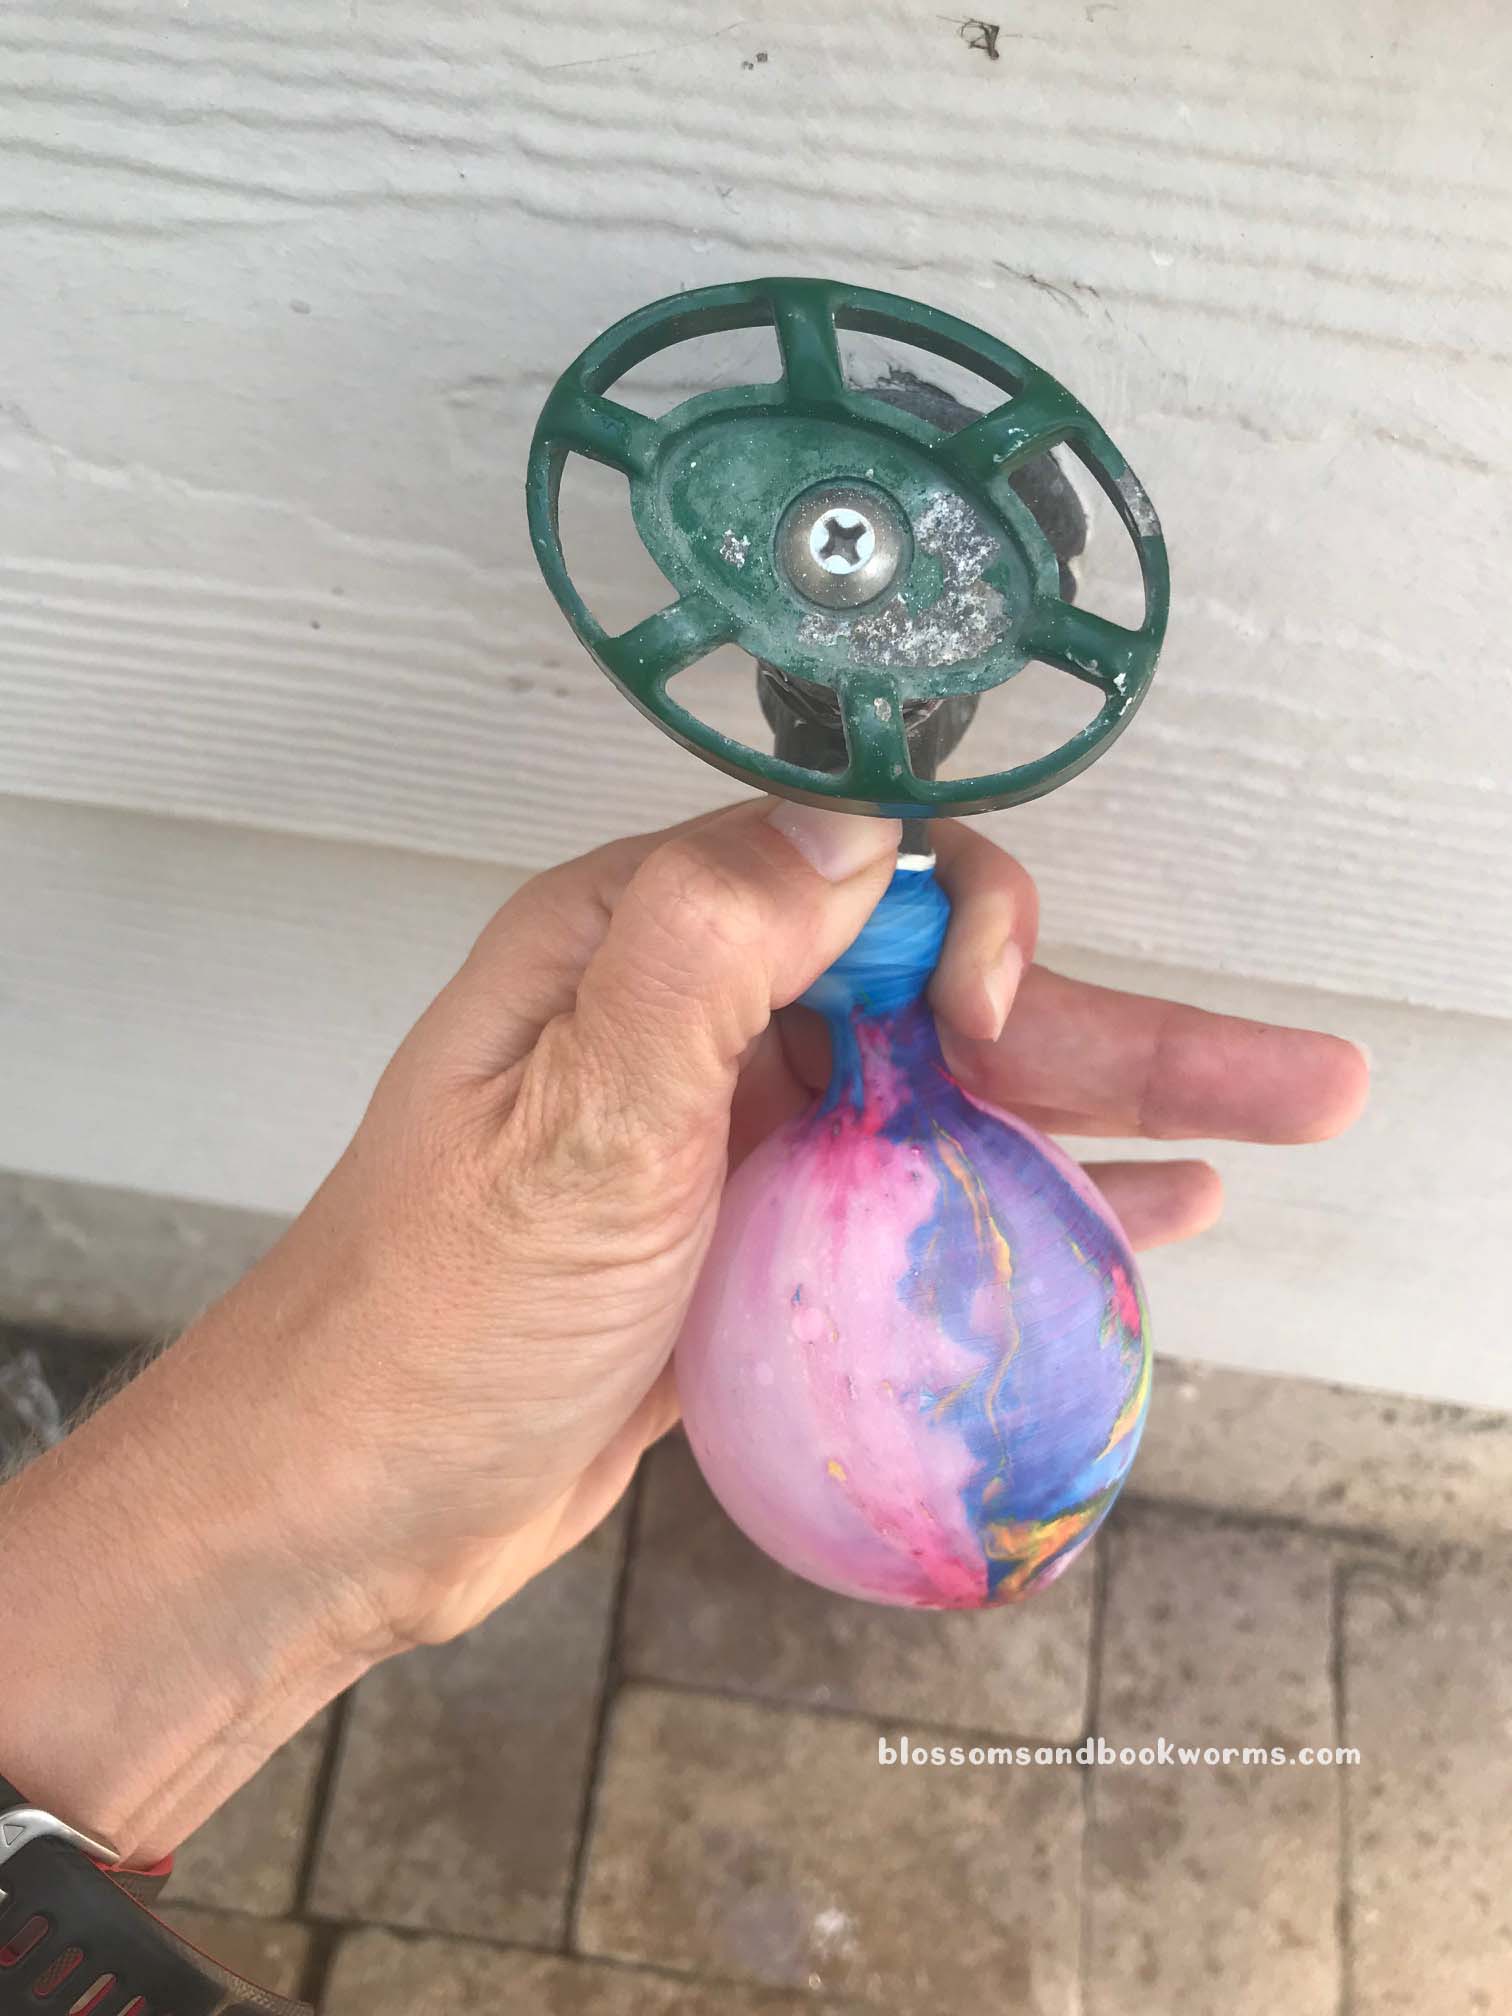
Now you have to fill the balloon with water.

This is the part in the directions where you investigate every faucet in your house only to realize they are all “cute” but are completely WRONG for filling water balloons ðŸĪĶ‍♀ïļ. Oh, is that just me?? 🙋‍♀ïļ Are faucets that cannot fill water balloons even practical? ðŸĪĢðŸĪĢðŸĪĢ

Outside faucet to the rescue!

Don’t overfill your balloons! You did not do all the work of tucking dinosaurs inside to have an overfilled balloon burst in your hands!

Once they are all filled and tied off, put them in a bowl and stick it in the freezer. Leave them overnight to freeze.

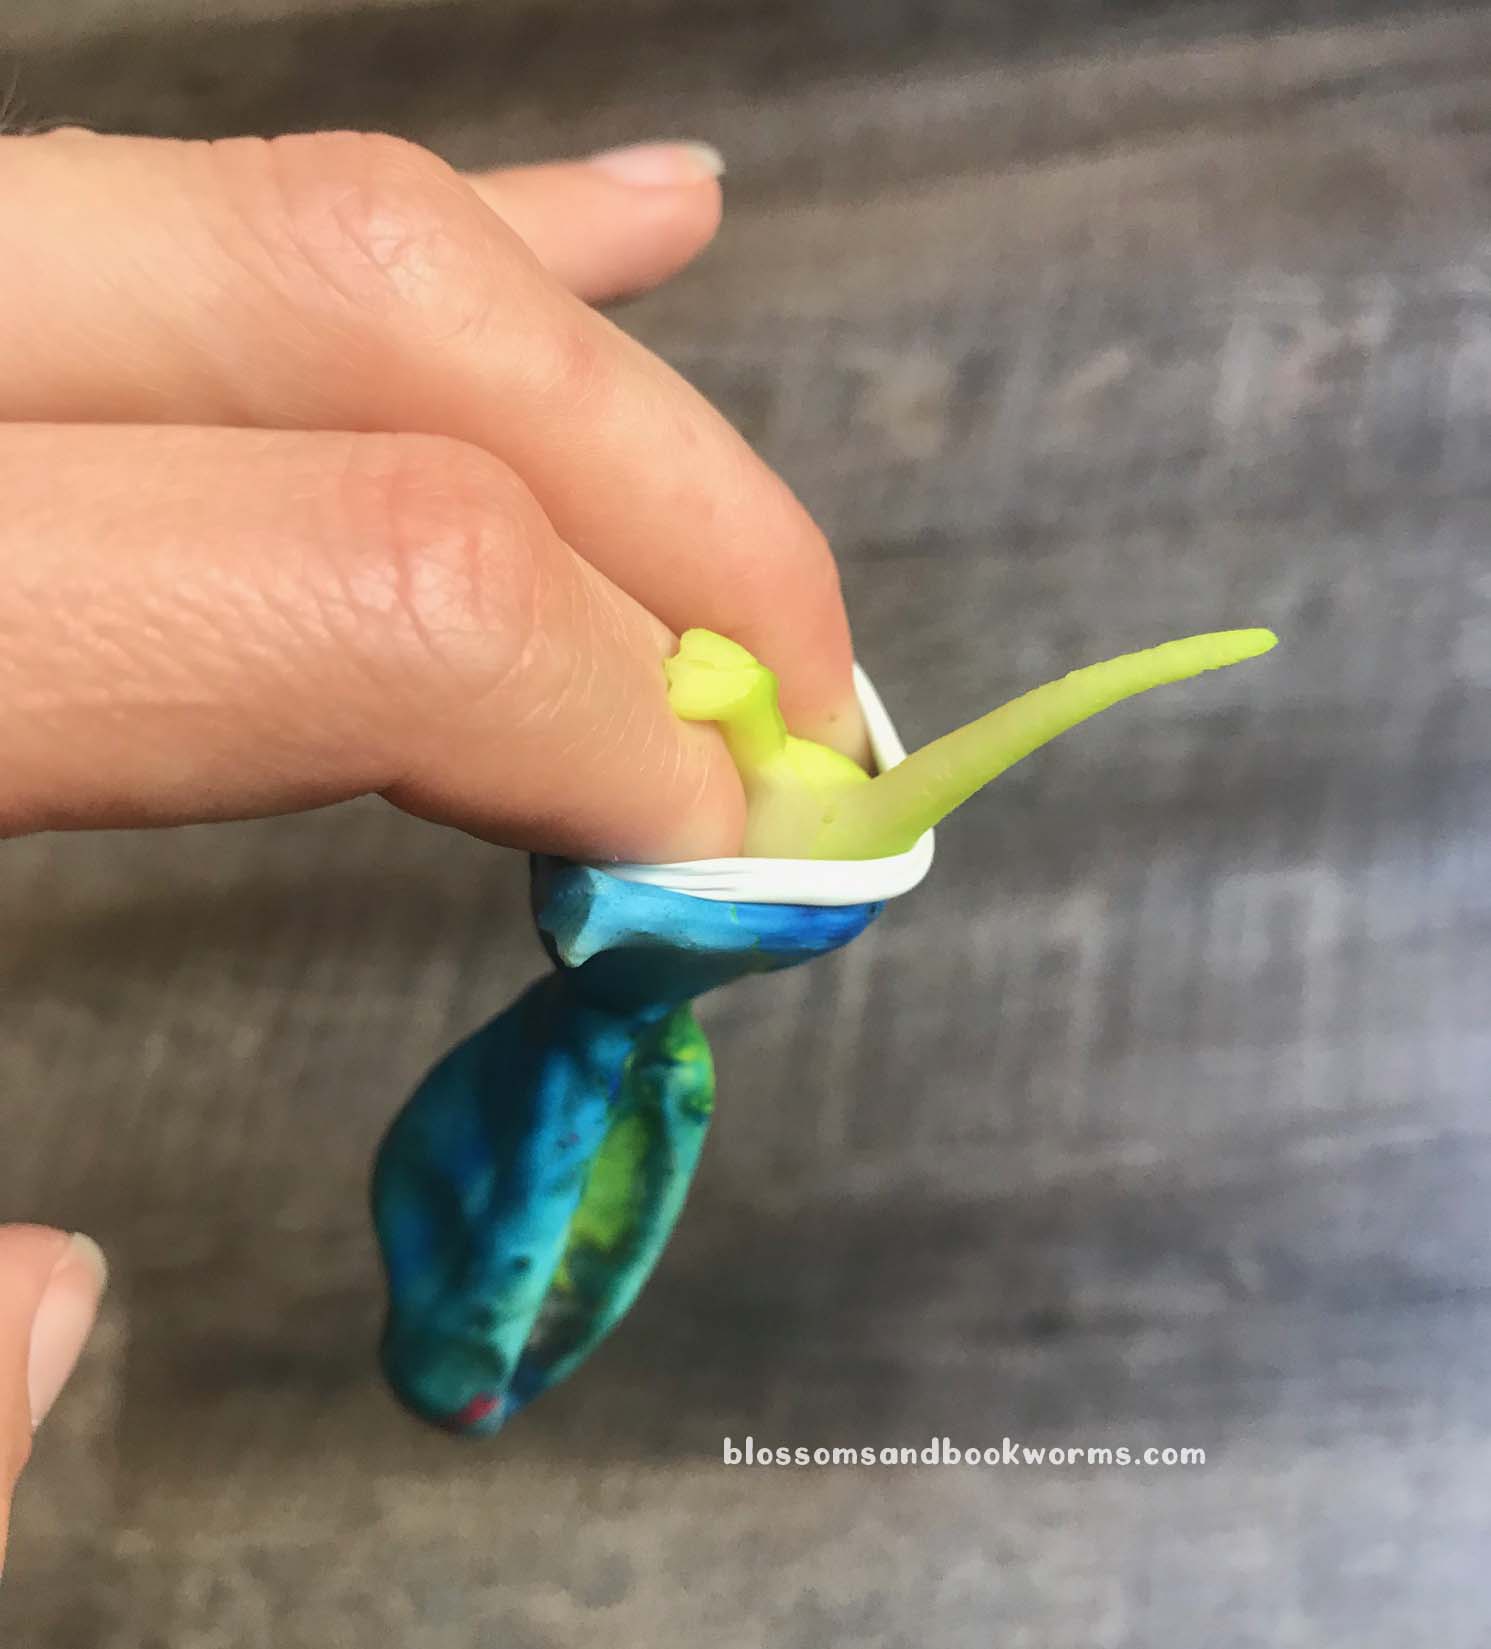
When you are ready for the WOW factor, take the balloons out of the freezer, run tap water on the frozen balloon, cut the balloon, and then peel the balloon away. You should have these remarkable, awesome dinosaurs suspended in ice!

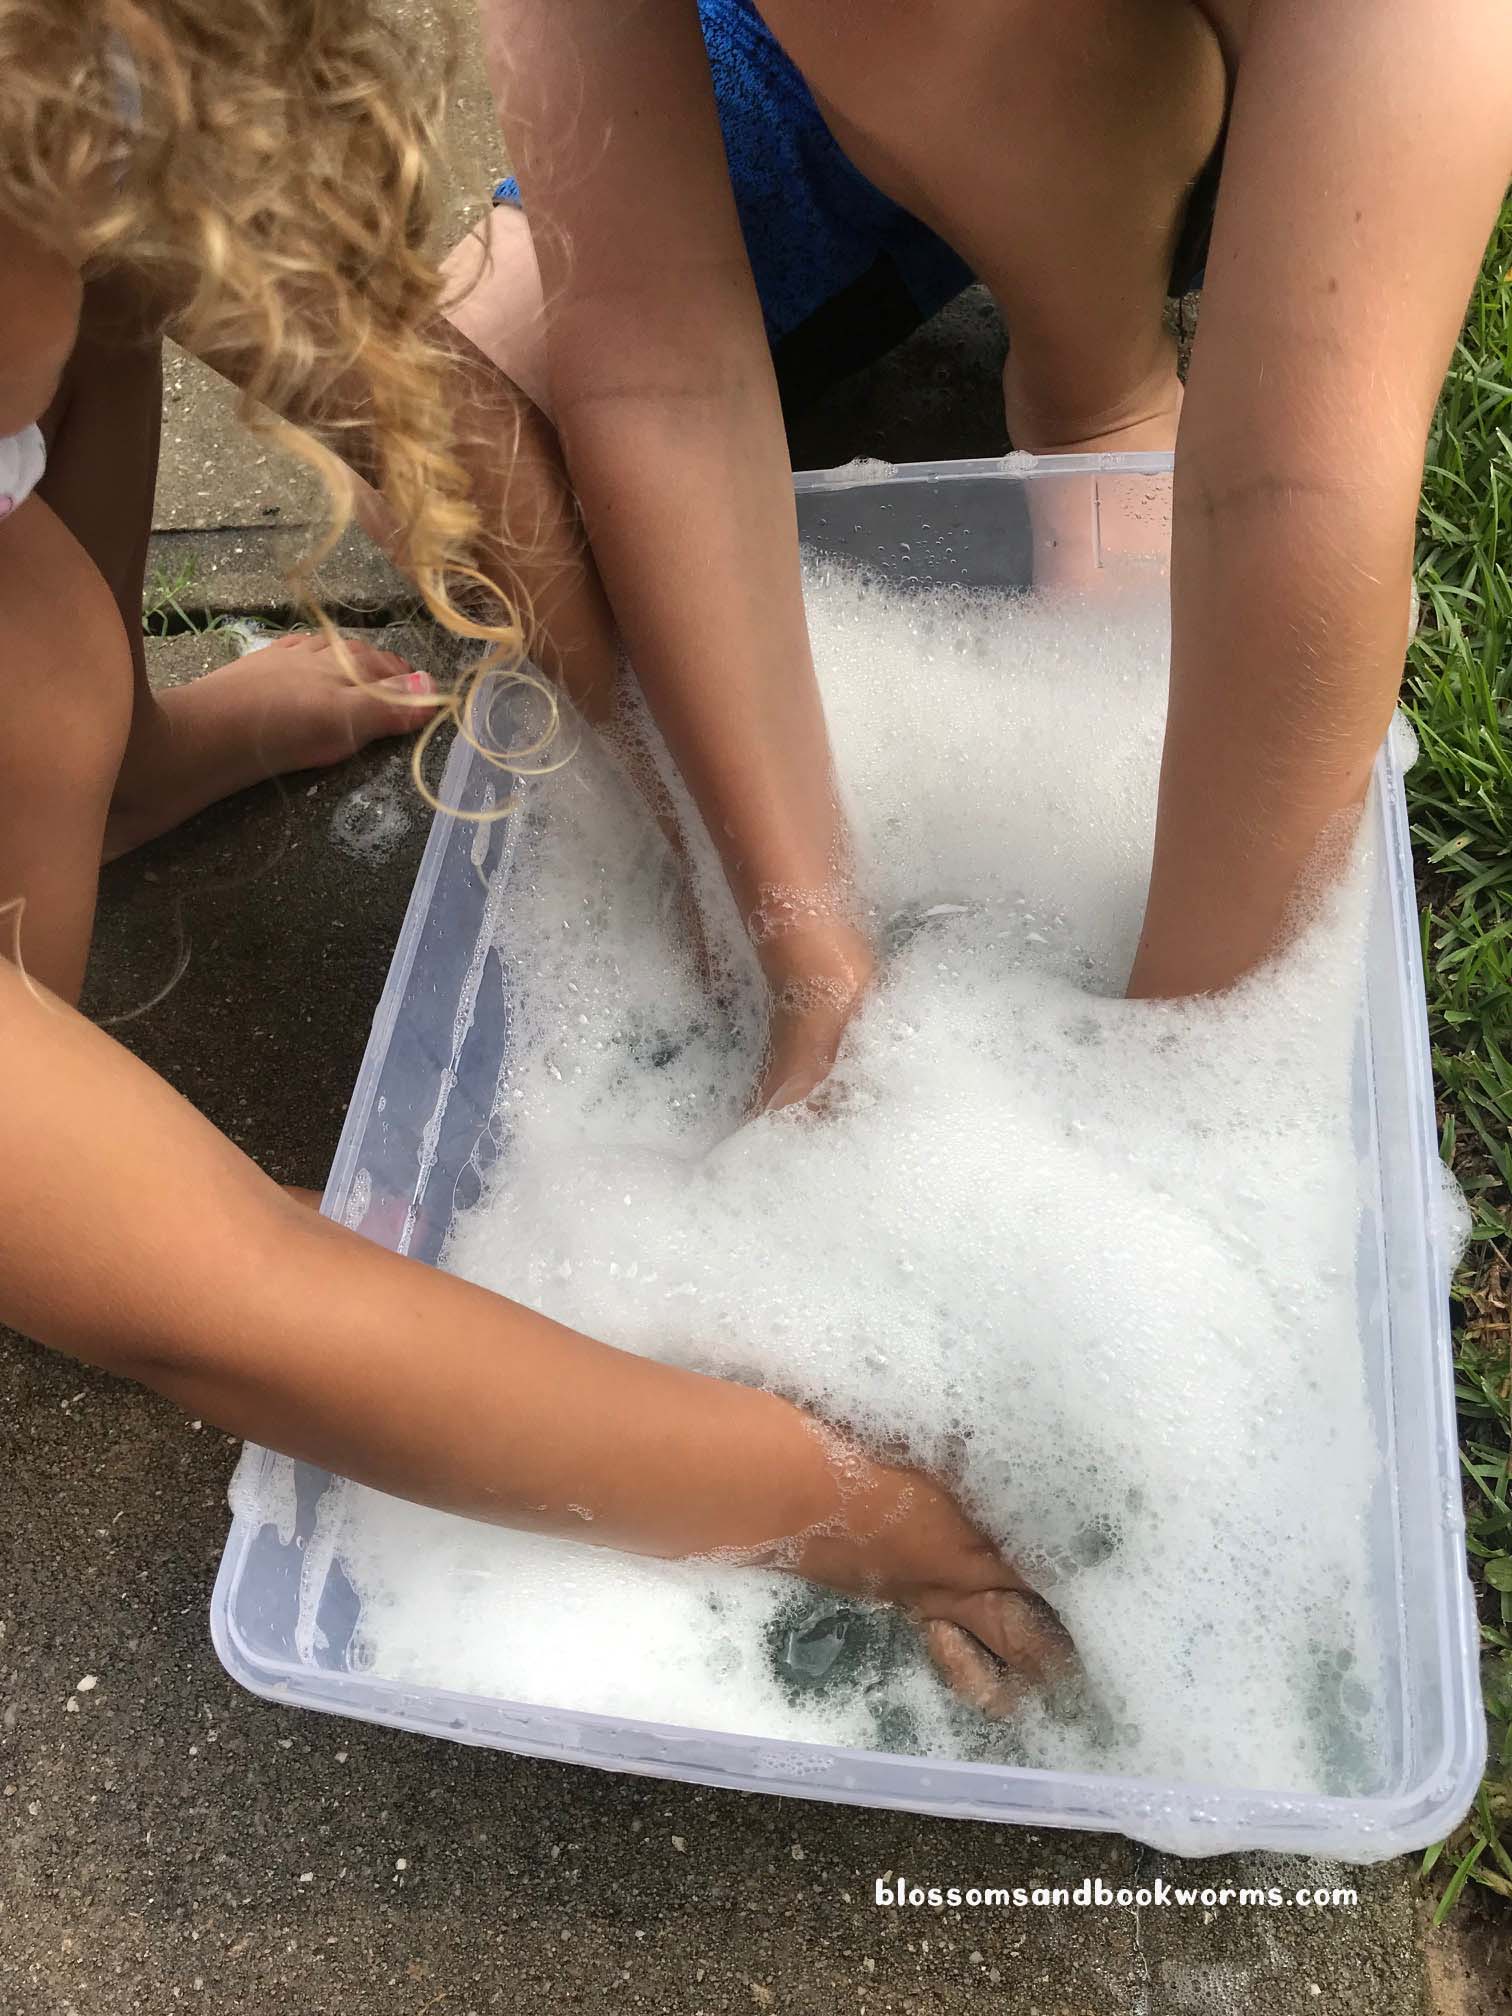
Now for the FUN part…
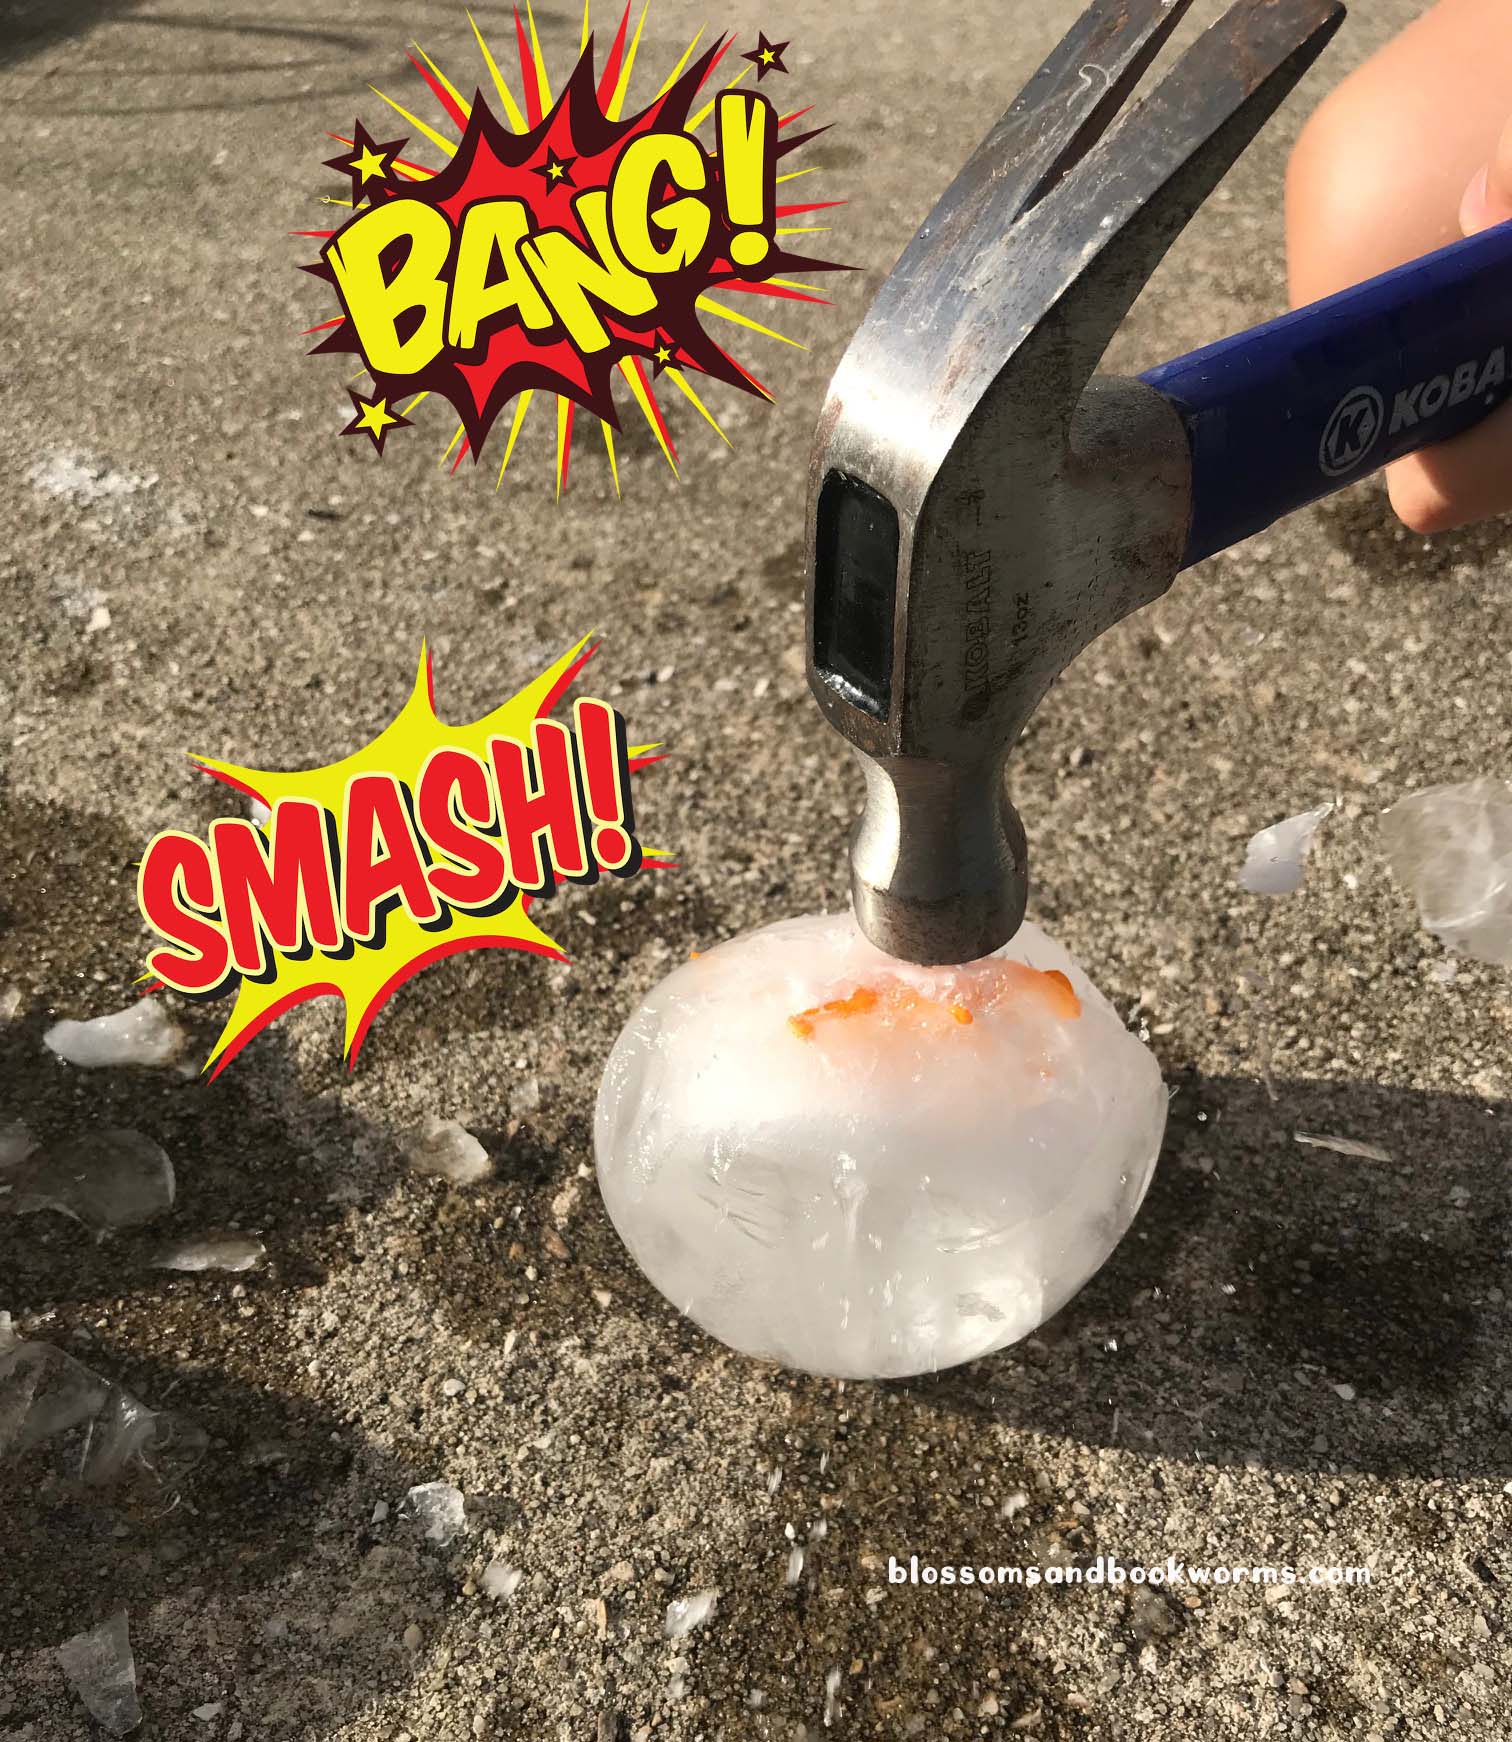
…break them open!!

My oldest LOVED using a hammer to bust up his eggs – but be sure to put safety glasses on, ice shards are sharp!!

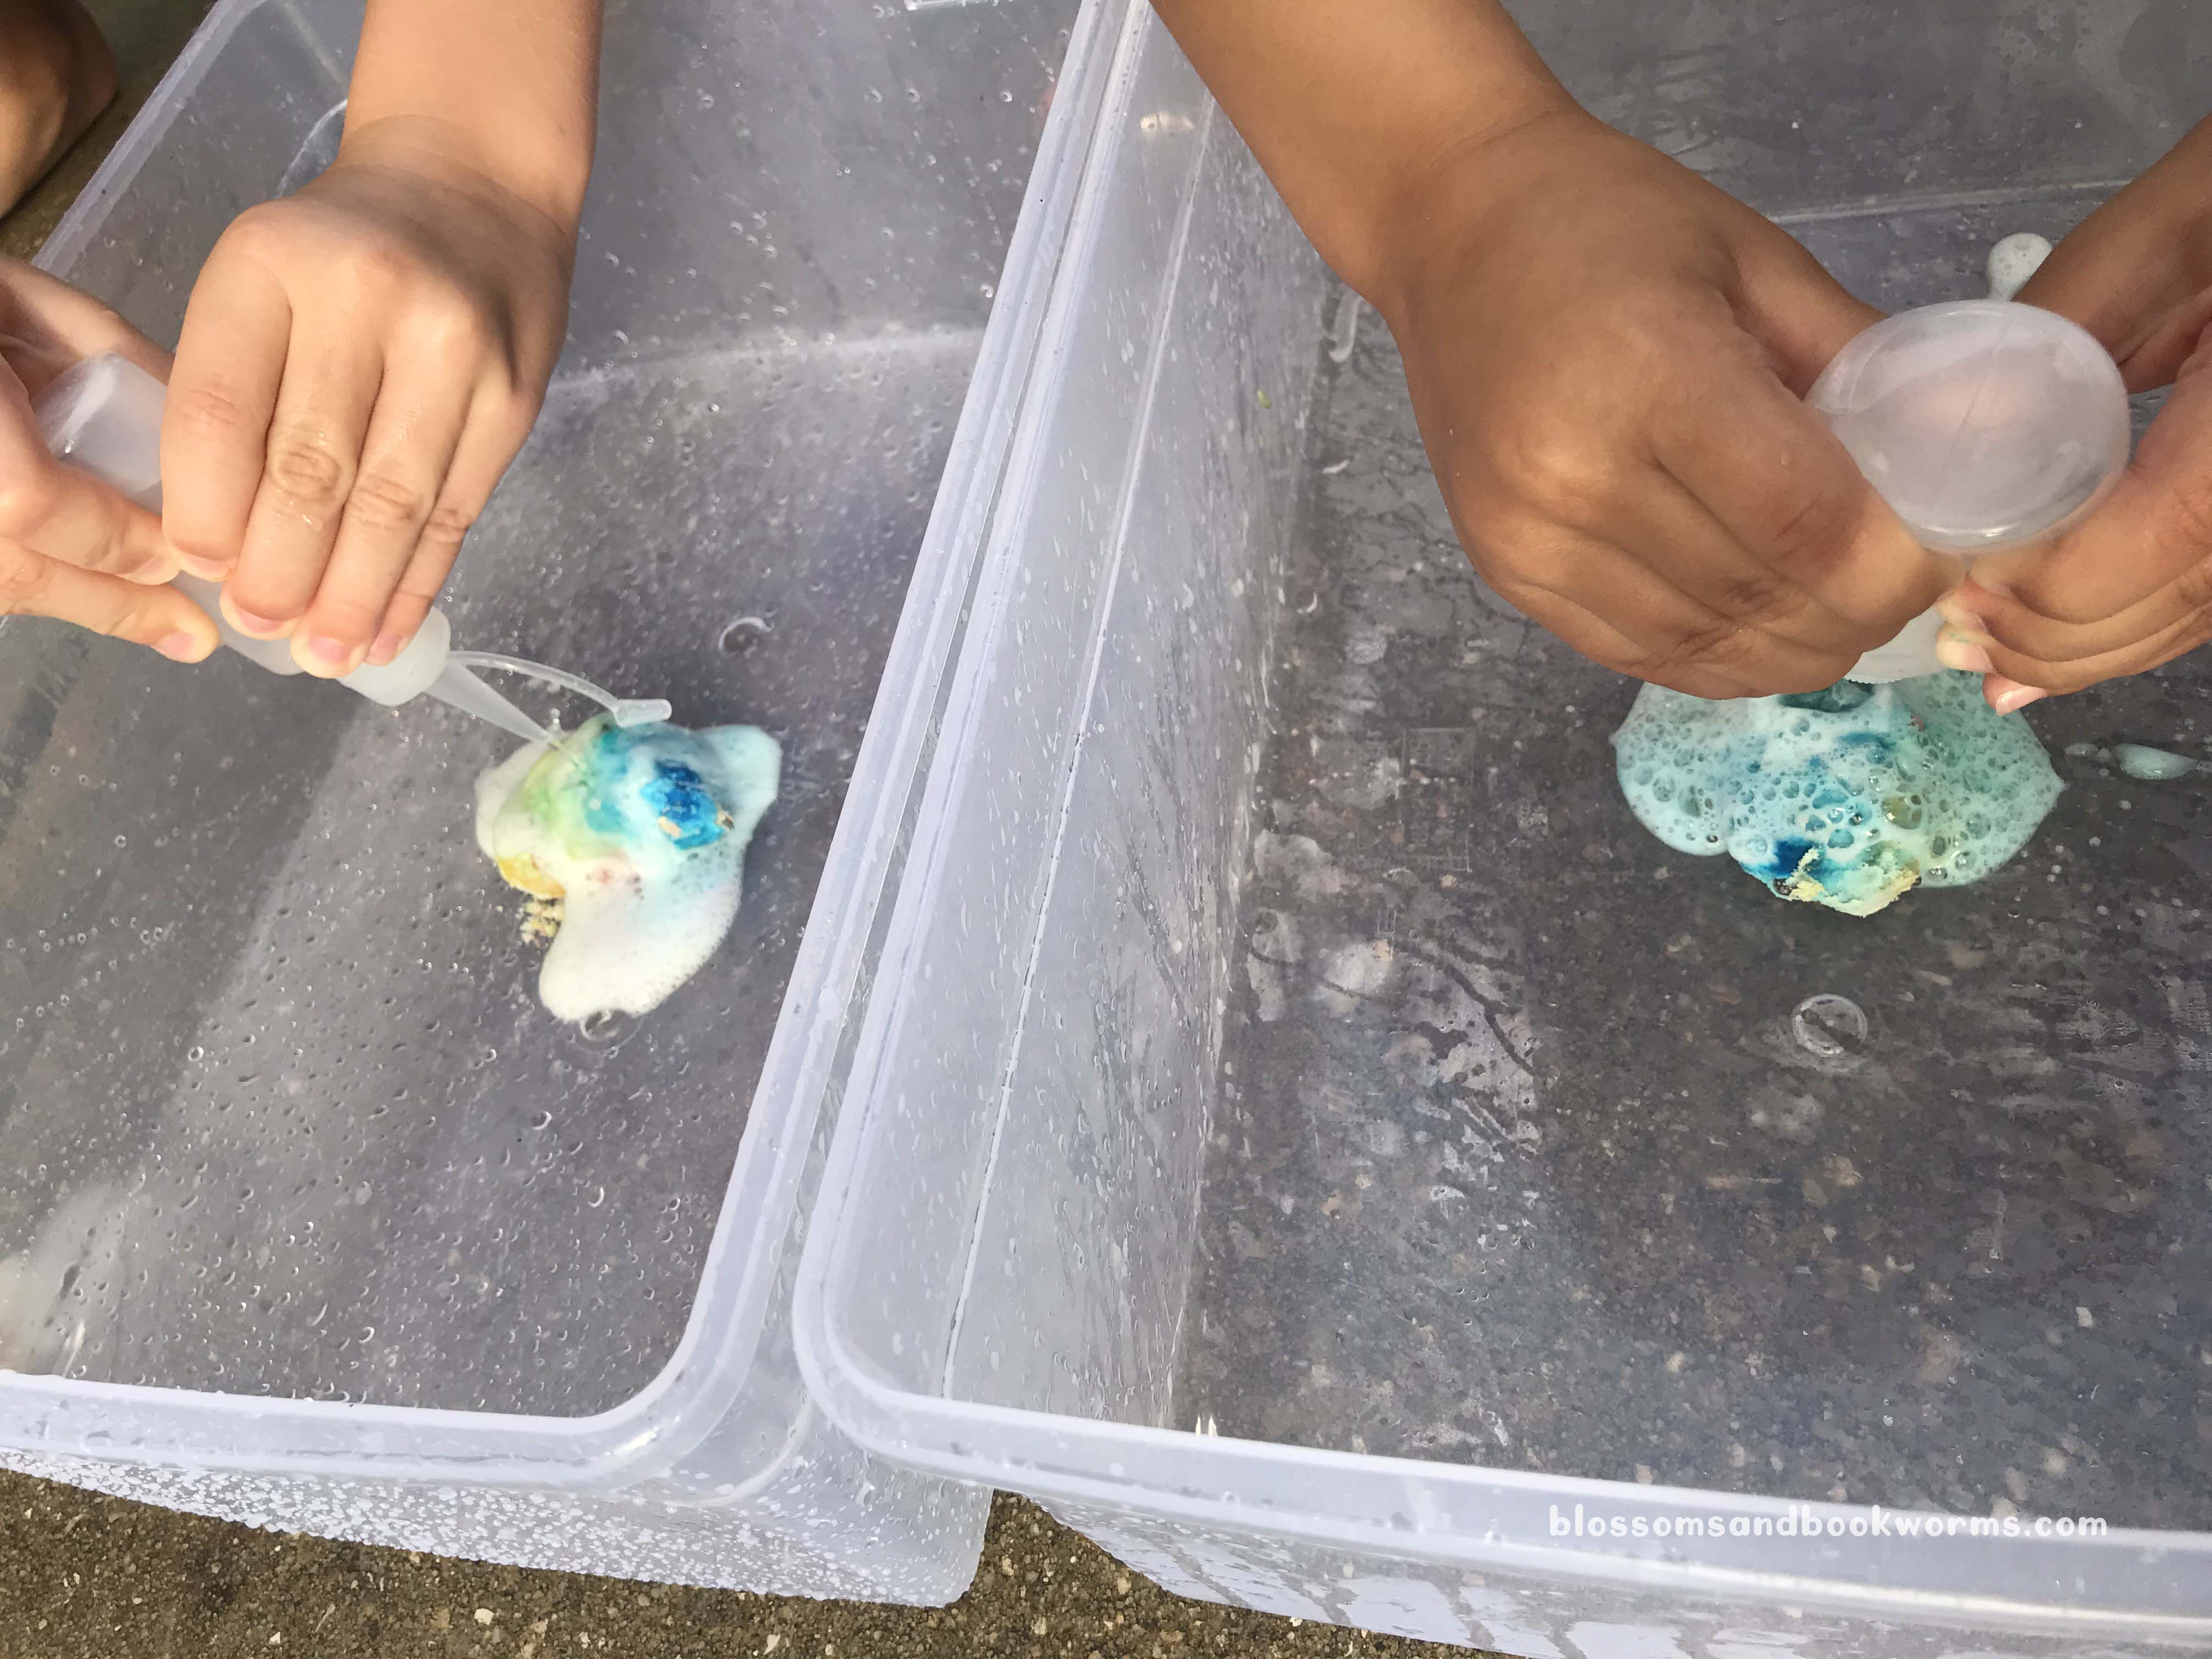
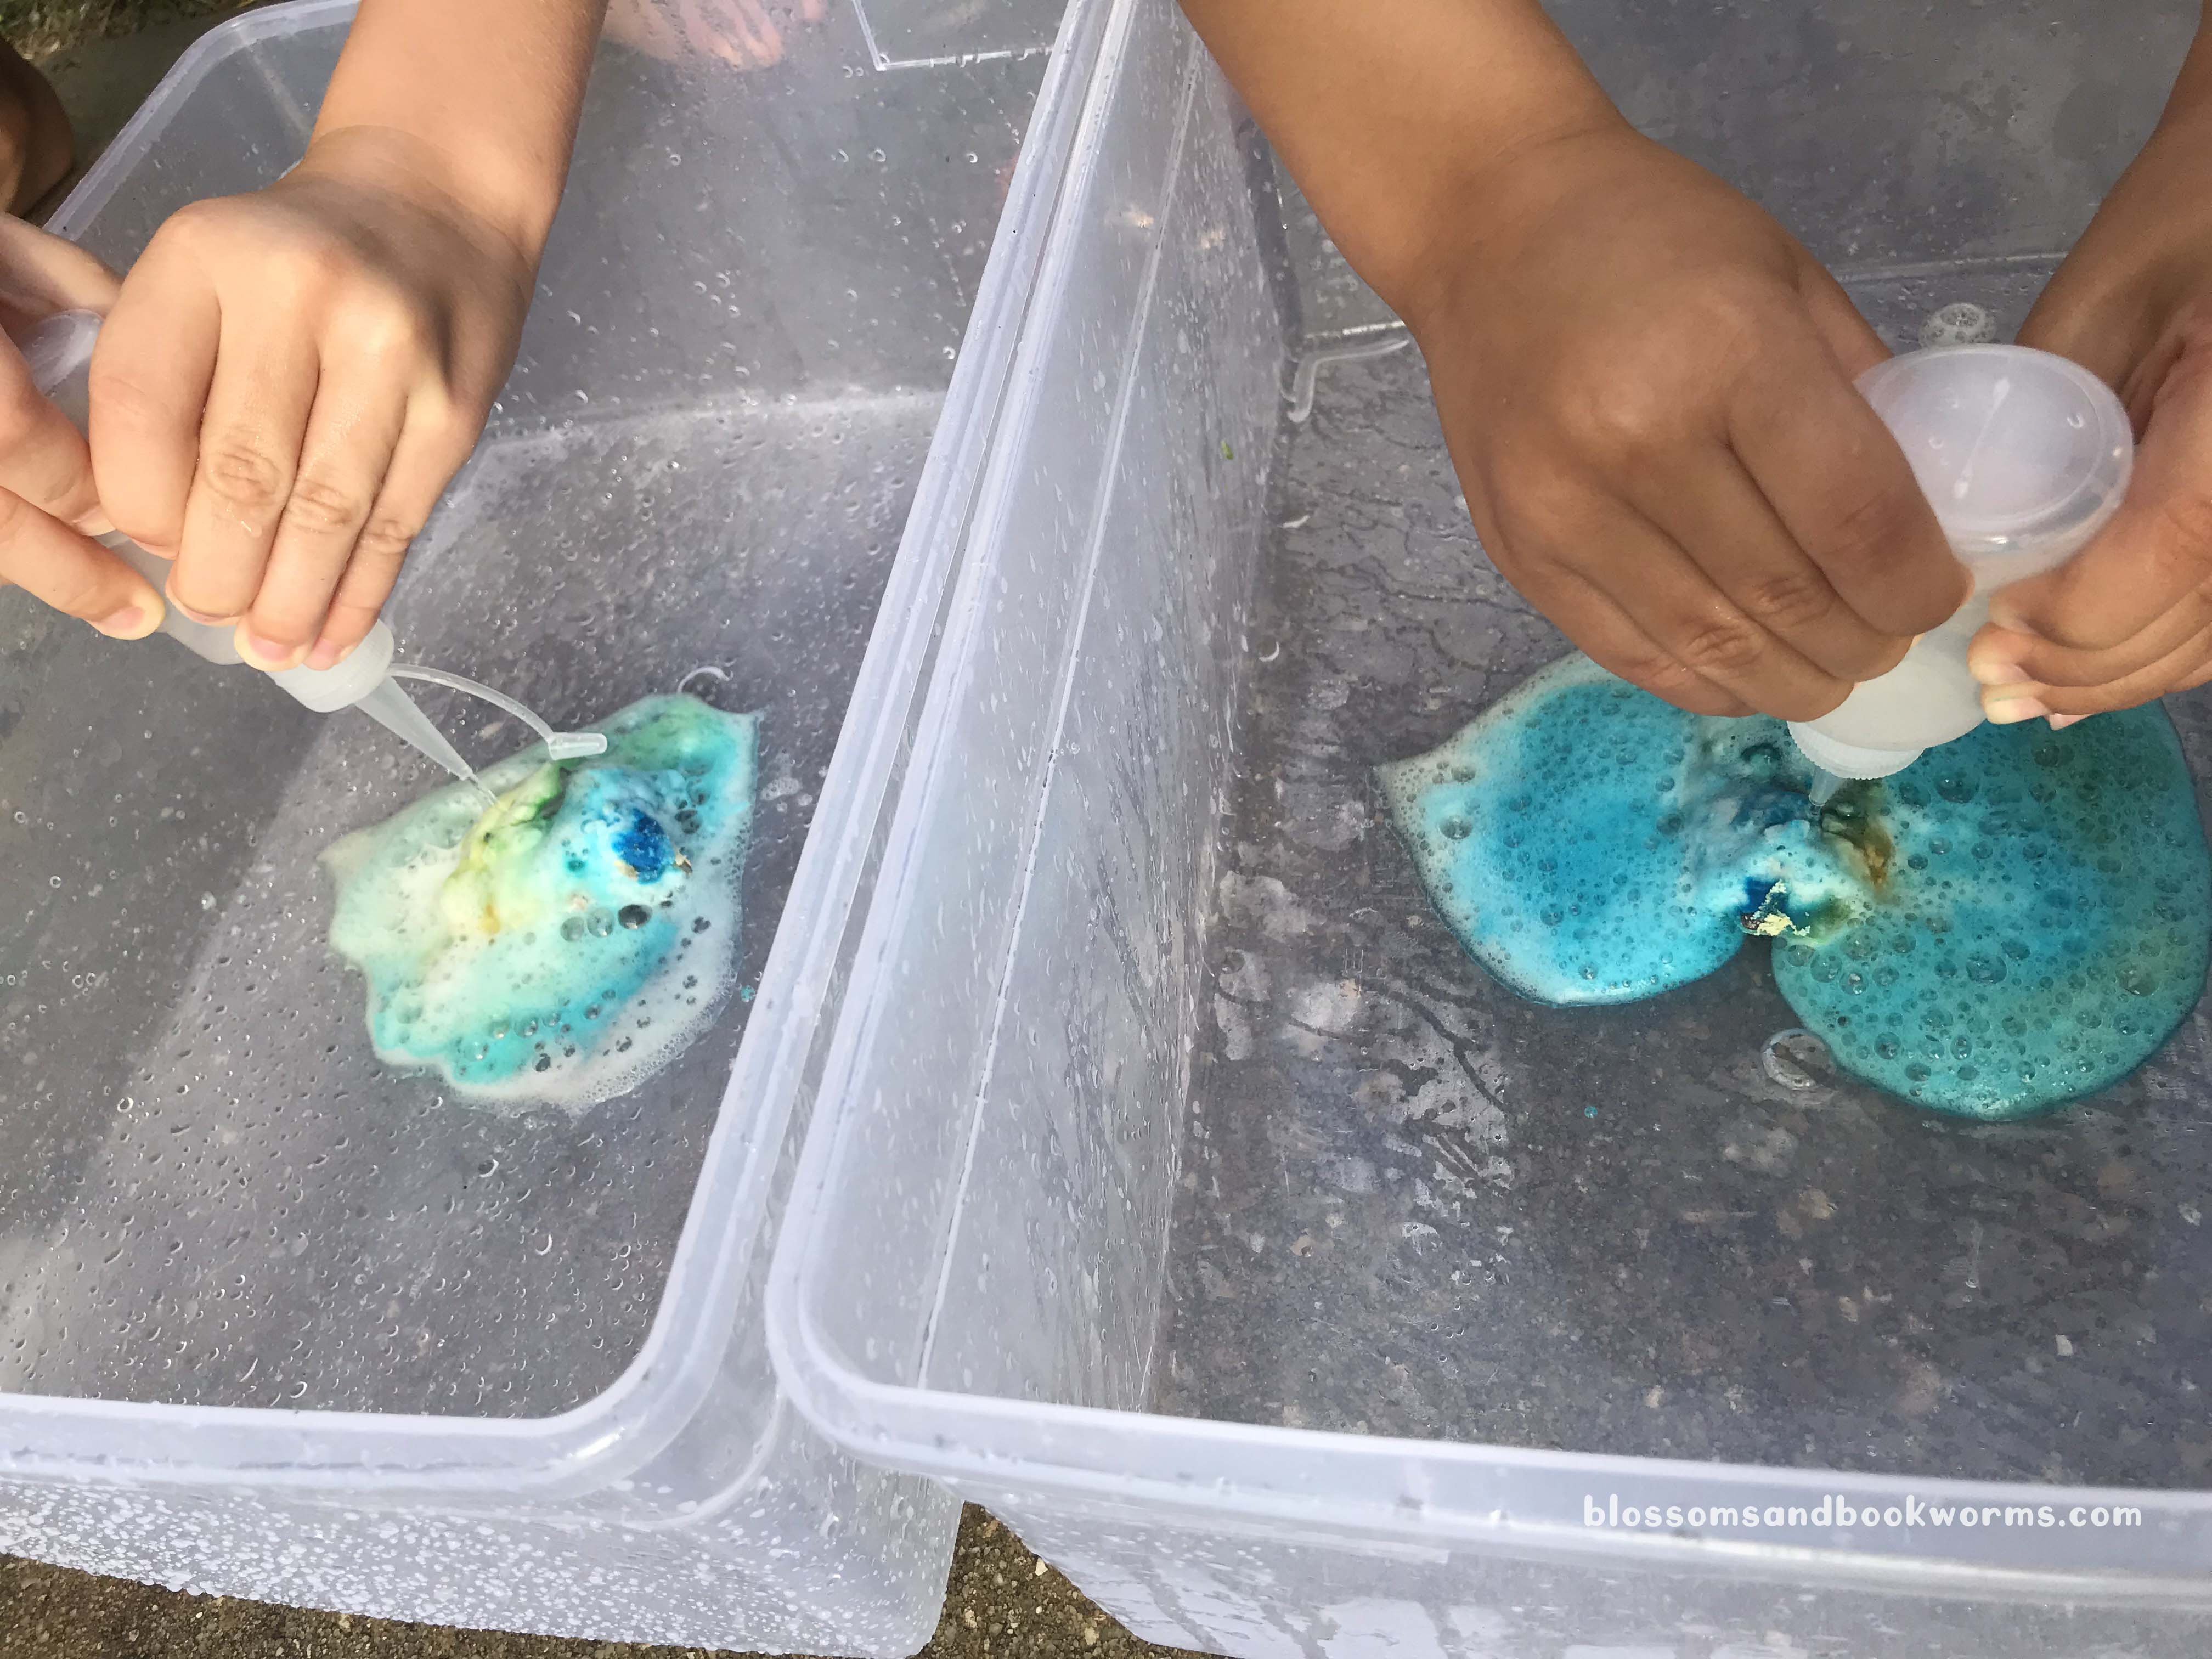
My youngest preferred a squeeze bottle of warm salt water to excavate her dinosaurs from the eggs.

I have to admit the warm salt water was my favorite method, too. You can really squeeze into the nooks and crannies, slowly melting the ice from around the dinosaur, and watch the dinosaur surface just like in a real dinosaur dig!

Then line up your dinosaurs and be amazed that you somehow used an entire rainbow of dinosaurs without even realizing it! ðŸĪĢ (Obviously, this part is optional 😉).

Ice Eggs truly is an amazing summer activity that will thrill your kiddos!

Can’t wait to try it?? Post pictures!! I cannot wait to see your kiddos breaking up their own eggs!

Happy Excavating!

Exploding Dinosaur Eggs

A STEM Activity

If you follow along with this blog, you know that I love simple science experiments that are easy to set up but have a big WOW factor. These Exploding Dino Eggs definitely fit the bill.

This is a play on the basic baking soda and vinegar reaction, but with the added WOW of dinosaurs hatching!

The prep isn’t difficult but it is messy and takes a bit of time. So plan your day accordingly 😉

Materials:

  • For the Eggs:
    • Baking Soda – opt for the big bag so you can make lots of eggs 😂
    • Mini Plastic Dinosaurs
    • Food Color – I used gel – totally optional but it ups the WOW factor!
    • Water
    • Spoons and Gloves are also super helpful!
  • For the Reaction:
    • Vinegar – again I buy vinegar in bulk so we have plenty for experiments.
    • Squirt bottles, spray bottles, or eye droppers

Grab a dish for each color you want to make, then measure out baking soda into the dishes. I was creating eggs for story time so I needed A LOT. Feel free to make less colors of reduce the recipe to fit your needs!

I used 1 cup of baking soda for each color. Then drop several drops of gel food coloring into the baking soda.

Add water, 2 TBS at a time, to make a thick paste. I used approximately 5 TBS water for each 1 Cup of baking soda.

Use spoons – or your hands if you’re a rebel 😉 – to mix the color, baking soda, and water into a thick paste.

Now for the messy part – mold the paste into eggs! If you do not want your skin stained, you should definitely wear gloves for this part. Obviously, I didn’t, and my hands were a lovely shade of purplish-red for a couple days ðŸĪĢ So this is “do as I say and not as I did” situation. ðŸĪĢ

I put a TBS of paste on the palm of my hand, added a dinosaur, then added a few more dollops of paste to cover the dino. Mold it together to cover all parts of the dinosaur.

Real Talk – my paste was a bit too liquid, so when I peeled the egg from my hand, I rolled it in extra loose baking soda on a sheet tray. As soon as my sticky, gooey egg touched the loose baking soda, it set up and was easy to handle.

I absolutely love all the colors!

Notice that my eggs are not 100% smooth or oblong or anything else “perfect”. But I am totally fine with that and so were my kiddos. The fun is in the experience, not in the perfection for photos. So give yourself a little grace if they don’t come out a perfect shape!

Move your eggs to a cool, dry place for several hours – or overnight – to finish drying out. It is worth the wait, because the reaction will be better when they are fully dry!

Now for the fun part! I added vinegar to squirt bottles and let my kiddos go to town. The reaction and “WOAH, its exploding” moment is totally worth it!

Since we used food coloring the reaction can make a mess. I recommend doing this part outside or in a bin – or both!

Check out that dinosaur exploding out of that egg!!

I know, I know, this looks too messy for you… but do not fear! I actually did this activity with 20 kiddos at story time – age range from 1-9 – and NONE of them ended up with stained hands or clothes.

BONUS – ALL of them LOVED the experiment!

You can totally make this work for your readers too!!

Don’t forget to have a “Dino Wash” bucket handy – plain water to rinse them off would be plenty, but bubbles amp up the fun factor! My kids loved washing the dinosaurs as much as hatching them!

Happy Experimenting!

DIY Solar Oven

S’mores Maker

One of the benefits to living in the Sunshine State is that you don’t have to wait on the “perfect” day to harness the power of the sun. Pretty much any day will do, especially when it is June! 😎ðŸĪĐ

A solar oven in its simplest form harnesses the heat created when sunlight-to-heat conversion generates heat. This occurs when light waves interact with molecules moving in a substance. Its sounds all technical, right?! But it is so much fun – and simple – to do!

We have made several solar ovens in the last couple years. Last year’s model used a pizza box that we whittled and adjusted to work for the project. This year our solar oven experiment was a bit impromptu and so I didn’t have a pizza box on hand. You know what that means… time to get creative. I started searching through my cupboards and craft closet until I came up with this clear plastic shoe bin. I just knew it could work!†

Materials:

  • Box – cardboard or dark colored surface would work even better than our clear box, but we were improvising!
  • A reflective surface – we used regular aluminum foil from the kitchen
  • A piece of glass or transparent plastic to protect the food – we used plastic wrap from the kitchen again 😉
  • Tape – not pictured, but clear packing tape or Scotch tape works great
  • Craft sticks or skewers to prop open the lid
  • S’Mores ingredients, of course! 😁

Begin by covering the inside of your box with aluminum foil. I used a long sheet to wrap the incase the inside of the box. You want that light from the sun to go into the box and get trapped in there!

Then, cover the inside of the lid of the box with aluminum foil as well.

Next, assemble the ingredients for the s’mores. Again, no judging our chocolate chips ðŸĪŠ we’re improvising! Ha!

We are pretty classic in our s’mores toppings but you could easily throw a Reece’s Cup or other fun surprise on your s’more!

Once everyone is thoroughly sticky from assembling the treats – and sneaking a few nibbles of the toppings – cover the box in plastic wrap. You will want to tape the sides of the plastic wrap down to the outside of the box so it has a tight fit. This protects the food from bugs that might want a snack and also allows light to penetrate easily.

After the plastic wrap is secure you will want to prop the lid on top of the box using the craft sticks or skewers. The lid helps to reflect the sunlight onto the food to cook the s’mores.

Now for the hardest part… you have to wait for the food to cook 😂 Wait till you make your own solar oven, you will see, this really is the hardest part!

Our s’mores were melty perfection in about 60 minutes in the hot Florida sunshine ☀ïļ

Look at these chocolate smeared faces! Absolute delight in the final product!

Happy Cooking!

Volcano Rainbow

AKA Bubbling Potion

Quick! It is blazing hot outside and the pool is unexpectedly CLOSED! Time for Plan B…

Oh no! What is Plan B?!?!

Does this ever happen to you?? 🙋🏞 That was totally me this morning! But, thankfully, I have my #ScienceWeek theme bin all pre-loaded with all the ingredients for tons of experiments.

I spend a little time over the weekend gathering up all the ingredients and tools for the projects we are going to tackle over the coming week. Then I tuck them all into one bin. Finally, I add a list of all the activities I just gathered necessities for and place that on top of the supplies… because, #mombrain is real. I can be SUPER EXCITED about an activity and one hour and 50 requests for snacks later say “why did I lay out those rubber bands again?”

This experiment is a classic that keeps being cool. I remember back in the 90’s we saw a fun volcano experiment in a magazine and my mom actually let us try it out. It was THE COOLEST thing! This rainbow volcano plays on that same simple vinegar and baking soda chemical reaction but it adds the fun of rainbow colors!

Ingredients:

  • Mason Jars (or glasses)
  • Baking Soda
  • Vinegar
  • Measuring spoon
  • Food Coloring (optional for the reaction, required for the rainbow fun!)

First, measure the baking soda into the glasses. We used about 2TBS in each glass jar.

Then add 5-10 drops of food coloring to each one. Note – I didn’t have regular food coloring on hand so I used gel colors. The gel has a more potent color so you need much less.

And my son just reminded me that we should have had one more jar for indigo so it wasn’t really a true rainbow after all. ðŸĪĢ

Now check the book to see if you are doing it right so far… ðŸĪĢ My son is all about doing things “correctly”. He read this book in his free time a few weeks back and was so ecstatic to show me you could really make a “bubbling potion”. His excitement after just reading about the reaction was why I added this activity to our #ScienceWeek list. It is a childhood must!

Now back to the experiment…. 😉 Measure out the vinegar into an easily pourable container. We used 2 2-cup measuring cups so that each kiddo could pour at the same time. The reaction happens super quickly! You will want to pour in a line down the center of the jars rather quickly to see them all bubble up at the same time.

Check out those fun bright colors!

Of course, my kiddos were a bit disappointed that the reaction didn’t last longer… but they had a blast pouring and mixing colors before clean up time.

Also, check out the epic mess. Do yourself a favor, do not try this inside your house, unless you have the jars inside a bin to catch the overflow. No one wants to be cleaning vinegar and food coloring off your nice white rug!

This was a perfect experiment for a sunny and warm summer day! Simple prep. Easy clean up with a hose. Bright fun colors. Impressed kiddos who talked about “bubbling potions” for the rest of the day!

Happy Experimenting!