Our little lady is fascinated with numbers and has been “counting” everything. She can count well, but she isn’t super careful about assigning only one number to each item. I wanted to integrate what she is learning into our fun #DinosaurWeek theme.
I made this cute dinosaur number matching game for you and made it extra simple with a FREE printable! Print out the page, laminate if you choose to, then cut and enjoy!
Super simple and easy!
This is the perfect activity for a rainy day when you are stuck inside. Minimal prep and fun dinosaurs – what could be better?
Cut out all the cards around the thick black lines and then cut down the dotted line to make the pair of pieces for matching.
There are several ways to set up this game. You can line the dots up in one column and the numbers in another so your kiddo can pick out the matches.
Or you can set it up in a more traditional matching game style. To up the difficultly even farther…. turn the images face down!
Then your kiddo can make matches. I had our kiddo count the dots and then find the number match piece.
She was SUPER focused!
You can even take it a step farther and have your kiddo count out toy dinosaurs to match the number on the cards! We are totally adding this step in the next time we pull out these cards!
My kids are enthralled with dinosaurs. They know all the scientific names, what each one eats, where it lives, who is the predator and who is the prey… they are truly a bevy of information! Since I never caught the dinosaur bug as a little sprout, I am learning SO MUCH about dinosaurs right alongside my kiddos!
Their love of the subject definitely makes #DinosaurWeek even more fun!
This activity is perfect for a hot summer day – it combines ice, the perfect way to cool down on a hot day, with paleontology, which might be the coolest profession ever!
You know I love an inexpensive experiment with a big WOW factor, and this one definitely fits the bill! Scrounge up some water balloons or other small balloon – I used 4 in balloons because I wanted smaller “eggs” after freezing. You could absolutely use bigger balloons, but make sure you have room to freeze them once filled with water!
You also need some toy dinosaurs. I bought these in bulk about a year ago for a very reasonable price. We have used them for all sorts of activities and they are a regular part of my kiddos’ imaginative play throughout the day.
Once you have balloons and the toy dinosaurs, you need to get the dinosaur inside the balloon. This sounds more difficult than it is, but it can be a bit tricky. Here are a couple of my #ProTips:
Blow up the balloon FIRST, before trying to stuff the dinosaur in. This will stretch out the balloon and give it a softer feel, which will allow the dinosaur to stretch and push on the balloon without breaking it.
Use a pump! If you are doing any quantity of ice eggs, using a pump to blow them up first will be so helpful. These small balloons can be super difficult to blow up with your mouth and we don’t want anyone passing out!!
Once the balloon has been blown up, stretch the end between 2 fingers. Then, tuck the dinosaur between your fingers and start working it into the balloon.
The size of the balloon matters when you are trying to tuck in the dinosaurs, so if you are concerned about being able to stretch the small balloons you can opt for a bigger round size to make it easier.
Eight little dinosaurs all tucked nicely into their balloon cocoon. AWWW!
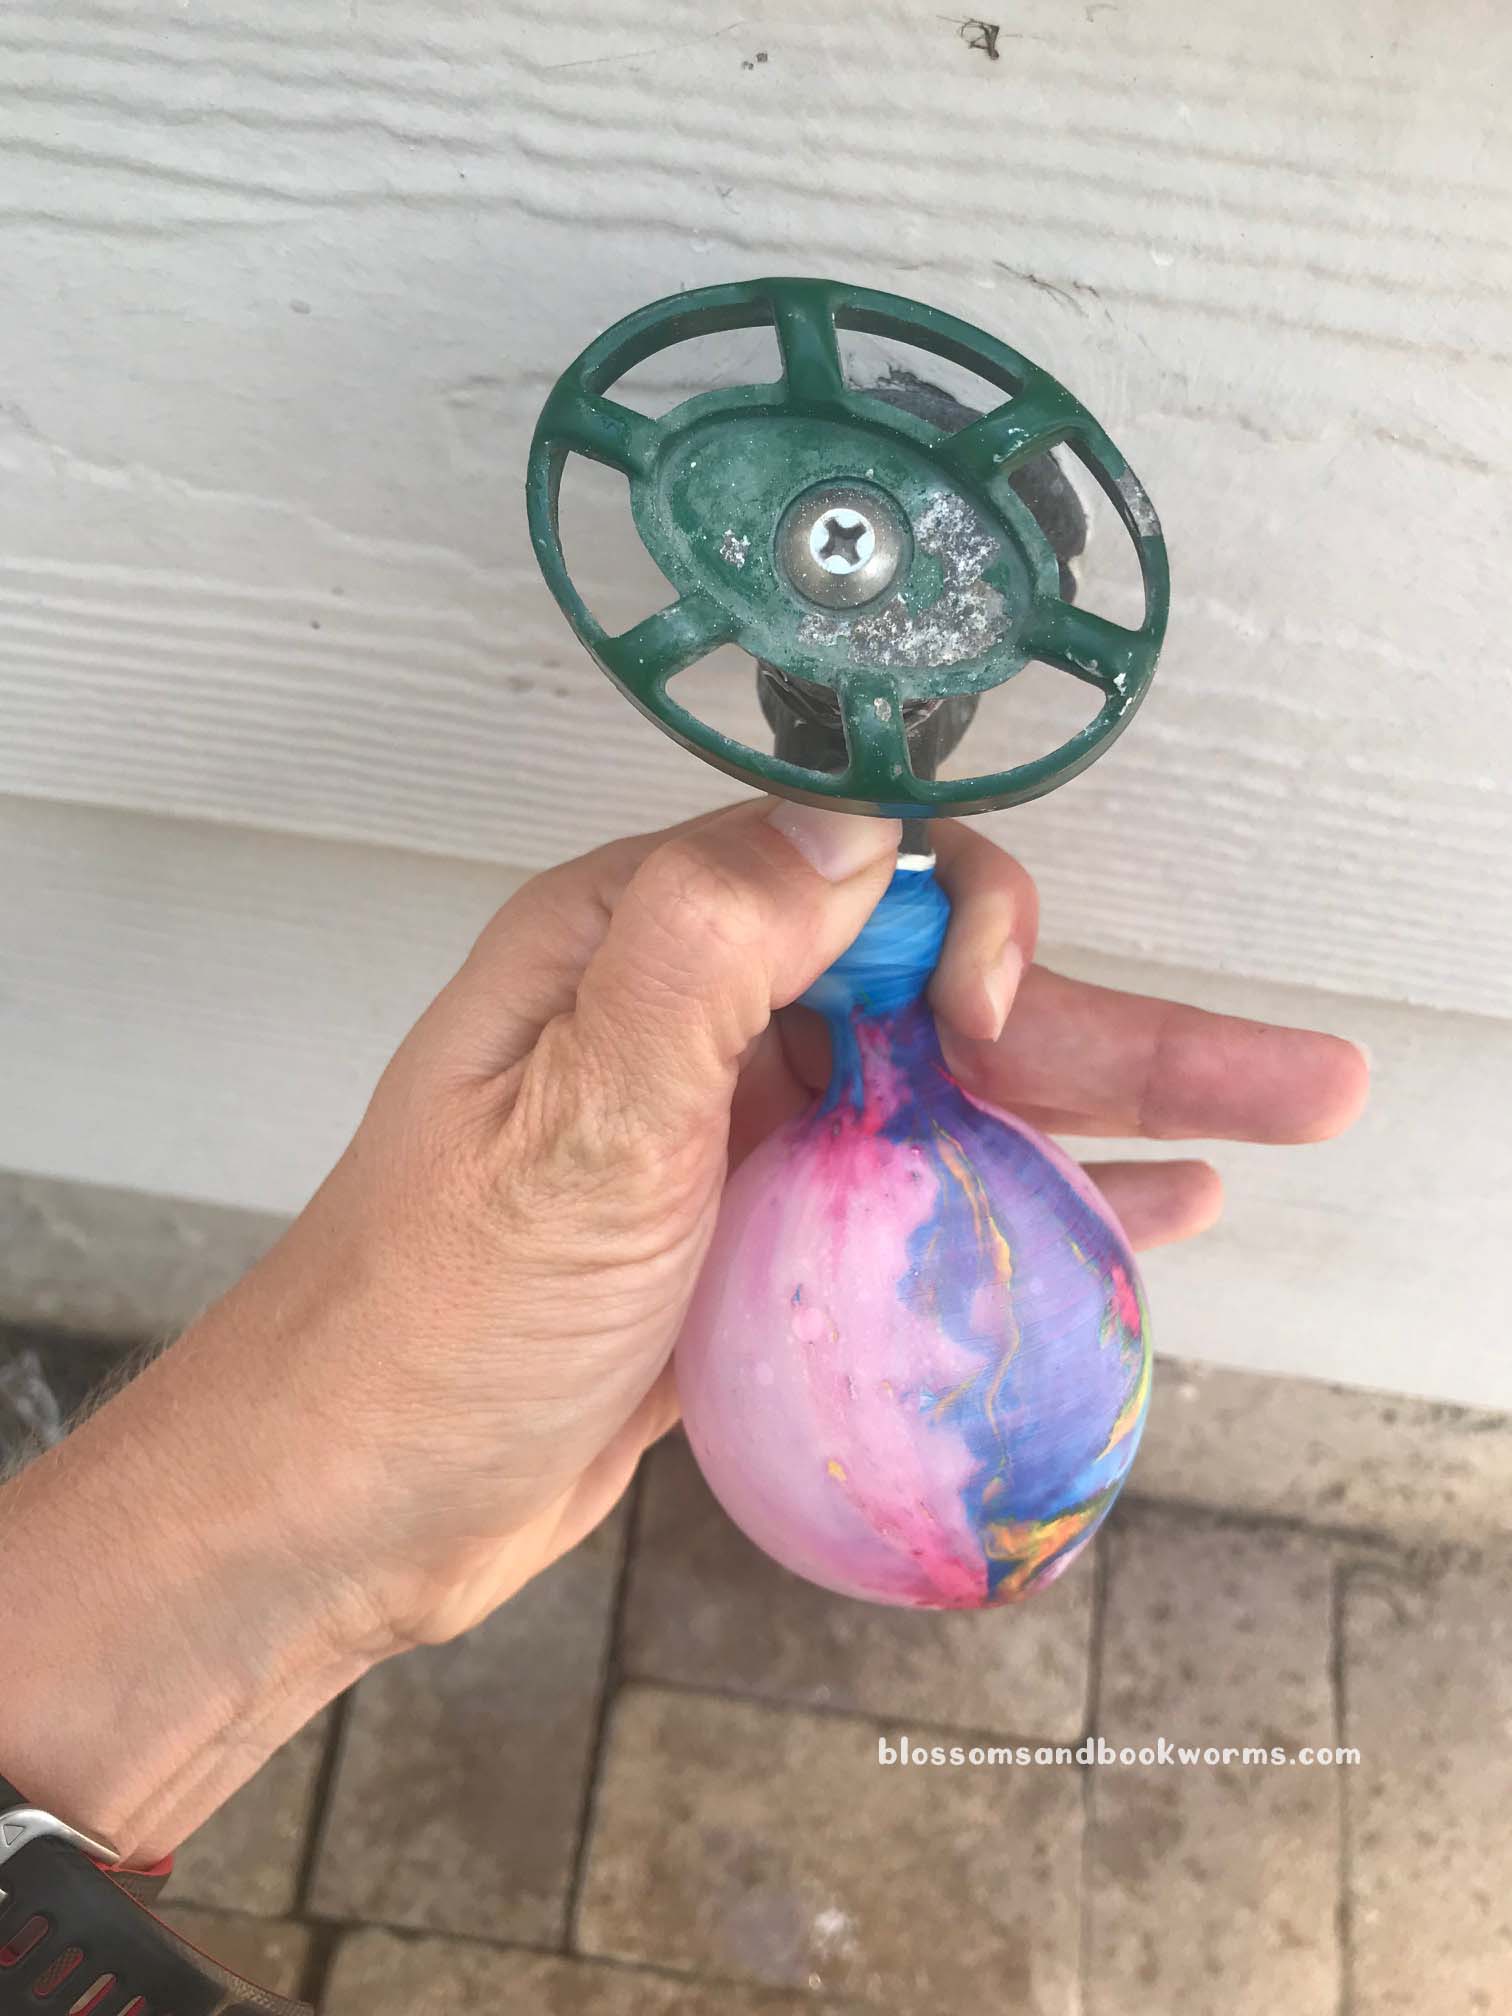
Now you have to fill the balloon with water.
This is the part in the directions where you investigate every faucet in your house only to realize they are all “cute” but are completely WRONG for filling water balloons 🤦♀️. Oh, is that just me?? 🙋♀️ Are faucets that cannot fill water balloons even practical? 🤣🤣🤣
Outside faucet to the rescue!
Don’t overfill your balloons! You did not do all the work of tucking dinosaurs inside to have an overfilled balloon burst in your hands!
Once they are all filled and tied off, put them in a bowl and stick it in the freezer. Leave them overnight to freeze.
When you are ready for the WOW factor, take the balloons out of the freezer, run tap water on the frozen balloon, cut the balloon, and then peel the balloon away. You should have these remarkable, awesome dinosaurs suspended in ice!
Now for the FUN part…
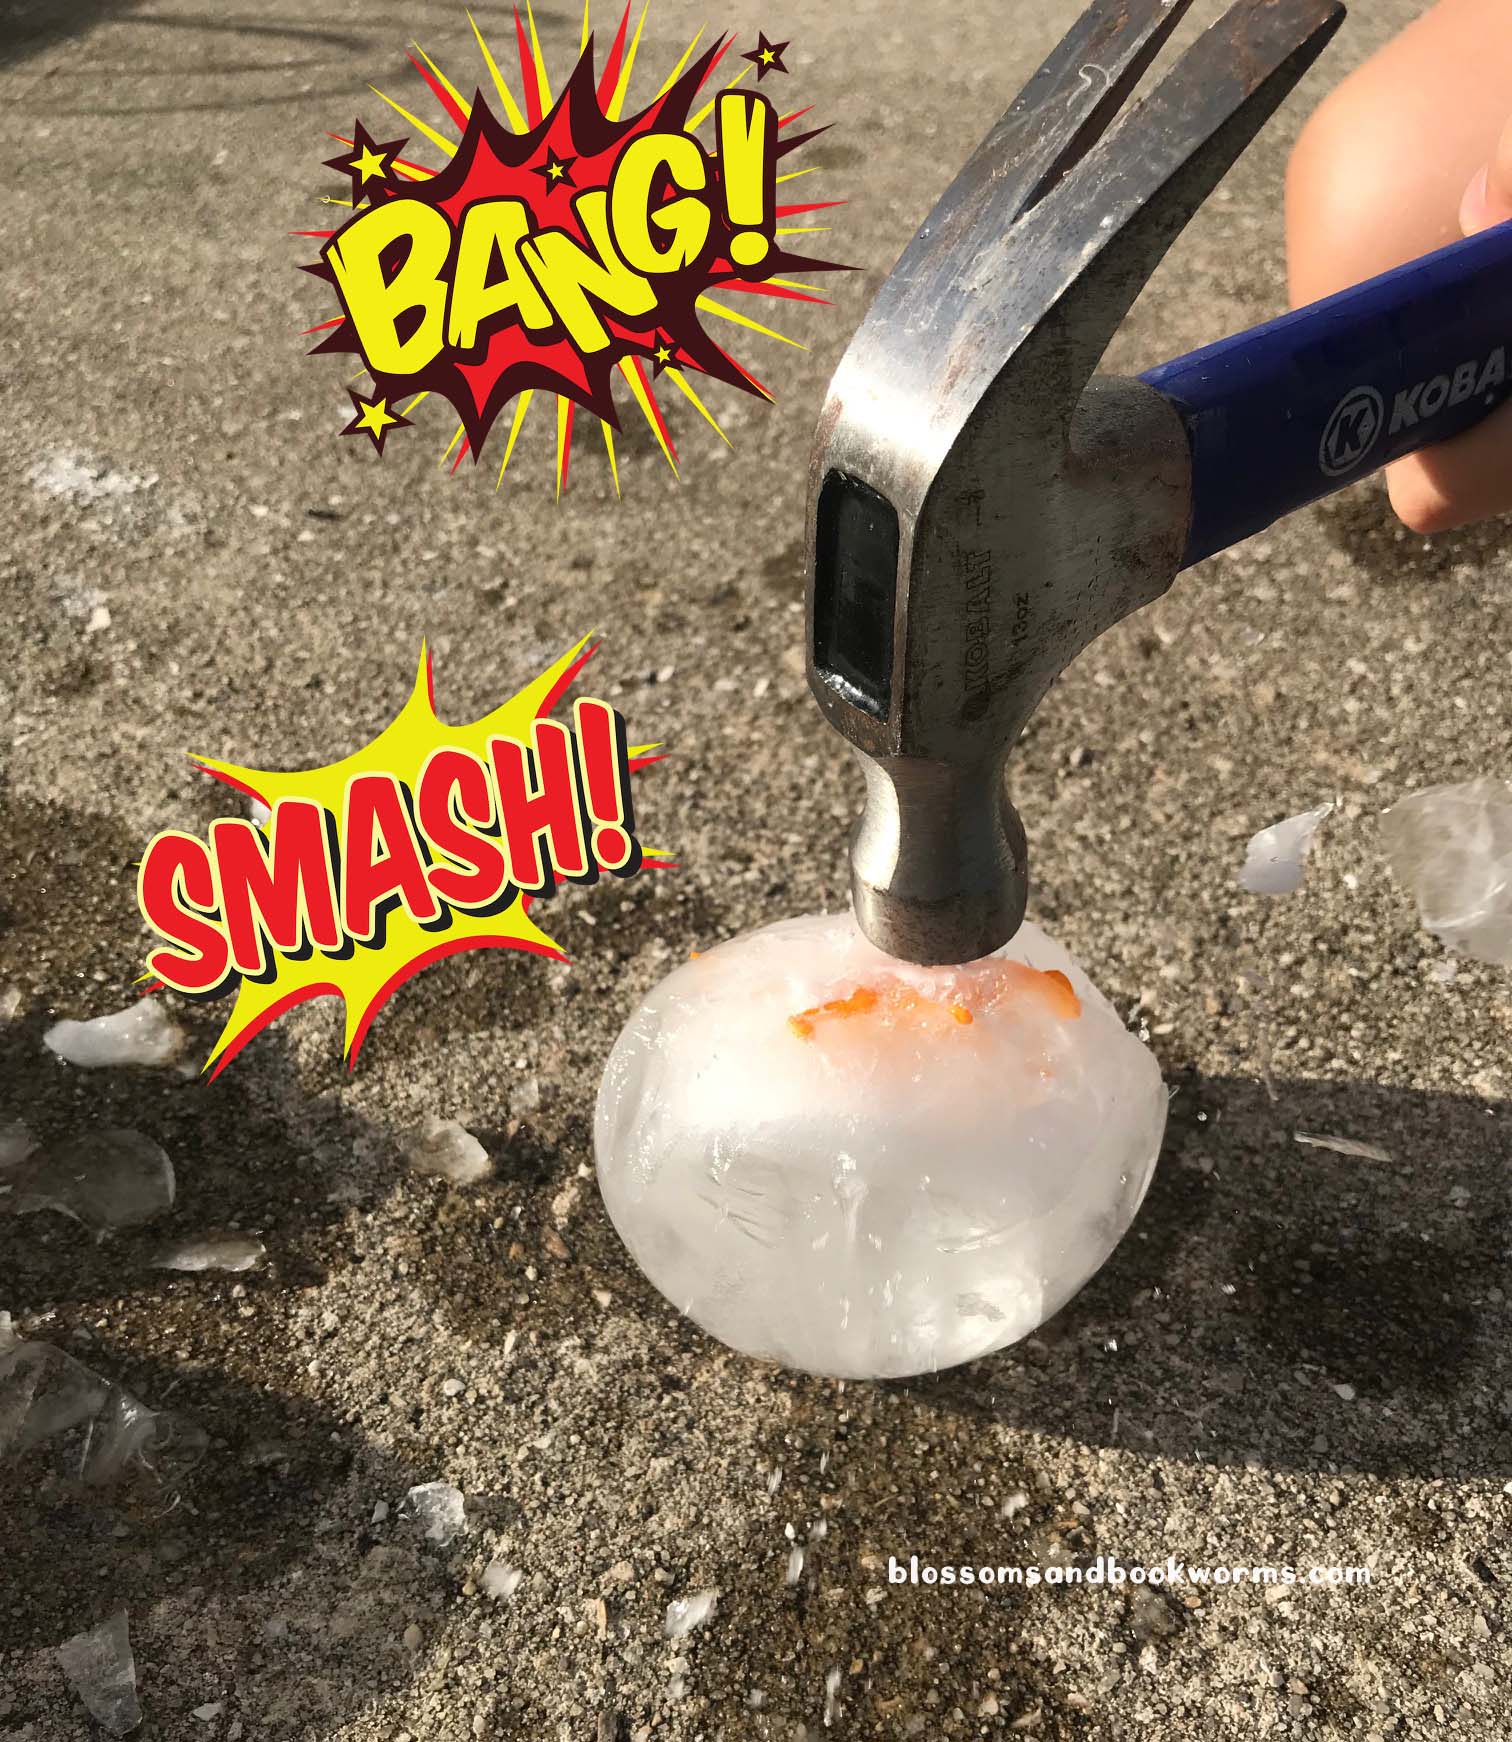
…break them open!!
My oldest LOVED using a hammer to bust up his eggs – but be sure to put safety glasses on, ice shards are sharp!!
My youngest preferred a squeeze bottle of warm salt water to excavate her dinosaurs from the eggs.
I have to admit the warm salt water was my favorite method, too. You can really squeeze into the nooks and crannies, slowly melting the ice from around the dinosaur, and watch the dinosaur surface just like in a real dinosaur dig!
Then line up your dinosaurs and be amazed that you somehow used an entire rainbow of dinosaurs without even realizing it! 🤣 (Obviously, this part is optional 😉).
Ice Eggs truly is an amazing summer activity that will thrill your kiddos!
Can’t wait to try it?? Post pictures!! I cannot wait to see your kiddos breaking up their own eggs!
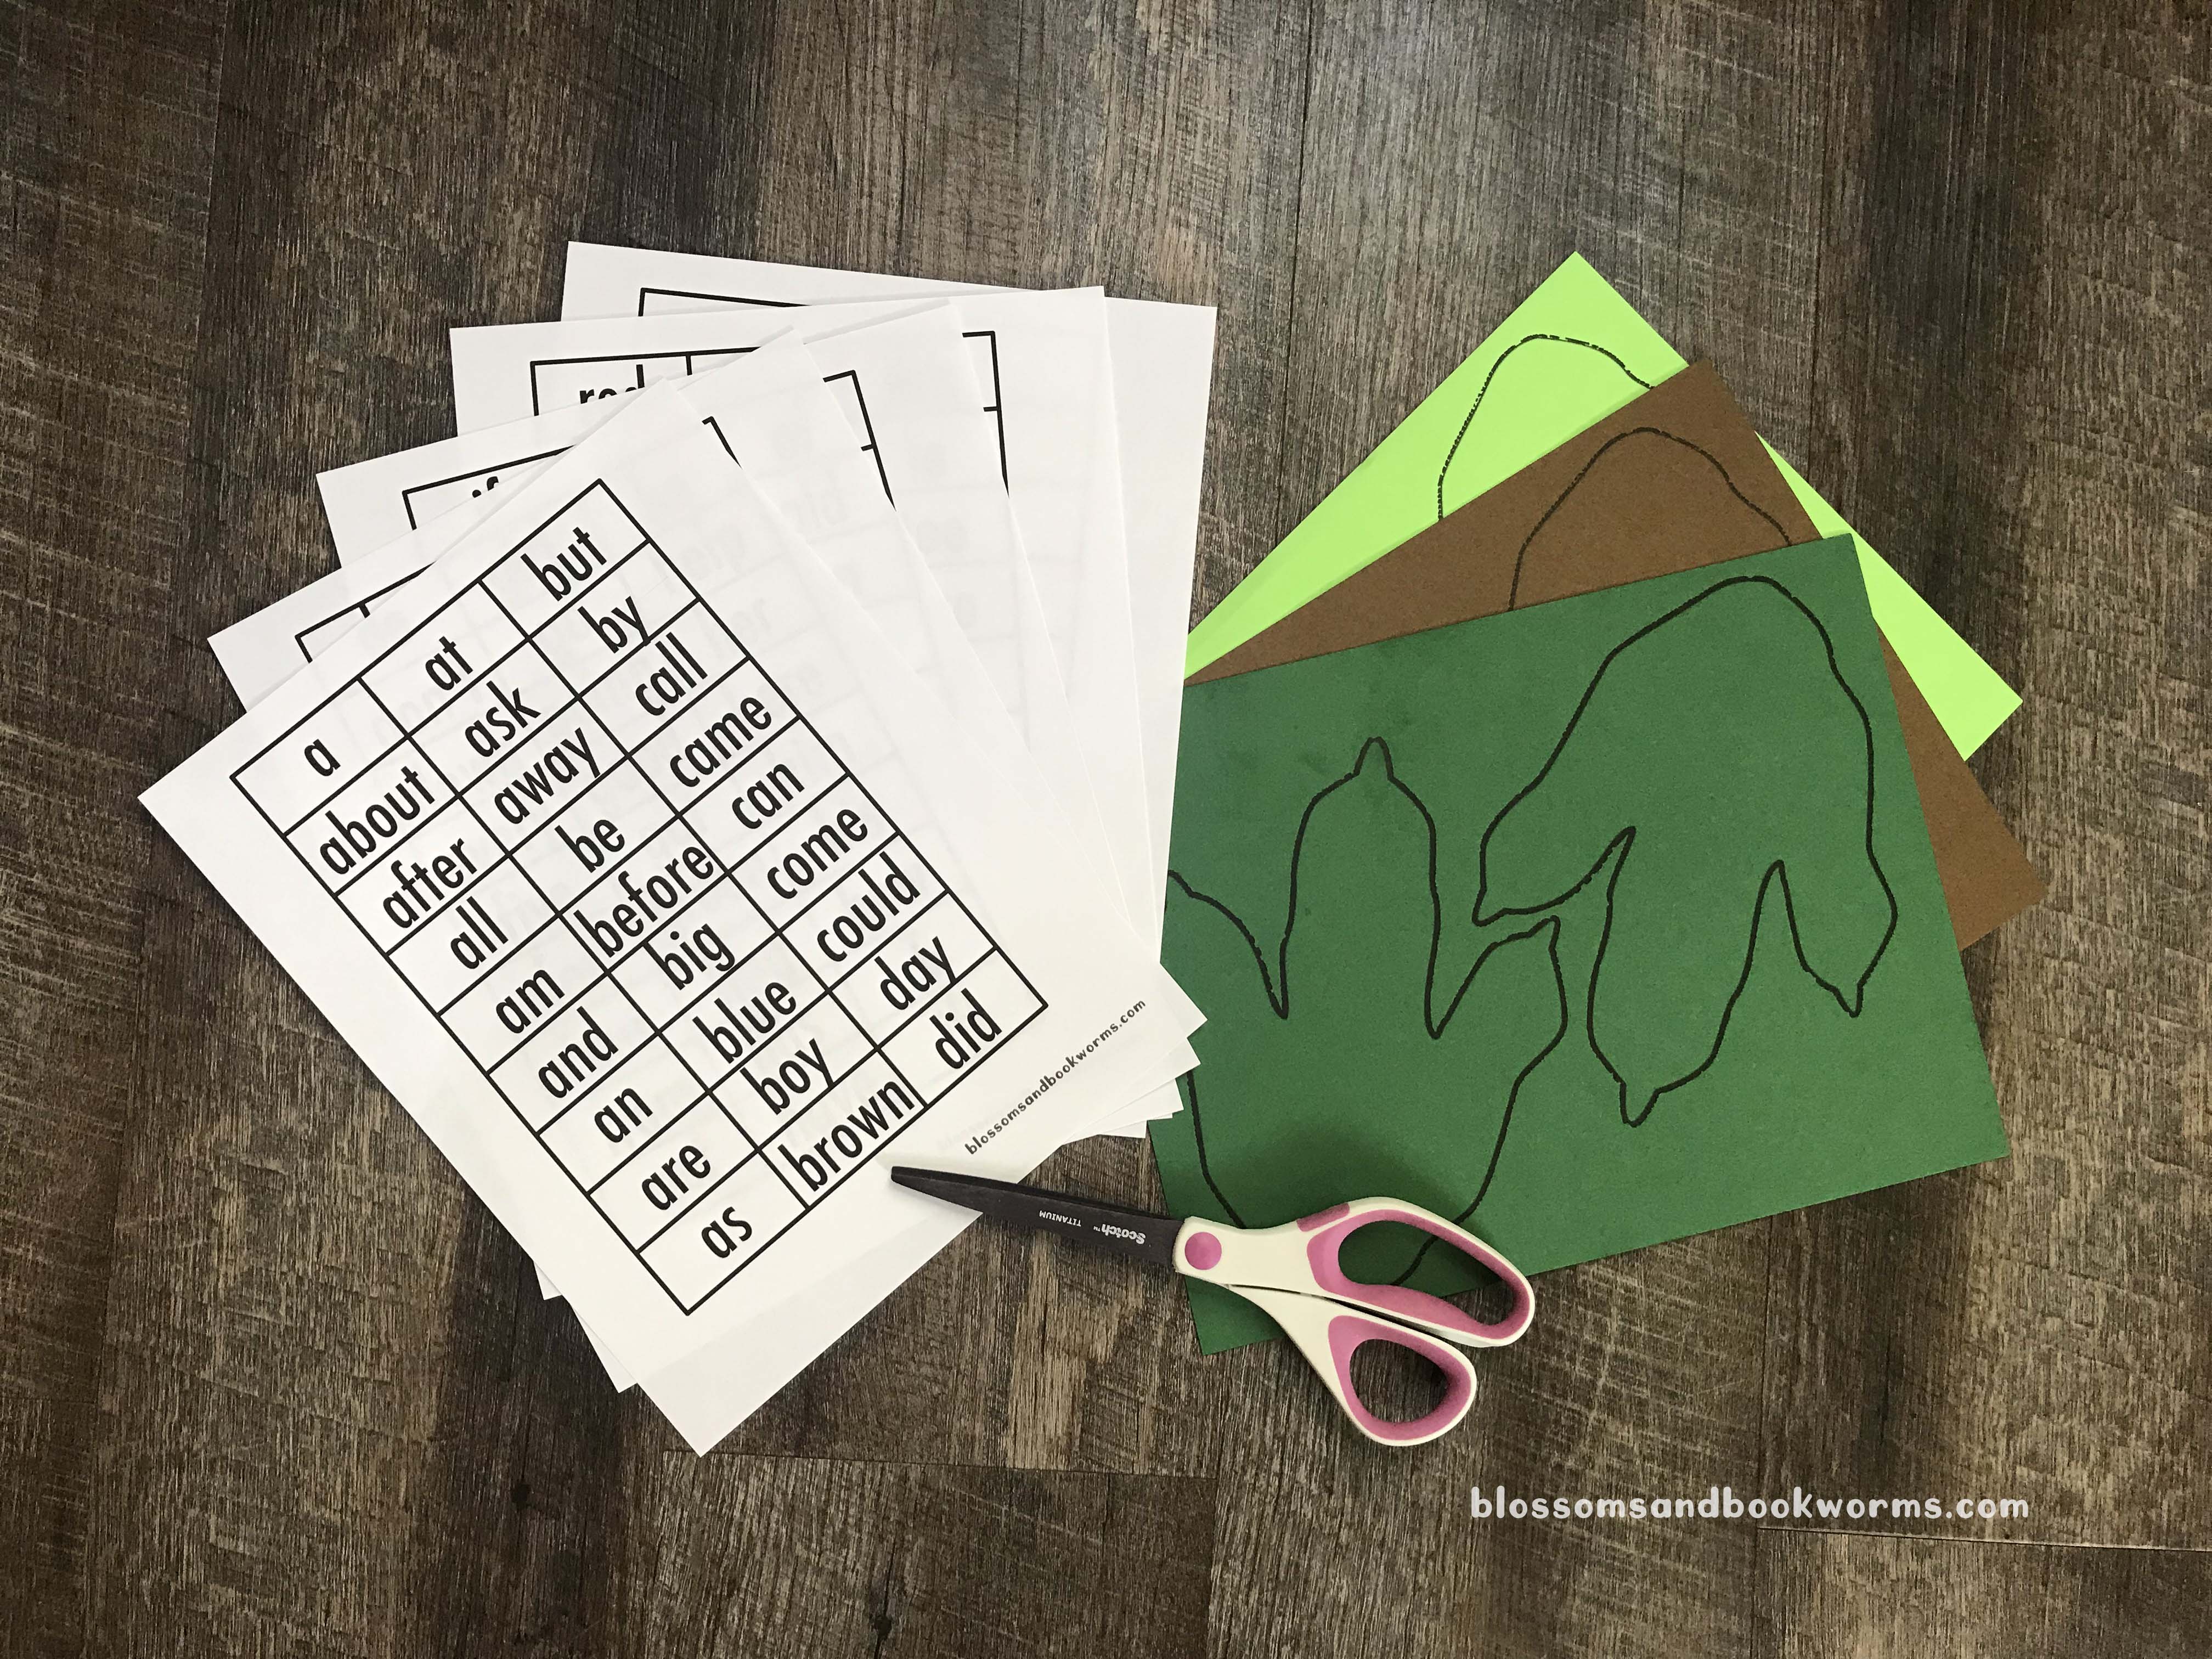
Did your kiddo come home from school with a GIANT list of sight words to memorize this summer? Mine totally did. And nothing makes my kiddo give me that long-suffering sigh that kids specialize in more than a humongous list of black and white words in columns.
I am so thankful that our oldest is such strong reader (and he loves to read🤩🎉), but we are still putting in some practice this summer to make sure he doesn’t forget any of the basics. Since he is not a fan of reading all 120+ words from the list, I came up with a fun way to integrate his sight words into our #DinosaurWeek theme!
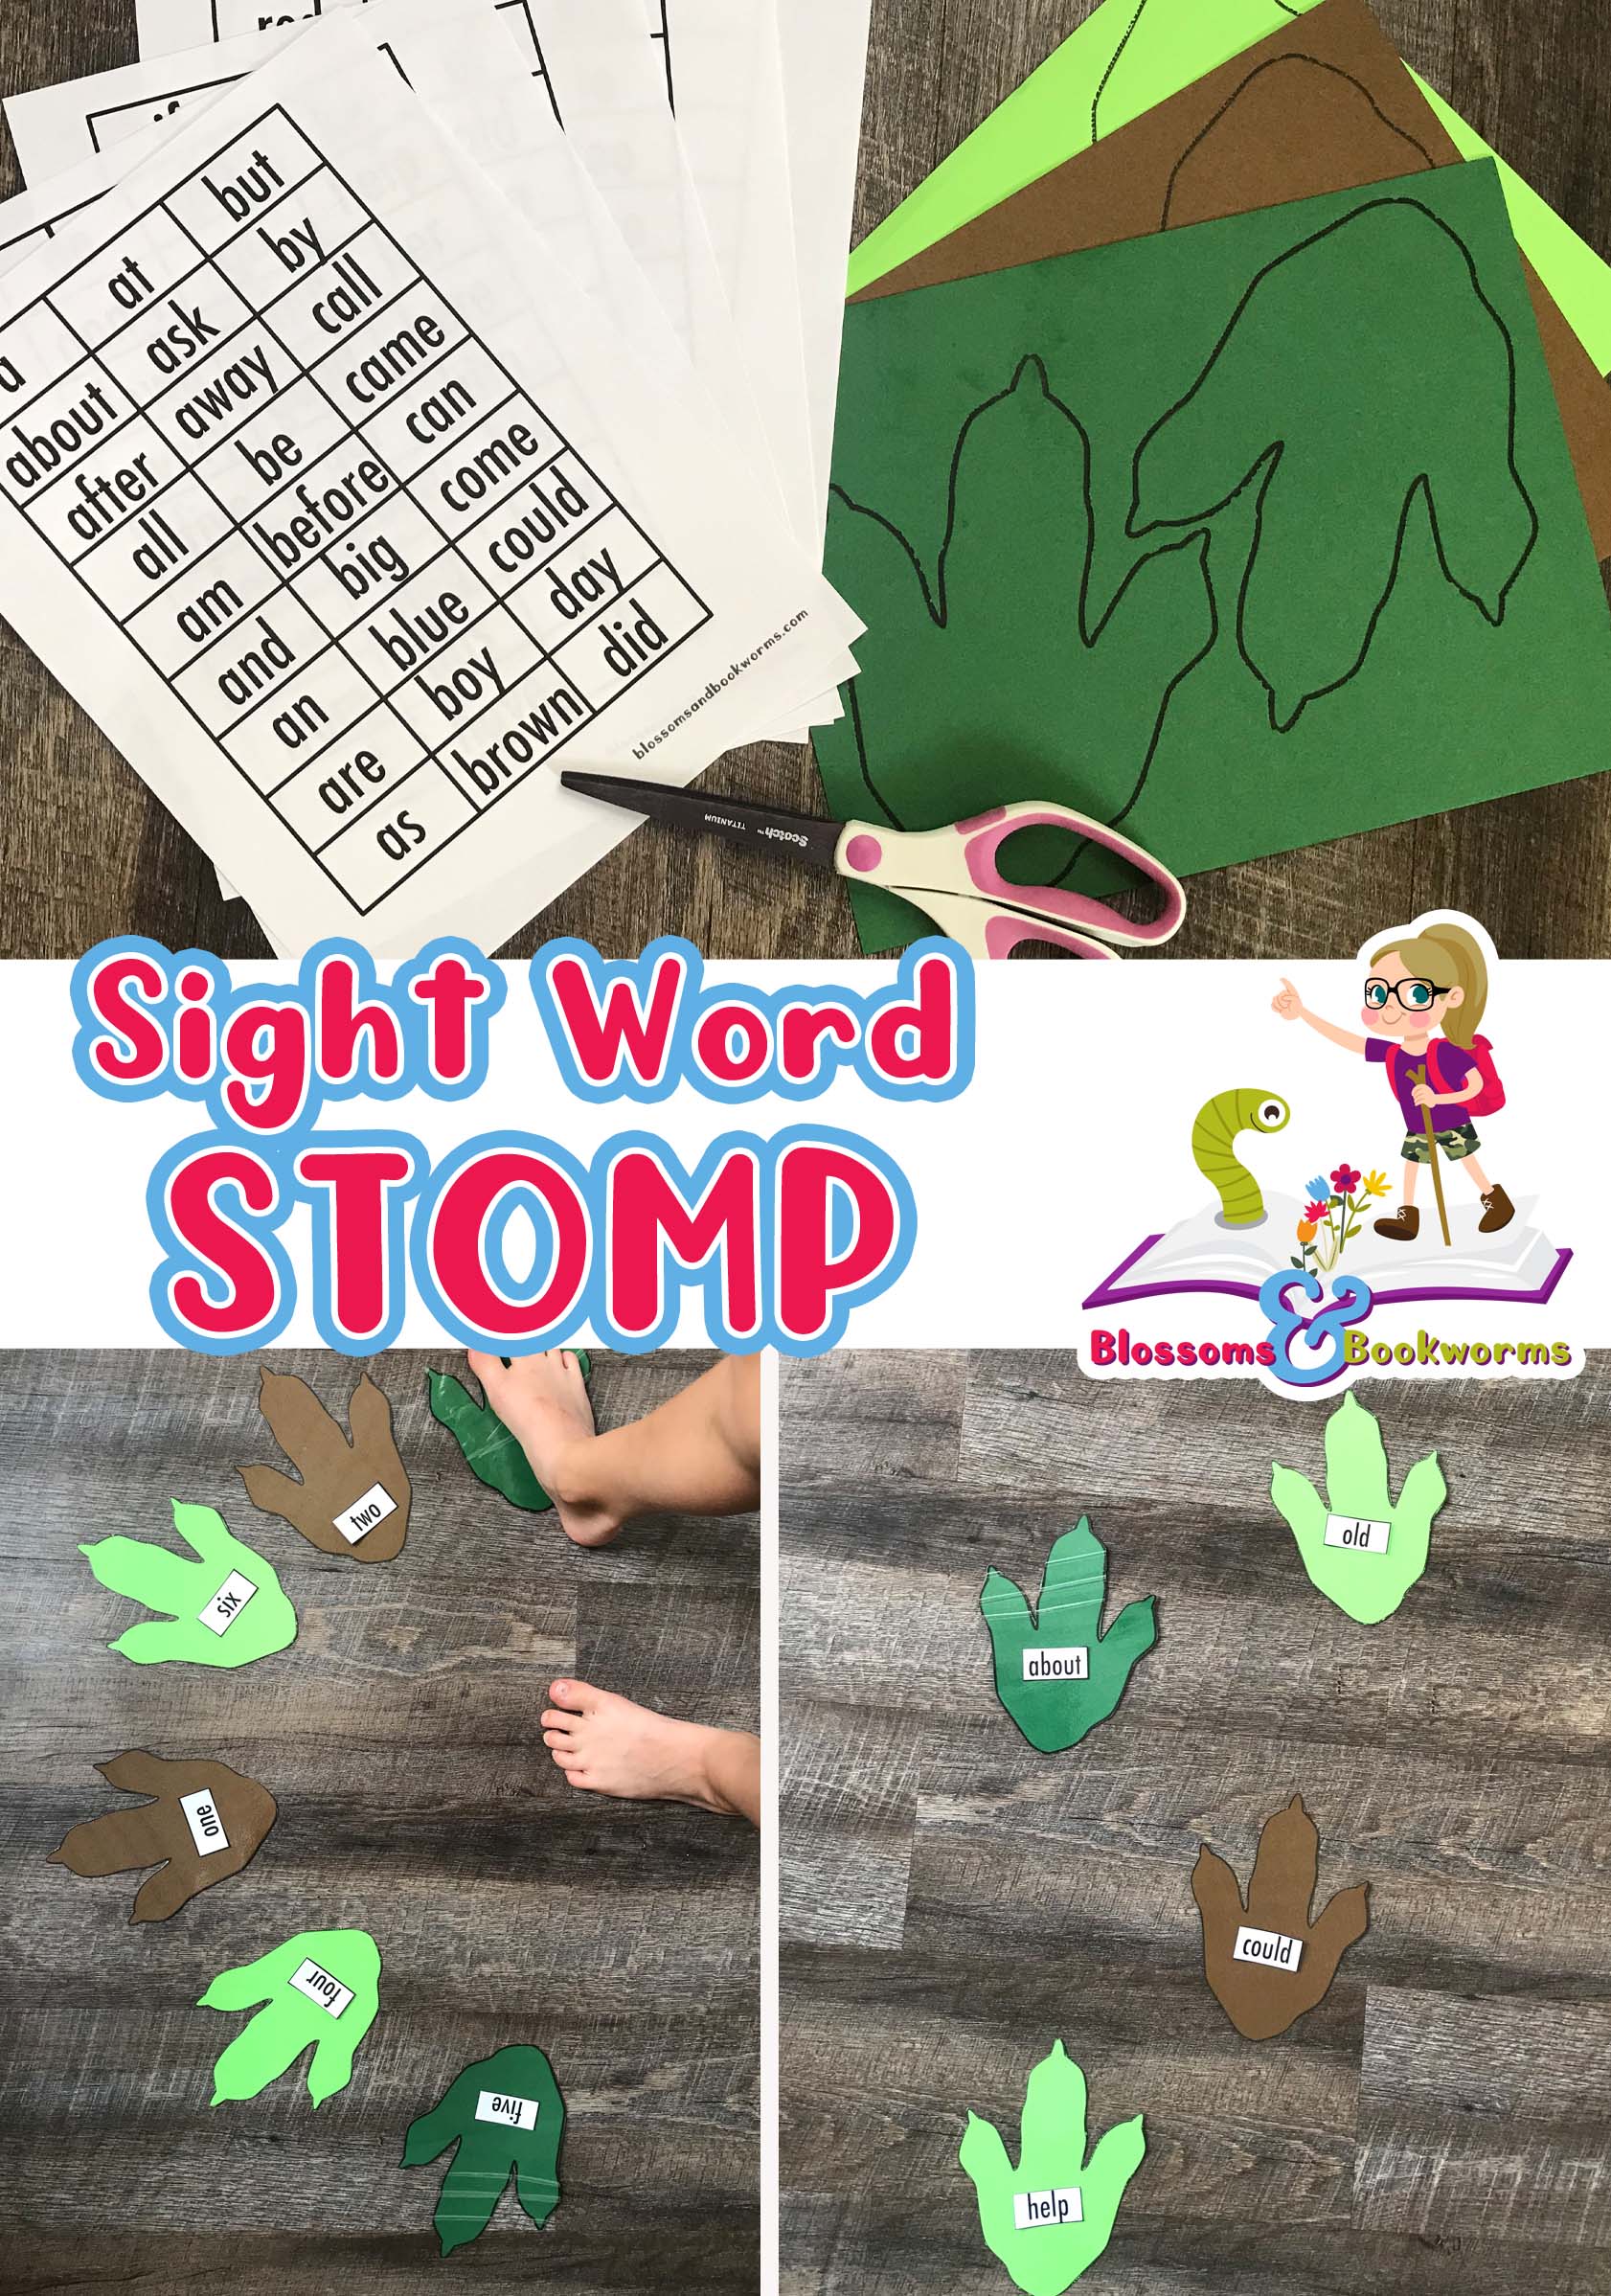
This activity was super simple to put together, especially when you download the free printable 😉. You can grab the Dinosaur Print FREE Printable HERE. You can grab the Sight Words FREE Printable HERE.
I printed the Dinosaur footprints onto colorful paper and the sight words onto plain white copy paper. I also opted to laminate the dinosaur prints because I have a feeling we will be using them for many things in our future!
One note on the sight words – I included the list of words from my son’s school, but the final page of sight words has 11 blank spots for you to add words your child is currently working on!
After you cut everything out, lay the dinosaur prints on the ground and use poster putty to adhere the sight words to the print. The poster putty is easy to use and move as you switch out the words on the prints.
Now, have fun experimenting with how to lay them out. You can lay them in a line and have your child stomp on each print while saying the sight words in a fun dinosaur voice…
… or set them in a semi-circle and make it a game – call out a word and have your child stomp on the correct one.
There are so many possibilities!
You can pick out the sight word opposites (like above)…
… or work on number words and counting….
… or even color words!
In case you missed it above – you can grab the Dinosaur Prints Printable HERE and the Sight Words Printable HERE.
There are so many ways to use these fun tools – I cannot wait to see what you come up with!
If you follow along with this blog, you know that I love simple science experiments that are easy to set up but have a big WOW factor. These Exploding Dino Eggs definitely fit the bill.
This is a play on the basic baking soda and vinegar reaction, but with the added WOW of dinosaurs hatching!
The prep isn’t difficult but it is messy and takes a bit of time. So plan your day accordingly 😉
Materials:
For the Eggs:
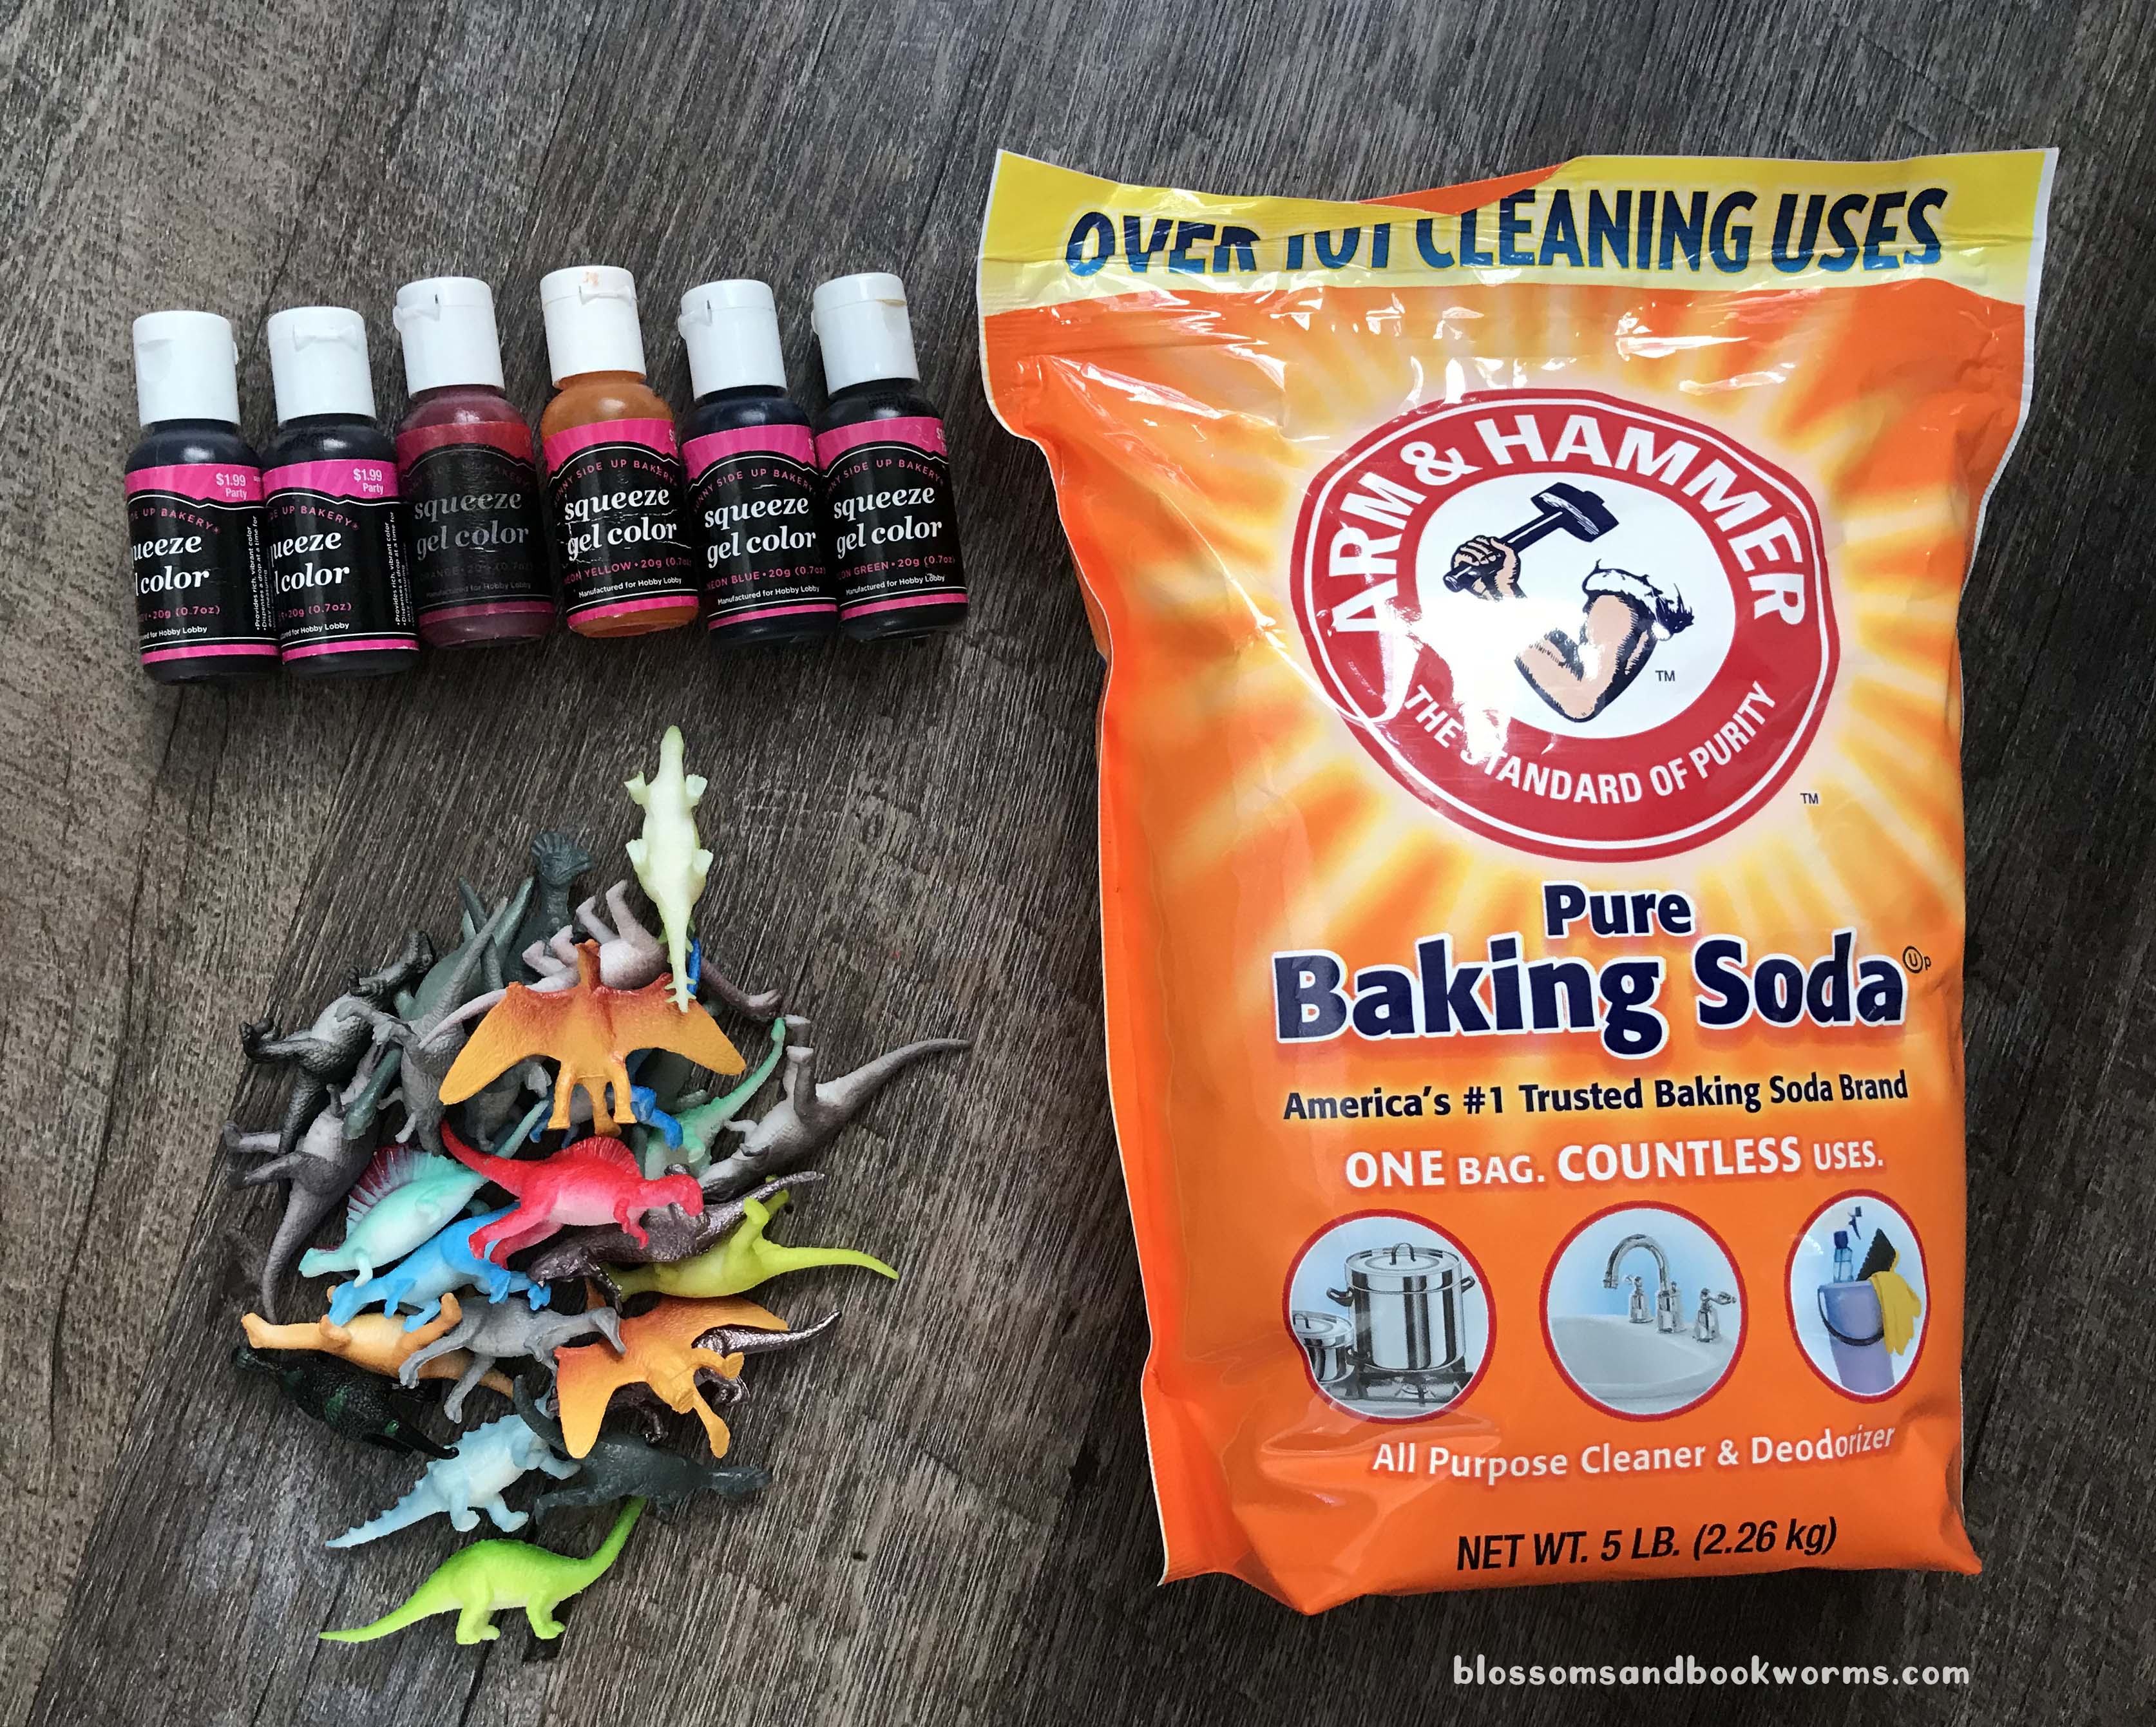
Baking Soda – opt for the big bag so you can make lots of eggs 😂
Mini Plastic Dinosaurs
Food Color – I used gel – totally optional but it ups the WOW factor!
Water
Spoons and Gloves are also super helpful!
For the Reaction:
Vinegar – again I buy vinegar in bulk so we have plenty for experiments.
Squirt bottles, spray bottles, or eye droppers
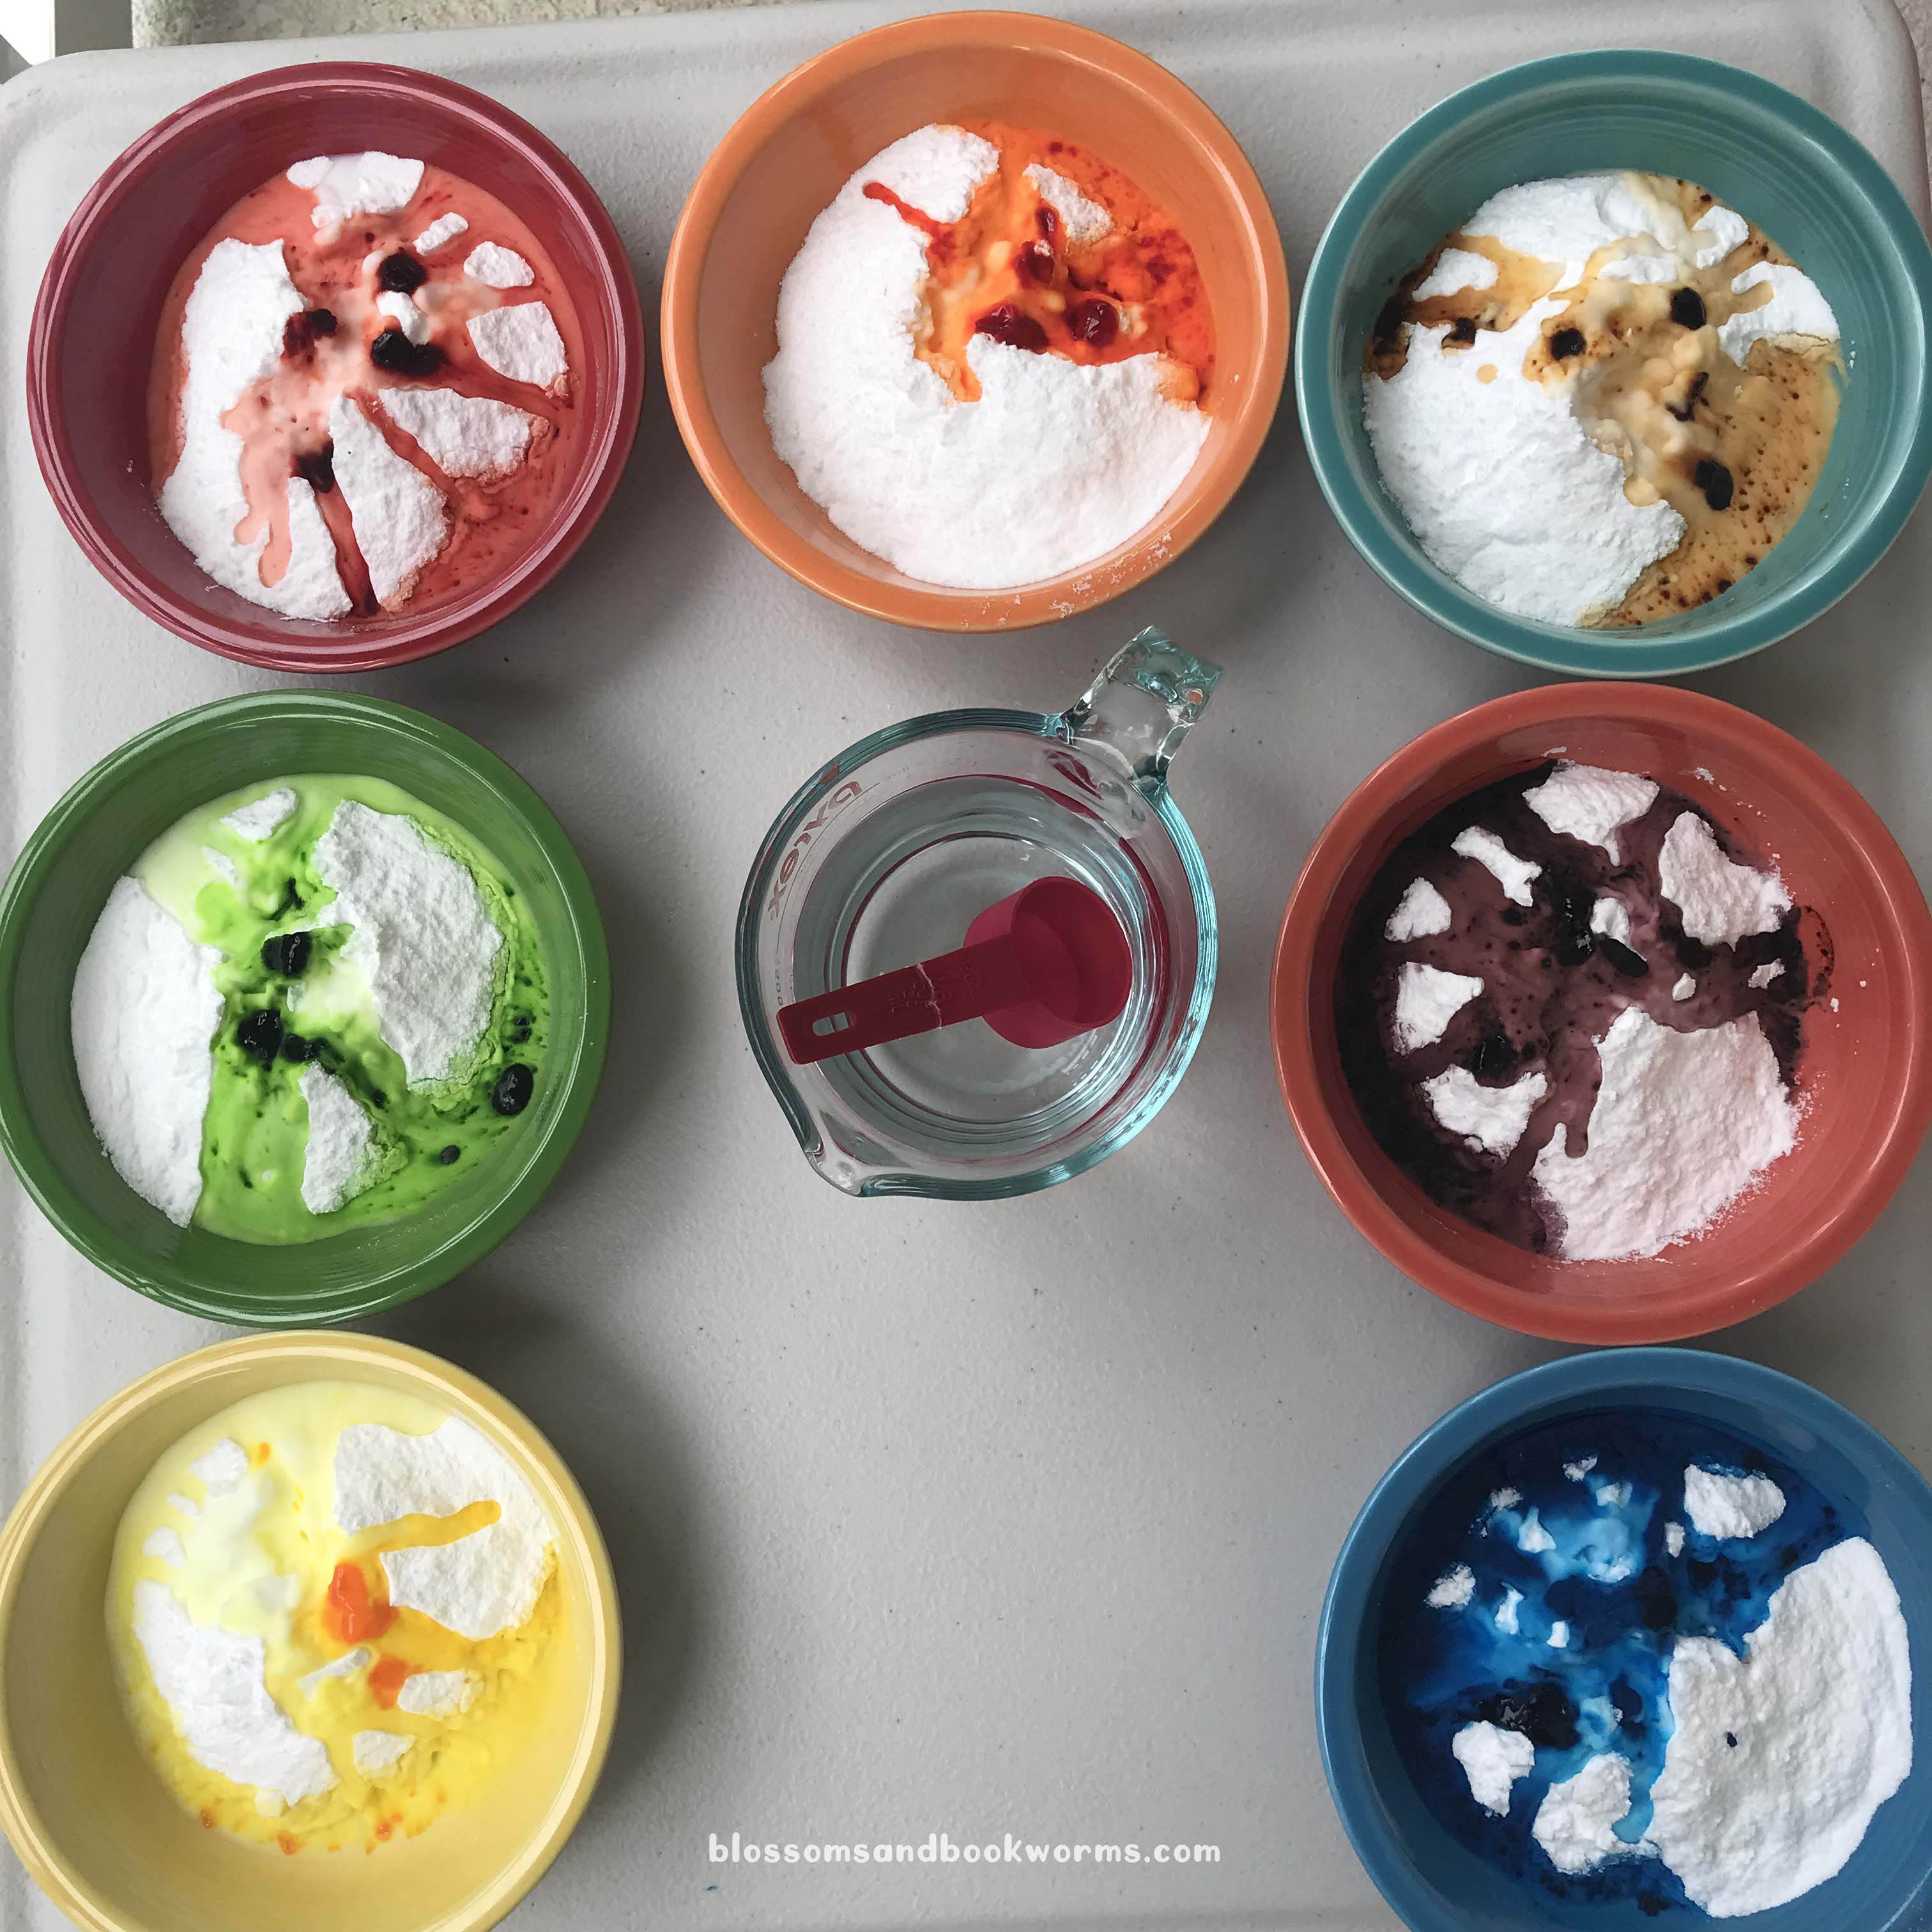
Grab a dish for each color you want to make, then measure out baking soda into the dishes. I was creating eggs for story time so I needed A LOT. Feel free to make less colors of reduce the recipe to fit your needs!
I used 1 cup of baking soda for each color. Then drop several drops of gel food coloring into the baking soda.
Add water, 2 TBS at a time, to make a thick paste. I used approximately 5 TBS water for each 1 Cup of baking soda.
Use spoons – or your hands if you’re a rebel 😉 – to mix the color, baking soda, and water into a thick paste.
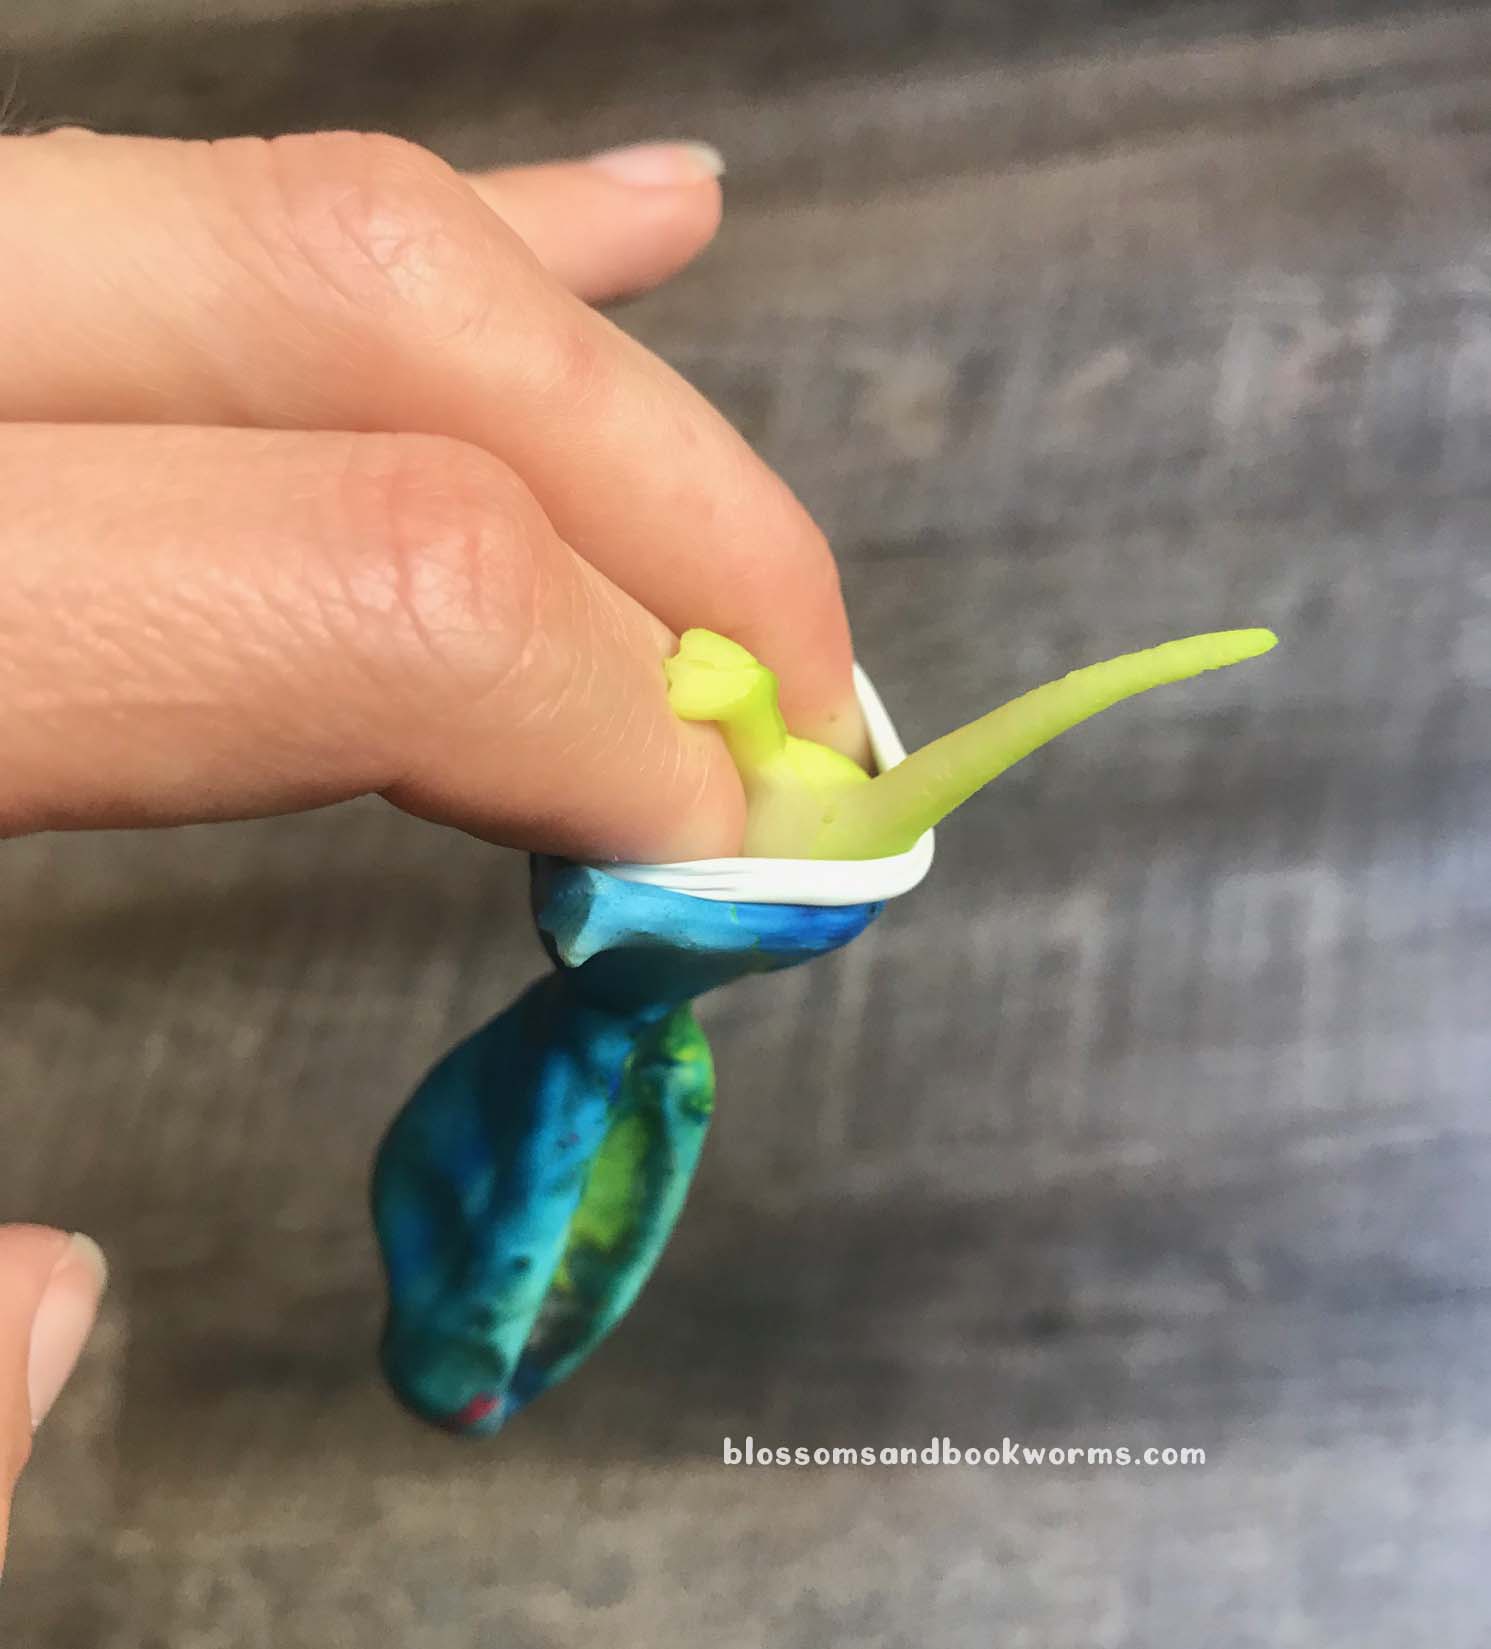
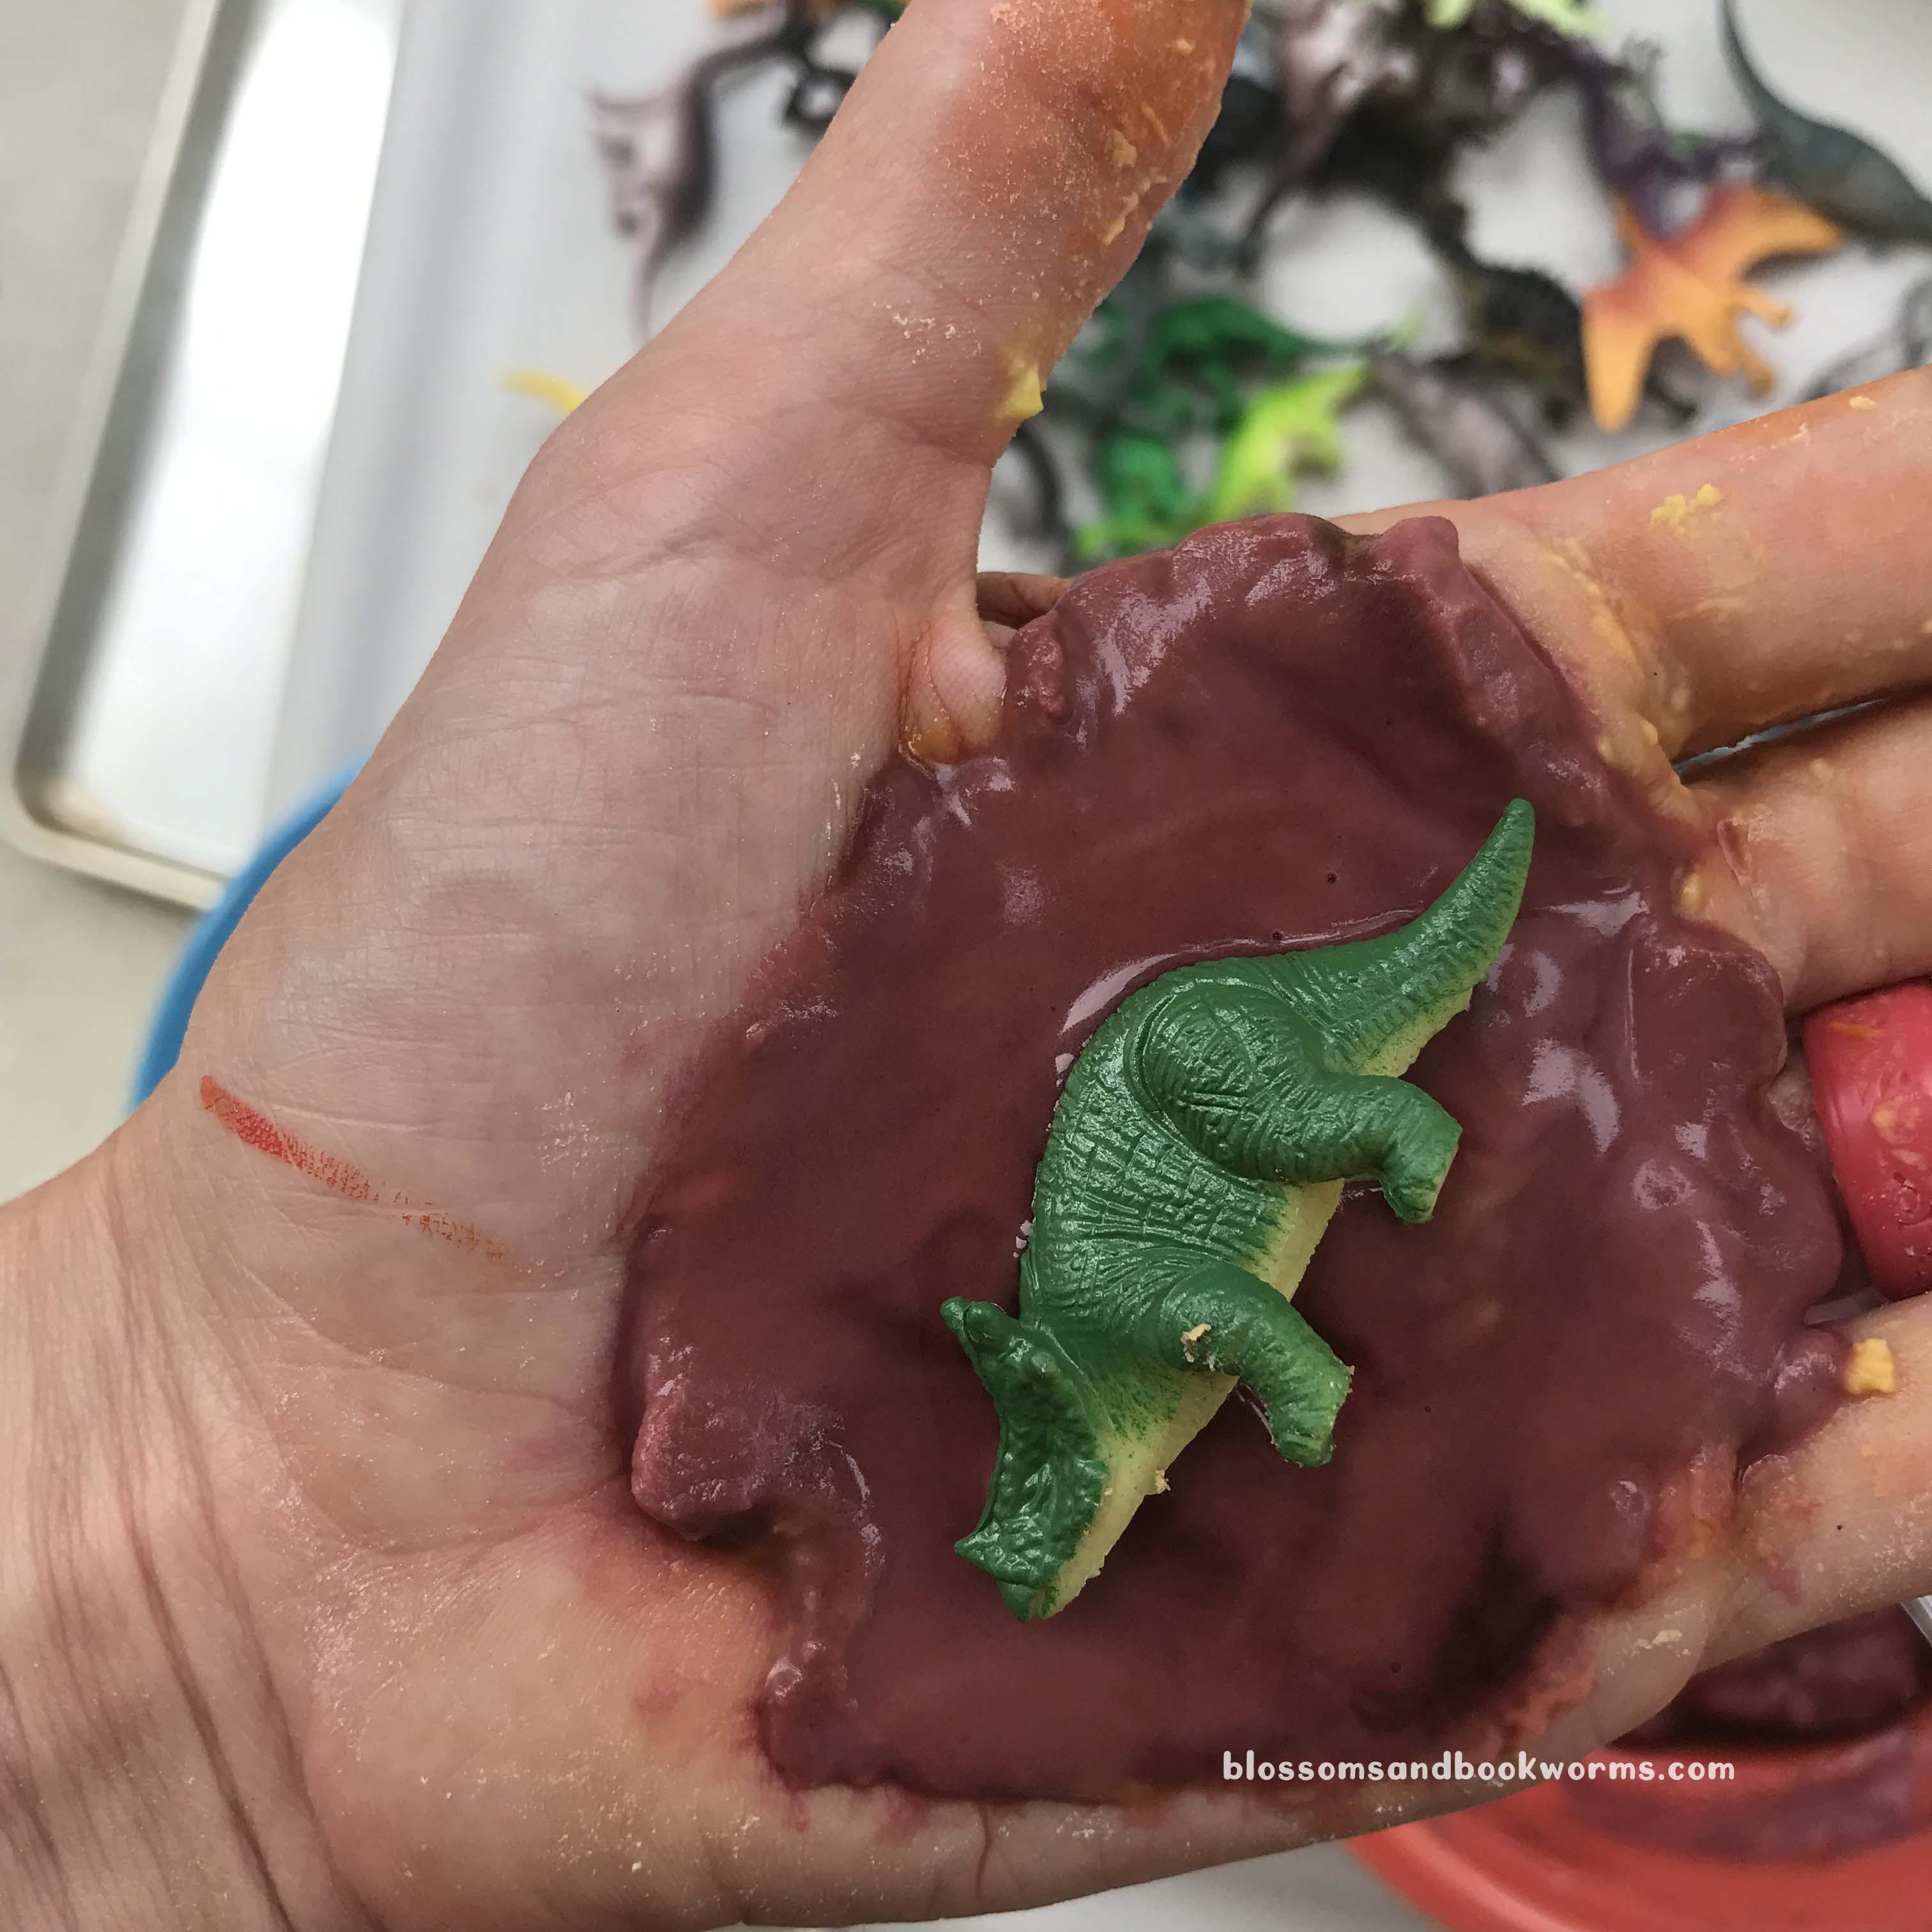
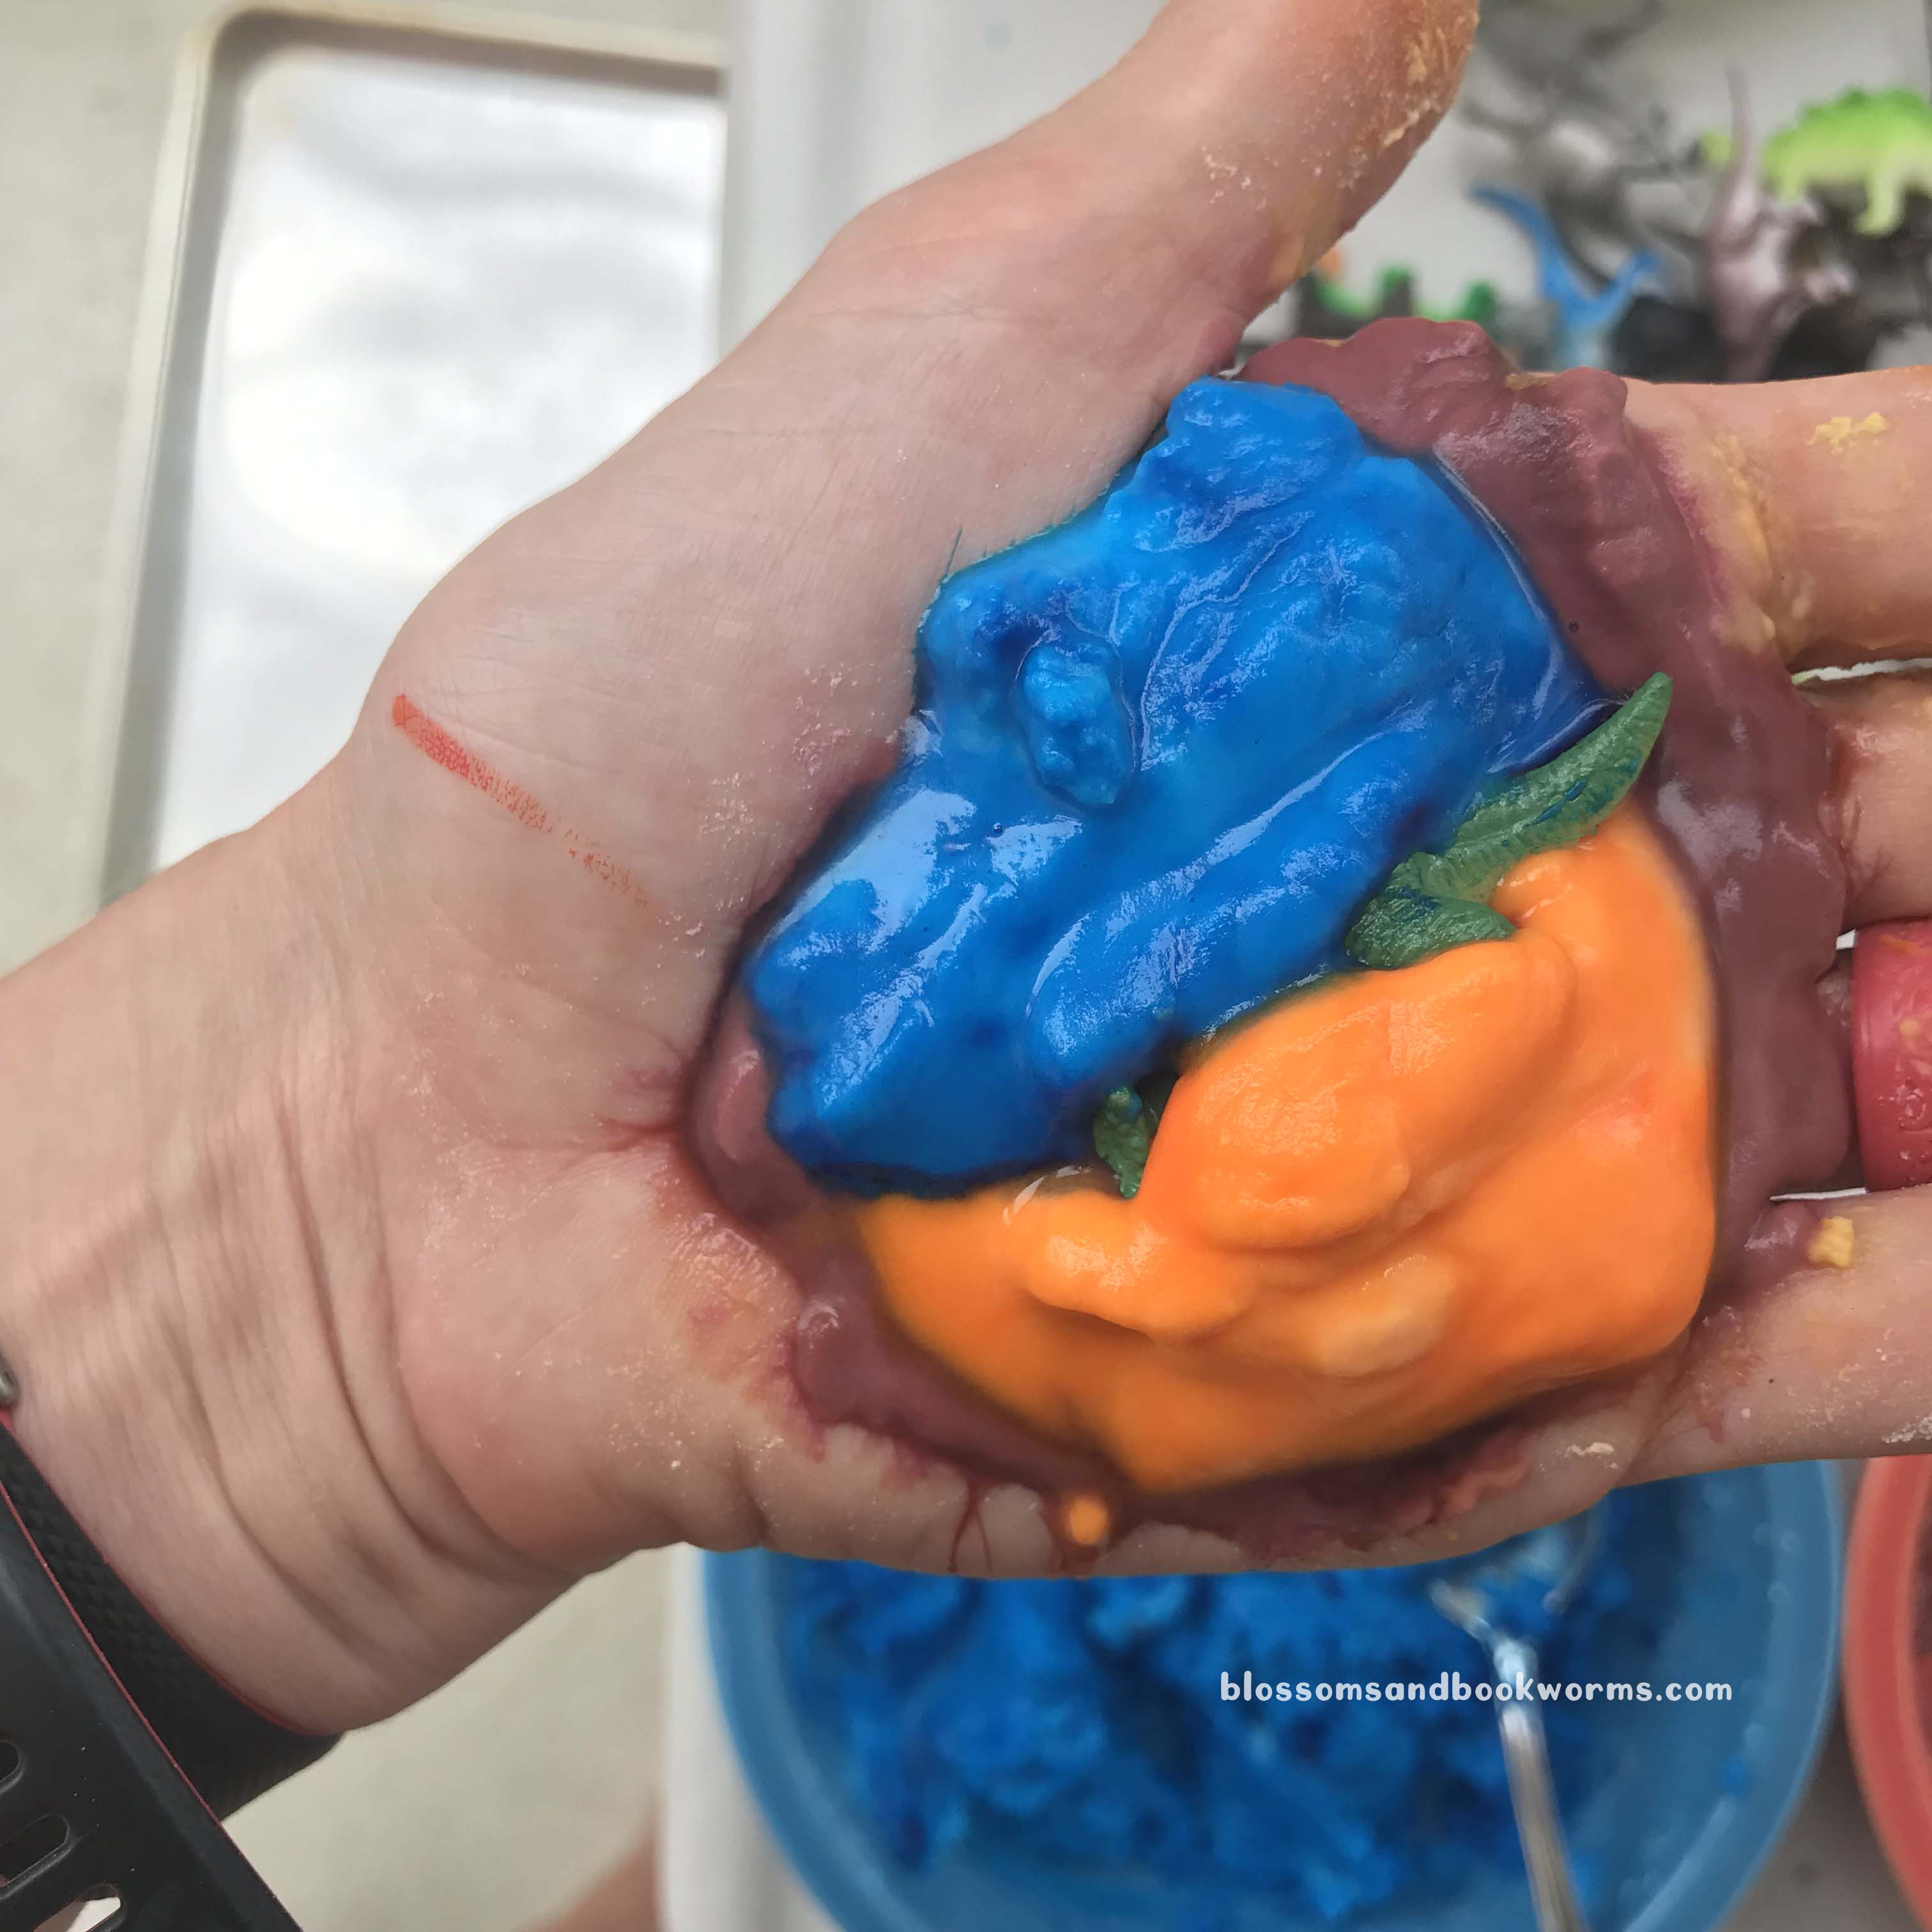
Now for the messy part – mold the paste into eggs! If you do not want your skin stained, you should definitely wear gloves for this part. Obviously, I didn’t, and my hands were a lovely shade of purplish-red for a couple days 🤣 So this is “do as I say and not as I did” situation. 🤣
I put a TBS of paste on the palm of my hand, added a dinosaur, then added a few more dollops of paste to cover the dino. Mold it together to cover all parts of the dinosaur.
Real Talk – my paste was a bit too liquid, so when I peeled the egg from my hand, I rolled it in extra loose baking soda on a sheet tray. As soon as my sticky, gooey egg touched the loose baking soda, it set up and was easy to handle.
I absolutely love all the colors!
Notice that my eggs are not 100% smooth or oblong or anything else “perfect”. But I am totally fine with that and so were my kiddos. The fun is in the experience, not in the perfection for photos. So give yourself a little grace if they don’t come out a perfect shape!
Move your eggs to a cool, dry place for several hours – or overnight – to finish drying out. It is worth the wait, because the reaction will be better when they are fully dry!
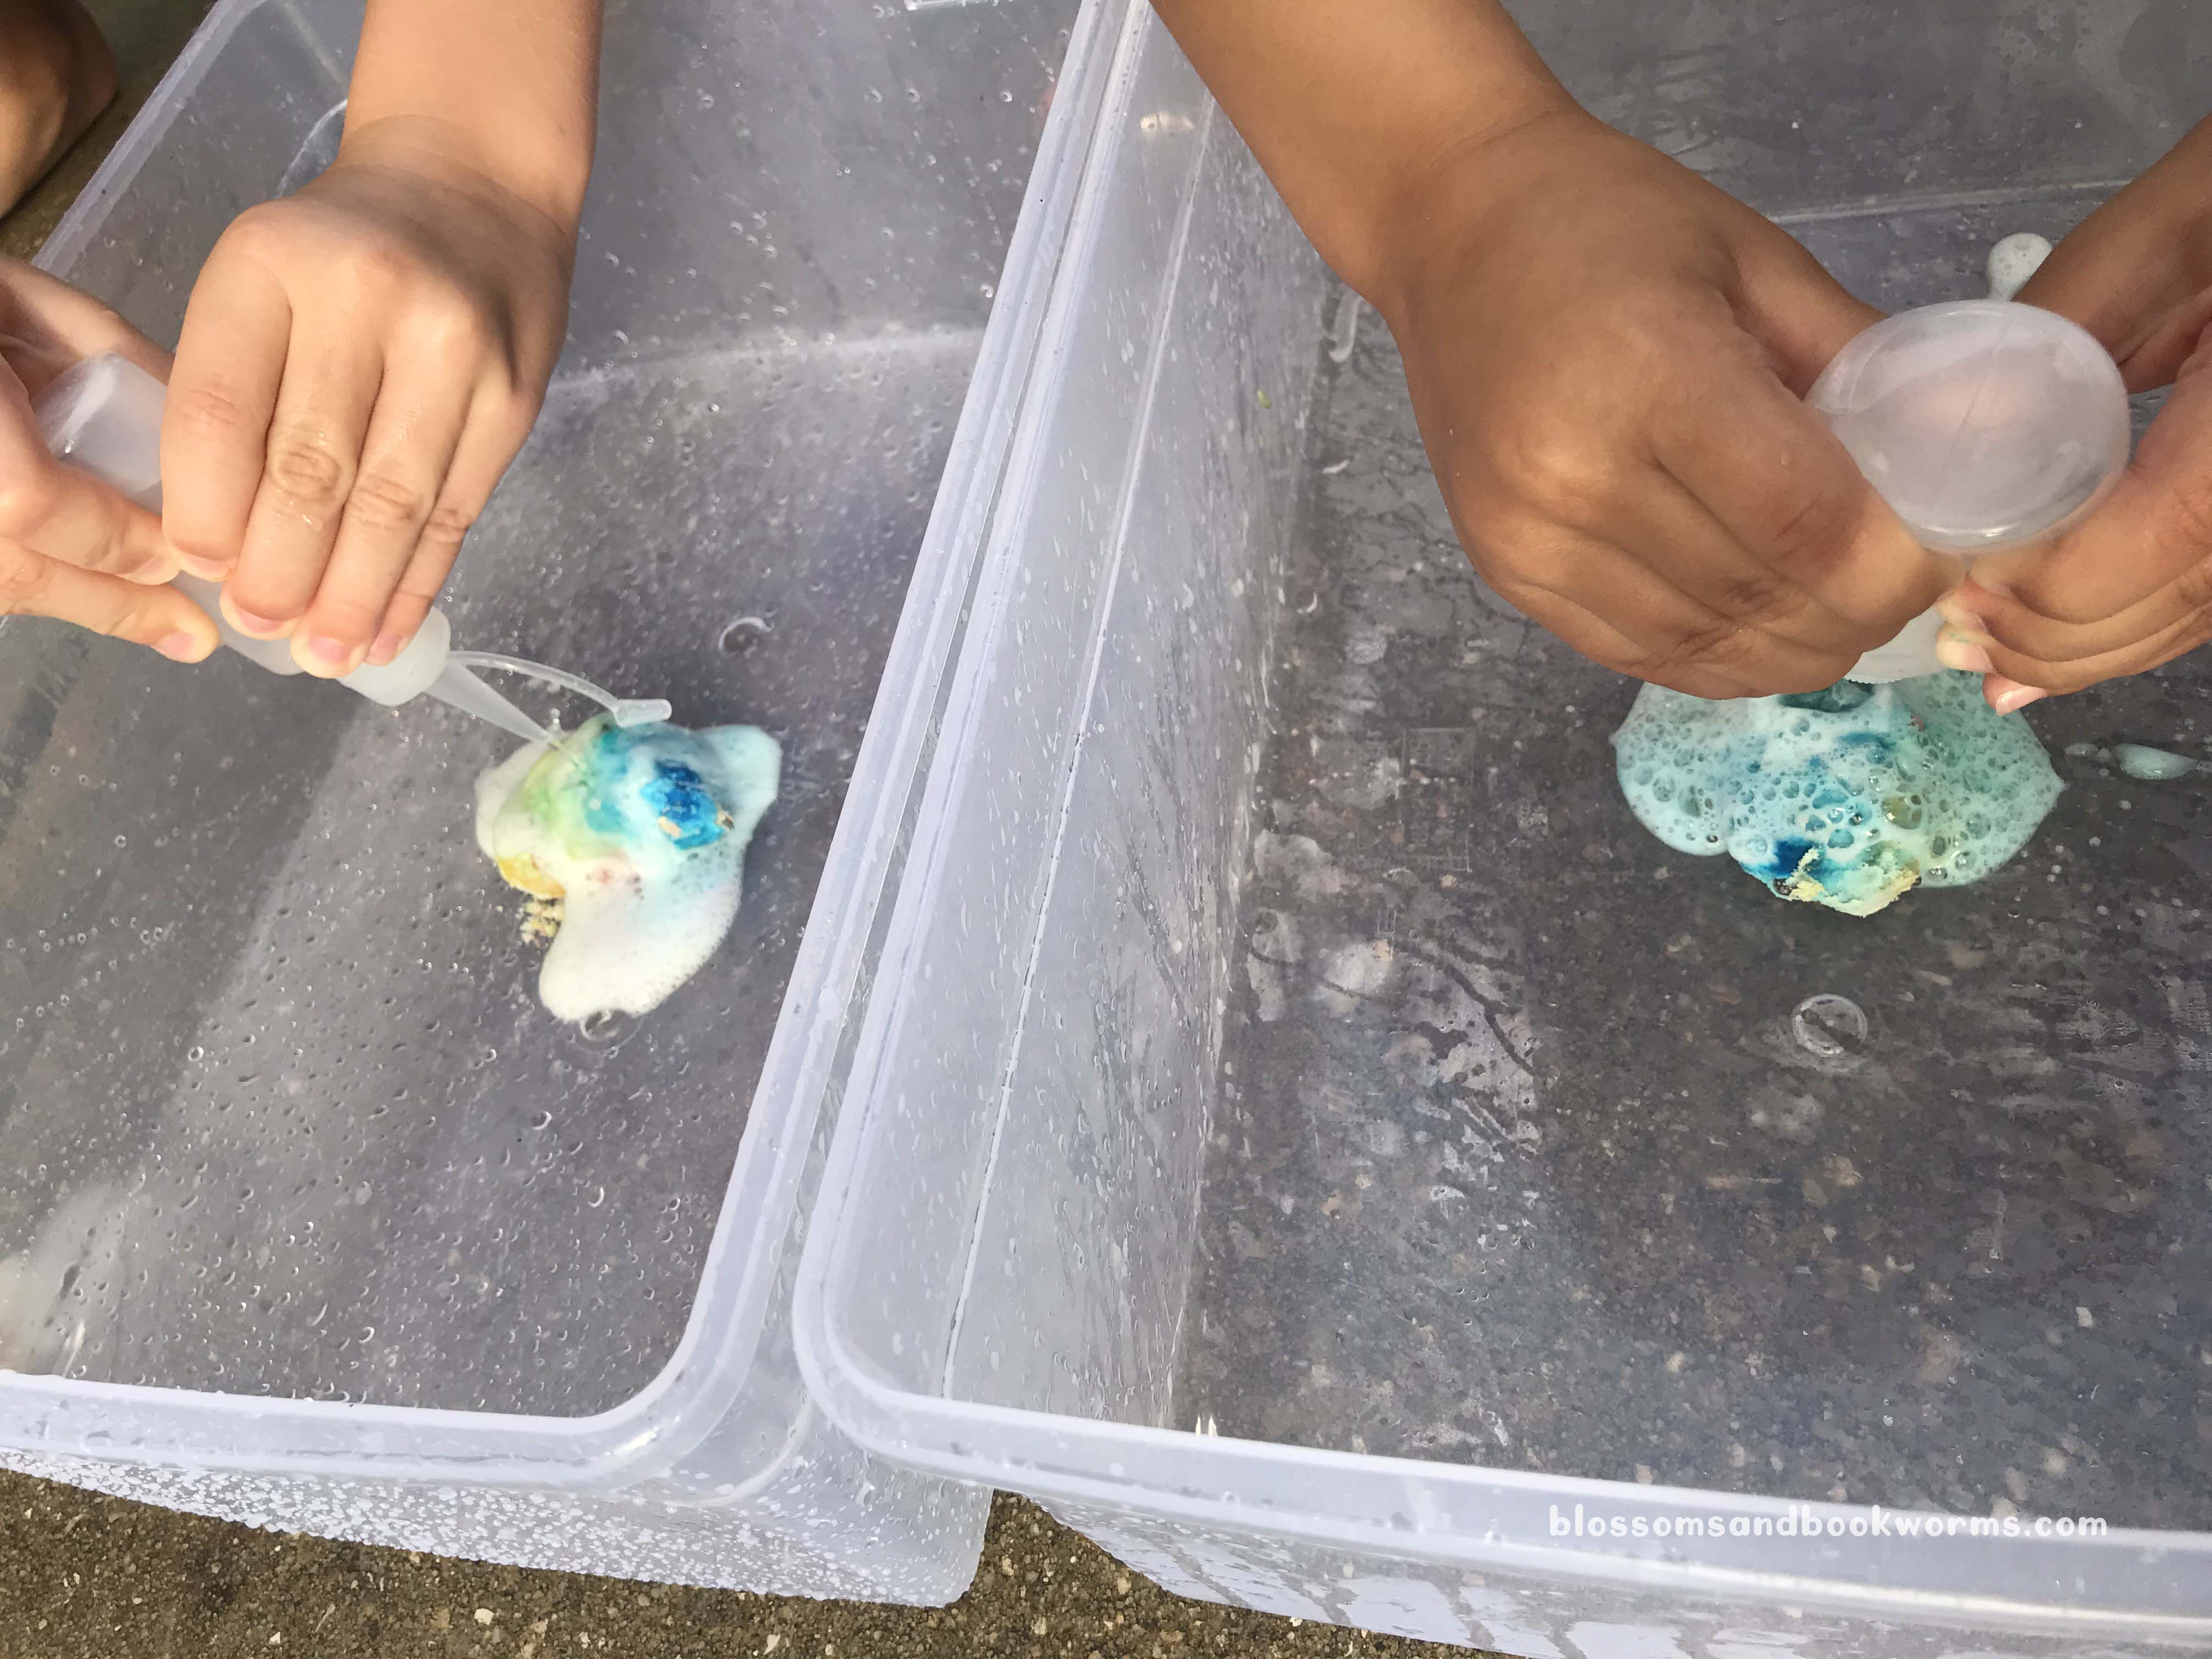
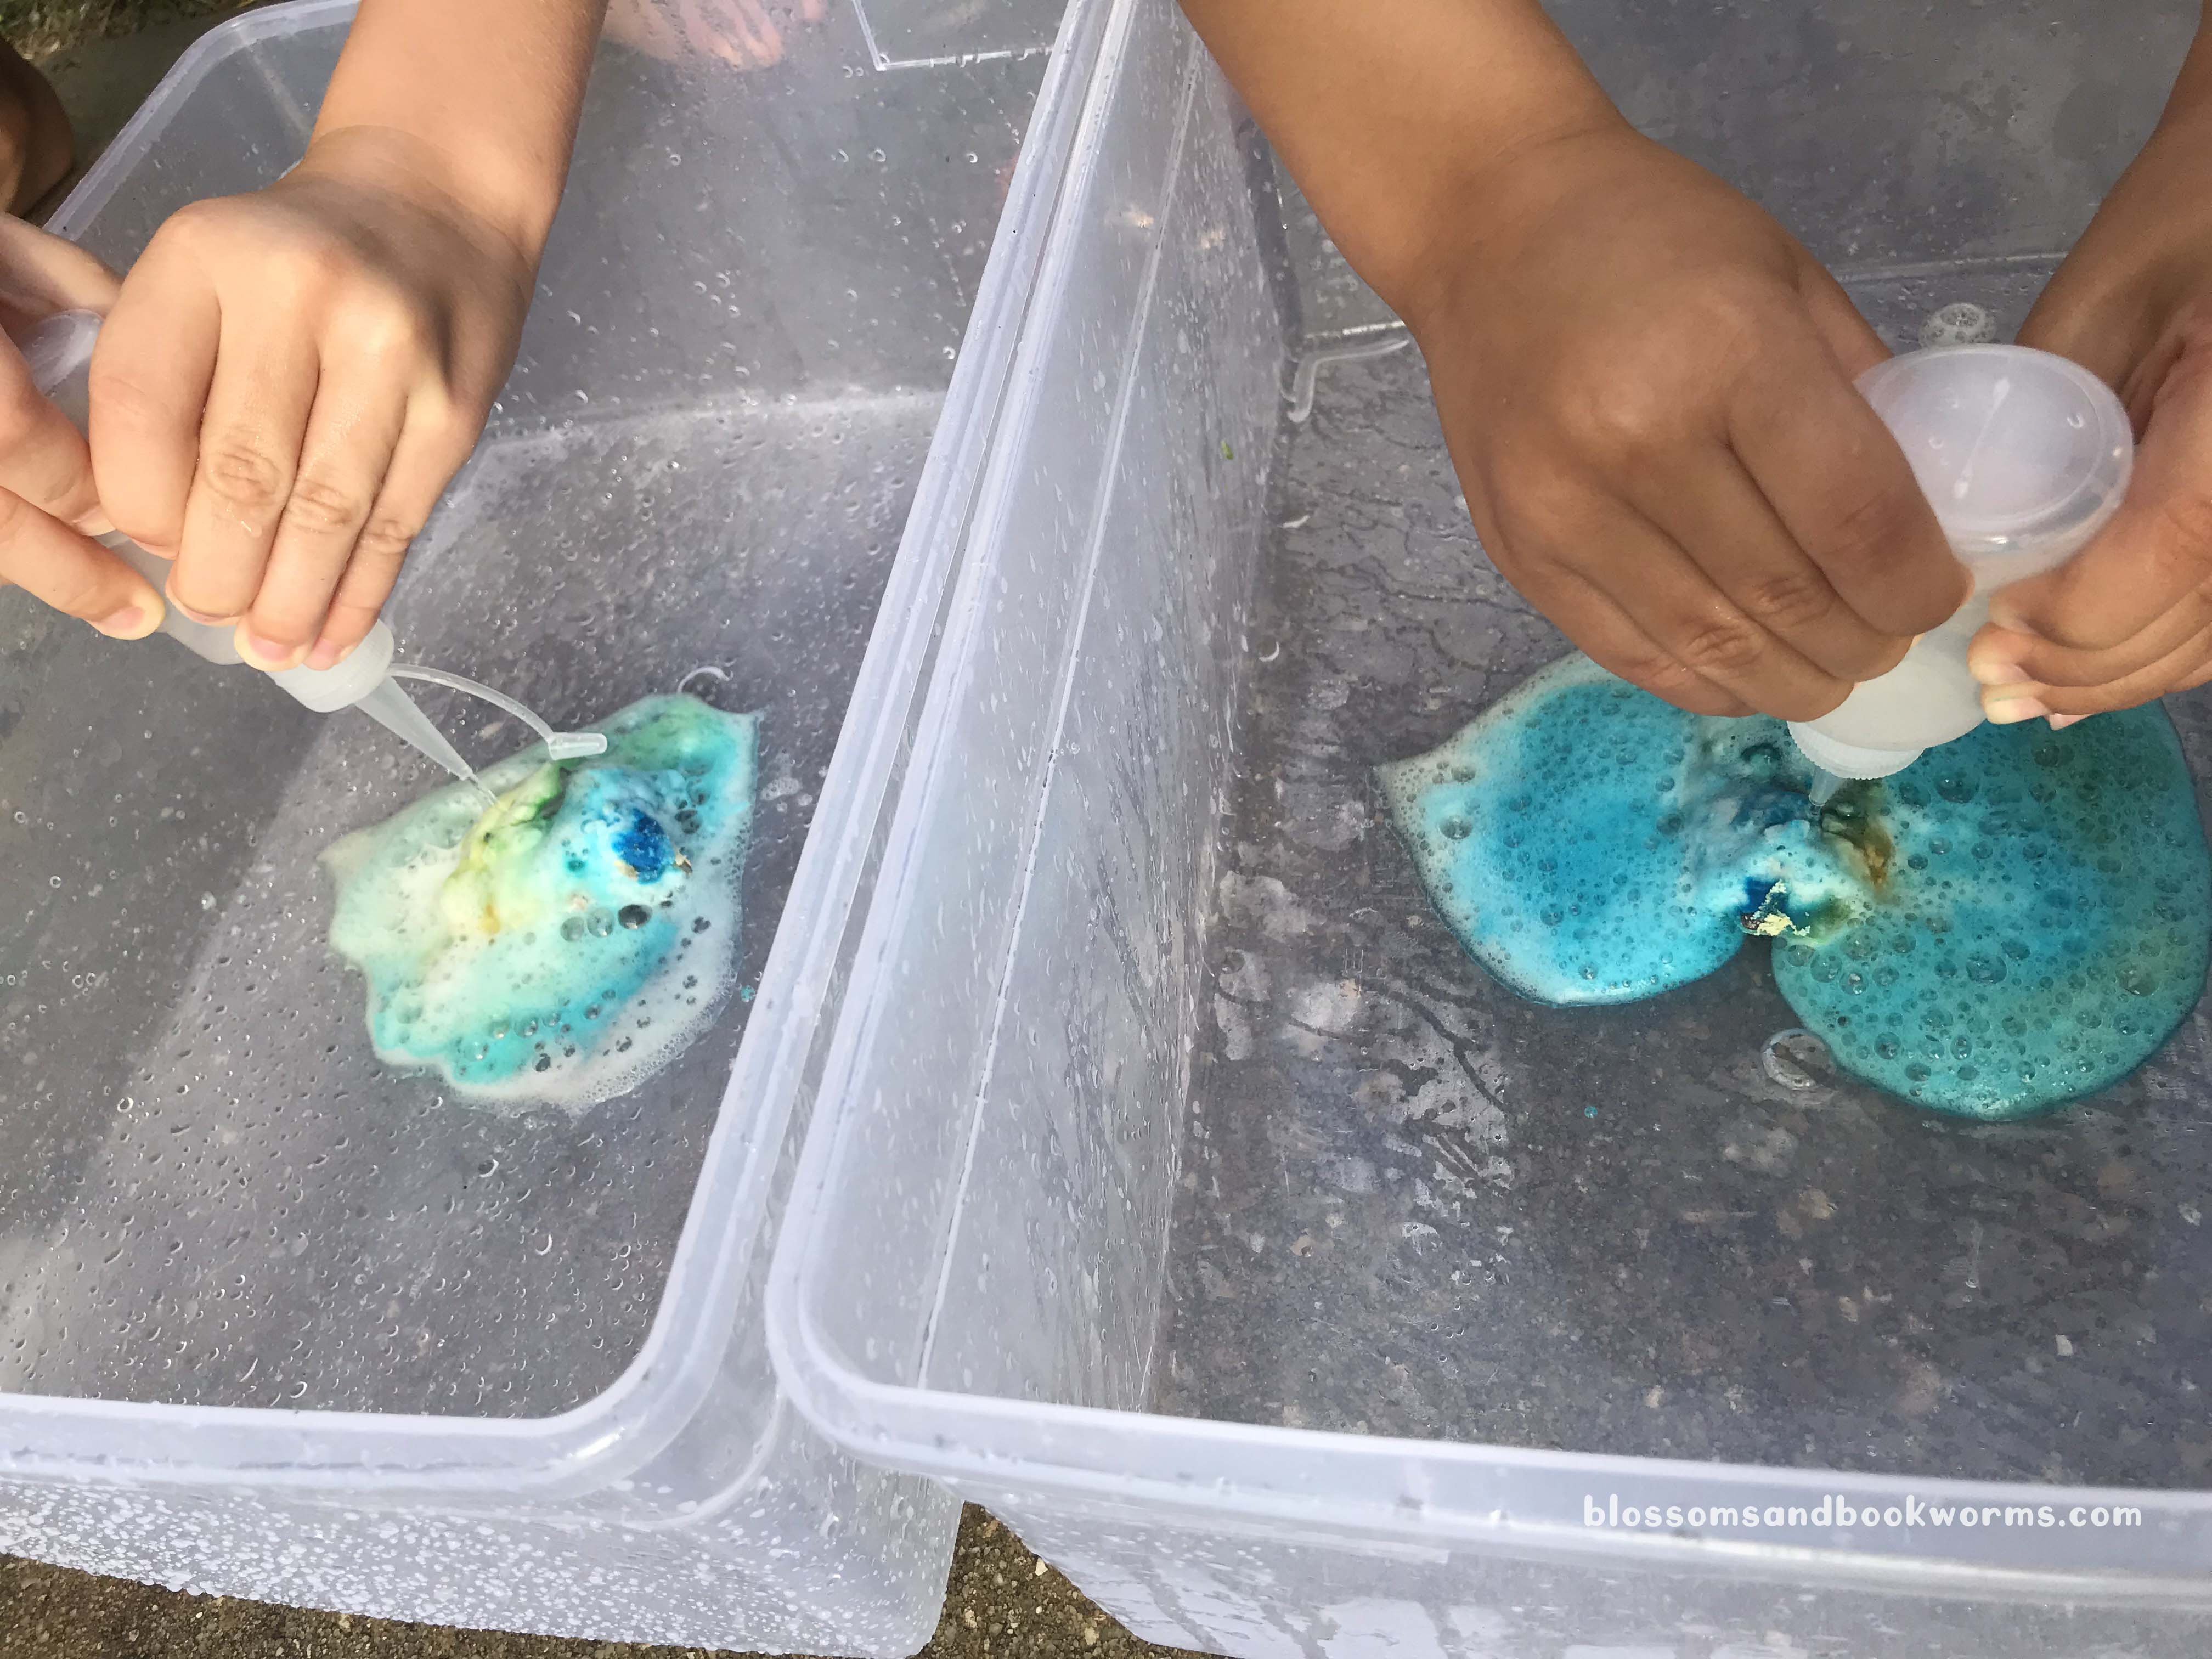
Now for the fun part! I added vinegar to squirt bottles and let my kiddos go to town. The reaction and “WOAH, its exploding” moment is totally worth it!
Since we used food coloring the reaction can make a mess. I recommend doing this part outside or in a bin – or both!
Check out that dinosaur exploding out of that egg!!
I know, I know, this looks too messy for you… but do not fear! I actually did this activity with 20 kiddos at story time – age range from 1-9 – and NONE of them ended up with stained hands or clothes.
BONUS – ALL of them LOVED the experiment!
You can totally make this work for your readers too!!
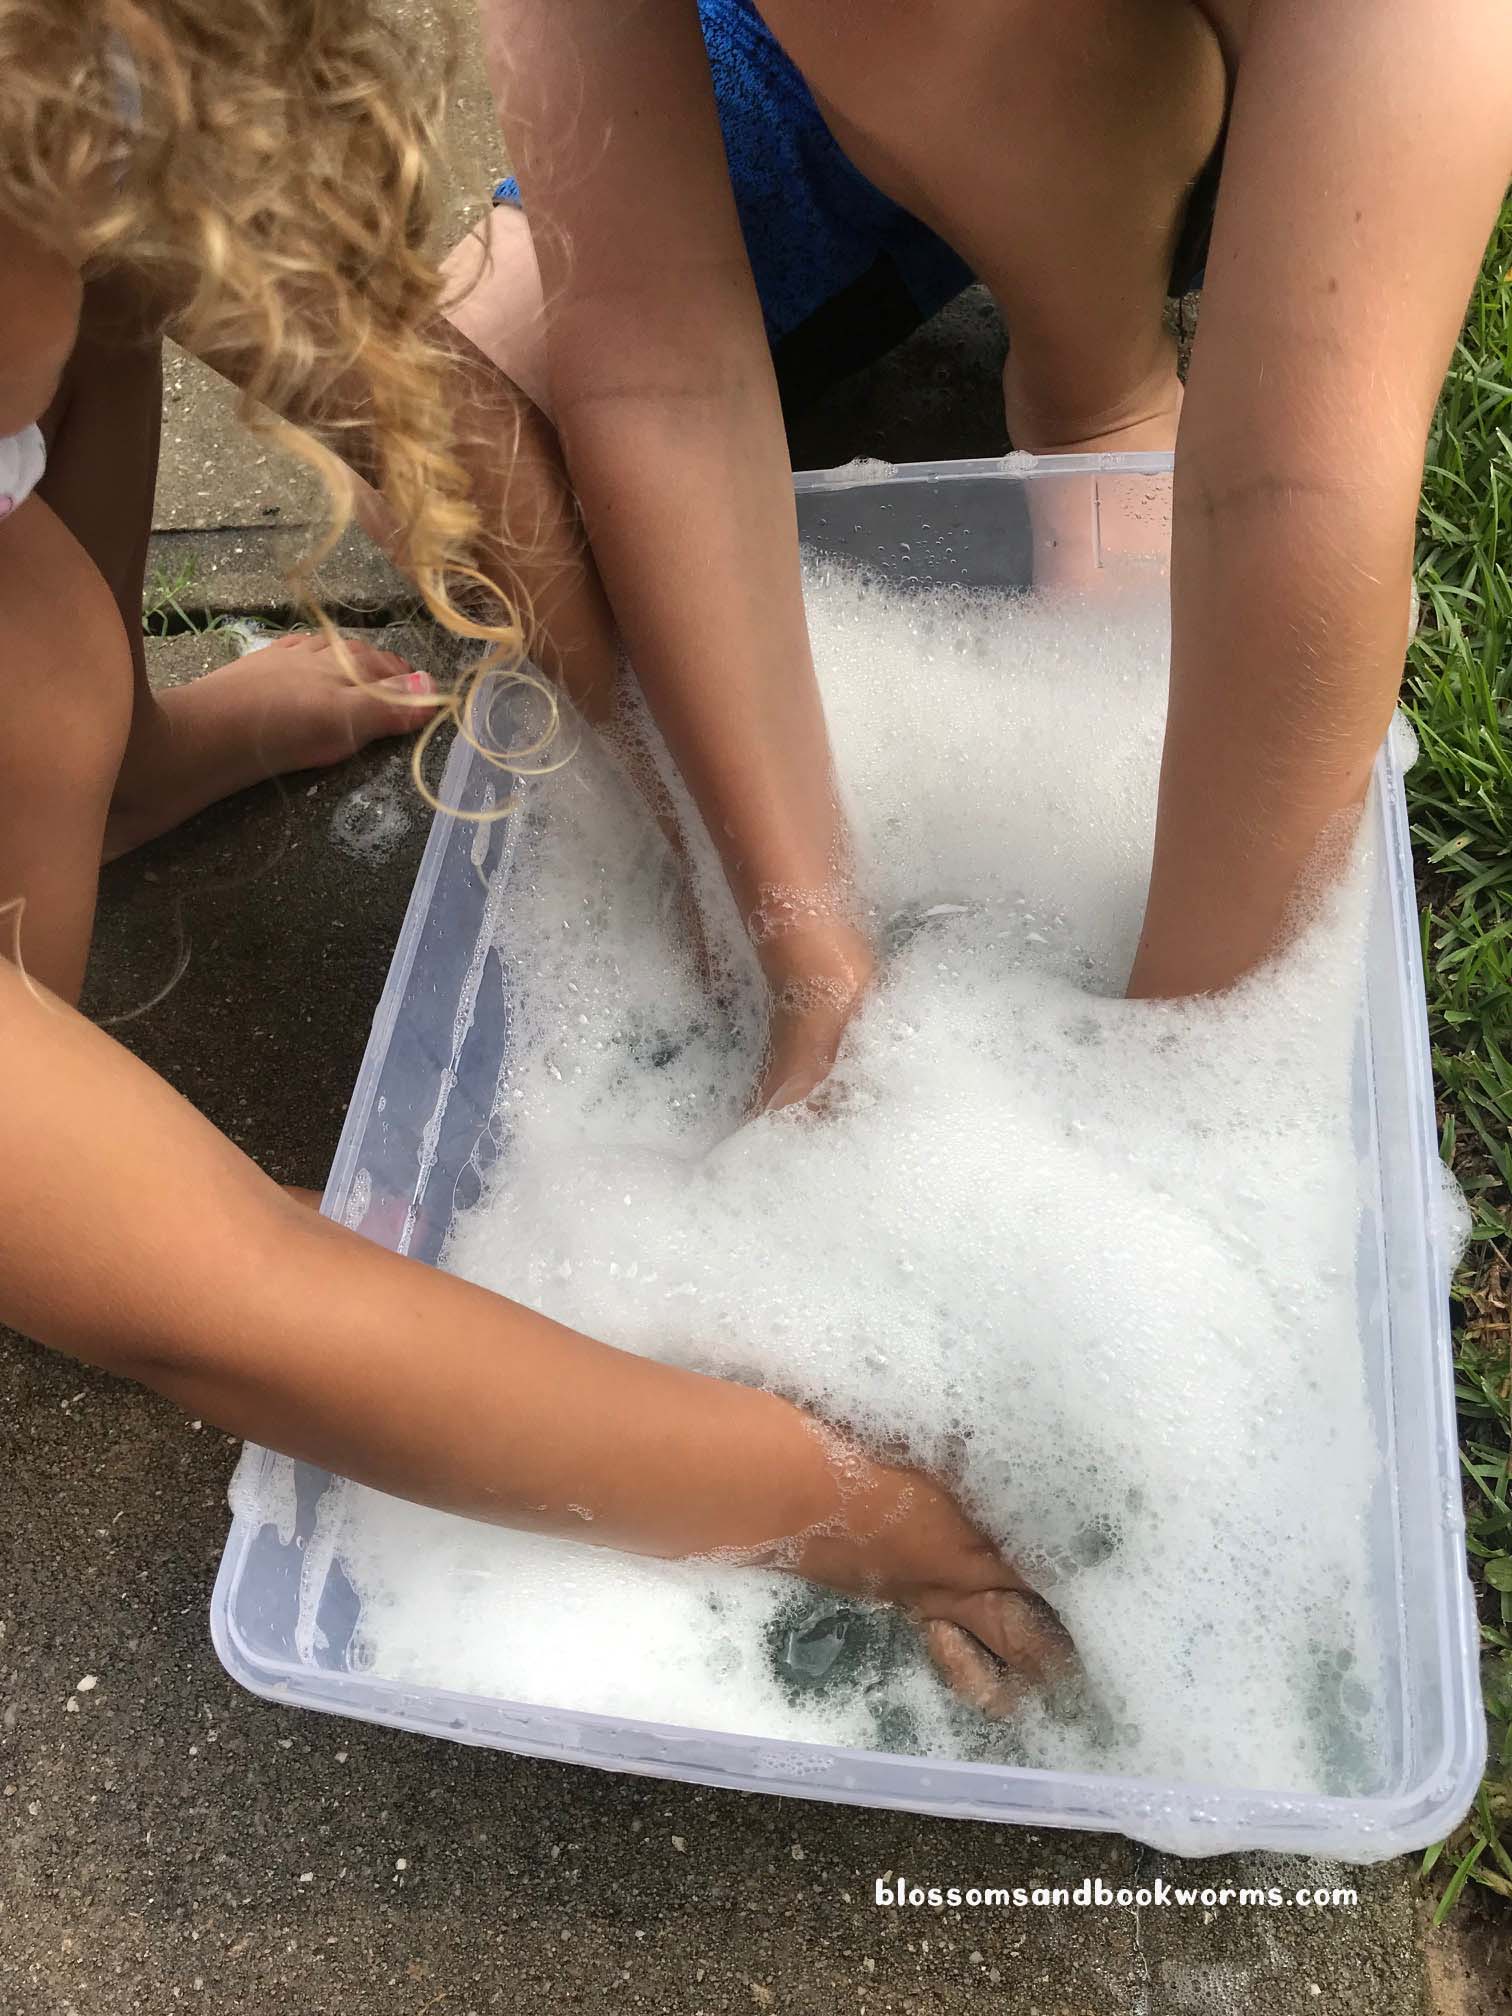
Don’t forget to have a “Dino Wash” bucket handy – plain water to rinse them off would be plenty, but bubbles amp up the fun factor! My kids loved washing the dinosaurs as much as hatching them!