I love that my youngest is working on matching, counting, and pen control all at the same time! And she loves that she is able to do it with a “special marker”! 😁
Matching games are wonderful for kiddos. They help pass the time when summer boredom sets in AND there are so many developmental benefits to these simple games.
Matching and Memory Games:
Train visual memory
Improve concentration
Increase a child’s attention to detail
Exercise and increase short term memory
Improve a child’s ability to find similarities and differences between objects
Help little ones classify objects and group by similar traits
Improve vocabulary
Since it is Under the Sea Week here at our house, I created this fun themed matching game. We are getting to talk about all the creatures we have been learning about throughout the week while we play. It is fascinating to hear how much these kiddos have retained from the books we have been reading!
BONUS – my kids thought it was so fun that I am including a FREE printable in this post so you can have fun with it at your home too! You can download it HERE!
I recommend printing these cards on heavy card stock or other thick paper so no cheater can peak through the paper to see what is on the other side! Not that that has ever happened in our house… 🤪 Did I mention that this is the second set of cards I printed out? 🤣
After you print the sheets, I recommend laminating and then cutting out the cards. Yes, I know there is a great debate about laminate first and then cut OR cut first and the laminate… It is totally up to you! For the sake of time, we laminated first and then cut for this game. 😁
Obviously, laminating is optional, but it will help the cards hold up to repeated use.
With small kiddos you can have them match with all the cards face up. Then, as they become more confident, try turning just half of the sets face down for them to practice matching. With older kiddos, use all the cards face down from the start. There are endless ways to play – and learn – through this matching game!
Ready to play? Download your FREE Printable, HERE! I cannot wait to hear what memories you made while playing!
We have done a lot of “stained glass” projects in the last couple years, but the finished product of this one might be my absolute favorite (so far 😉). The colors are vibrant, translucent, and it seems to glow as the sunlight streams through! I am already thinking of ways to change the color palette and incorporate different scenes in the future…
To be fair this activity takes a bit more prep than I usually go for. If you have older kiddos who are good with scissors they can totally help with the prep. My younger kiddos waited until I had everything prepped and then jumped in to create the “stained glass” effect.
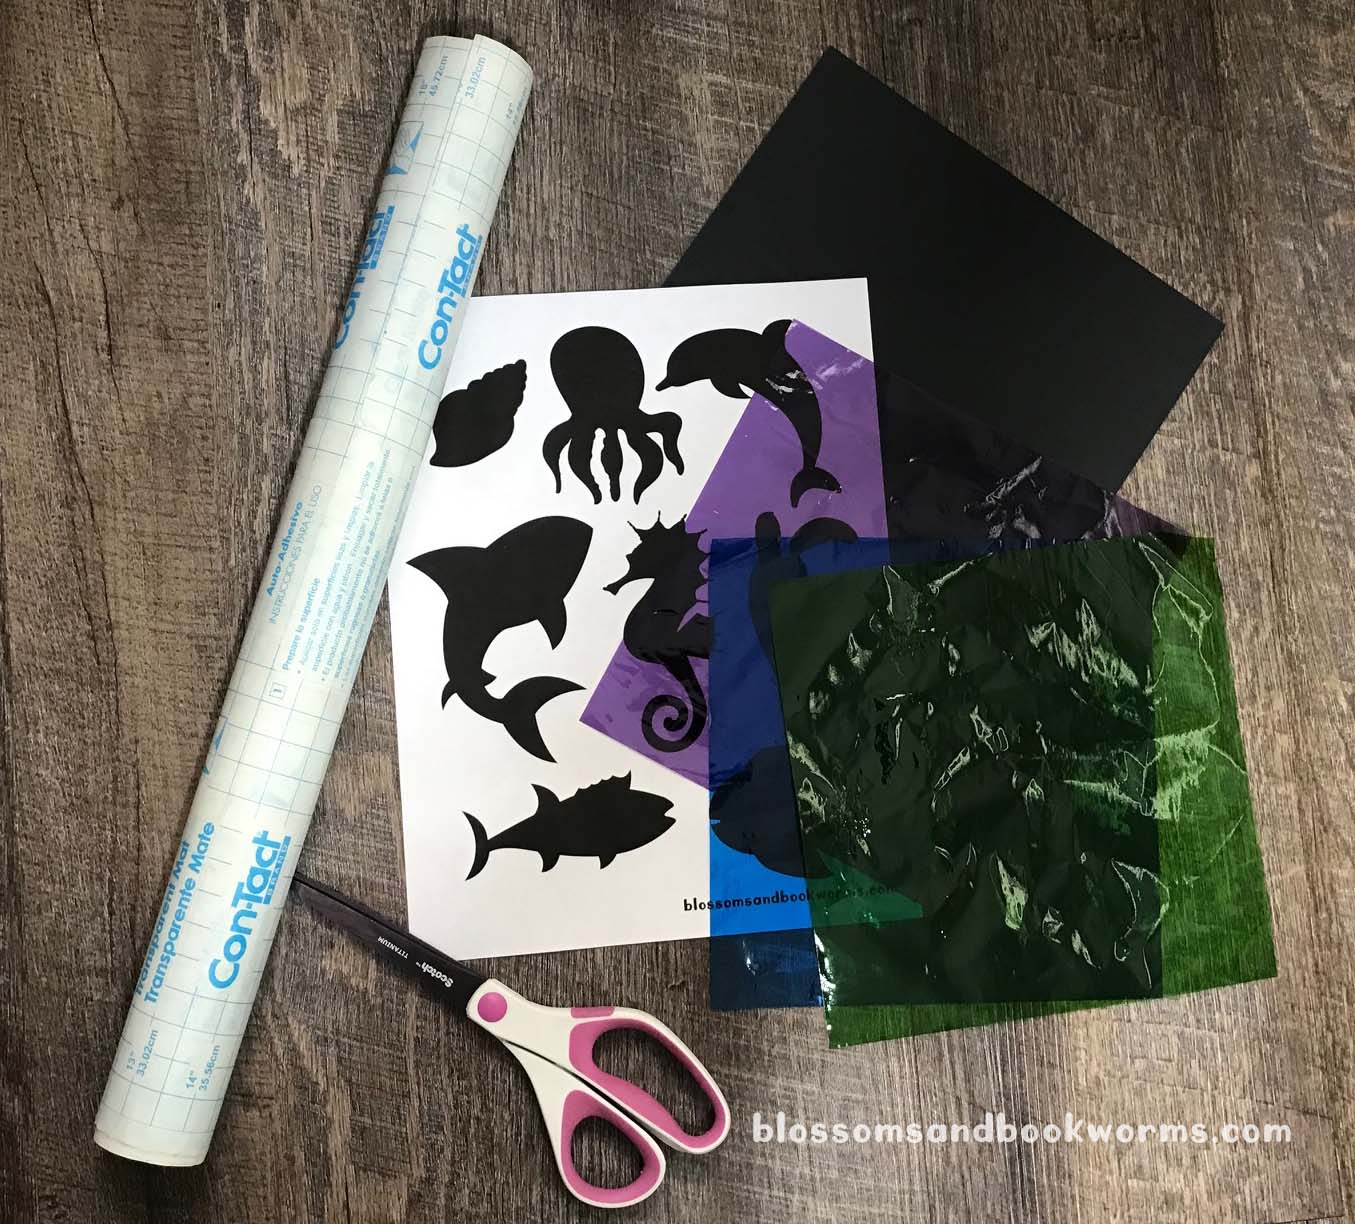
Materials:
Black Cardstock
Colored Cellophane – I love the look the cellophane gave, but you can totally do this with tissue paper too!
Glue Stick or Scotch Tape to affix the sea creatures at the end.
Start by grabbing the free printable with the ocean creatures. Print the sheet and cut out the creatures you want to use.
Next, cut cellophane into small squares. We used mostly 1 inch squares but random shapes and sizes makes it even more interesting!
Precision is not required in this step. However, if small children are going to arrange the stained glass color part then make sure your pieces of cellophane are big enough for them to grab.
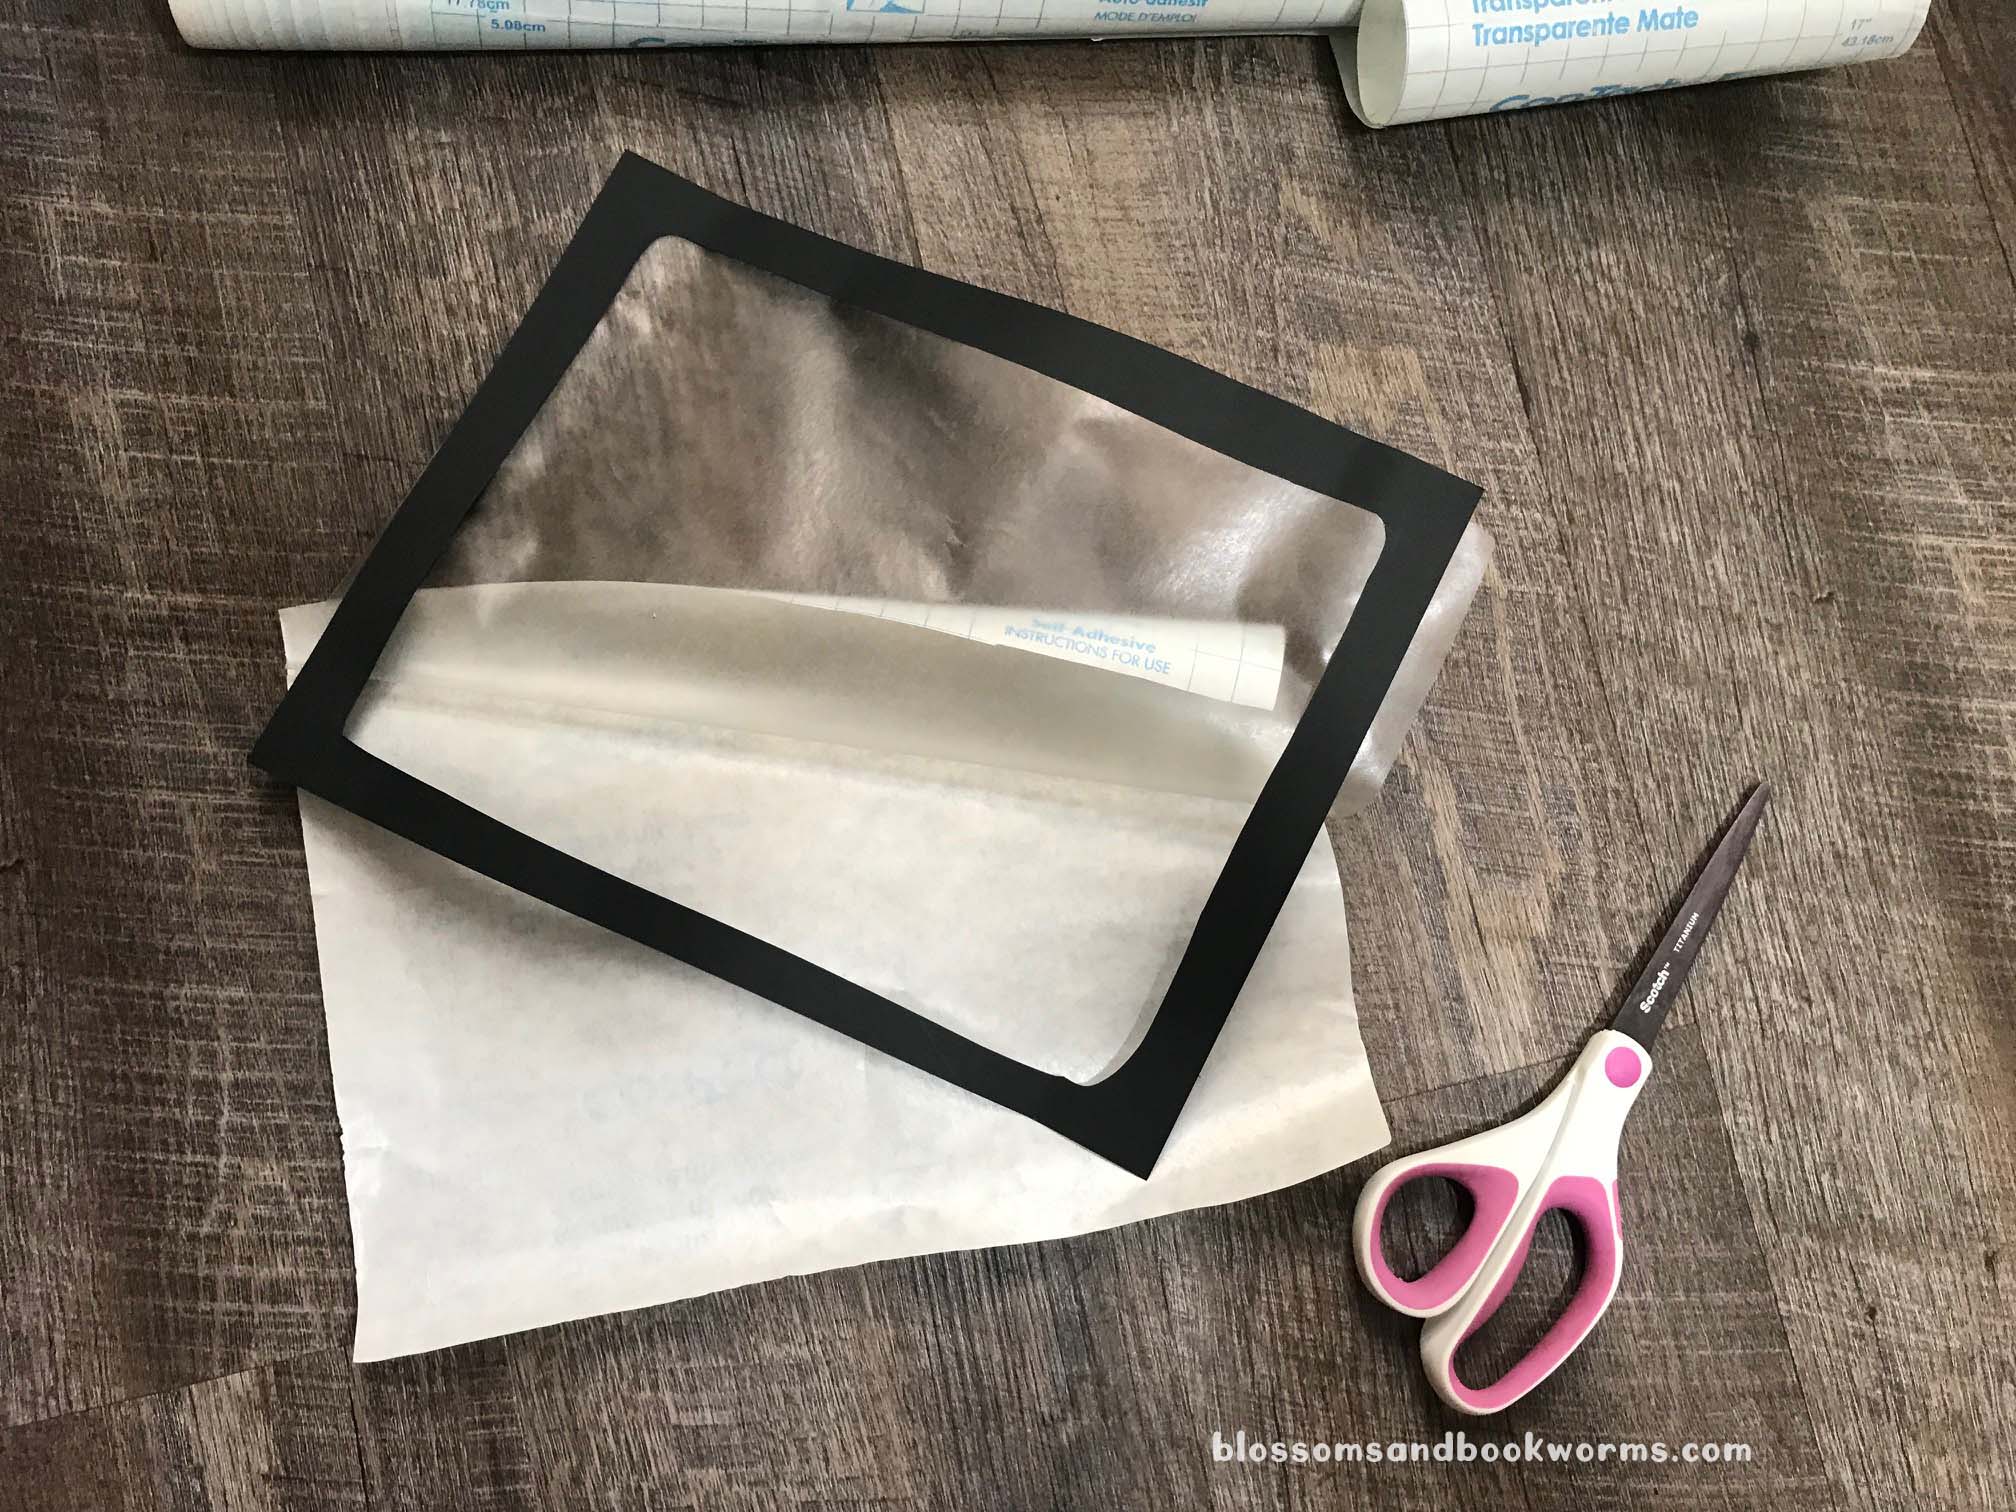
Next prep step – cut a frame out of the black card stock. The card stock is more durable than regular paper and it will give your final piece some stability.
Then cut a square of contact paper to the same size as the frame. Pull off the backing and adhere the contact paper to the back of the frame. Don’t worry if it wasn’t a perfect match. You can trim off any excess!
Lay the frame with the sticky part of the contact paper up!
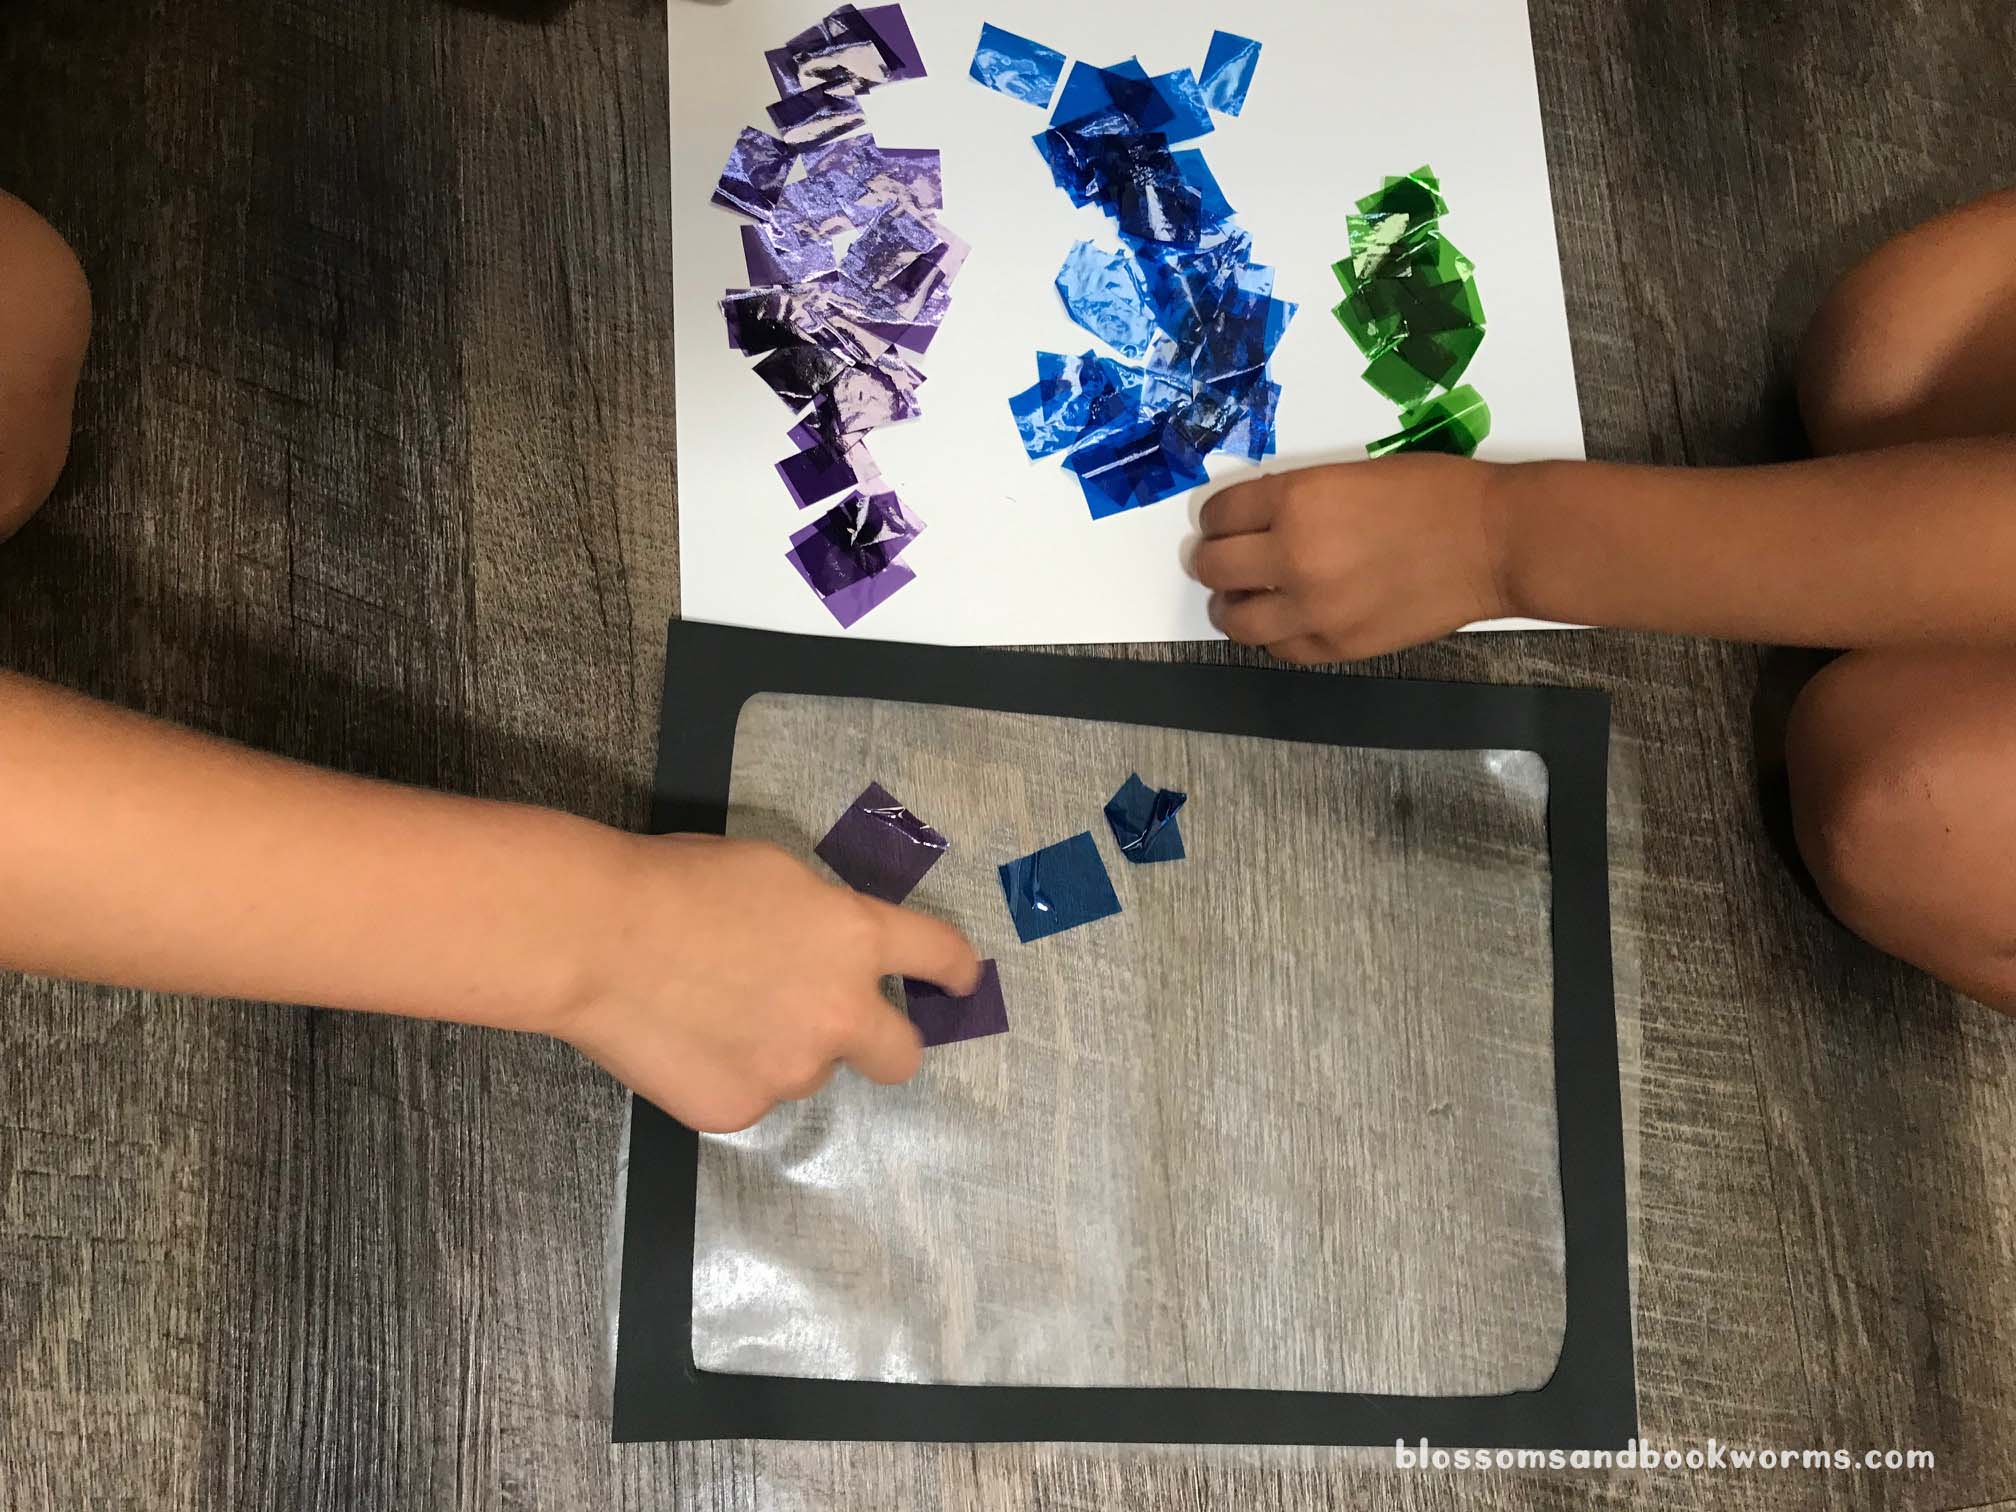
Now let those little kiddos jump in to help!
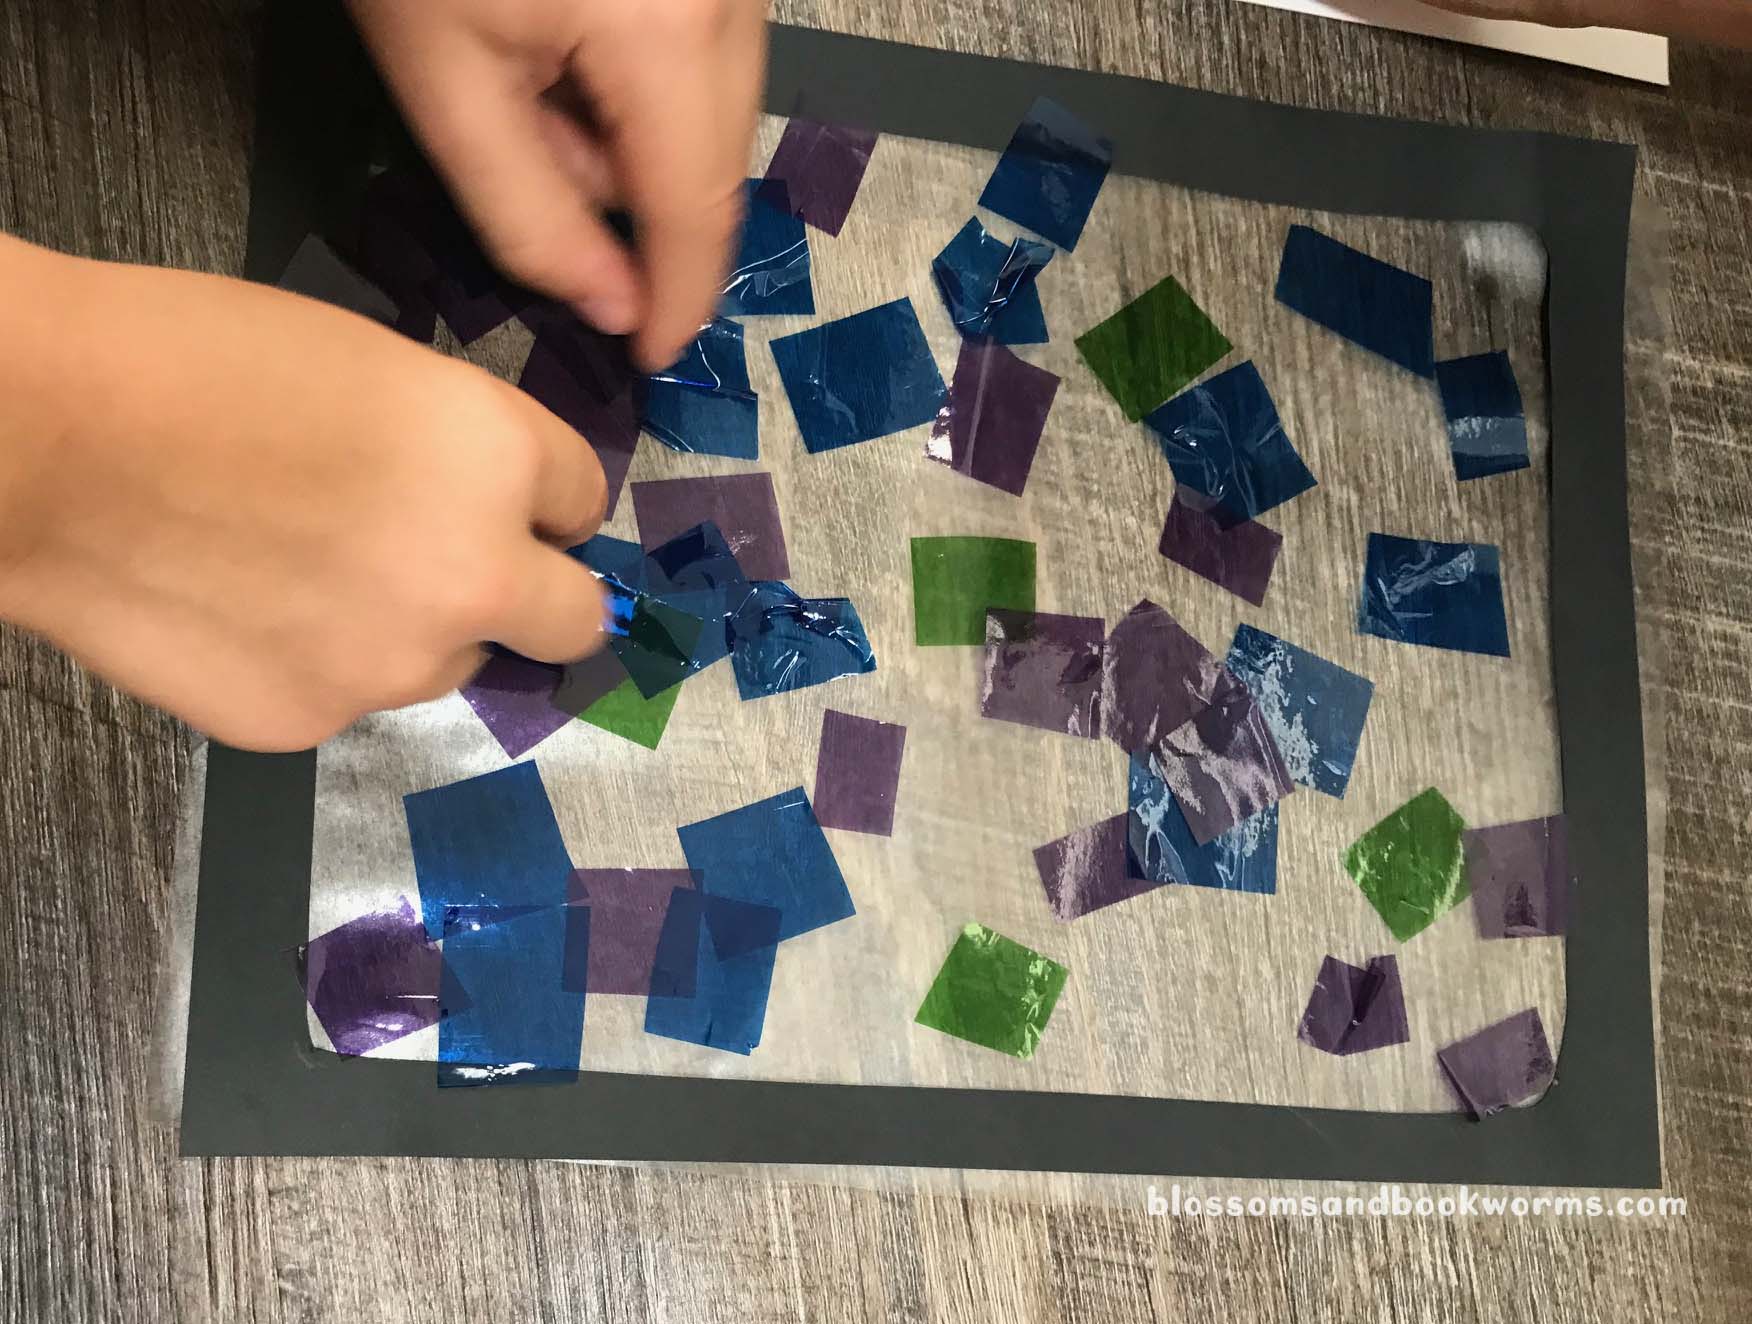
I let them arrange the cellophane as they chose. The goal is to cover all the sticky space inside the frame. There will be pieces that overlap and touch – that is totally okay! In fact, it is desired! This will give your final design depth of color and variation, making it a truly unique masterpiece.
Now grab a cup of coffee because they are going to be sticking for quite a while… 😂
You could absolutely have each kiddo make their own stained glass panel but my kids would have given up before it was finished. Working together on one beautiful stained glass piece was quite enough for us! 😁
Once all the sticky contact paper is covered – you may need to go back and make sure they got all the little bits – you will adhere your under the sea creatures. You can do this step with a glue stick or with Scotch tape. I found rolling tape and letting my little ones stick the pieces down was the best approach for us.
We didn’t put quite all the creatures on our final design, but we did end up hanging the rest on the window around the piece.
I love how vibrant the colors are!
As the sun and light changed throughout the day, the stained glass seemed to glow! I absolutely love the final effect and I cannot wait to see how yours turns out!
It is fitting that we are “under the sea” in our theme this week since we have been getting rain for the first time in well over a month. We desperately needed the rain but the storms have been keeping us out of the pool and inside for much of the day. Thankfully, I have some tricks up my sleeve for just such an occasion.
One of the greatest ways to pass the time inside, in my humble opinion 😉, is with play doh! I love the fine motor skills that are developed and the creativity that is applied with a kiddo digs into a container of play doh…. and the SMELL! Seriously, what is it about smells that have the power to bring us right back to our own childhood??
There is so much you can do with play doh – from free play to letters, shapes, colors, building, and more! The possibilities truly are endless. One of my kiddos’ favorite things to do is to make fossils or imprints with their toys in the dough….. hmmmm now that I think about it dinosaur fossils just might need to make an appearance during dinosaur week…. 😁
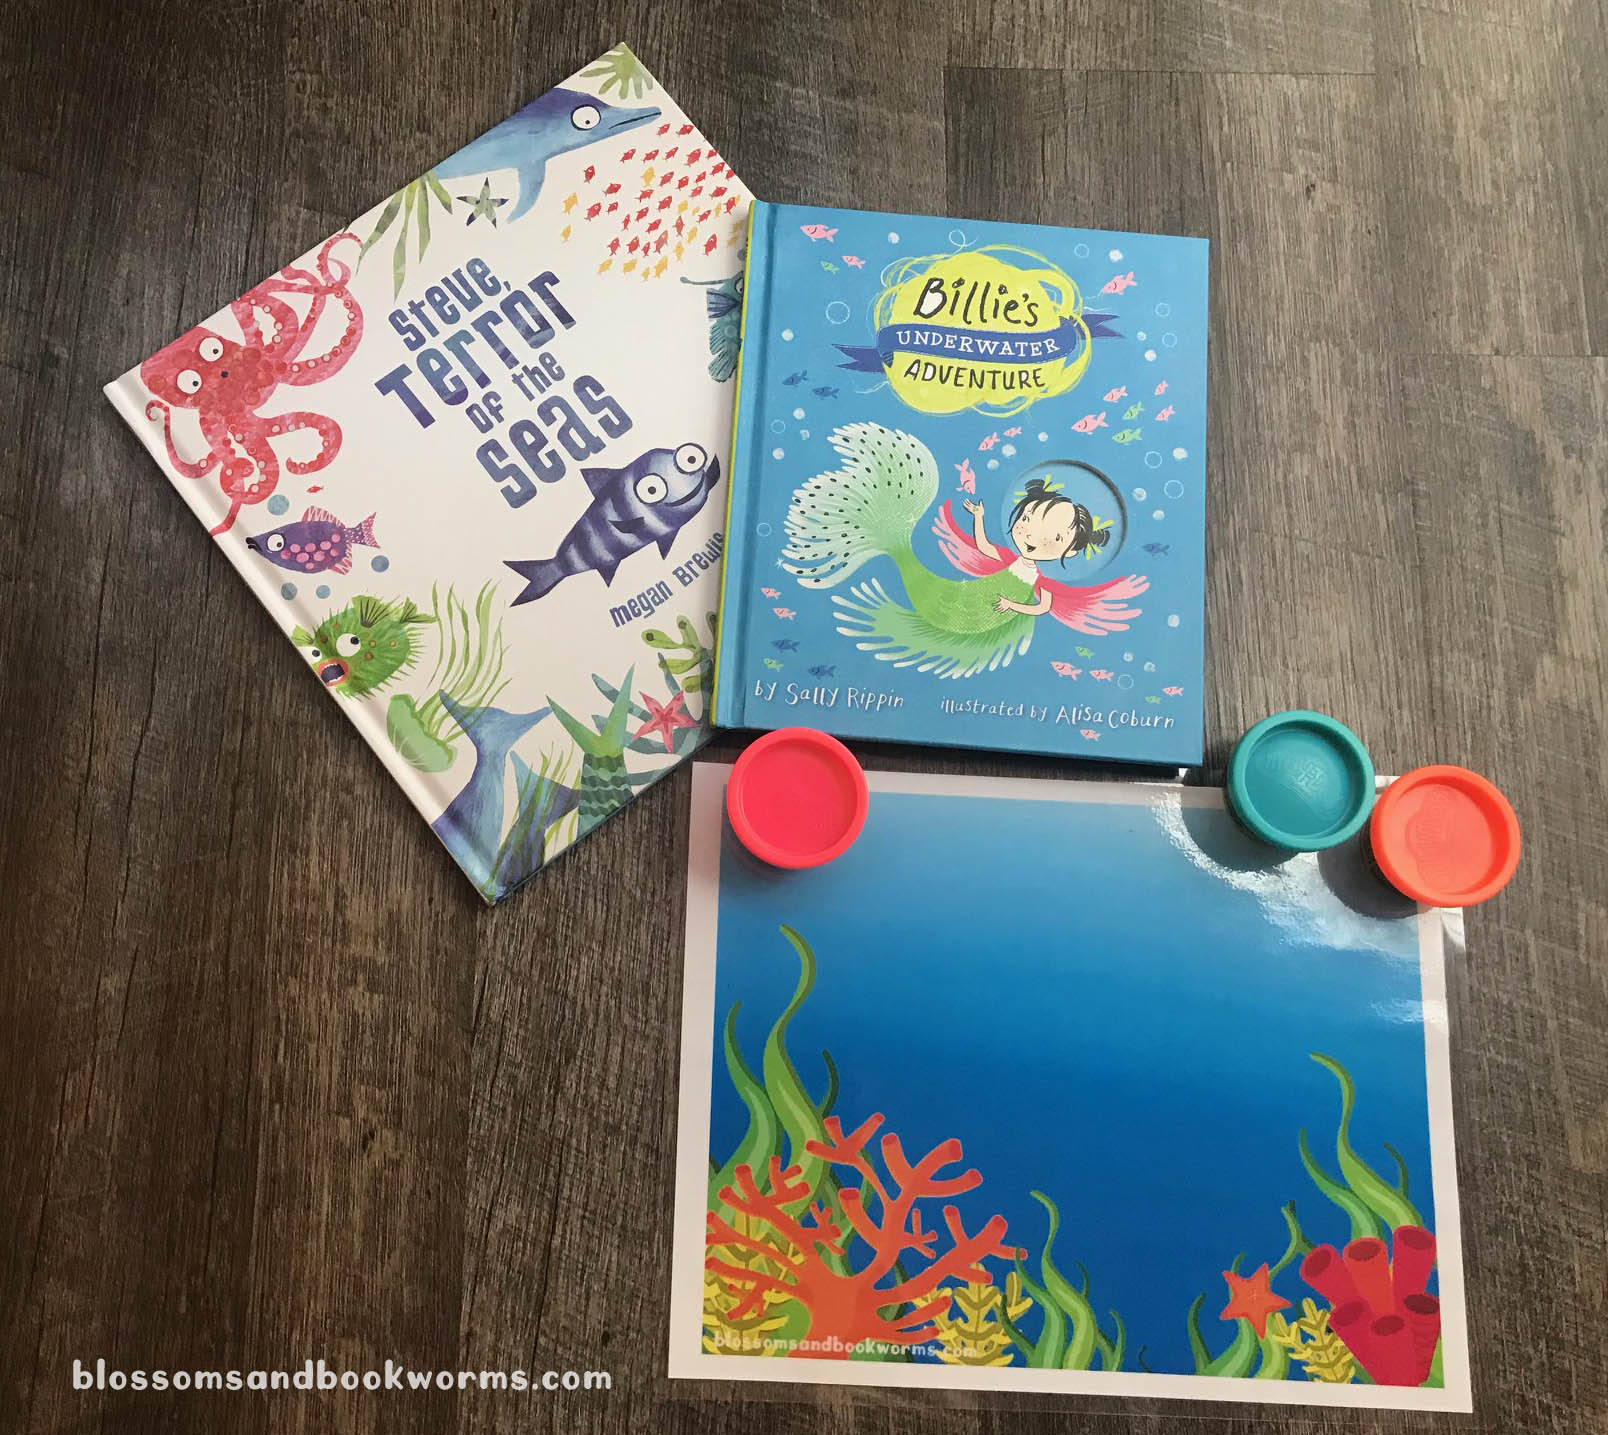
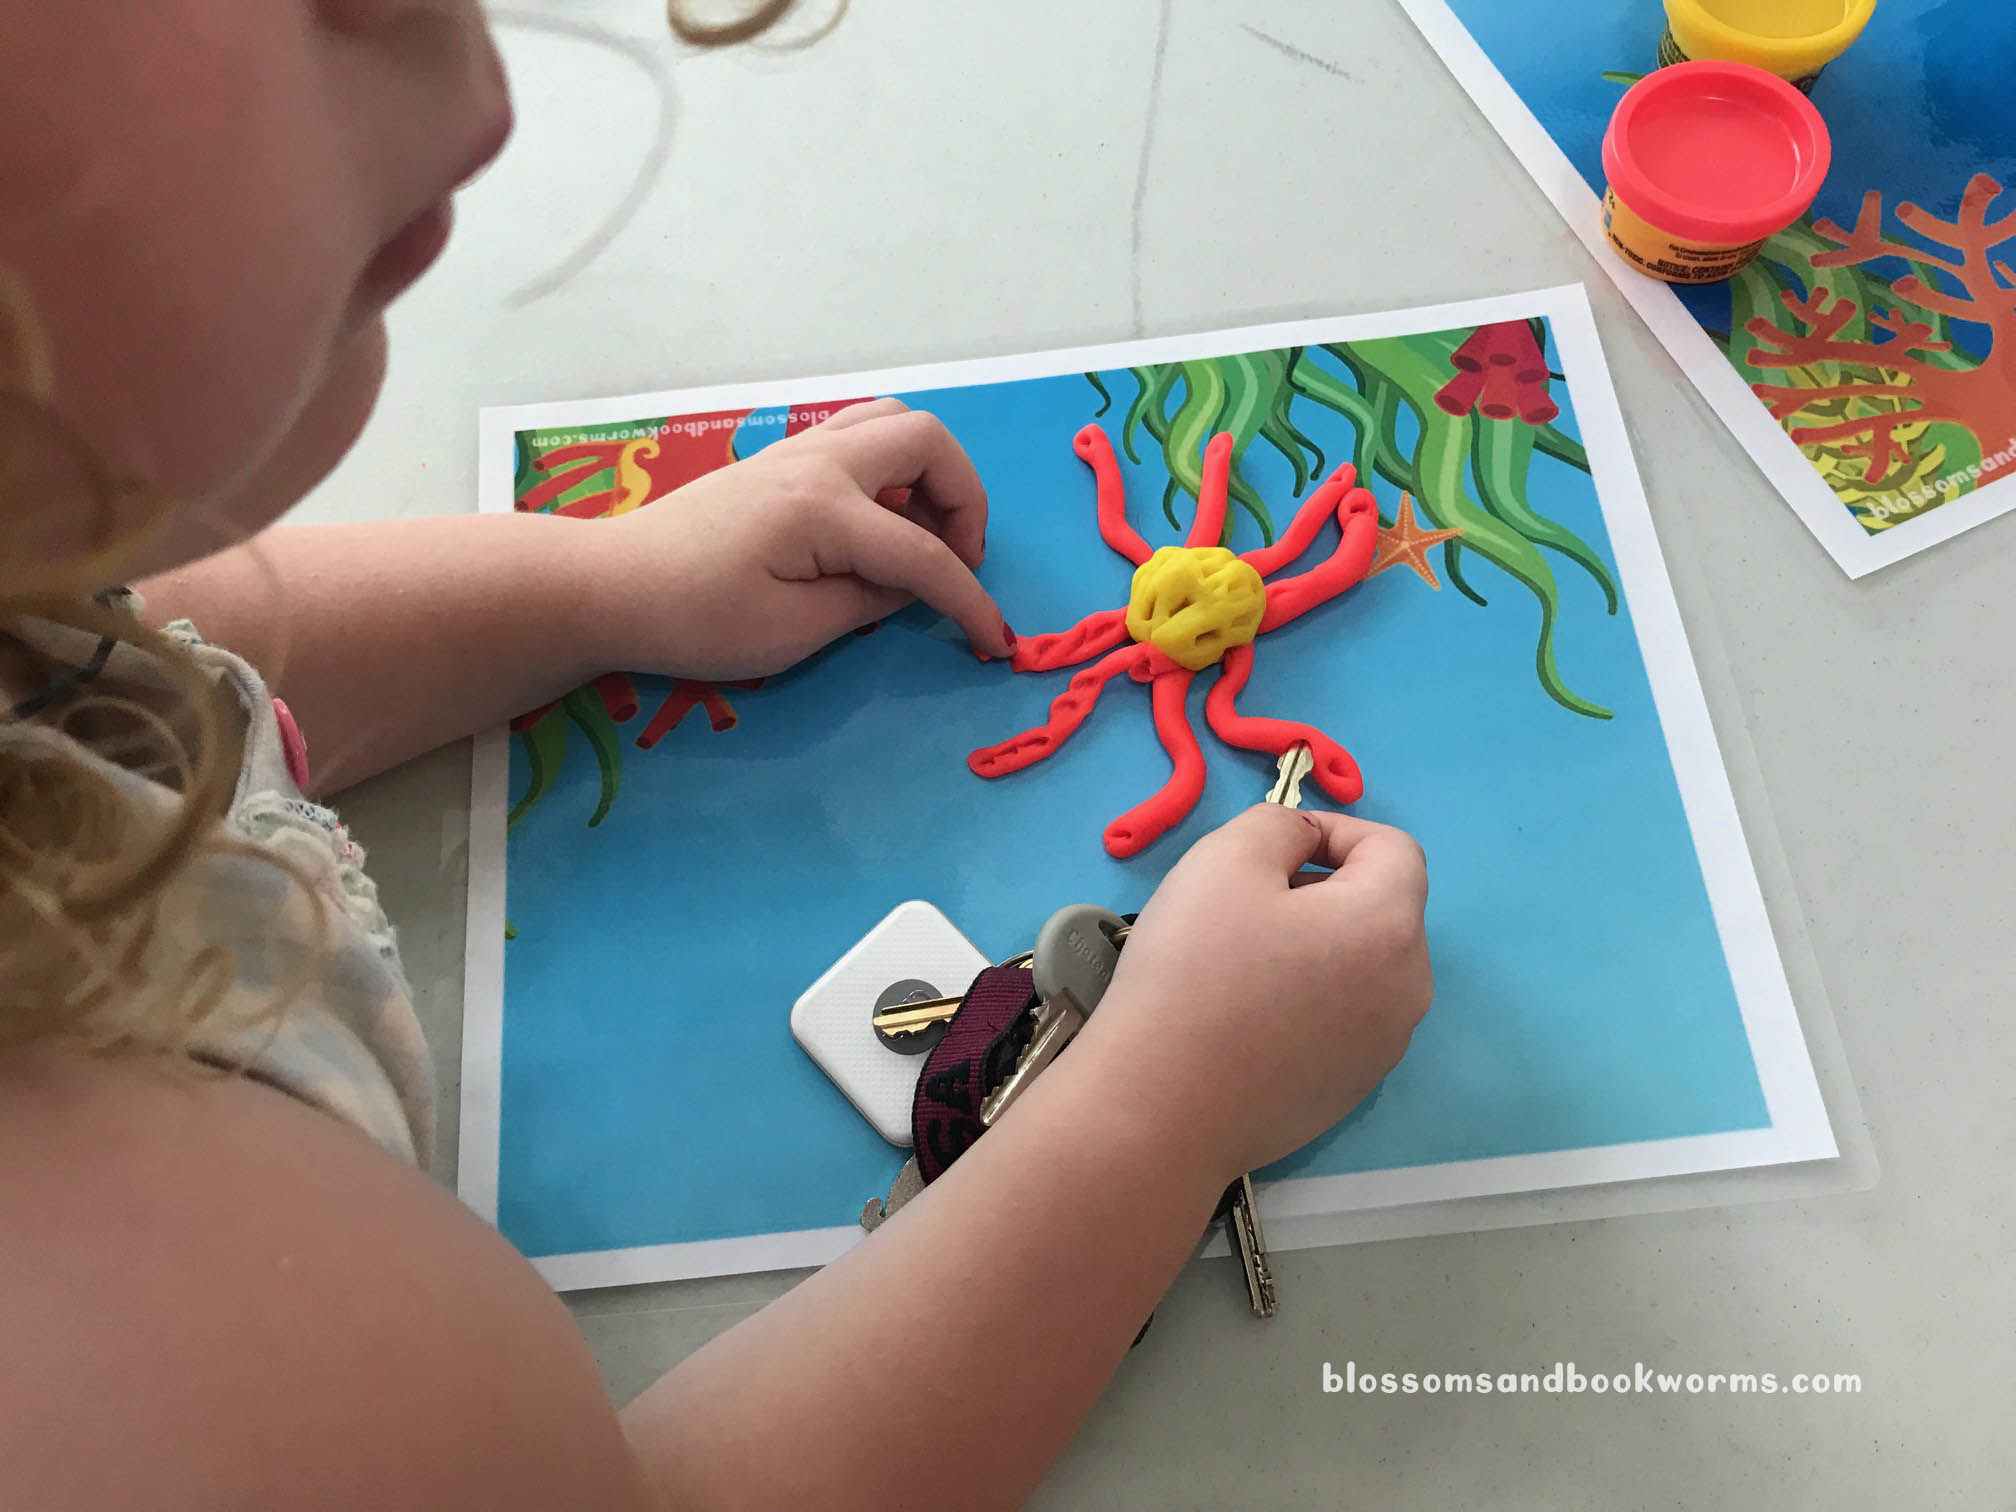
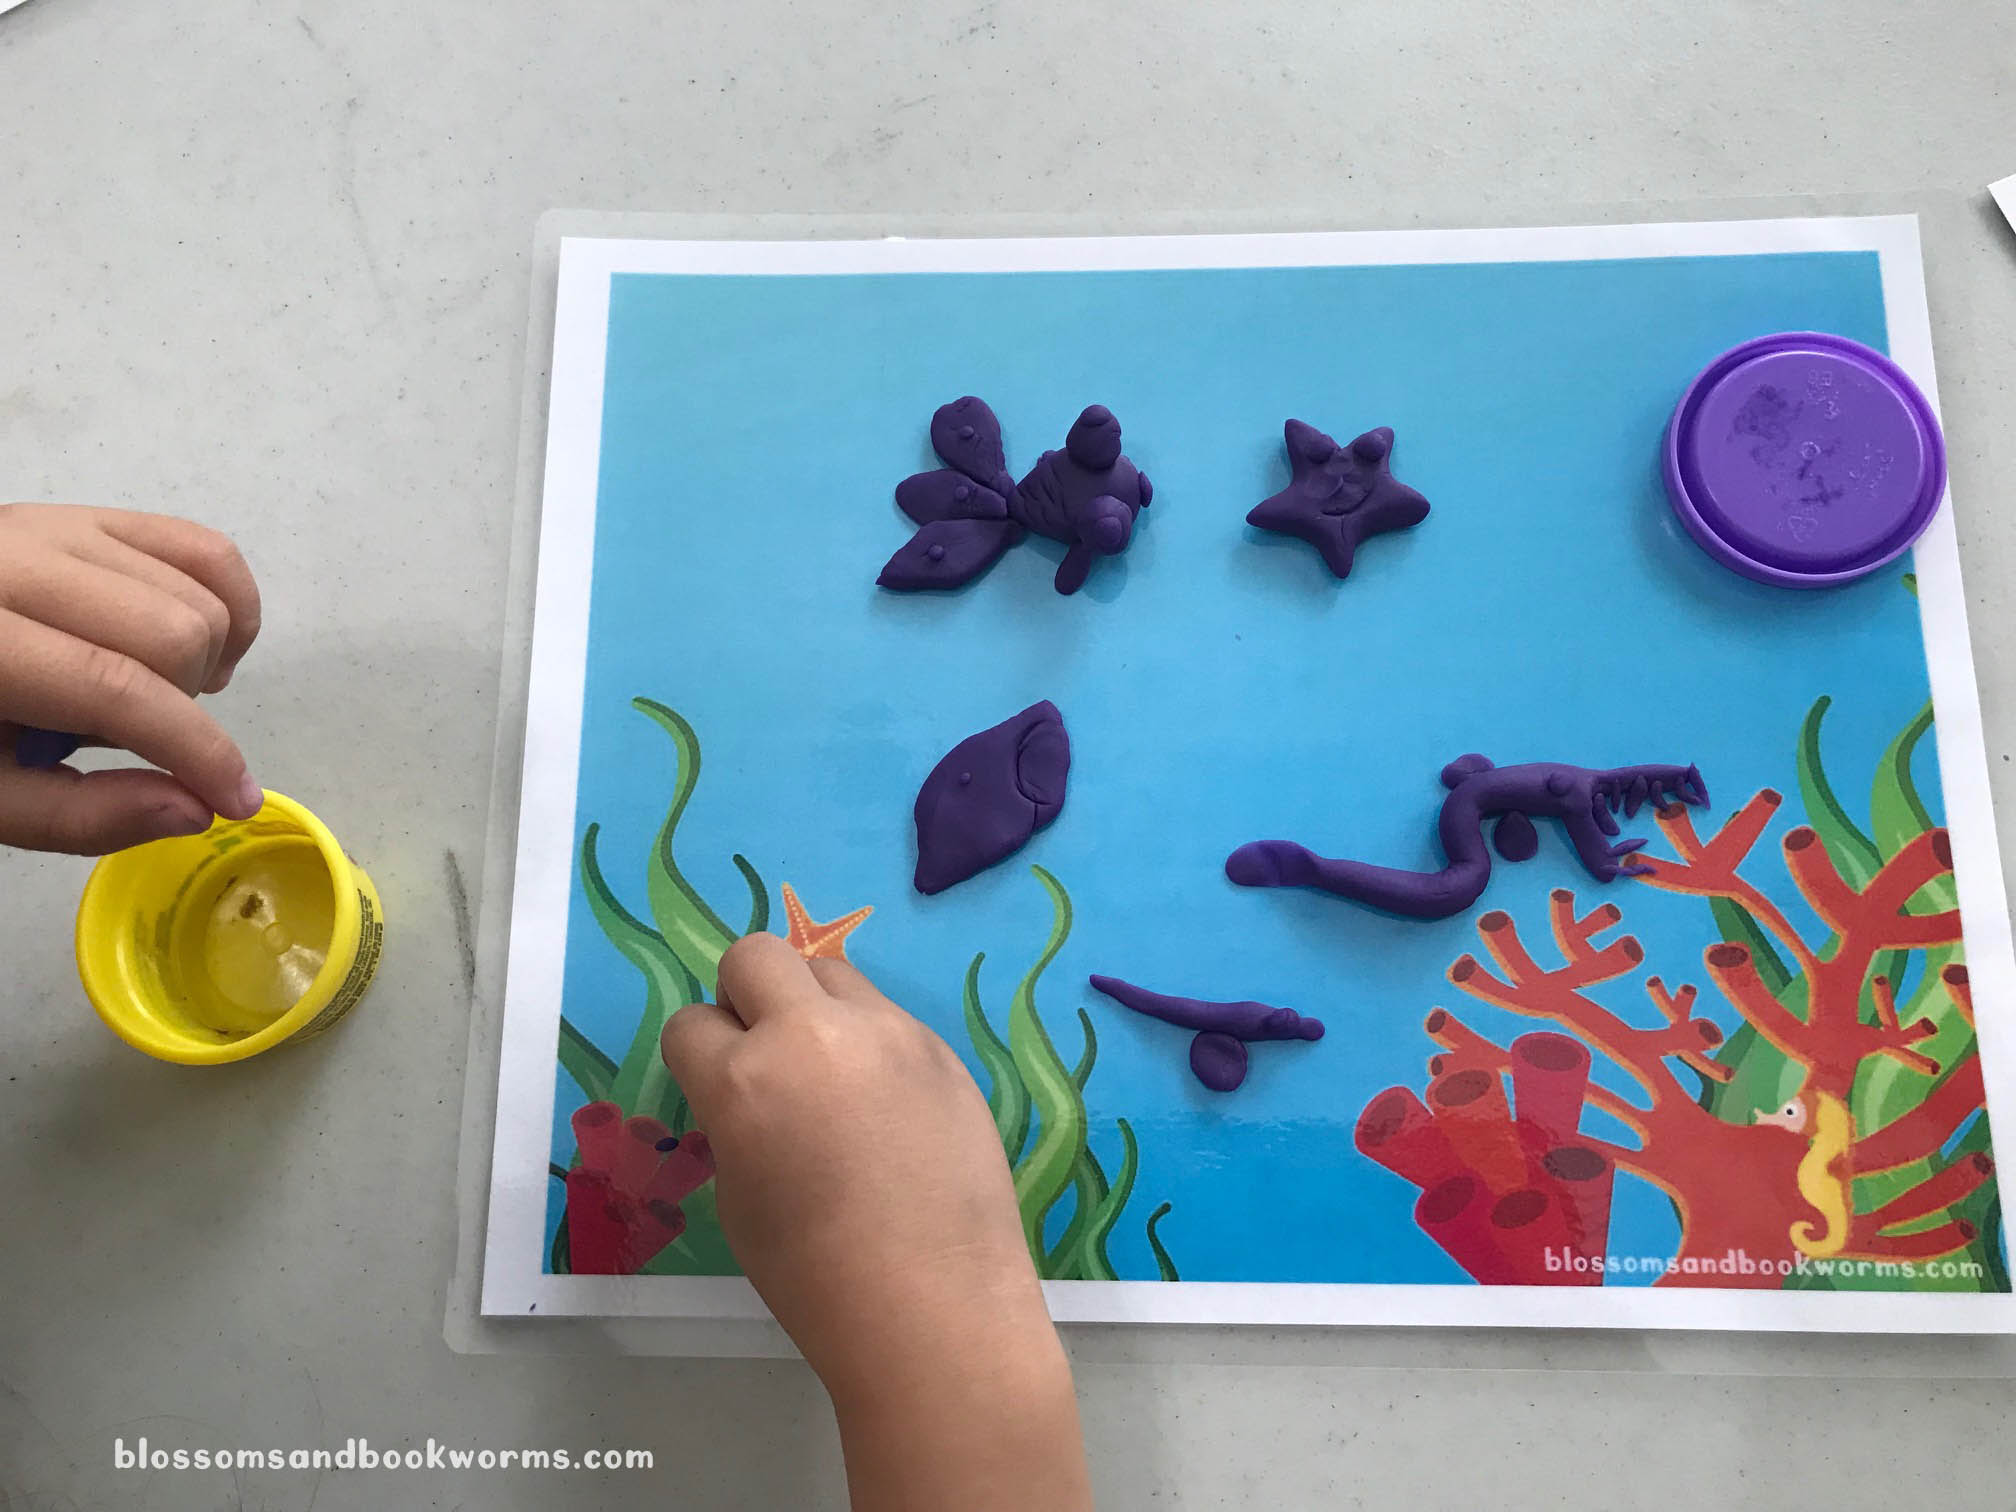
Today we used the mats while we read fun picture books. We tried to recreate all the characters that we read about. It was so much fun to see their creativity!
This play doh mat inspires with its bright colors but leaves plenty of space for you to design your own scene. You can add sharks, octopi, starfish, clownfish, manatees, whales, dolphins, sea turtles, coral…. whatever you can imagine, it can find a place under the sea!
We printed the mat on paper and then laminated it so that we can use it over and over again. I love having a laminator handy – they are so useful!
My son even got out his favorite reference book for animals – 1,000 Animals – to inspire his creations. I love all the vibrant colors, variety of textures, and strange and unusual things that are under the sea!
Then, I took this activity to story time this week! We read some fun books and then the kiddos made their own creations. Check out these adorable masterpieces! They were so determined and focused. Each child has his or her own style for approaching play doh and it is so amazing to see their imagination come to life!
Would you like to try this activity yourself? I have made not just one, but two!, play doh mats for you!
Click HERE to download the light blue sea play doh mat.
Click HERE to download the bright blue sea play doh mat.
We were reading fun fiction book one day and in the book the child planted candy and it grew into more candy. Then I had this little conversation with my son:
Some of my most favorite activities from out of my kiddo’s saying, “you can’t ….” you can fill in the blank. Then we try to look at it from another direction and see if you really can or cannot do it. Growing candy has to be the most 🍬SWEET 🍬 experiment yet!
The recipe is very simple. The hardest part is waiting 2-3 days while the crystals grow in size!
‼️ This activity uses very hot liquids and requires full parental supervision.
Ingredients:
1 Cup of Water
3 Cups of White Sugar + extra 1/4 cup white sugar
Food Coloring – I used gel color that I had on hand
Optional – Candy flavoring to make your rock candy extra special!
You will also need a sauce pan, measuring cups, glasses (or jars) for growing the crystals in, and lollipop sticks.
Note: This recipe was perfect for my containers, but you could easily double it to make more candy or to fill bigger containers!
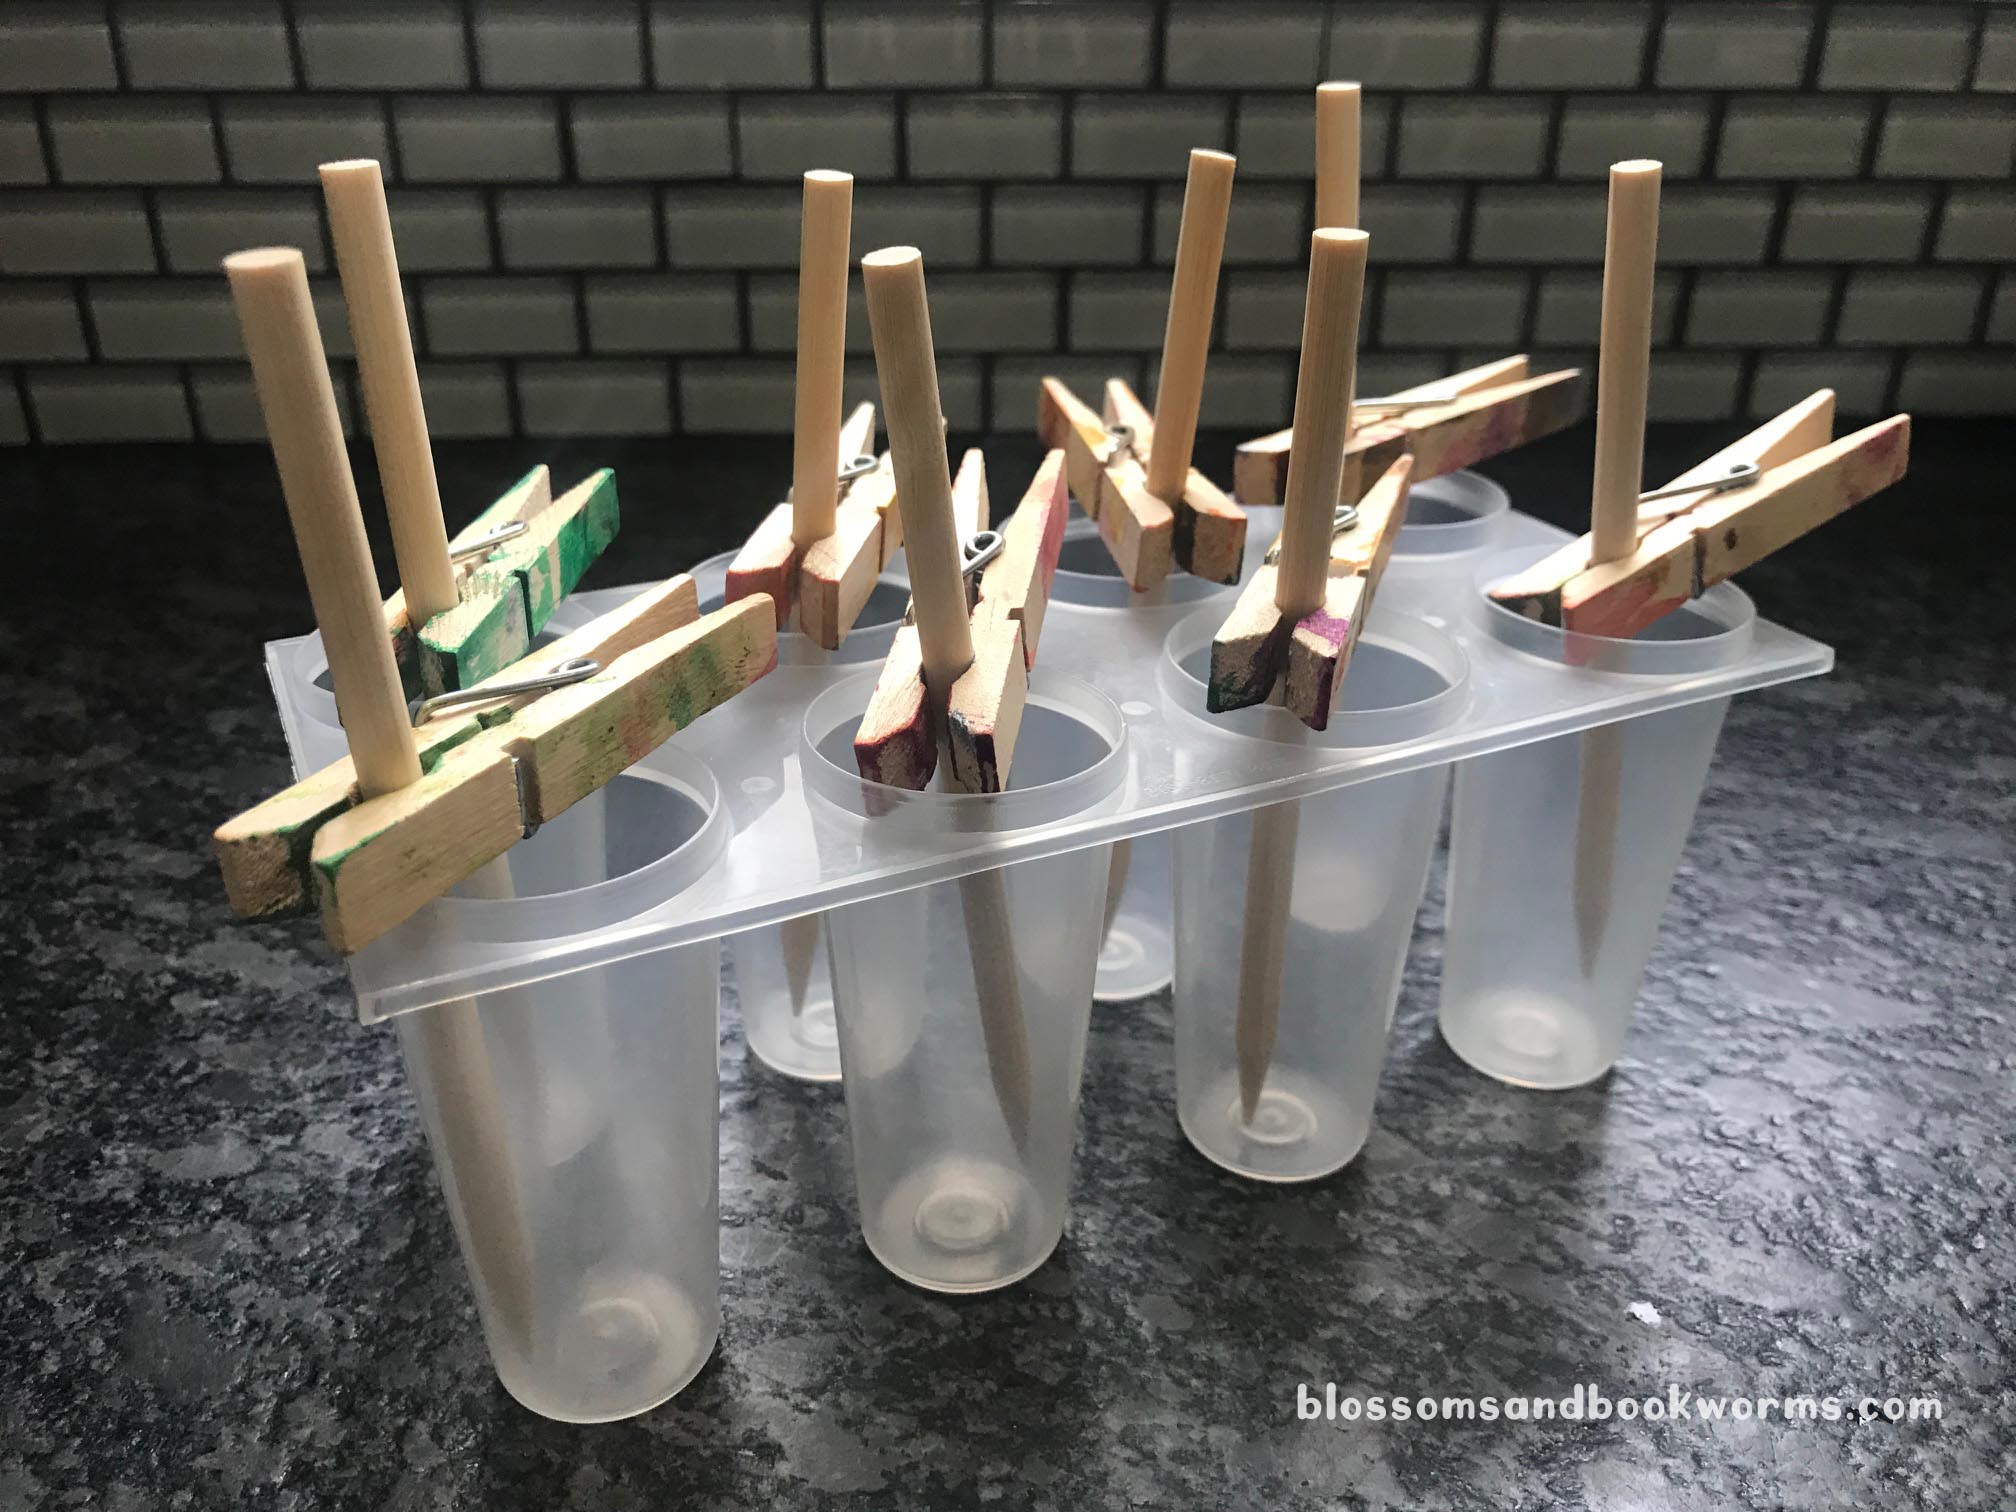
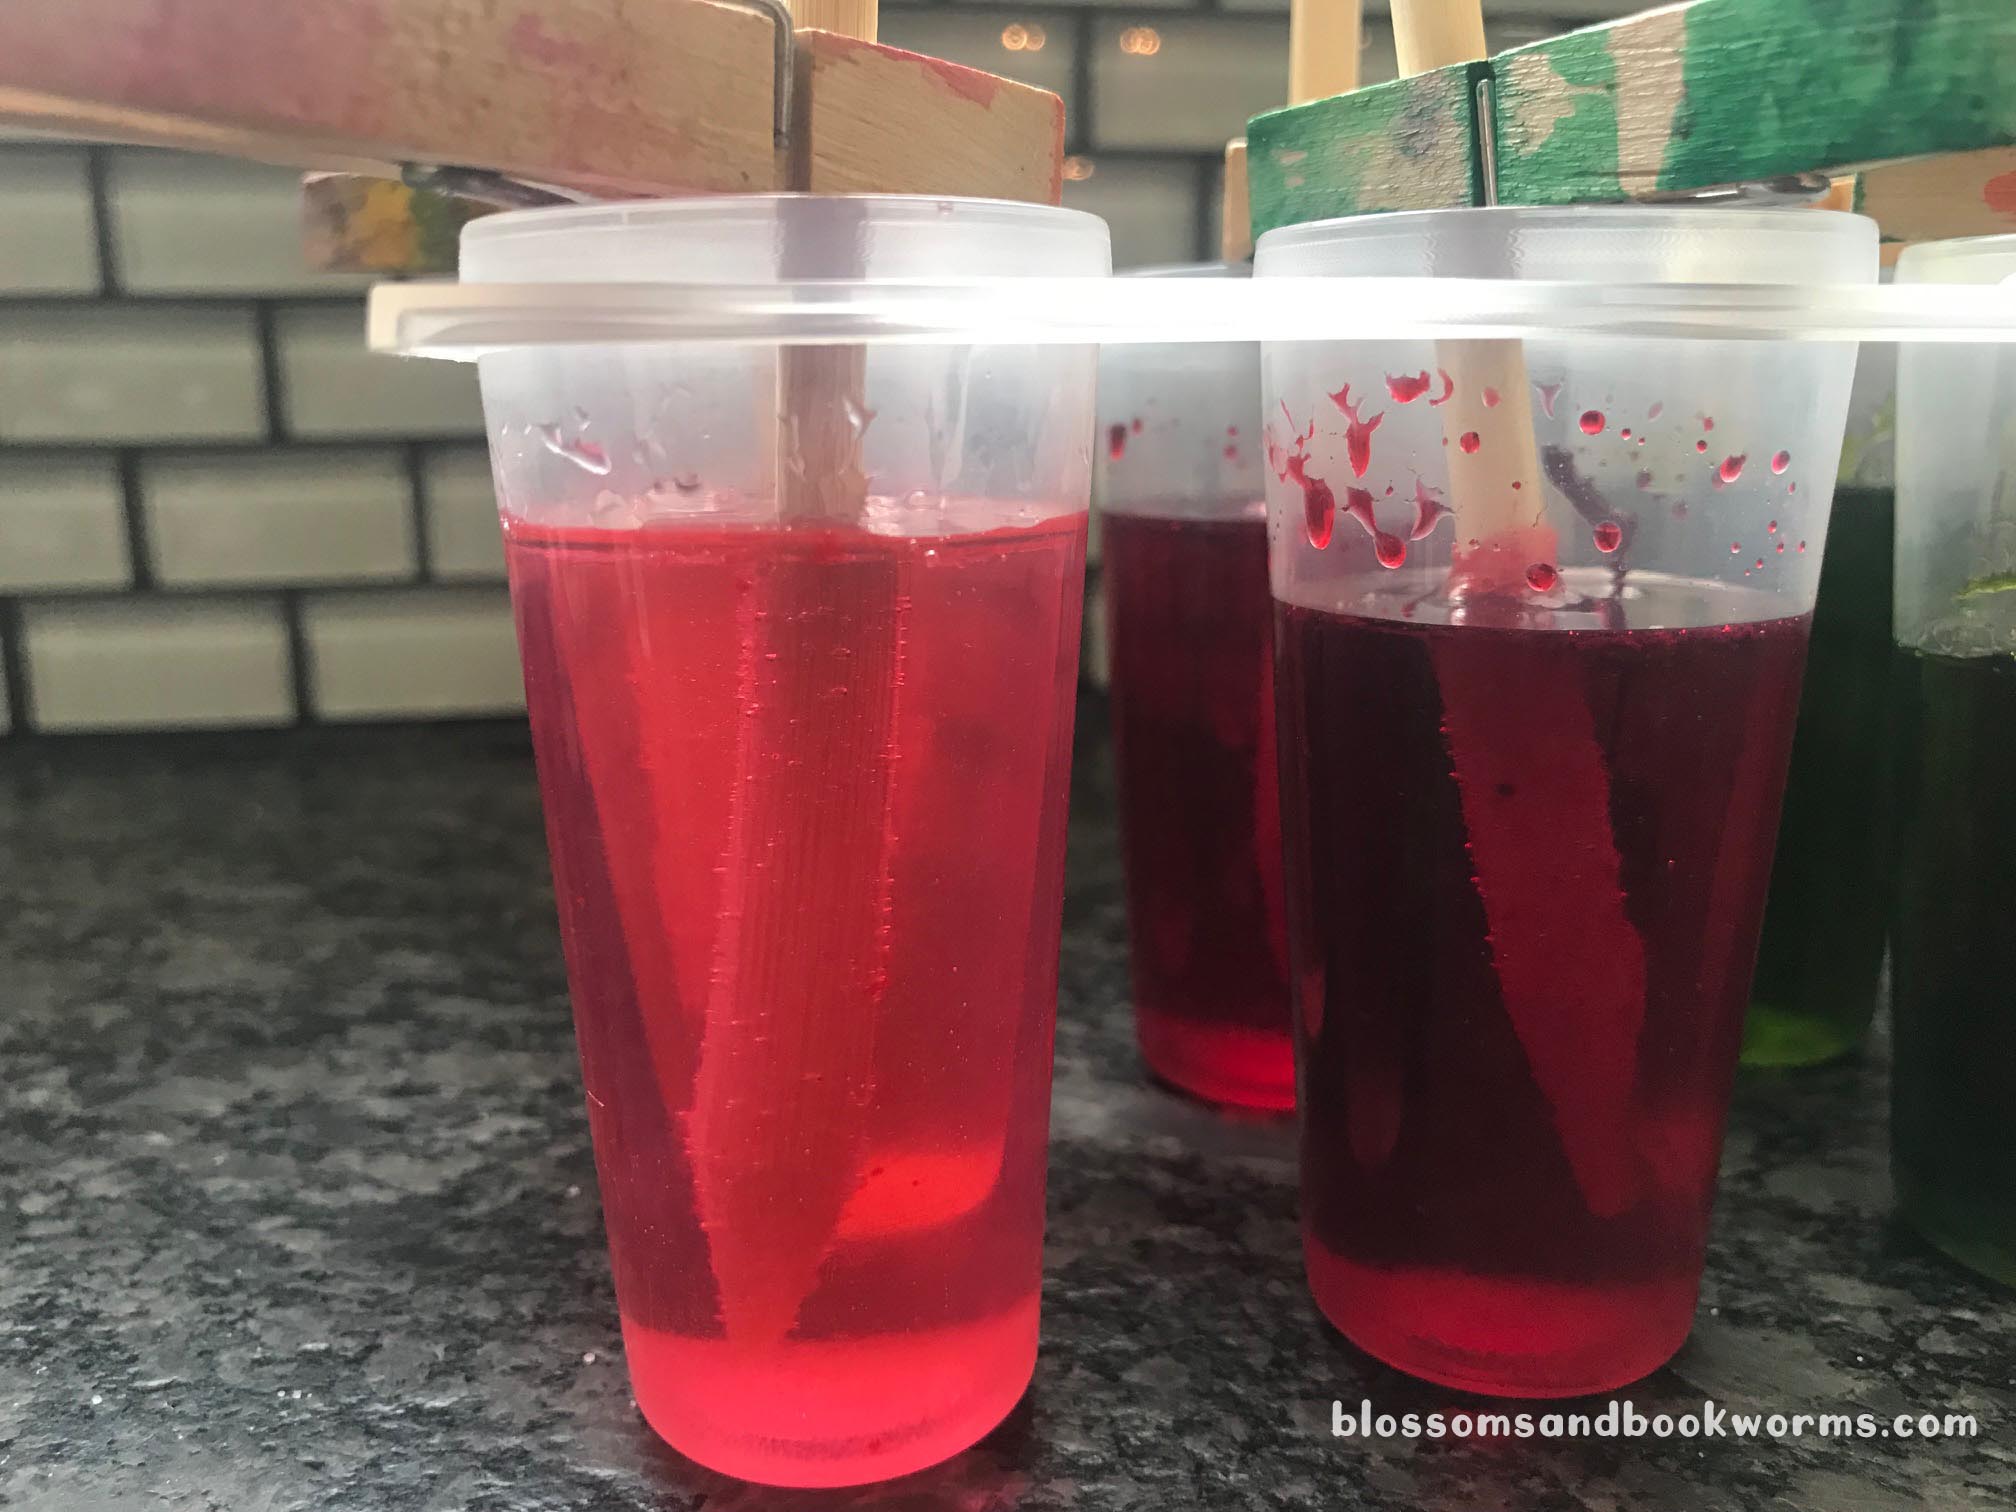
We grew 4 different flavors and colors of rock candy. For each color, you will need a glass or jar. First, I placed the stick in the middle of the glass and used clothes pins to hold it in the center. You do not want the stick to touch the bottom or the sides of the glass.
I was curious if I could grow crystals in a smaller container to save on the liquid necessary. Hence we also used this popsicle mold and clipped the sticks in the middle the same as we did for the glasses.
Next, you will take the prepped sticks out of the glass. Into the glass add small dab of gel color and 2 drops of candy flavor.
Now heat the 1 C Water and 3 C White Sugar in a saucepan over medium heat. Stir the mixture constantly to dissolve the sugar.
Stir constantly for about 1 minute after it comes to a boil, then turn off the heat. Transfer hot liquid to a heat proof measuring cup with a pour spout. Pour sugar syrup equally into each glass and stir with an extra stick to combine the food coloring and flavor with the sugar syrup.
Allow the sugar syrup to cool in the glasses for about half an hour before placing the wooden sticks into the liquid.
Next, place the wooden sticks on the clips into the containers to wet the stick.
Take the wet wooden stick out of the syrup mixture and roll it in the dry white sugar. This step is super important – the dry sugar will help the sugar crystals attach and grow on the wooden stick.
Place the sugar coated wooden sticks into glasses with the sugar syrup. Be gentle – you want to keep that dry sugar on the wooden stick! Make sure the stick isn’t touching the sides or bottom of the glass.
Set aside for 2-3 days and watch the sugar crystals grow!
On day 3, take the sugar crystals out of the syrup. Allow the crystals to drip off and then place on a paper towel to dry.
Now it is time to enjoy your treat!
Your kids will be totally in awe that you GREW candy right in your own kitchen!
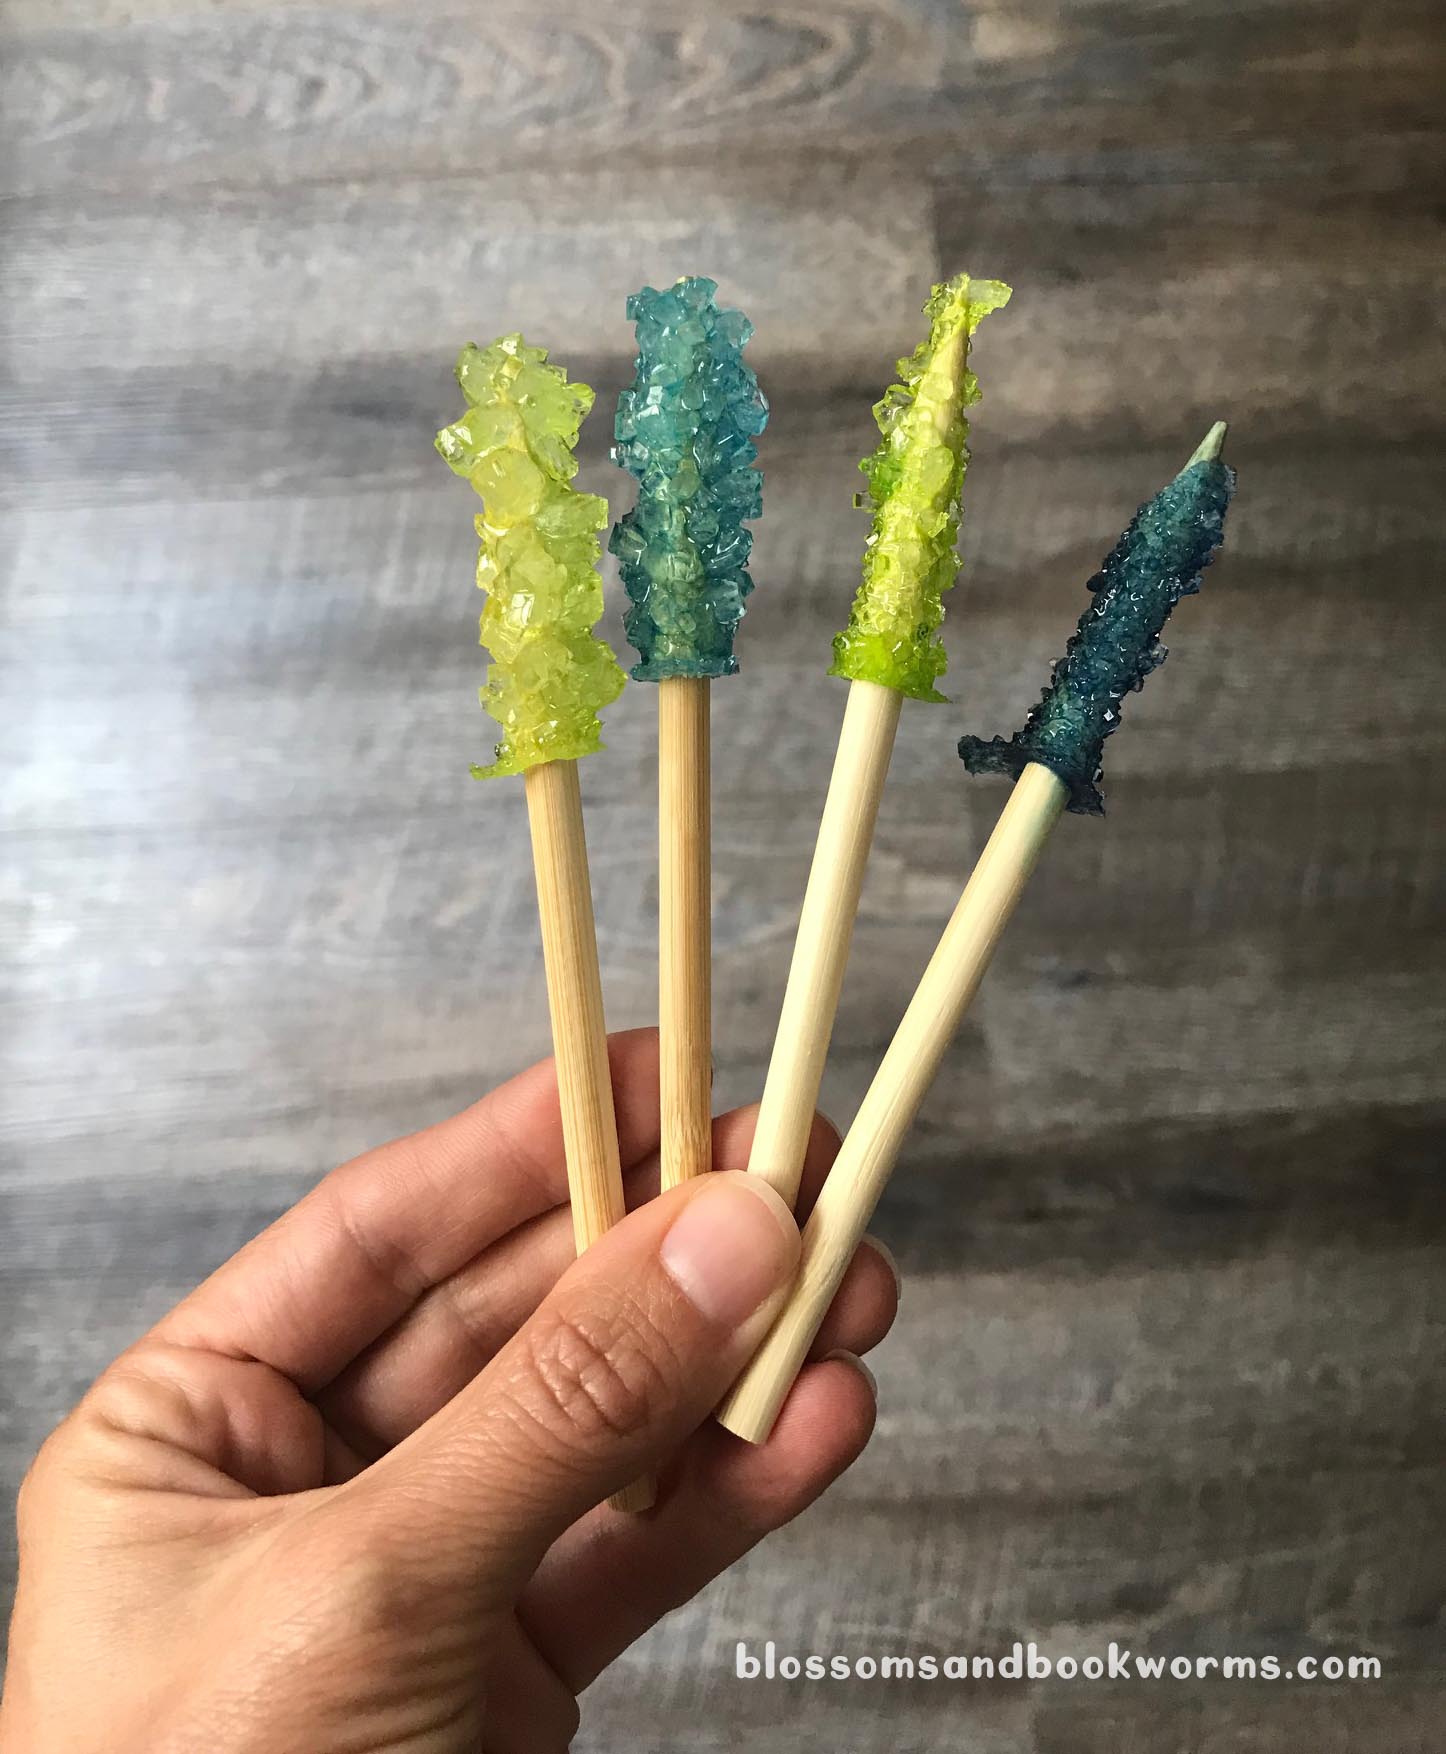
Oh and are you curious if there was a difference between my small container and bigger glasses? There was! The sugar crystals that grew in the bigger containers were bigger than the sugar crystals that grew in the popsicle mold. Imagine that!
Look at all those colors! These 4 grew in the smaller popsicle mold. The crystals are smaller but they are still super tasty!
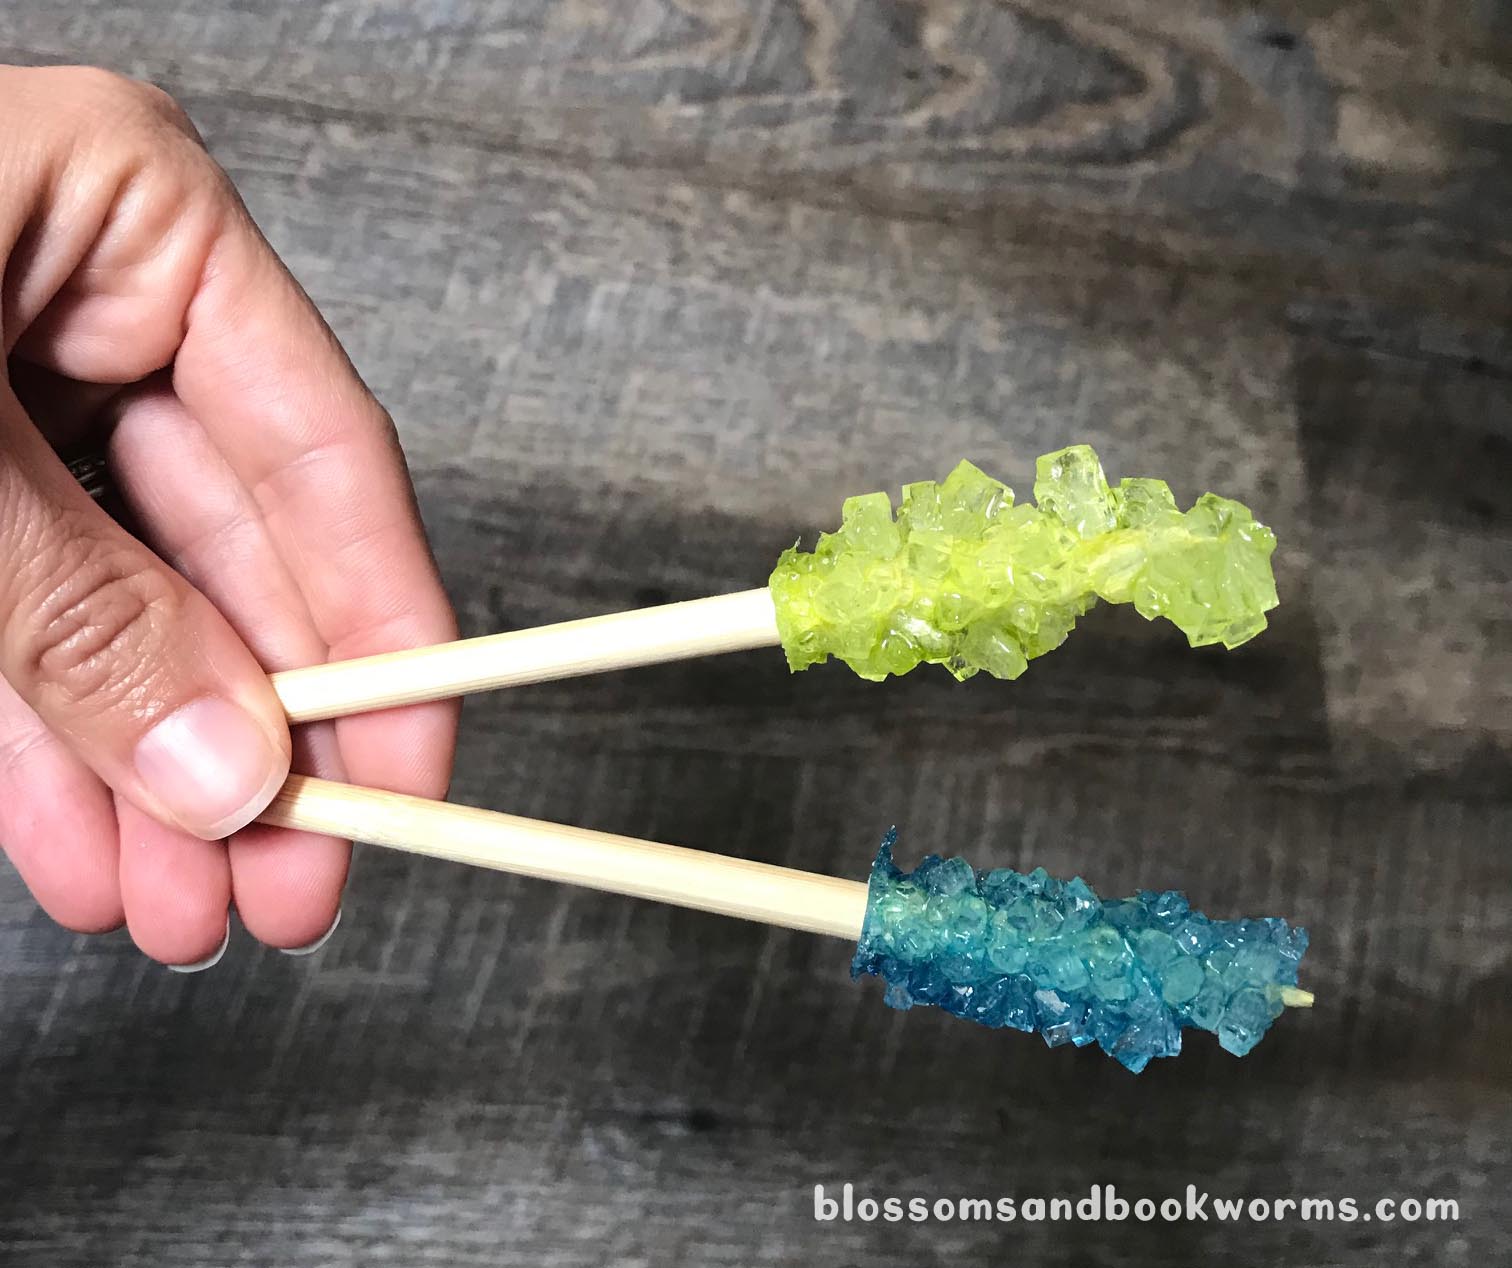
Here is an event better comparison. The green and blue on the left grew in the bigger glasses, the green and blue on the right grew in the smaller popsicle mold. So cool!
🍧 Fun tip: the leftover sugar syrup would make the PERFECT snow cone flavoring!
🍭 It turns out you really can grow candy with a couple ingredients and a big dose of patience 🍭
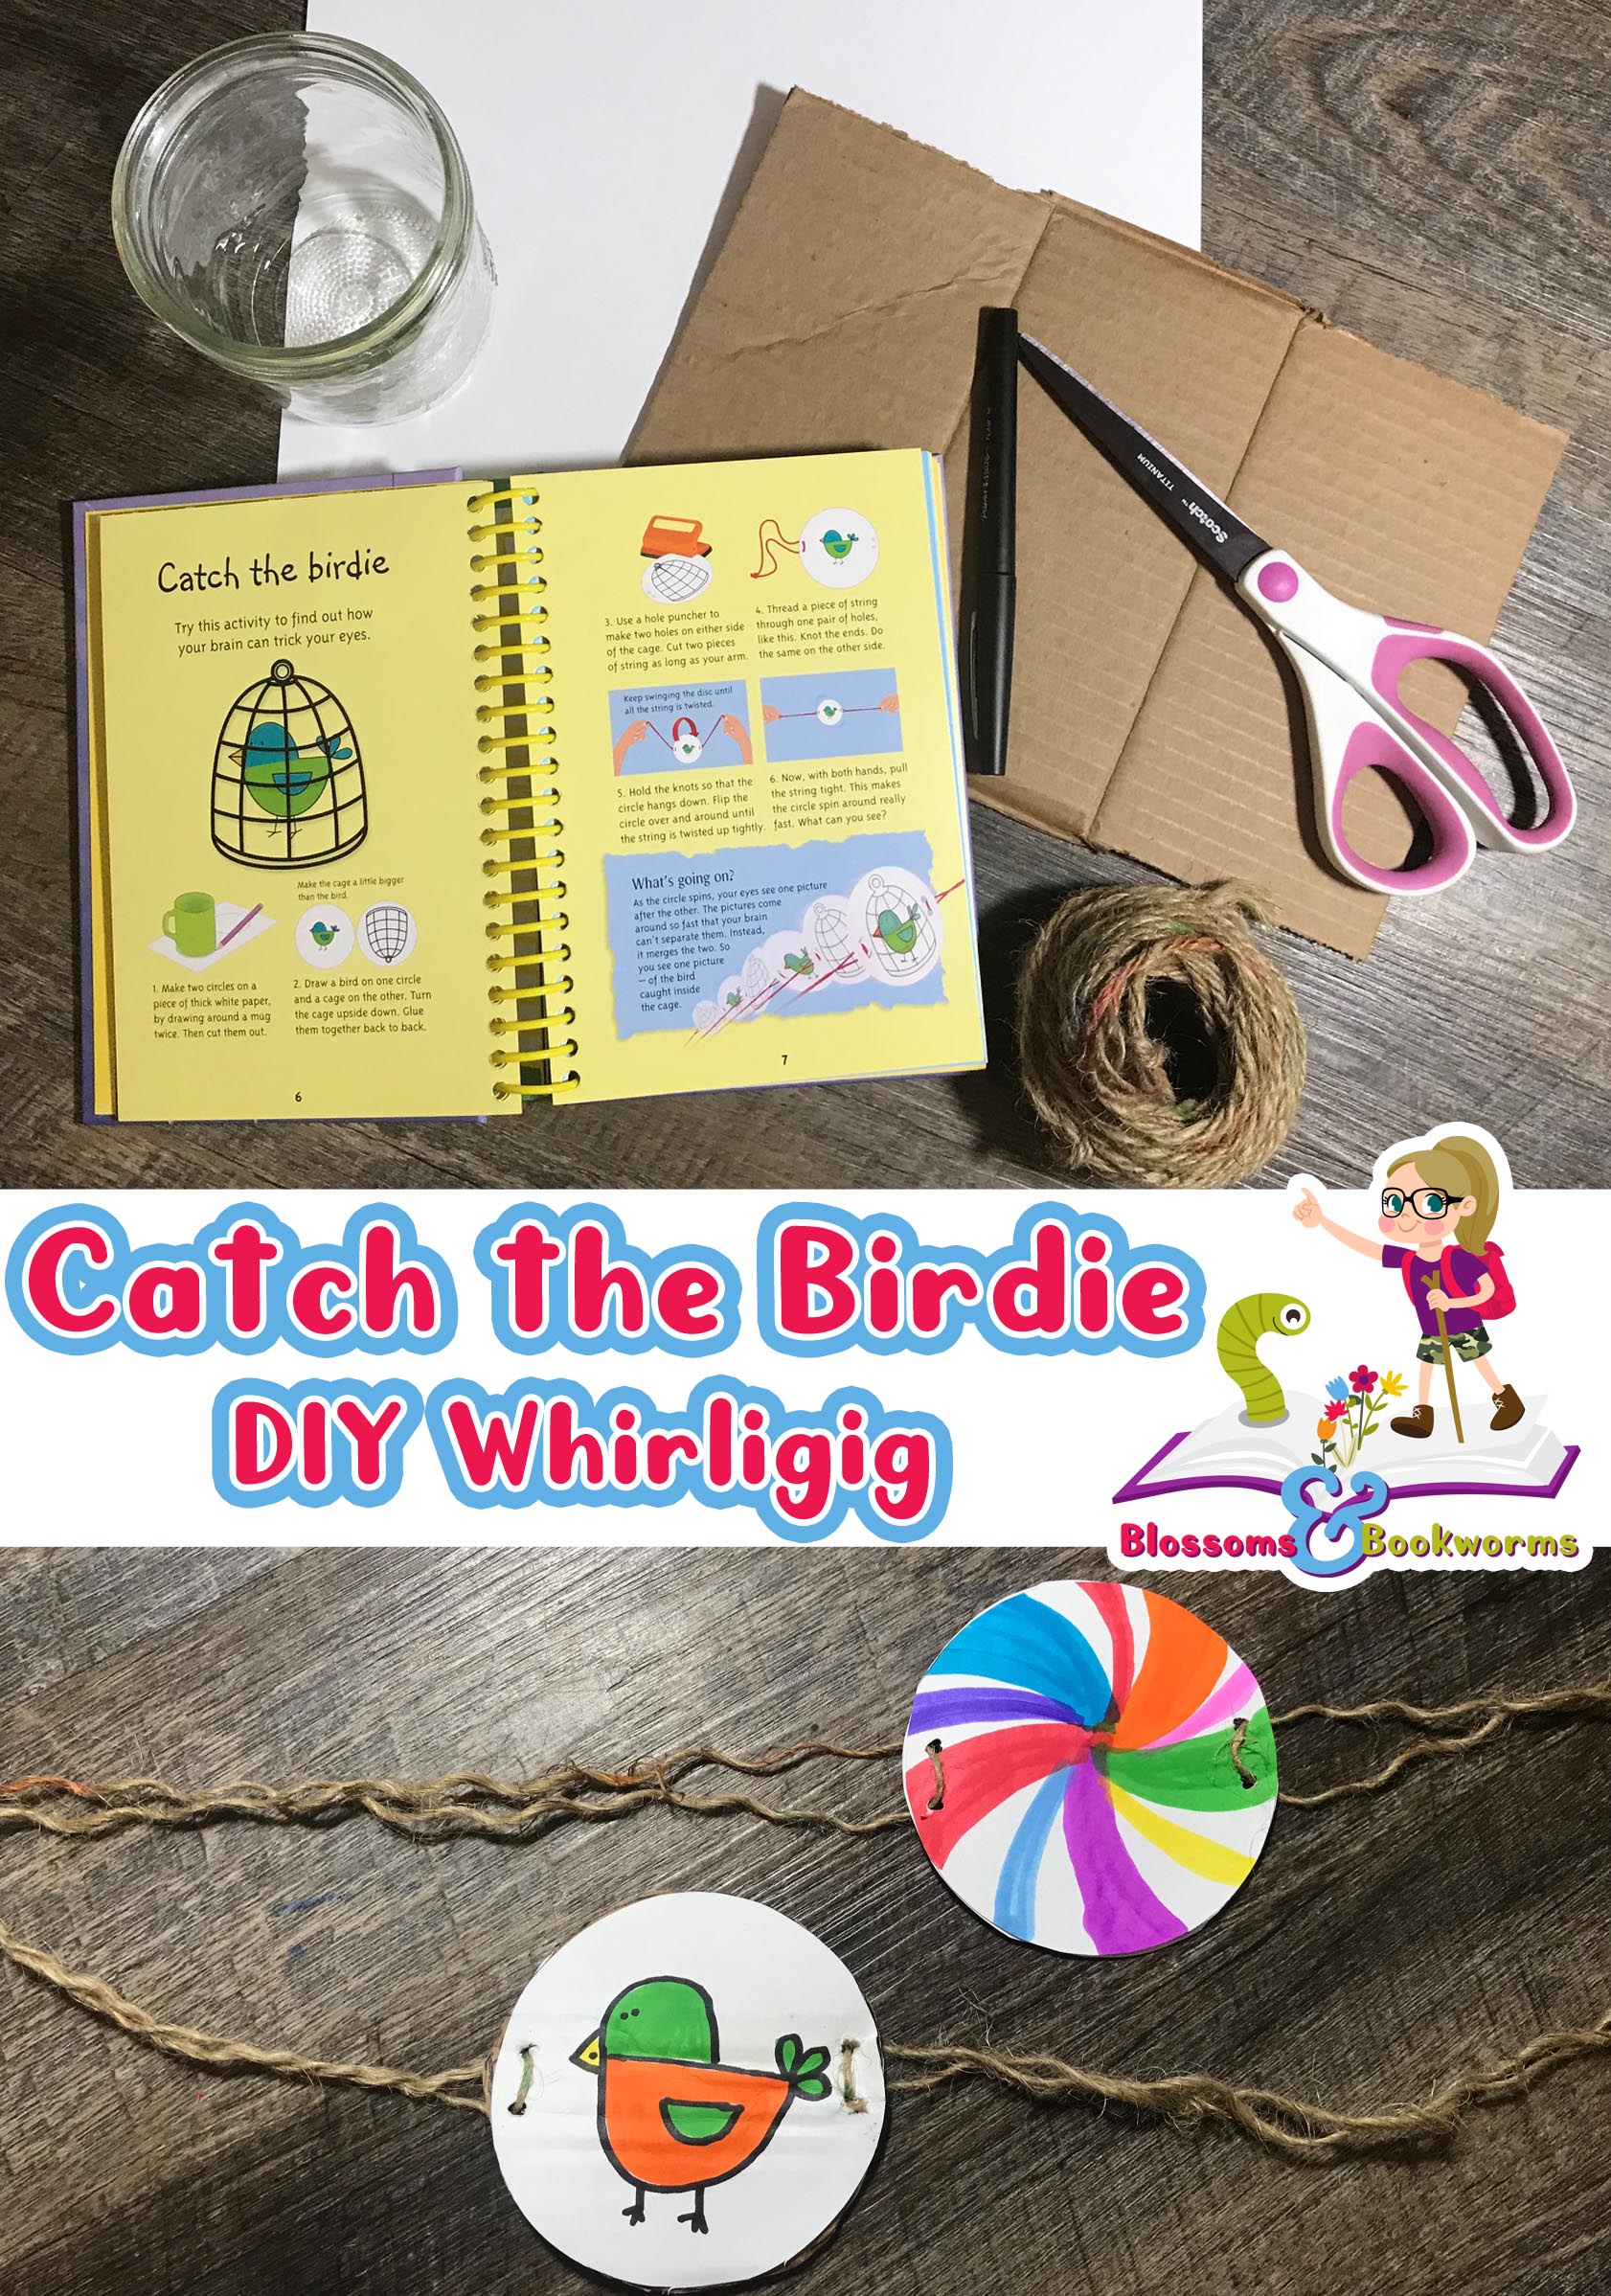
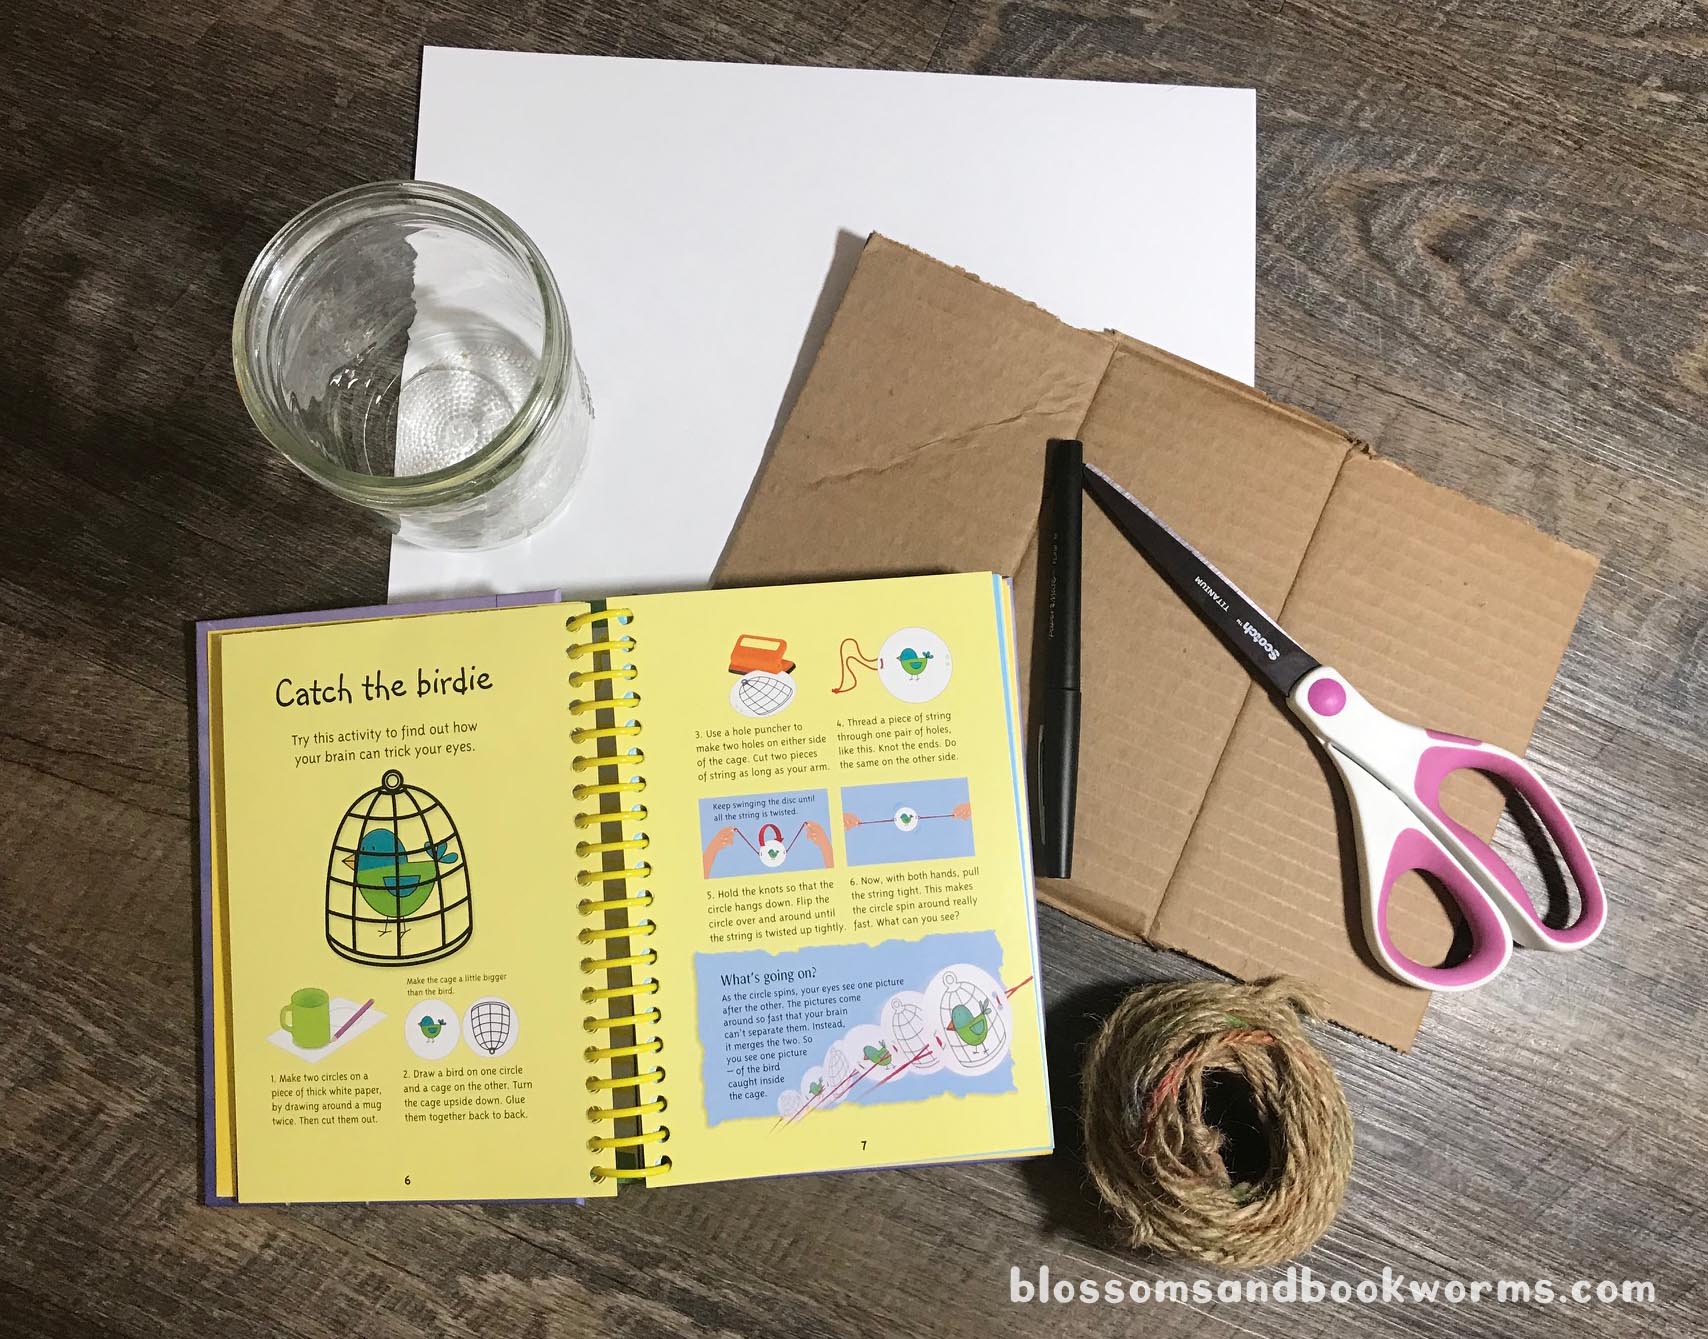
This super fun brain bender is brought to you by our amazing 50 Science Things to Make and Do. We come back to this book time and time again. There are so many fun activities with fun outcomes that take very little prep. You can find out more about this fun title HERE.
Whirligigs are great fun for kiddos of all ages. They don’t take a lot of work to put together, they are fully customizable, and you can even use them to trick your brain!
Materials:
Card Stock or other sturdy paper
Jar or cup to make circle outlines
Scissors, Pen, Markers to decorate your whirligig, glue to put the pieces together, and twine or yarn for twirling.
Optional: Cardboard to reinforce the whirligig
Begin by using the jar to trace circles for whirligig onto the card stock. We used 2 circles for each whirligig. By gluing the front and back together you get a stronger whirligig.
Next, color your circles! I followed instruction in the book to create a little birdie and a simple cage drawing. But, my kiddos had so much fun creating different creations on their circles!
Now you will glue the front circle to the back circle. Notice that the birdie is right side up but the cage is glued upside down to the back. To make the brain teaser work, the cage has to be upside down! 😁
Note – I reinforced the birdie and cage by sandwiching a piece of cardboard in between to 2 layers of card stock. I did not reinforce the colorful whirligig, so it is only 2 pieces of card stock. Both whirligigs worked very well. However, the reinforced birdie was easier for the younger kiddos to use because it was heavier and easier to twirl.
To reinforce or not to reinforce…. that is the question… 🤣
Next, you will poke or punch 2 small holes on either side of your design. Then, cut a length of twine as long as your arm and loop the twine through the holes as shown. Finally, tie a knot to secure the 2 loose ends of the twine.
Holding the knots you will twist up the whirligig, pull taught, and watch the magic!
Want to see the birdie in action?? Check out this short clip:
Did you see it? The birdie gets caught inside the cage! How does that happen?? Lucky for me – and YOU! – the book explains the phenomenon.
“As the circle spins, your eyes see one picture after the other. The pictures come around so fast that your brain can’t separate them. Instead, it merges the two. So you see one picture – of the bird caught inside the cage.”
So fascinating!
What other creations can you make where something get “caught” inside the other design?? I cannot wait to see what you come up with!
#ScienceWeek continues at our house… and so does the rain…
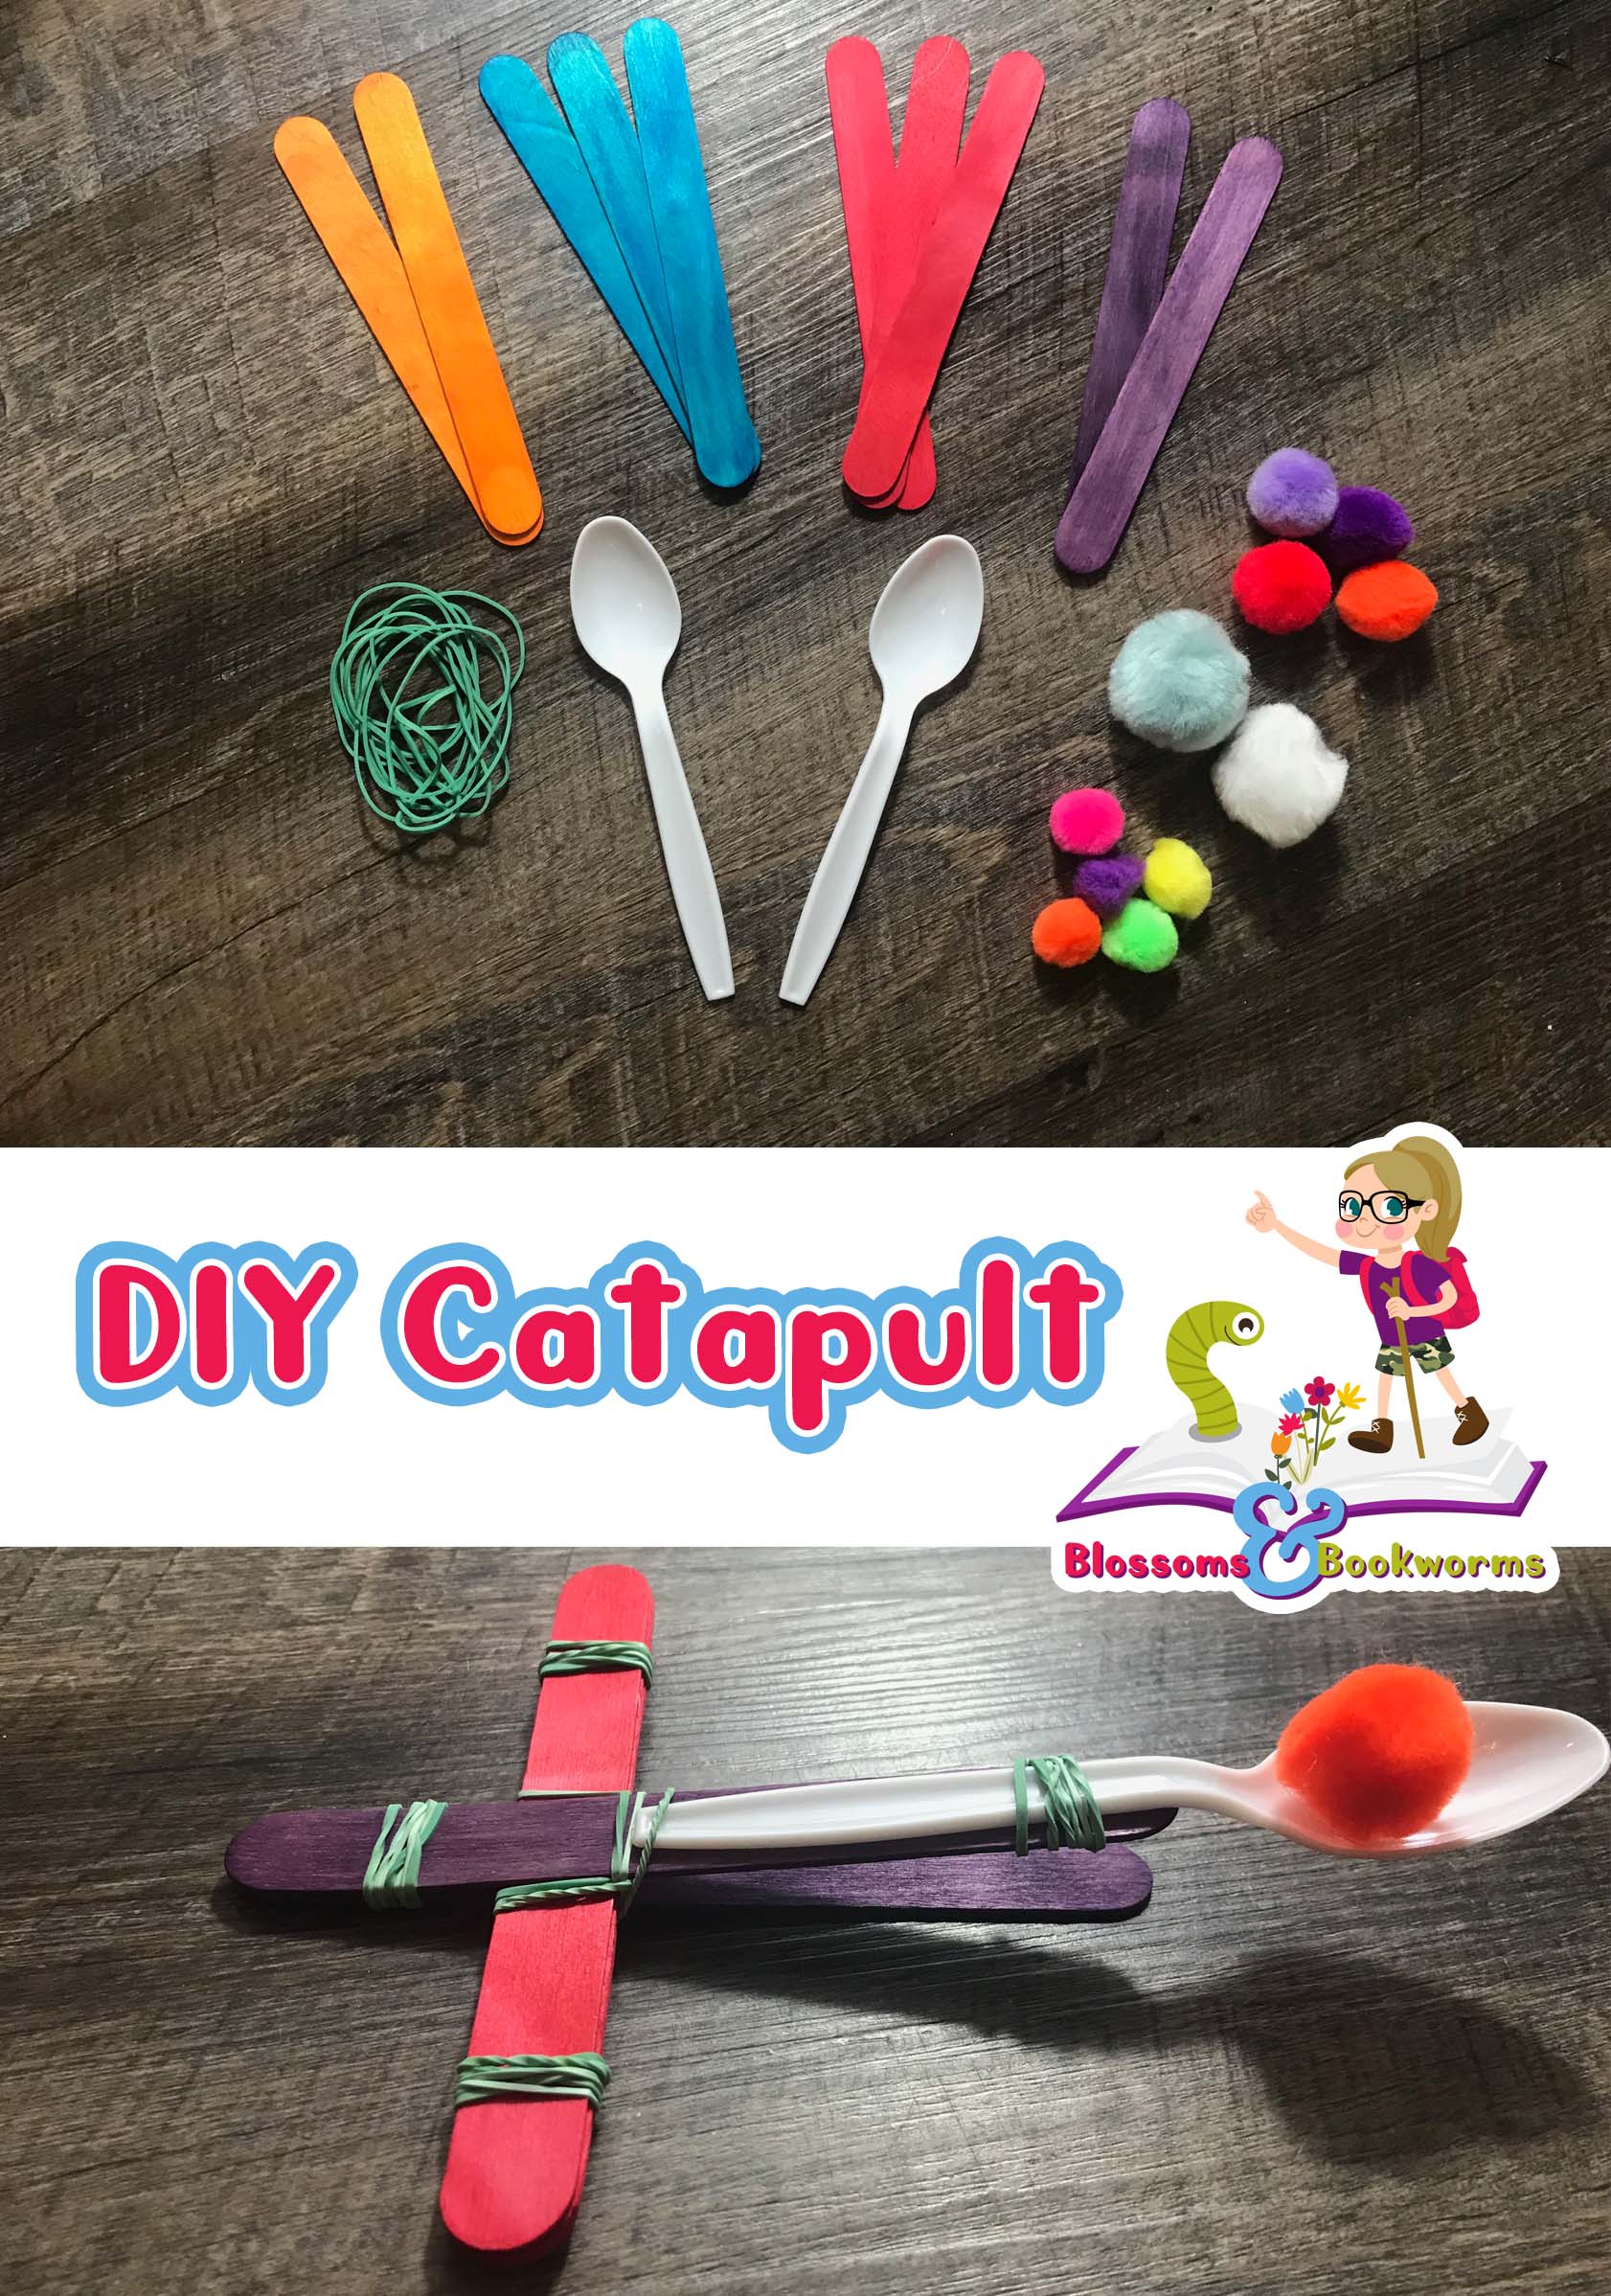
Since we are stuck inside I needed a fun, easy to assemble, and potentially genius experiment that both of my kiddos would adore… not a small order by any means! Lucky for me – and you! – I found these incredibly cool catapults and I had all the items to assemble them on hand.
Check out all the bright fun colors! I love colorful craft sticks and we have pom-poms galore for various projects and sorting activities. Just by adding the colorful items, my 3 year old was sure to love this experiment.
Materials:
Craft Sticks – we used 10 all together to create 2 catapults using our basic model. But you may want more craft sticks to try out different configurations.
Plastic Spoons – the cheap ones with a little more flex in them work best for this experiment
Rubber Bands
Pom-Poms – we tried out various sizes but any you have on hand will work
The catapult is very simple to construct. A few stacks of craft sticks and a few rubber bands to secure and you are good to go!
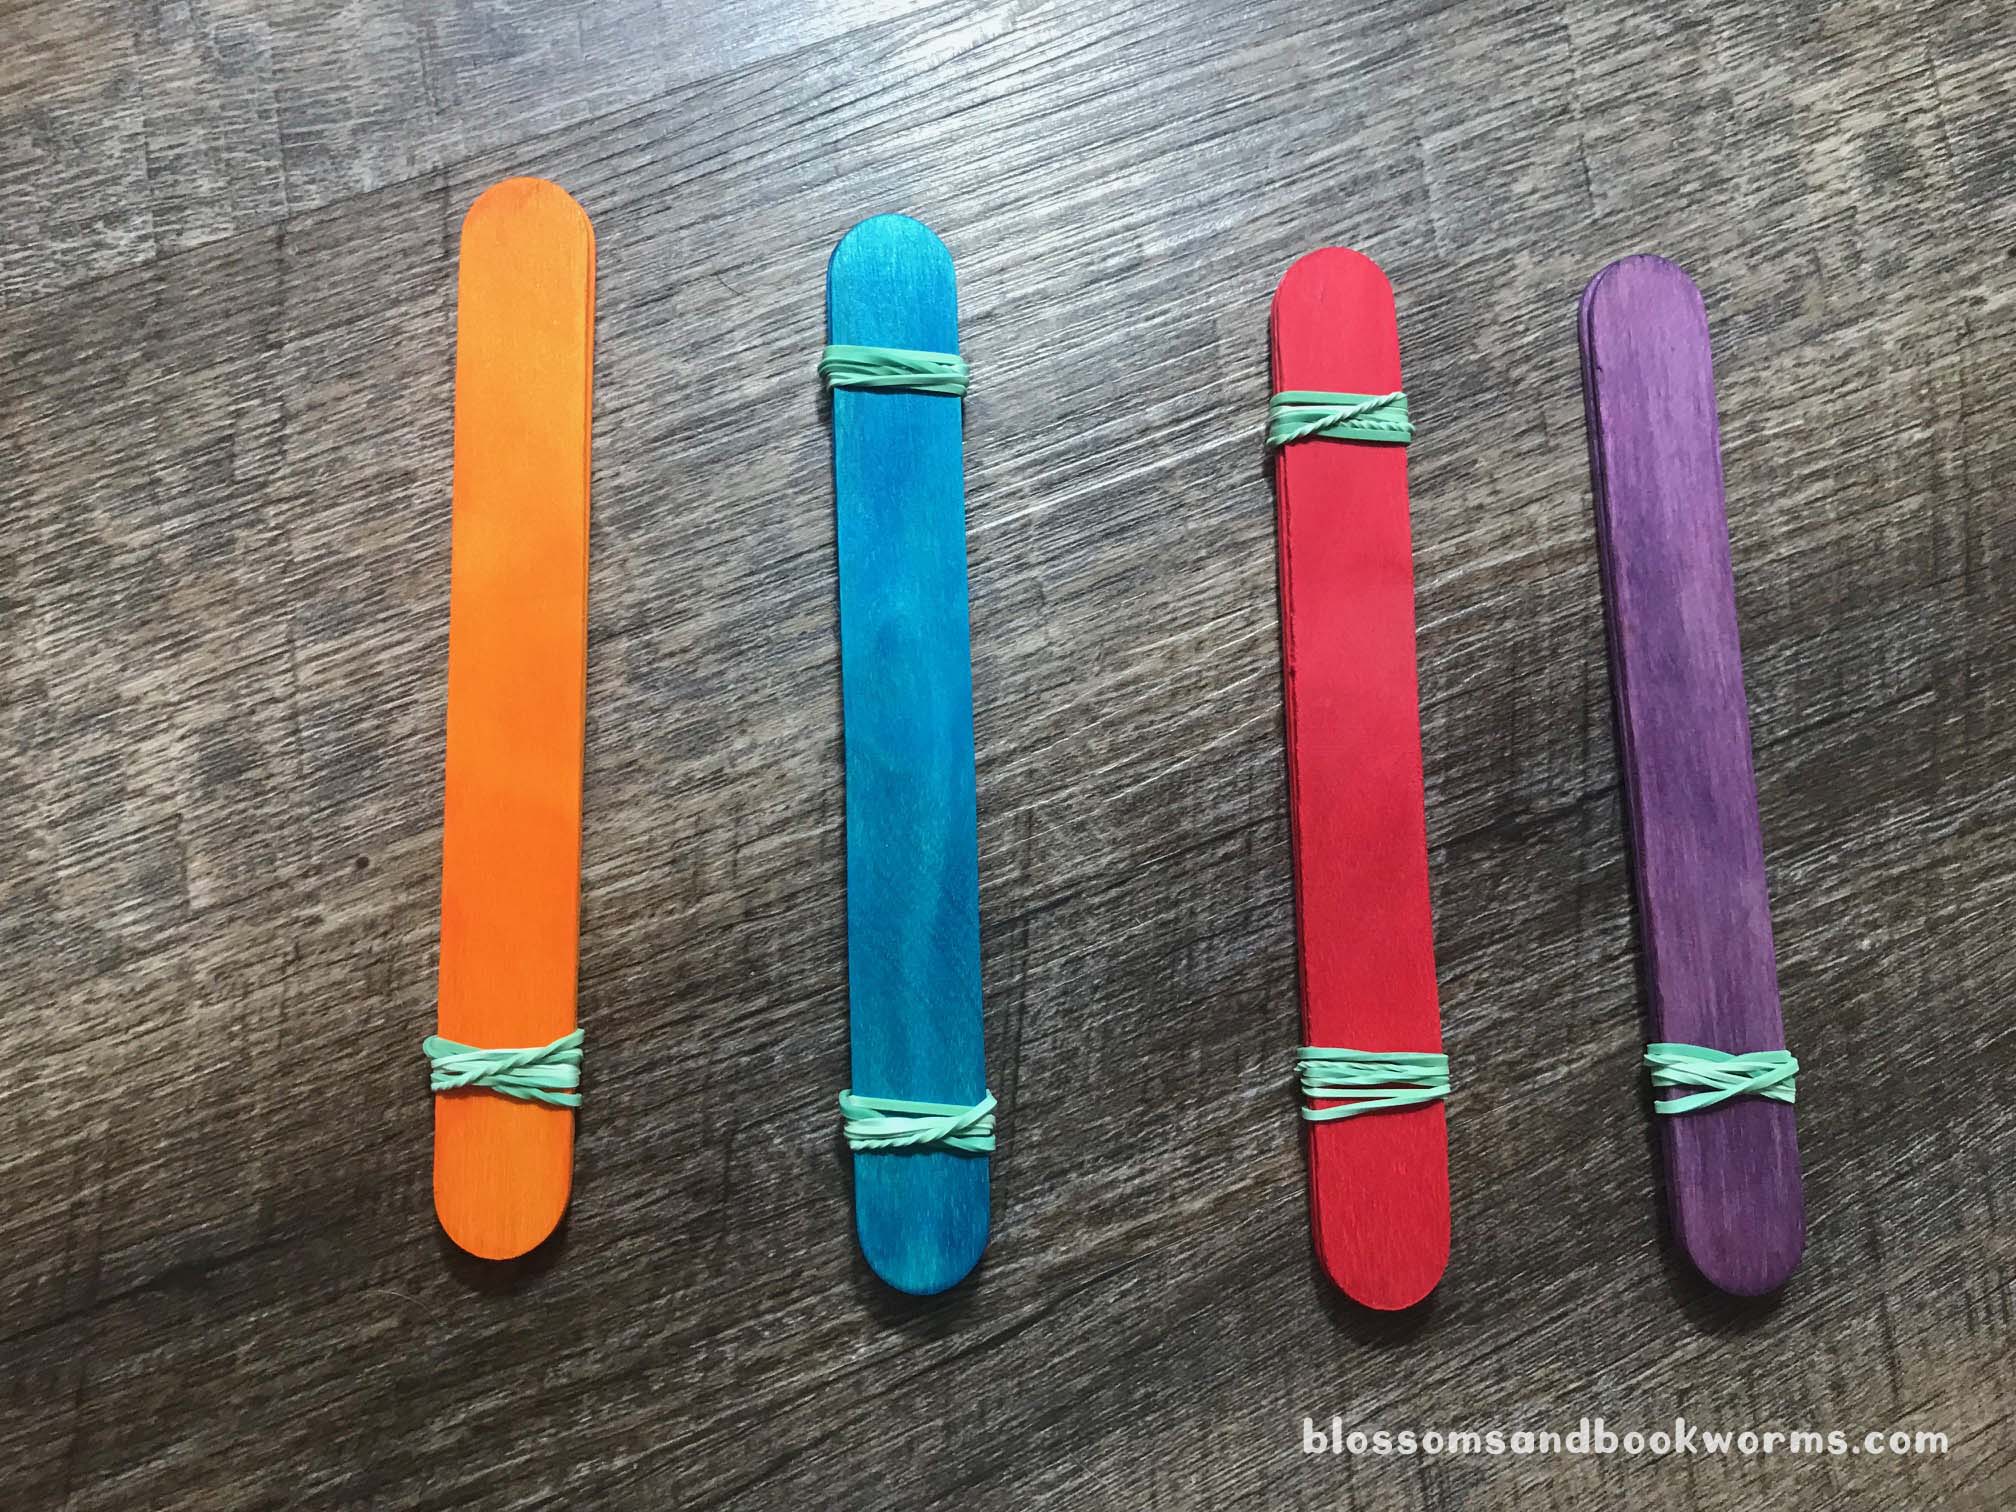
Note: In each of these photos you see duplicates for each step. That is because I have 2 kids and, of course, they each needed their own catapult. However, you could easily make just one or make 5 to suit your needs!
You begin by layering 2 craft sticks together and securing with a rubber band on only one end (e.g. see the orange and purple sticks). Then you layer a stack of 3 craft sticks together and secure with rubber bands at both ends (e.g. see the blue and red craft stick stacks).
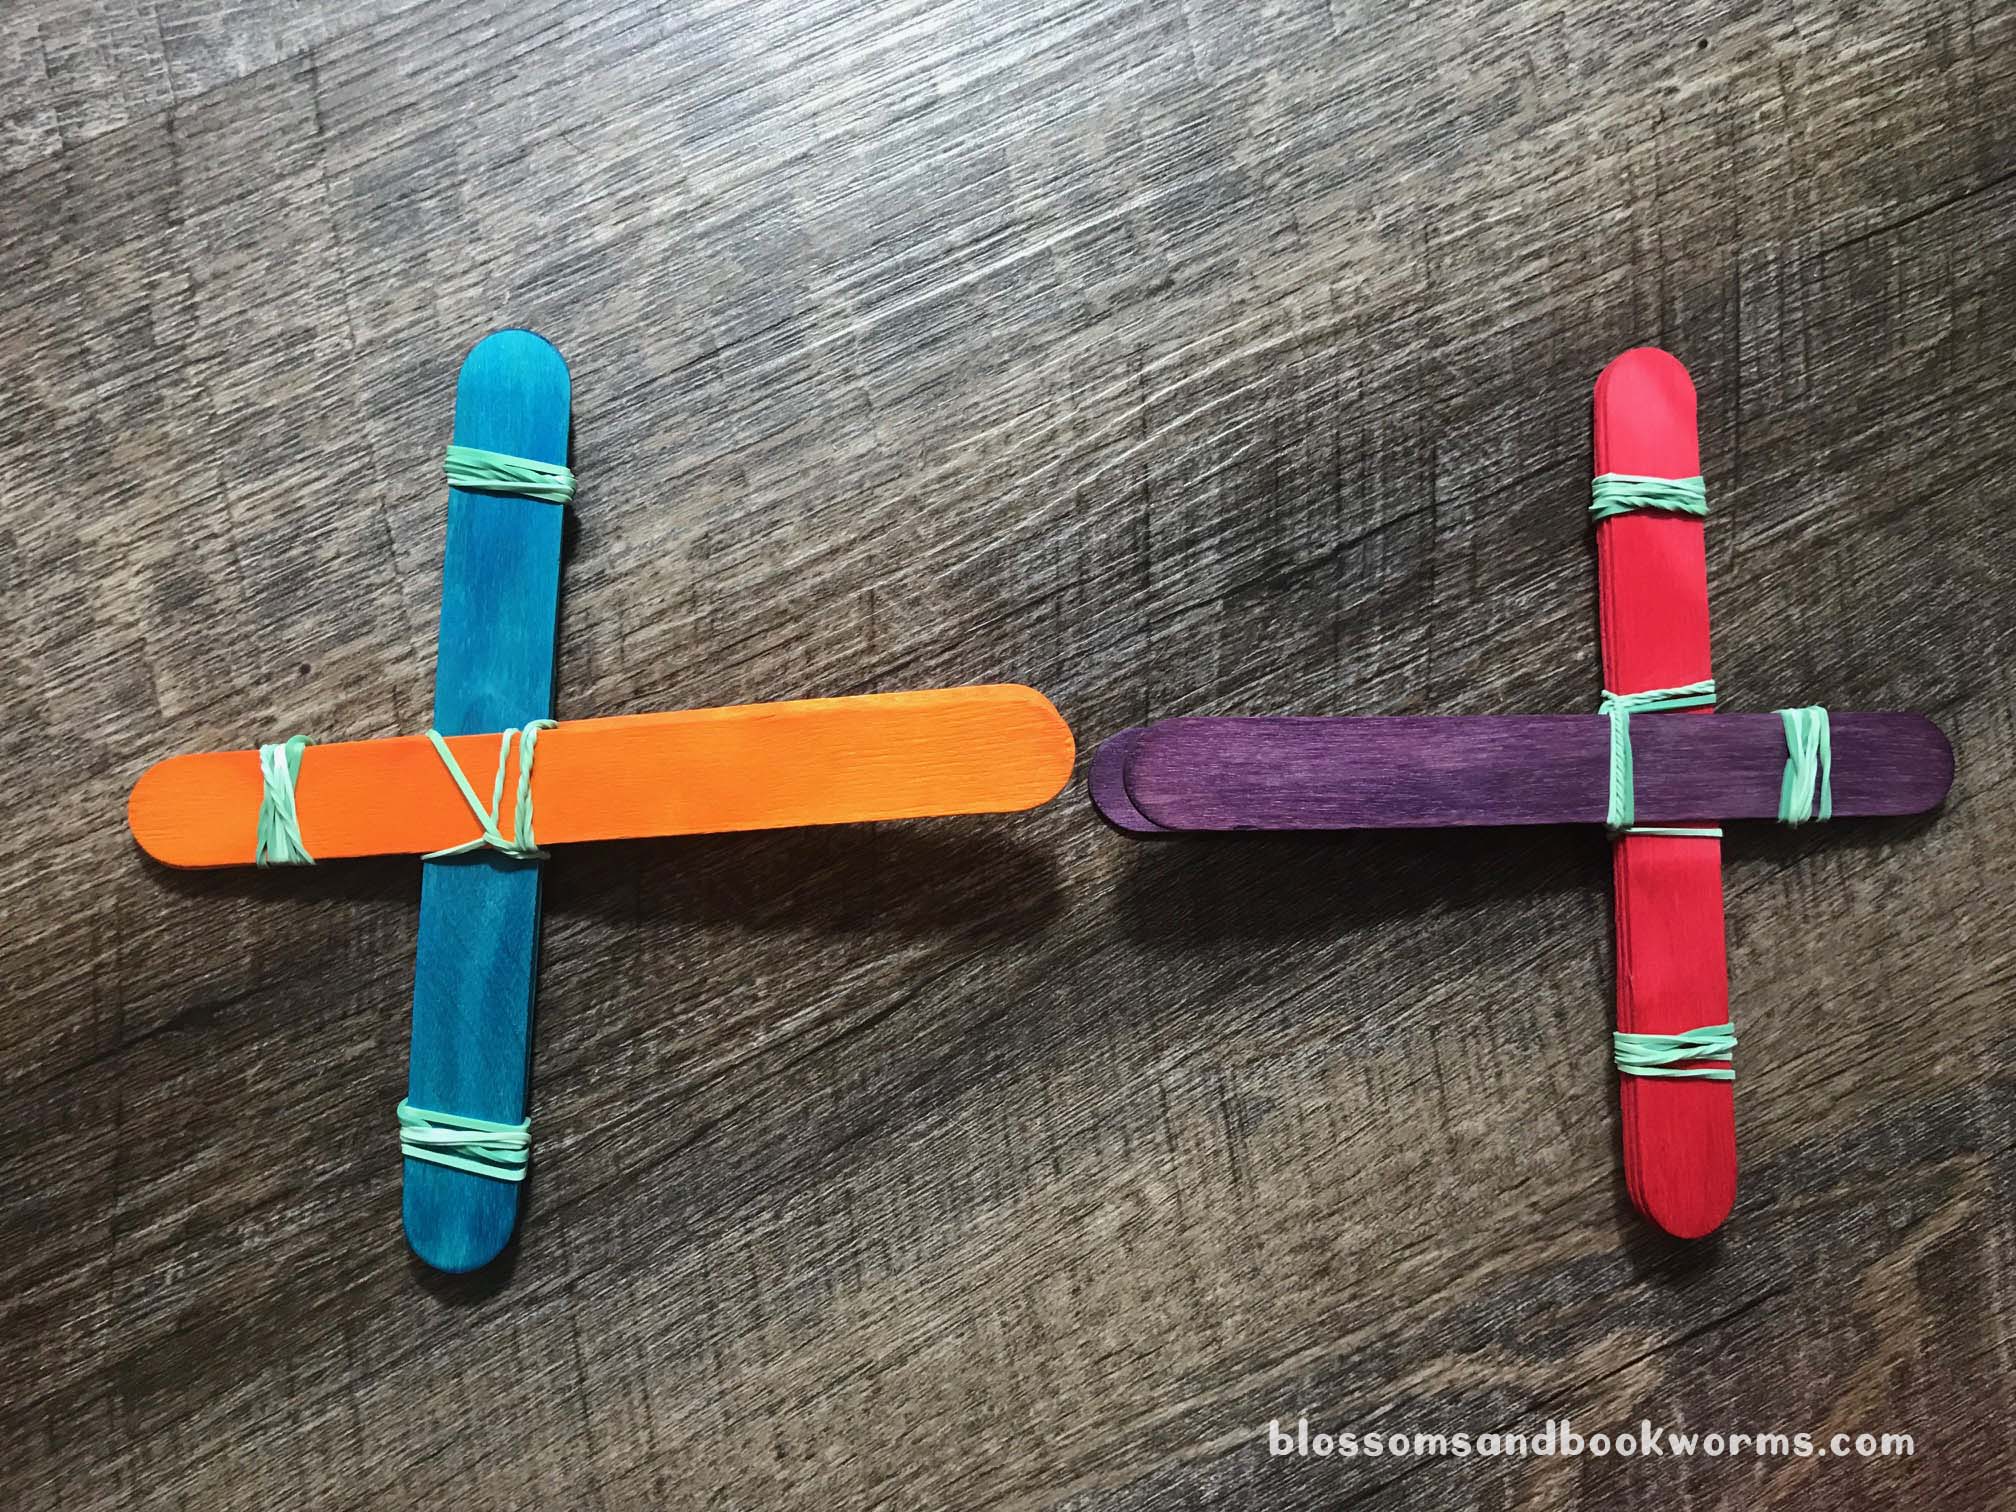
Next, you insert the stack of 3 craft sticks in between the 2 craft sticks from the 2-stick bundle. The closer the 3 stick bundle gets to the edge of the 2-stick bundle, the more leverage the catapult will have. Use a rubber band to secure the 3 craft stick bundle to the top craft stick from the 2-stick bundle.
Using a rubber band, secure the plastic spoon to the top of your catapult.
Finally, add the pom-pom, pull back, and….. LAUNCH!
We found that our catapult worked best if you placed a finger on the 2 stick bundle to hold it in place before pushing down on the spoon.
Our 6 year old was all about adjusting and reconfiguring the basic model to see what would happen. The scientific discovery – and complete focus on the activity – were so much fun to observe!
There are so many variations and adjustments that you can try during this experiment:
Try changing the number of crafts sticks in the 3-stick bundle. Try more sticks to give your catapult even more leverage. How far does your catapult launch an object with 7 craft sticks bundled together?
Try launching different items. Do marshmallows fly farther than the pom-poms? Can your catapult launch a small ball or plastic toy?
What happens if you move the spoon farther off the end of the catapult?
One of the benefits to living in the Sunshine State is that you don’t have to wait on the “perfect” day to harness the power of the sun. Pretty much any day will do, especially when it is June! 😎🤩
A solar oven in its simplest form harnesses the heat created when sunlight-to-heat conversion generates heat. This occurs when light waves interact with molecules moving in a substance. Its sounds all technical, right?! But it is so much fun – and simple – to do!
We have made several solar ovens in the last couple years. Last year’s model used a pizza box that we whittled and adjusted to work for the project. This year our solar oven experiment was a bit impromptu and so I didn’t have a pizza box on hand. You know what that means… time to get creative. I started searching through my cupboards and craft closet until I came up with this clear plastic shoe bin. I just knew it could work!
Materials:
Box – cardboard or dark colored surface would work even better than our clear box, but we were improvising!
A reflective surface – we used regular aluminum foil from the kitchen
A piece of glass or transparent plastic to protect the food – we used plastic wrap from the kitchen again 😉
Tape – not pictured, but clear packing tape or Scotch tape works great
Craft sticks or skewers to prop open the lid
S’Mores ingredients, of course! 😁
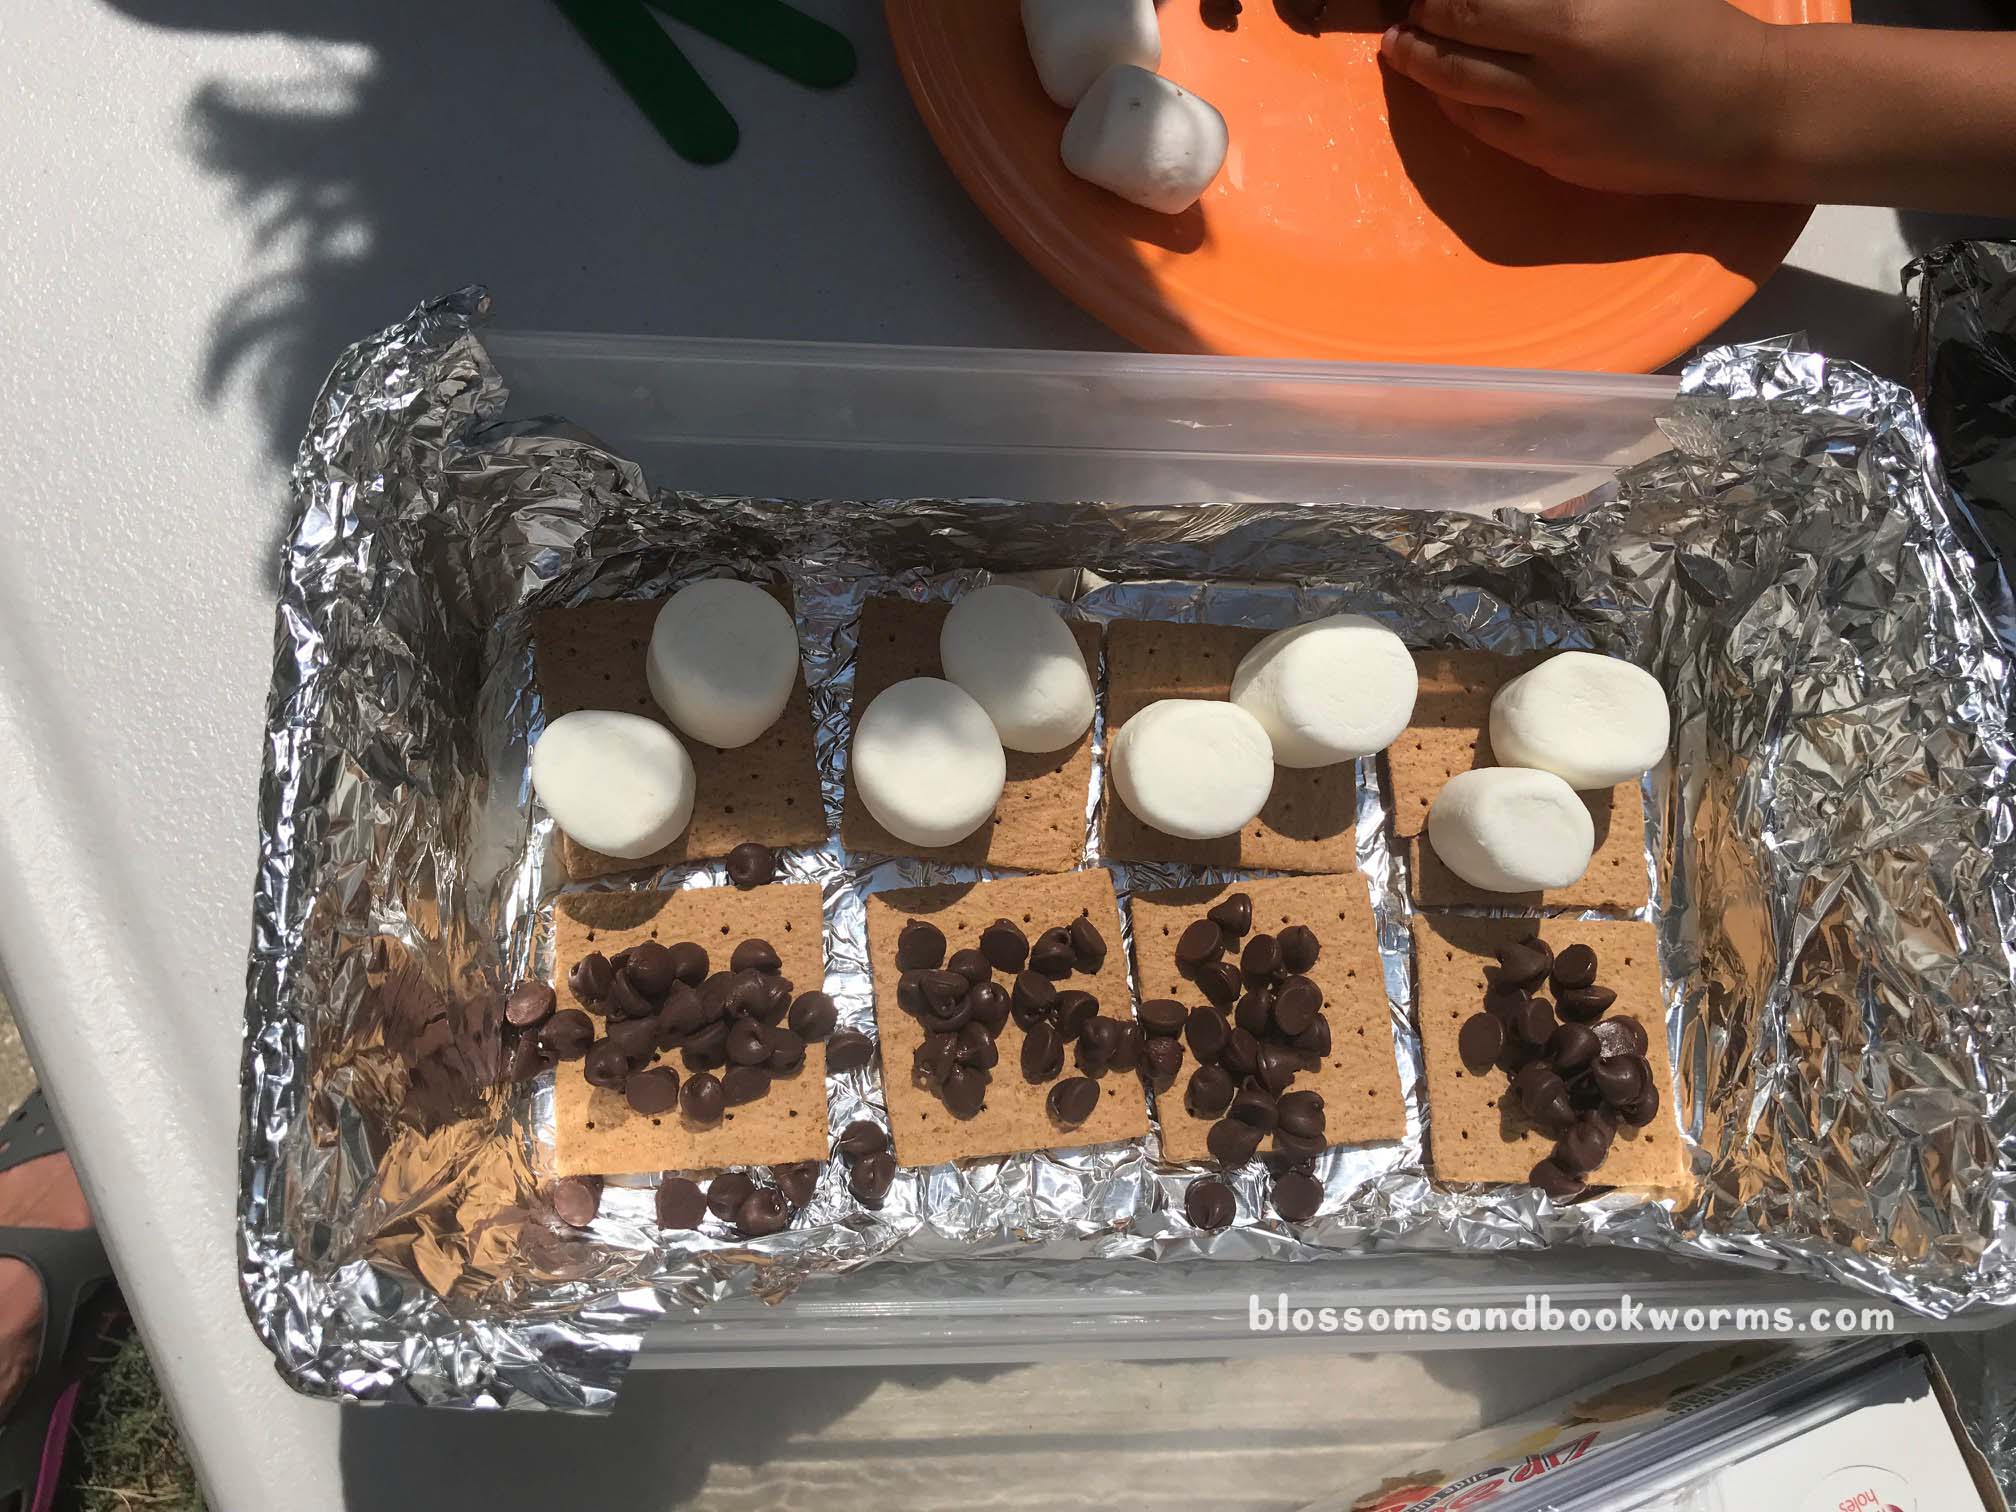
Begin by covering the inside of your box with aluminum foil. I used a long sheet to wrap the incase the inside of the box. You want that light from the sun to go into the box and get trapped in there!
Then, cover the inside of the lid of the box with aluminum foil as well.
Next, assemble the ingredients for the s’mores. Again, no judging our chocolate chips 🤪 we’re improvising! Ha!
We are pretty classic in our s’mores toppings but you could easily throw a Reece’s Cup or other fun surprise on your s’more!
Once everyone is thoroughly sticky from assembling the treats – and sneaking a few nibbles of the toppings – cover the box in plastic wrap. You will want to tape the sides of the plastic wrap down to the outside of the box so it has a tight fit. This protects the food from bugs that might want a snack and also allows light to penetrate easily.
After the plastic wrap is secure you will want to prop the lid on top of the box using the craft sticks or skewers. The lid helps to reflect the sunlight onto the food to cook the s’mores.
Now for the hardest part… you have to wait for the food to cook 😂 Wait till you make your own solar oven, you will see, this really is the hardest part!
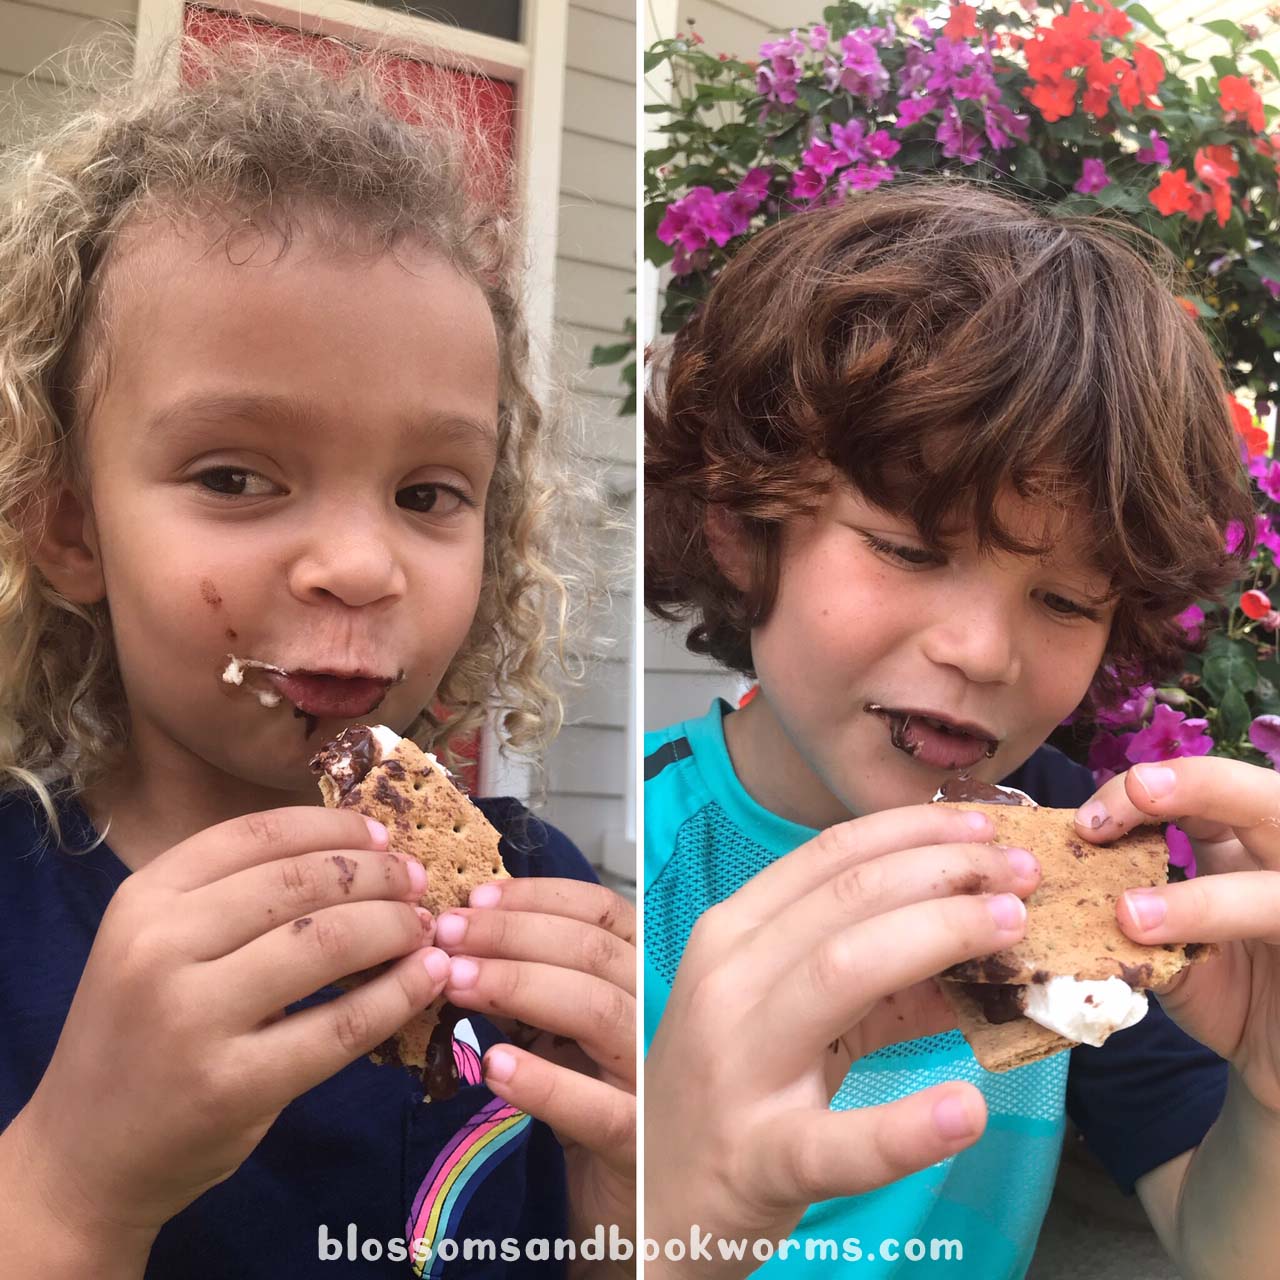
Our s’mores were melty perfection in about 60 minutes in the hot Florida sunshine ☀️
Look at these chocolate smeared faces! Absolute delight in the final product!
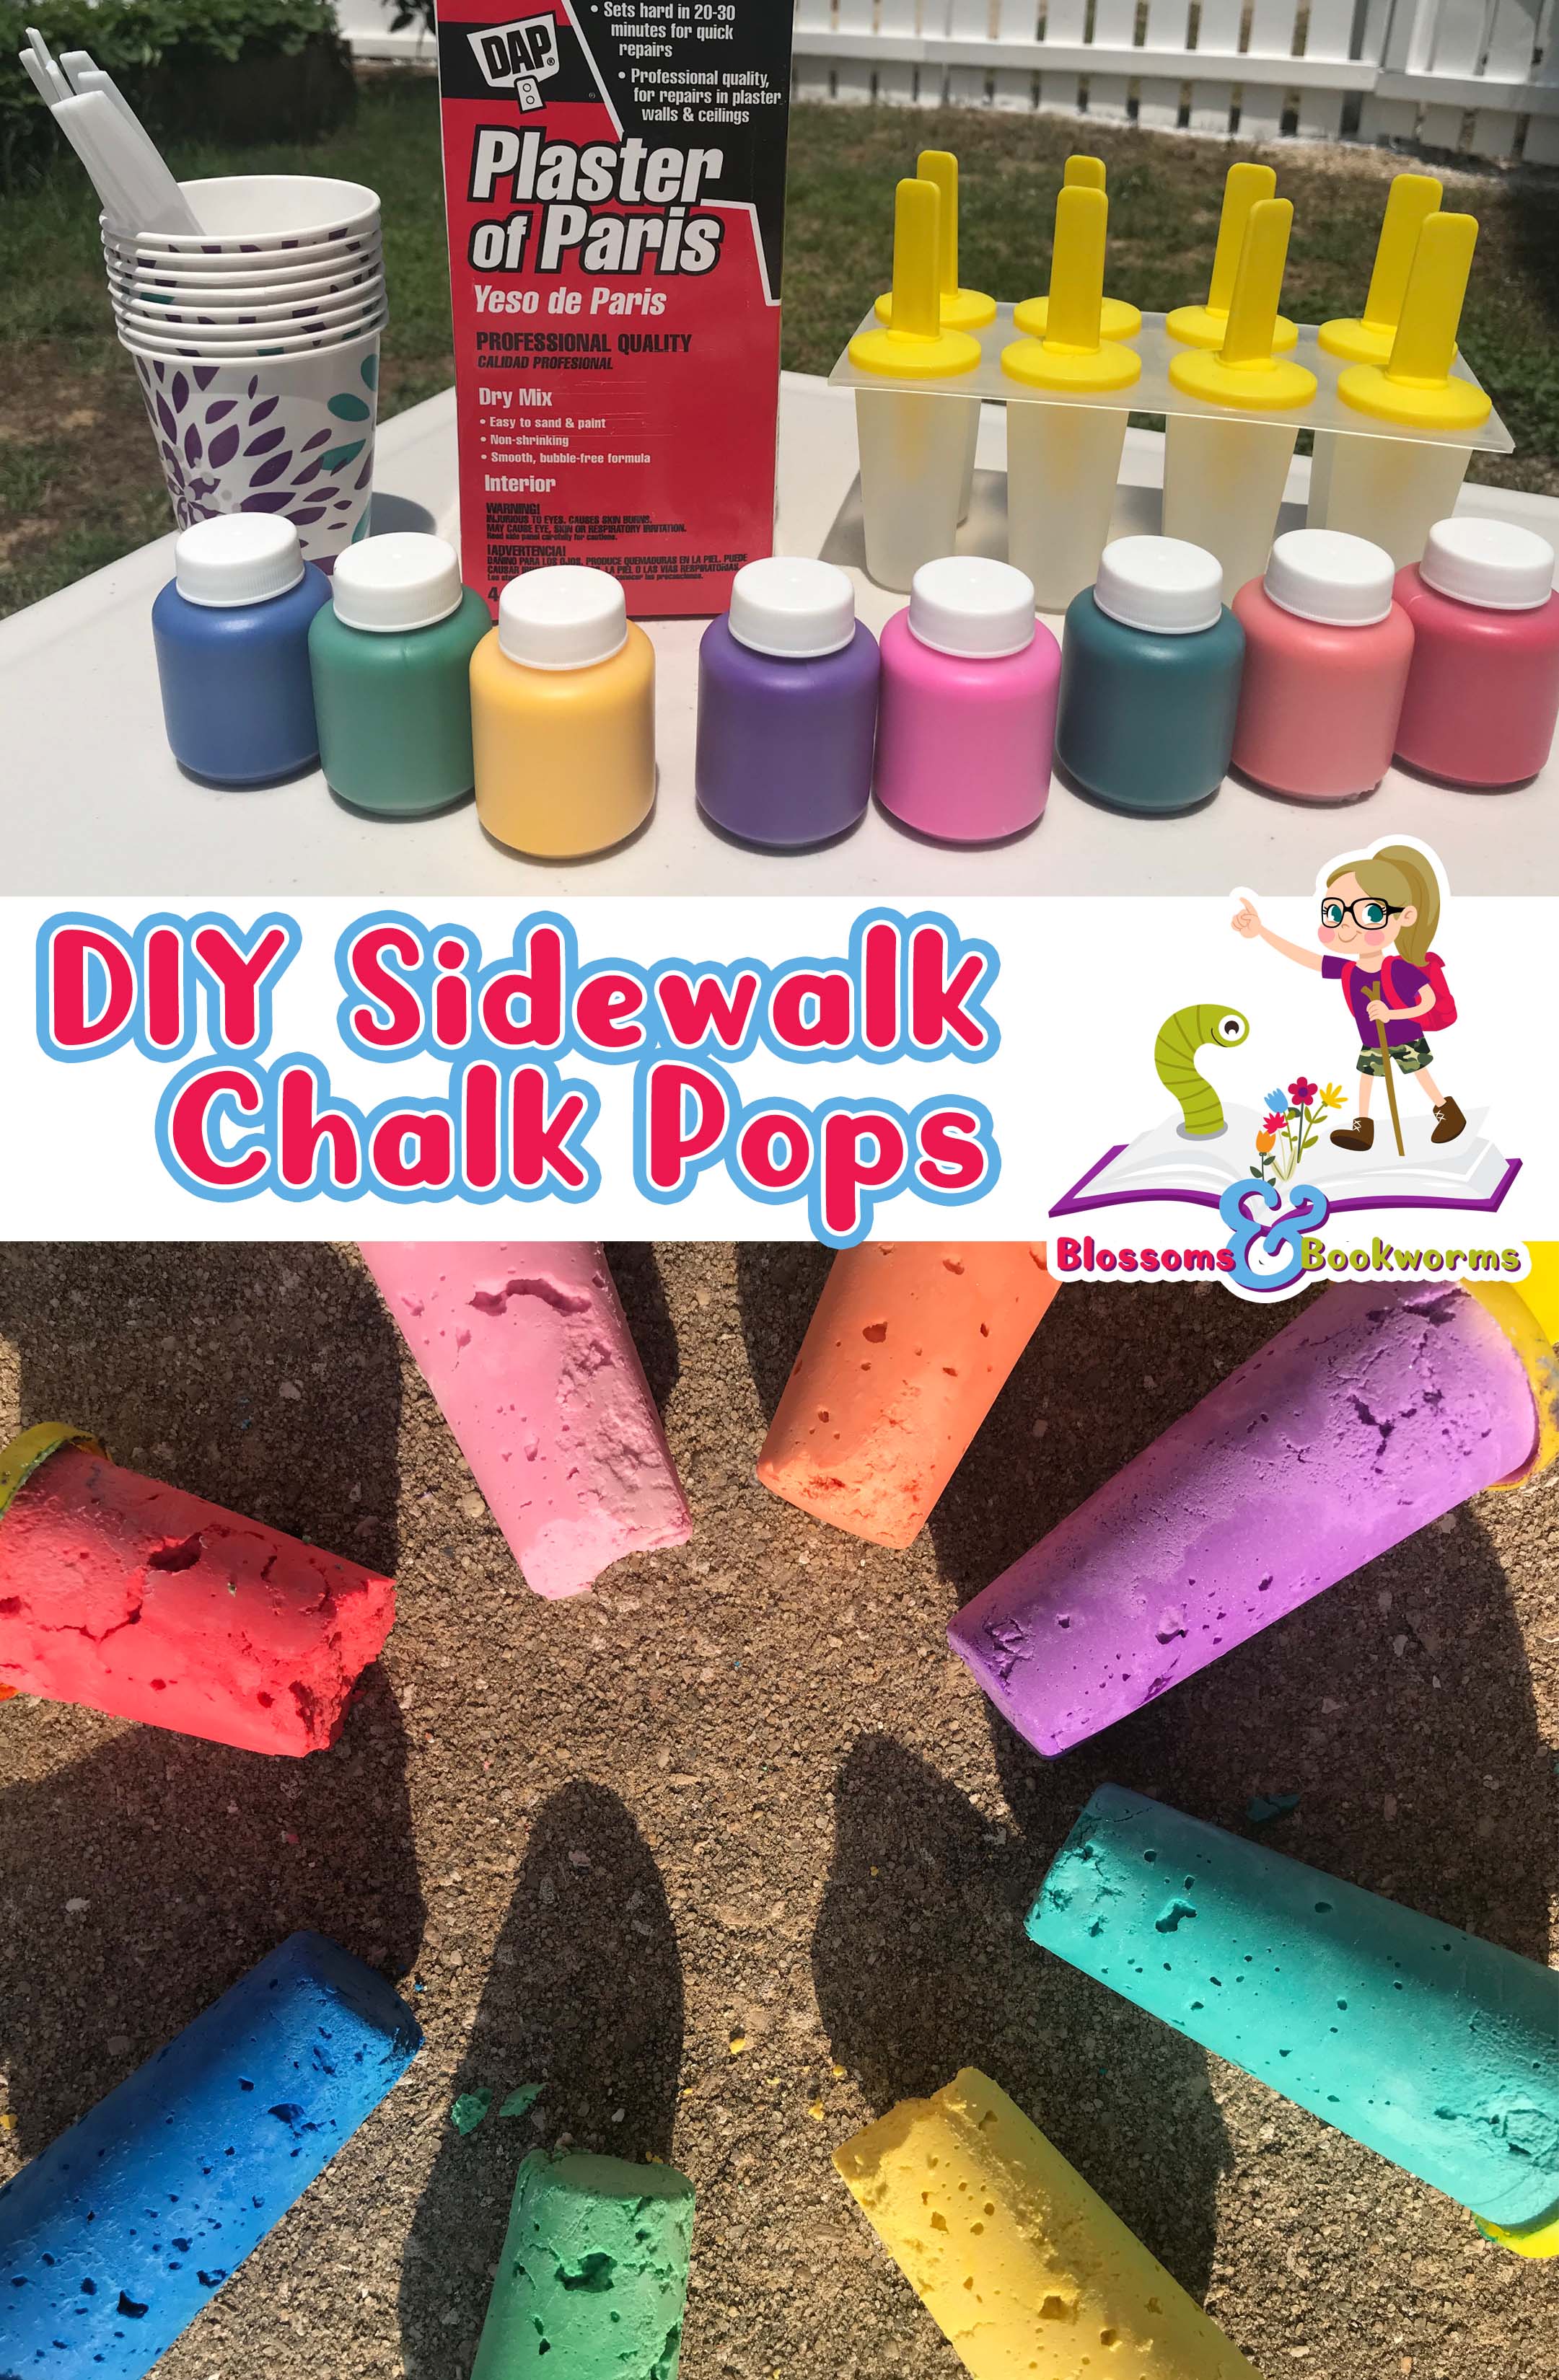
Sidewalk chalk is virtually synonymous with summer. There is something quintessential about little hands, faces, and bodies covered in a thin sheen of sweat and chalk dust as they embellish their latest creation in the middle of the driveway.
Chalk is relatively inexpensive to buy, but I love giving my kiddos the experience of making your own. You get to choose the colors, shapes, and, in this case, even the handle!
The supplies are pretty basic, except for the Plaster of Paris. However, I was actually pleasingly surprised at how many retailers had it in stock. So I am sure you won’t have trouble locating it either!
Materials:
Plaster of Paris
Popsicle Mold – we used an old plastic popsicle mold from our outdoor play bin but a silicone mold would work even better!
Popsicle Sticks
Tempera Paint – we used what we had but neon would be even more fun!
Paper cups and plastic spoons
Cold water and measuring cups – not pictured
A few important notes:
Plaster of Paris should NOT under any circumstances be put down your drain! It will harden in your pipes and cause damage. That is why we are using disposable cups and spoons for this activity.
Cold water needs to be between 40-50 degree F. Yes, it matters. 😁 We chilled ours in a picture in the refrigerator before getting started.
This can be messy and you do not want Plaster of Paris dust getting spread around your interior space. I would highly recommend taking this activity outside!
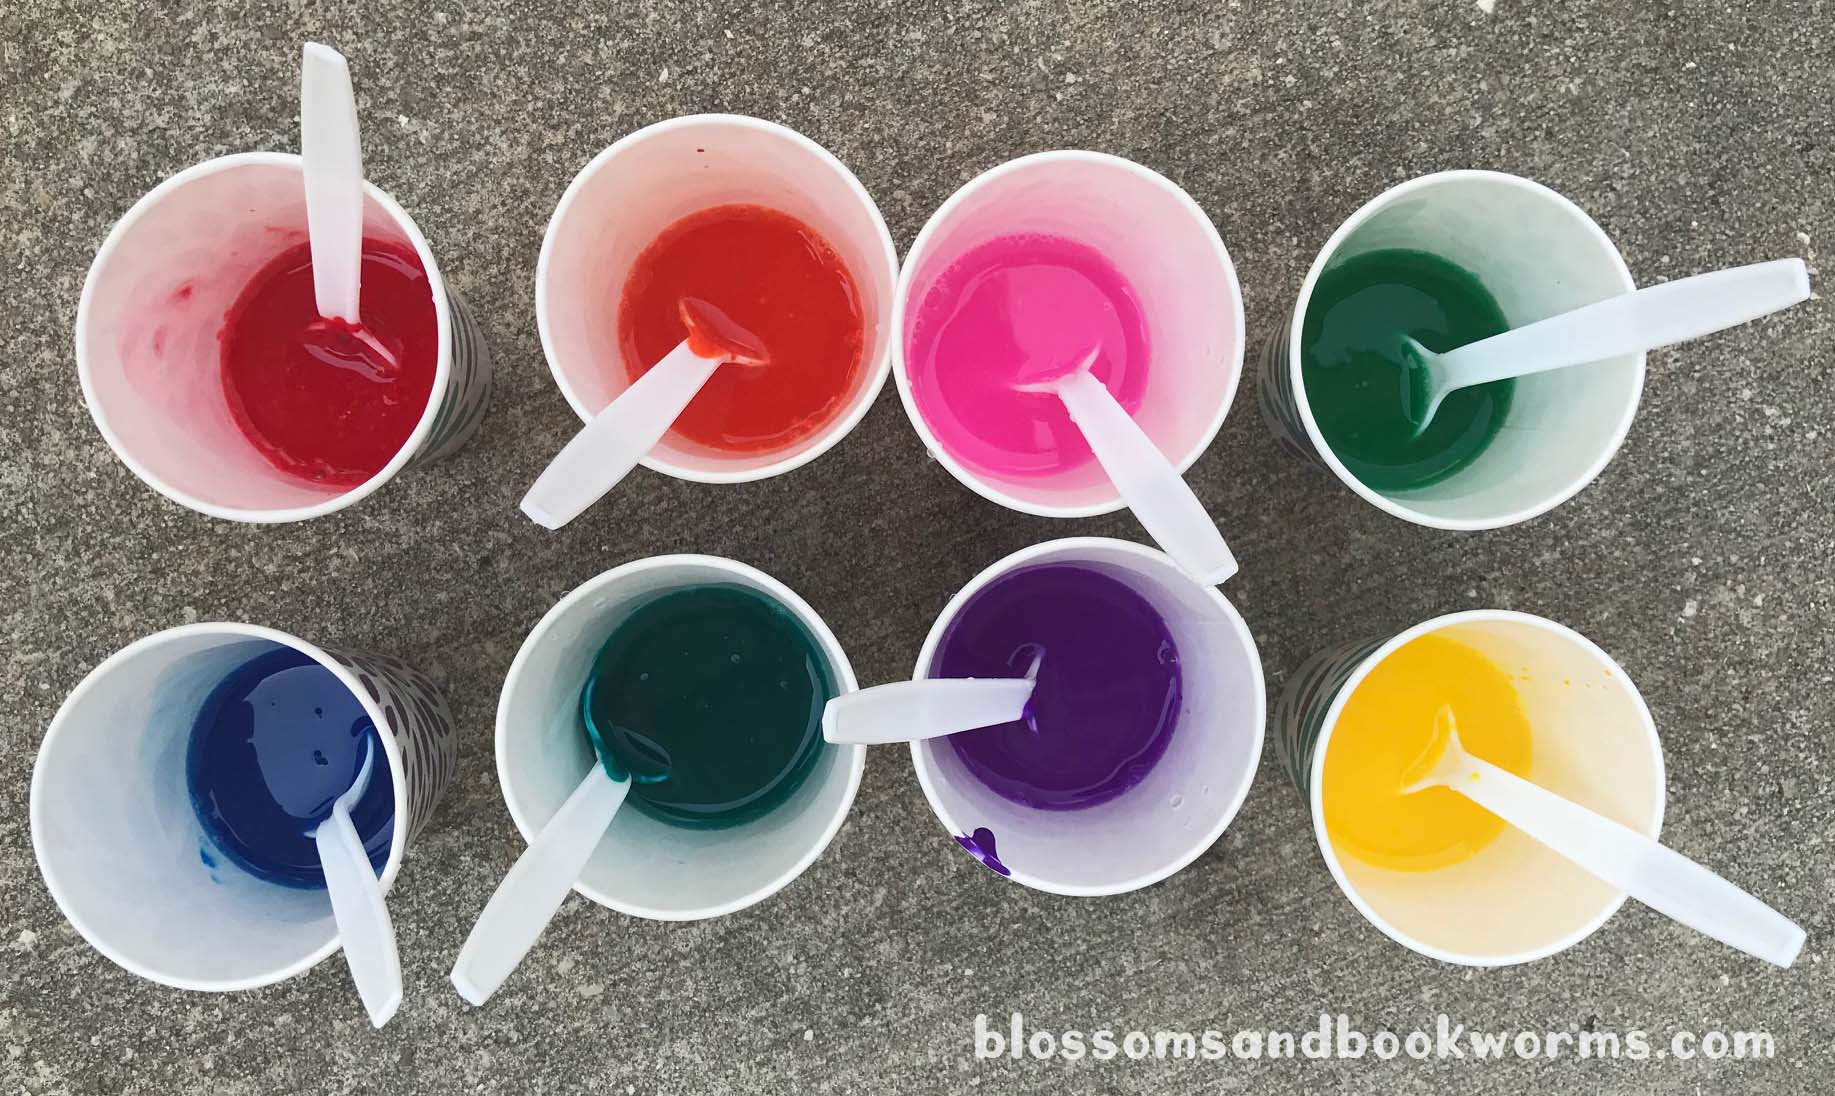
You will start by getting out one paper cup for each color you are going to make. Then measure about 3 TBS of tempera paint into the bottom of the cup – I really wanted a colorful POP. Add 1/3 cup of cold water to each cup and gently stir with a plastic spoon to combine. Getting things perfect in this step is not necessary. The color blobs will smooth out in the next step 😉
Measure 2/3 cup of Plaster of Paris into each paper cup. This is where it can start to get messy. Make sure your paper cups are big enough to contain this much picture and still stir things together.
Stir until the Plaster of Paris, paint, and water mixture is thoroughly combined. Mine was a bit thicker than I anticipated but still loose enough to easily stir with a plastic spoon.
Note: Some of the colors look super dull and washed out at this point. I was honestly nervous that they would end up pastel. However, wait for the final product, they are vibrant, bold, and just the right amount of color!
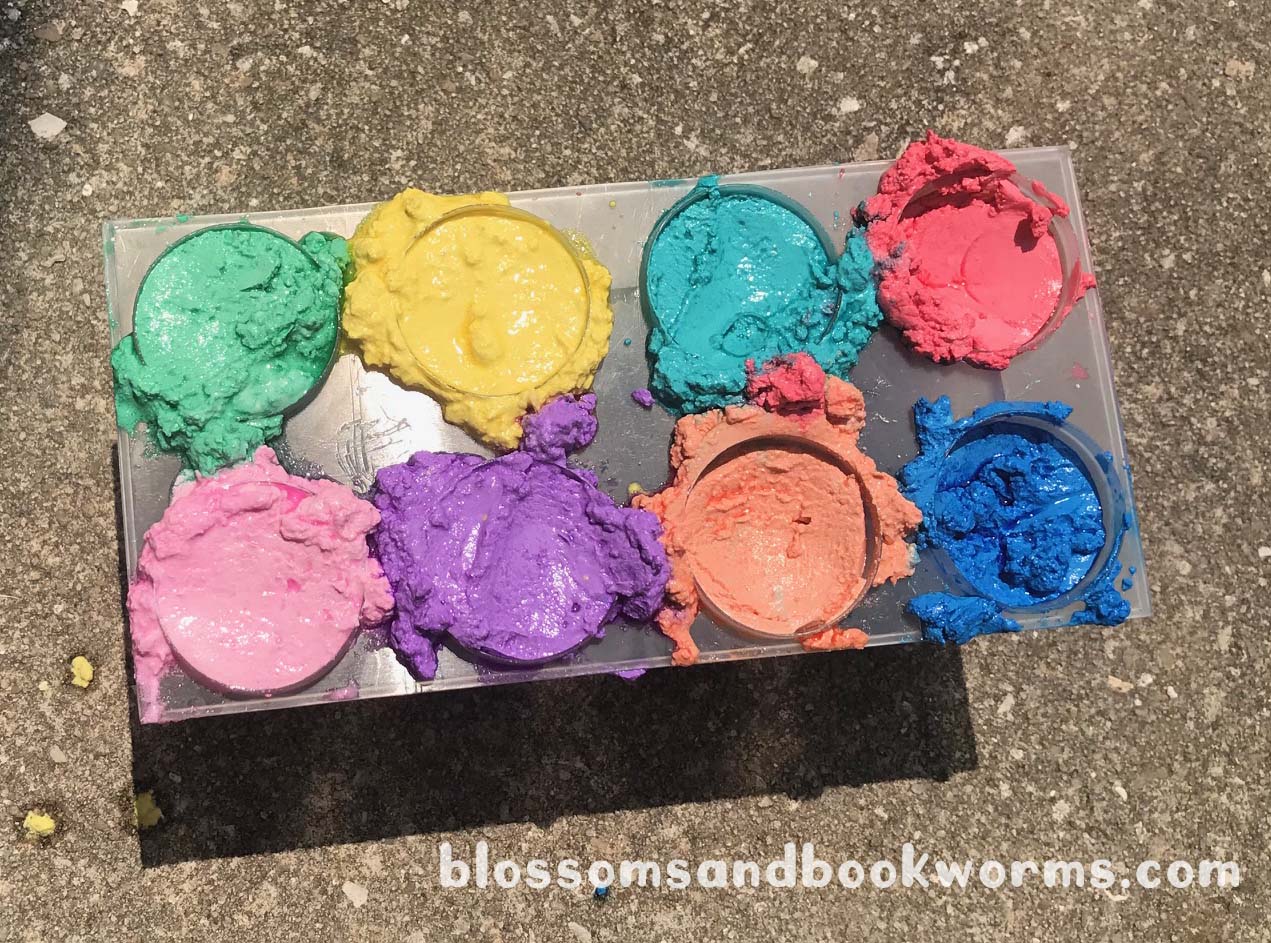
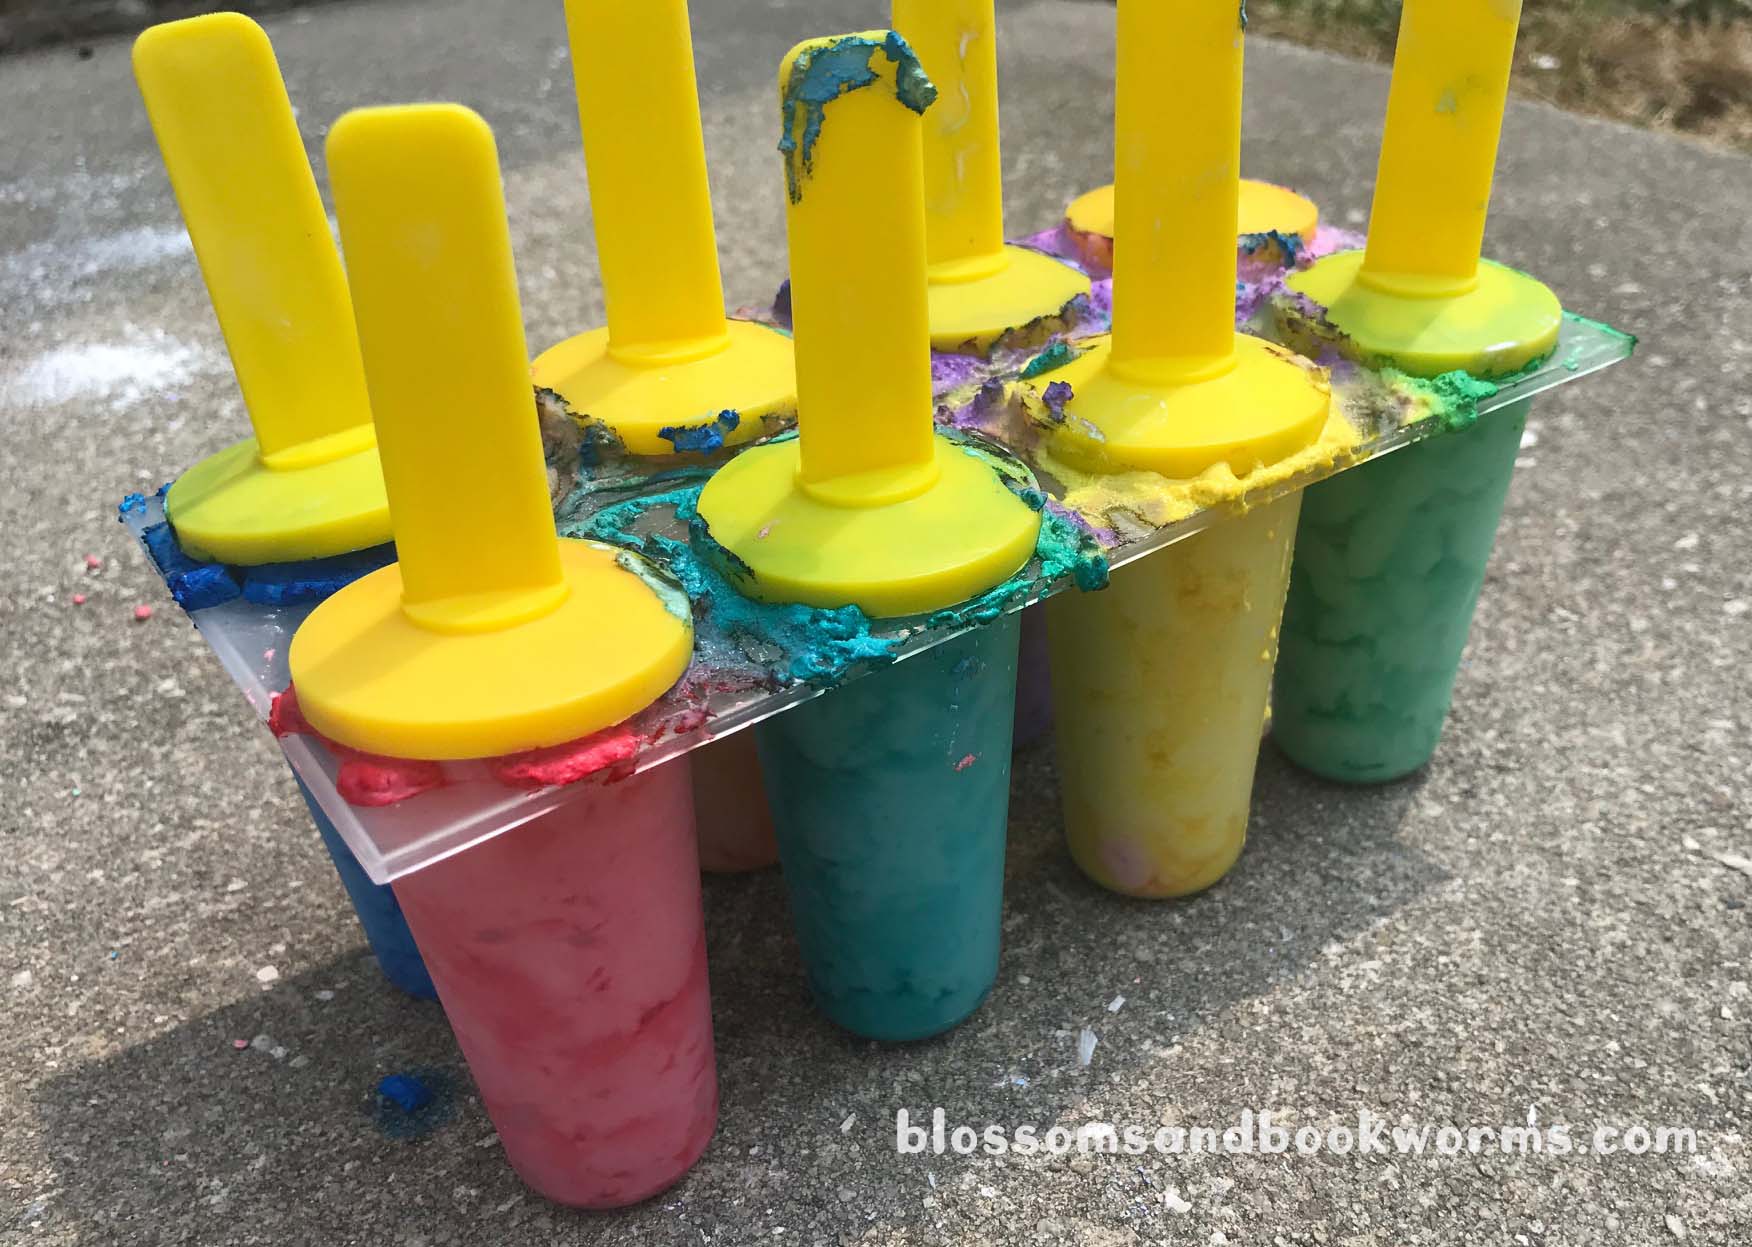
Carefully spoon mixture into the mold. Obviously this is a “do as I say and not as I do” moment because my mold is definitely less than “carefully” filled 🤣 Gently tap on the work surface (aka the sidewalk) to release air bubbles.
After about 2 minutes the plaster will begin to firm up. Insert your popsicle stick into the middle of the wet chalk “pops”. They should be easy to place. You will not have to push hard or hold them up.
Note – I used the popsicles sticks that came with my mold and in hindsight I would not have done this. The little cap part creates a barrier that doesn’t allow the chalk to properly set. Using regular popsicle or craft sticks would have been a much better option.
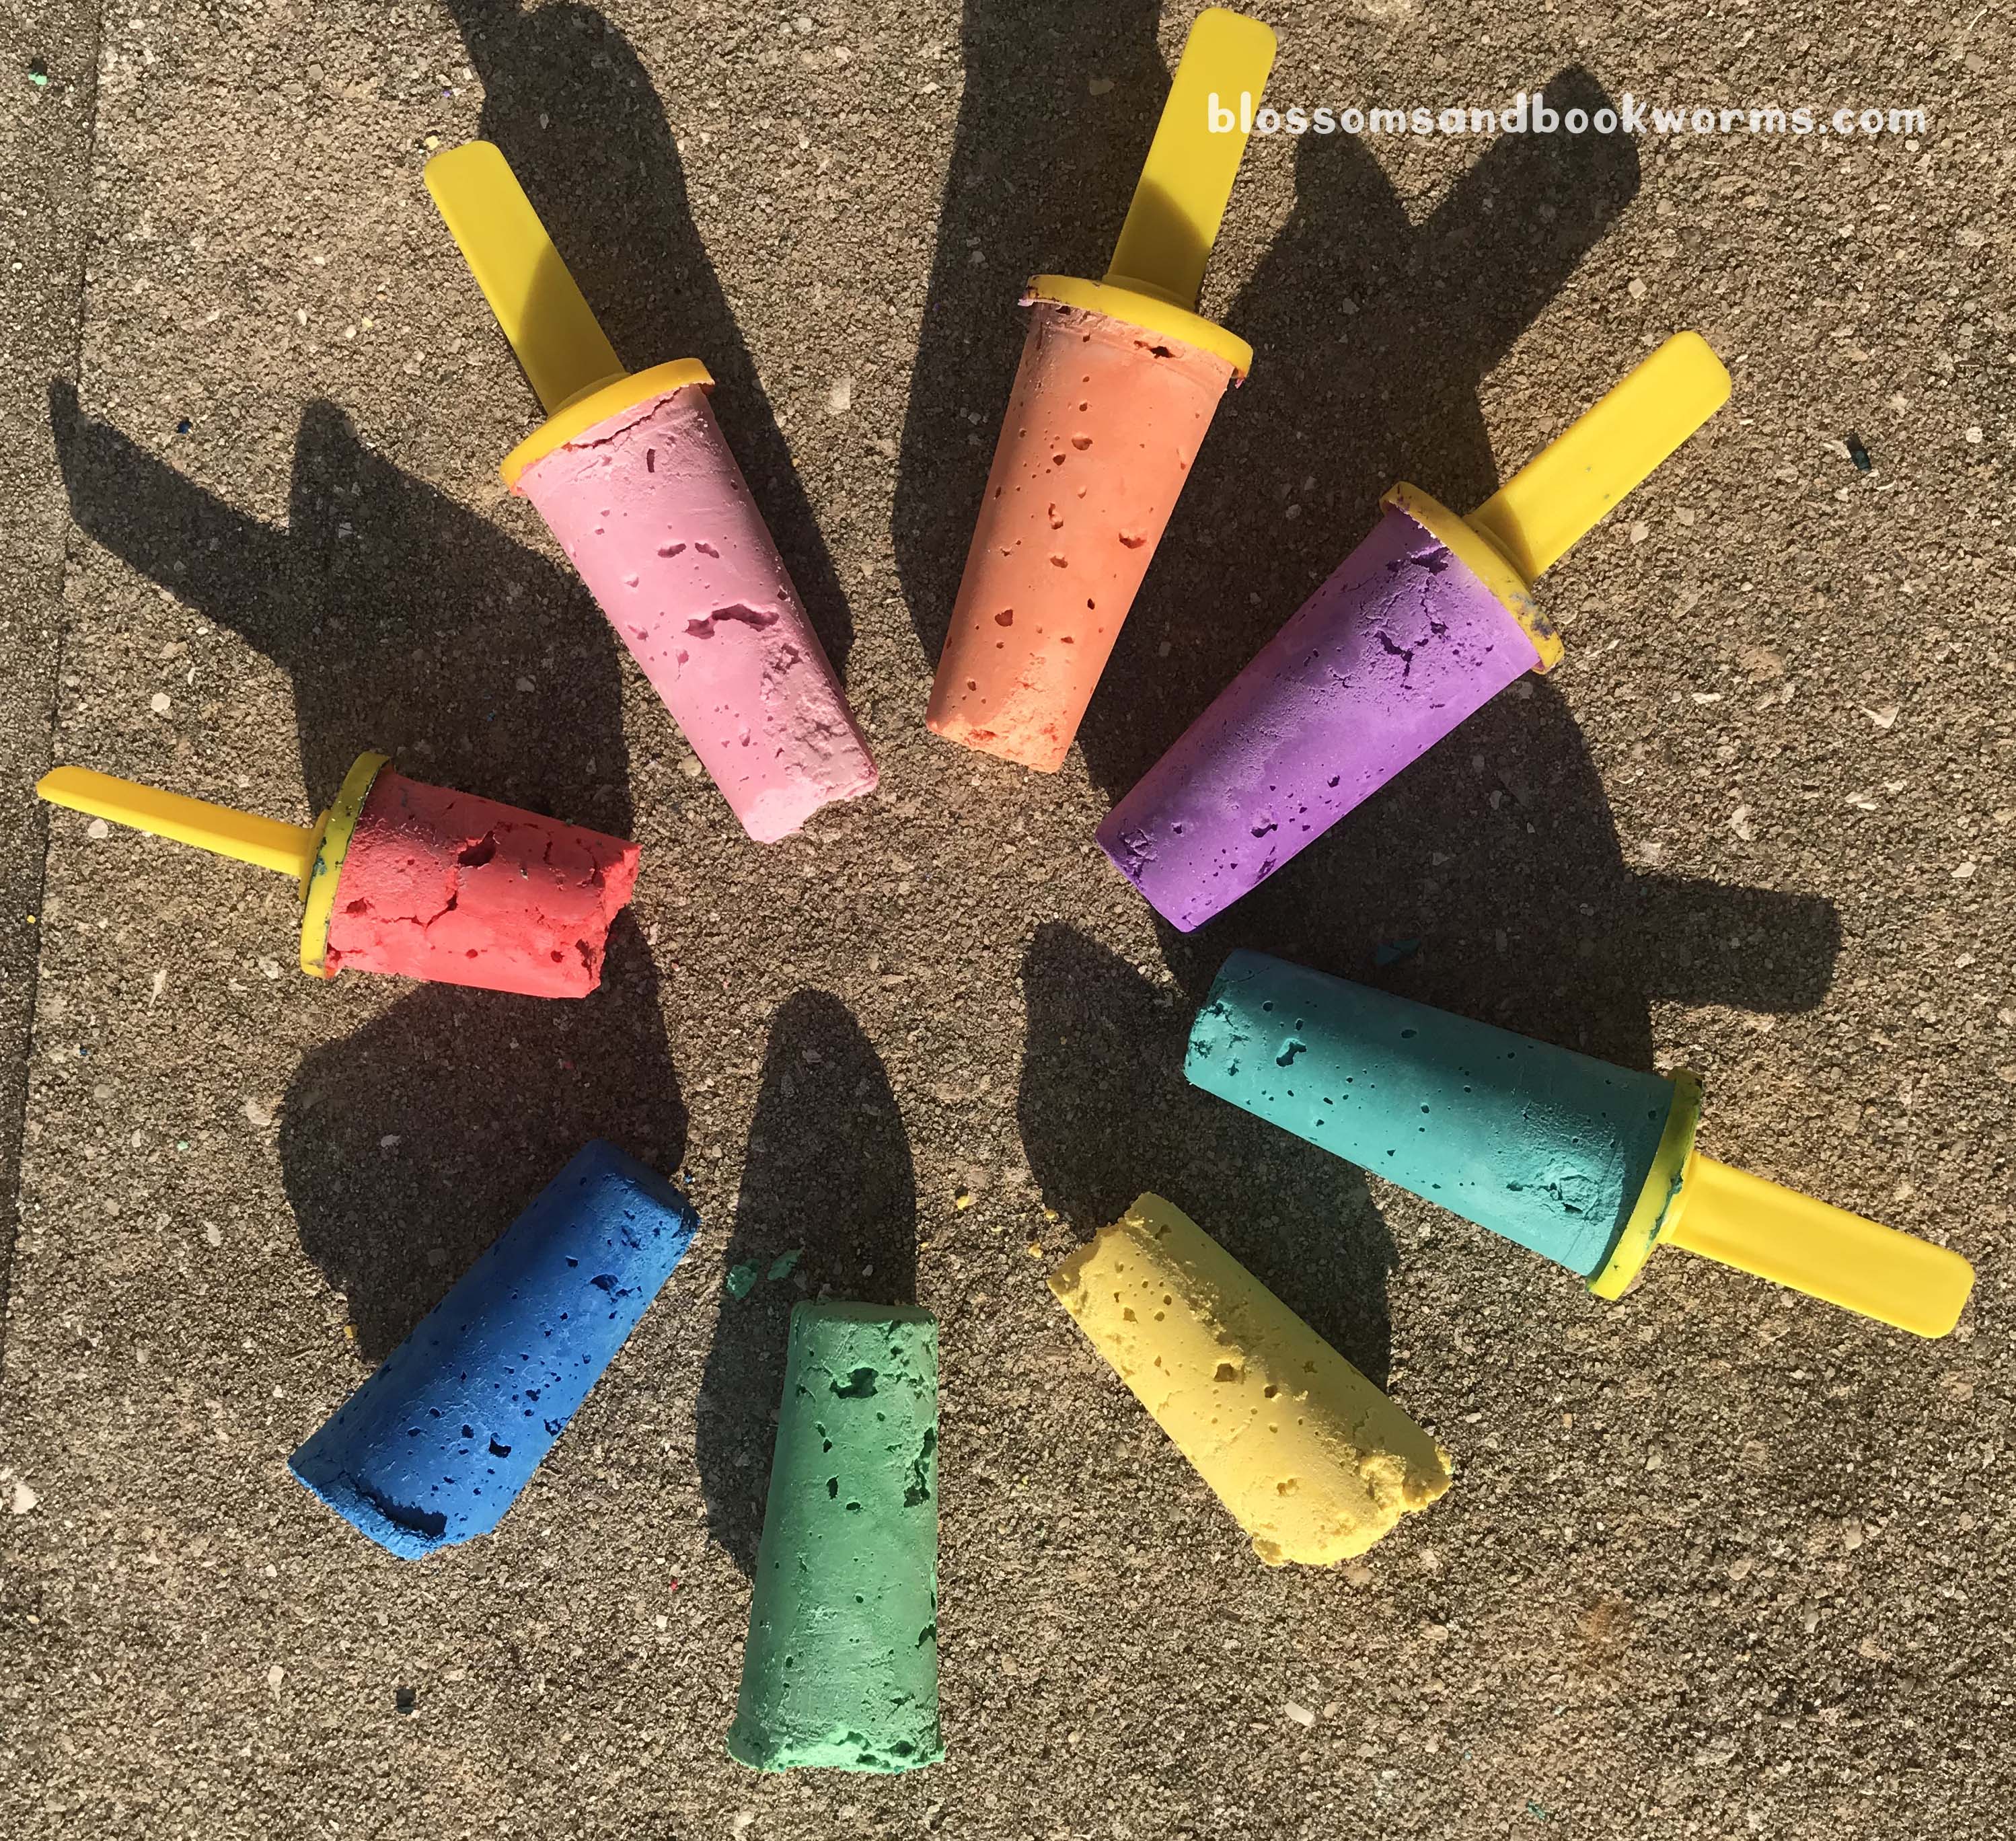
Leave them to set in the hot sun for about an hour before carefully removing from the mold. Then leave them out in the sun to continue drying.
Look at all those bubbles I didn’t tap out. 🤣 But aren’t the colors vibrant?!
These sidewalk chalk pops actually made it 24 hours before my kids started experimenting with them. I was super impressed at the vibrant colors and the easy-to-hold popsicle handle. No more scraping knuckles on the rough concrete as you color!
. . .
Want to know a little secret? Things do not always go as planned…. check out the zoomed out version of the photo above 👇
HA! 4 perfect chalks. 1 broken chalk. 3 missing sticks. That, my friends, is real life.
Lessons Learned: My mixture should have been a bit runnier. I should have tapped a bit more firmly to get the bubbles out. I definitely should have used regular popsicle sticks.
But you know what?! It was still super fun and I would totally do it again – with a silicone mold this time!!!
DIY sidewalk chalk pops would make amazing party favors for a summer party or birthday. You could even make them more special by layering or swirling the colors!
Quick! It is blazing hot outside and the pool is unexpectedly CLOSED! Time for Plan B…
Oh no! What is Plan B?!?!
Does this ever happen to you?? 🙋🏼 That was totally me this morning! But, thankfully, I have my #ScienceWeek theme bin all pre-loaded with all the ingredients for tons of experiments.
I spend a little time over the weekend gathering up all the ingredients and tools for the projects we are going to tackle over the coming week. Then I tuck them all into one bin. Finally, I add a list of all the activities I just gathered necessities for and place that on top of the supplies… because, #mombrain is real. I can be SUPER EXCITED about an activity and one hour and 50 requests for snacks later say “why did I lay out those rubber bands again?”
This experiment is a classic that keeps being cool. I remember back in the 90’s we saw a fun volcano experiment in a magazine and my mom actually let us try it out. It was THE COOLEST thing! This rainbow volcano plays on that same simple vinegar and baking soda chemical reaction but it adds the fun of rainbow colors!
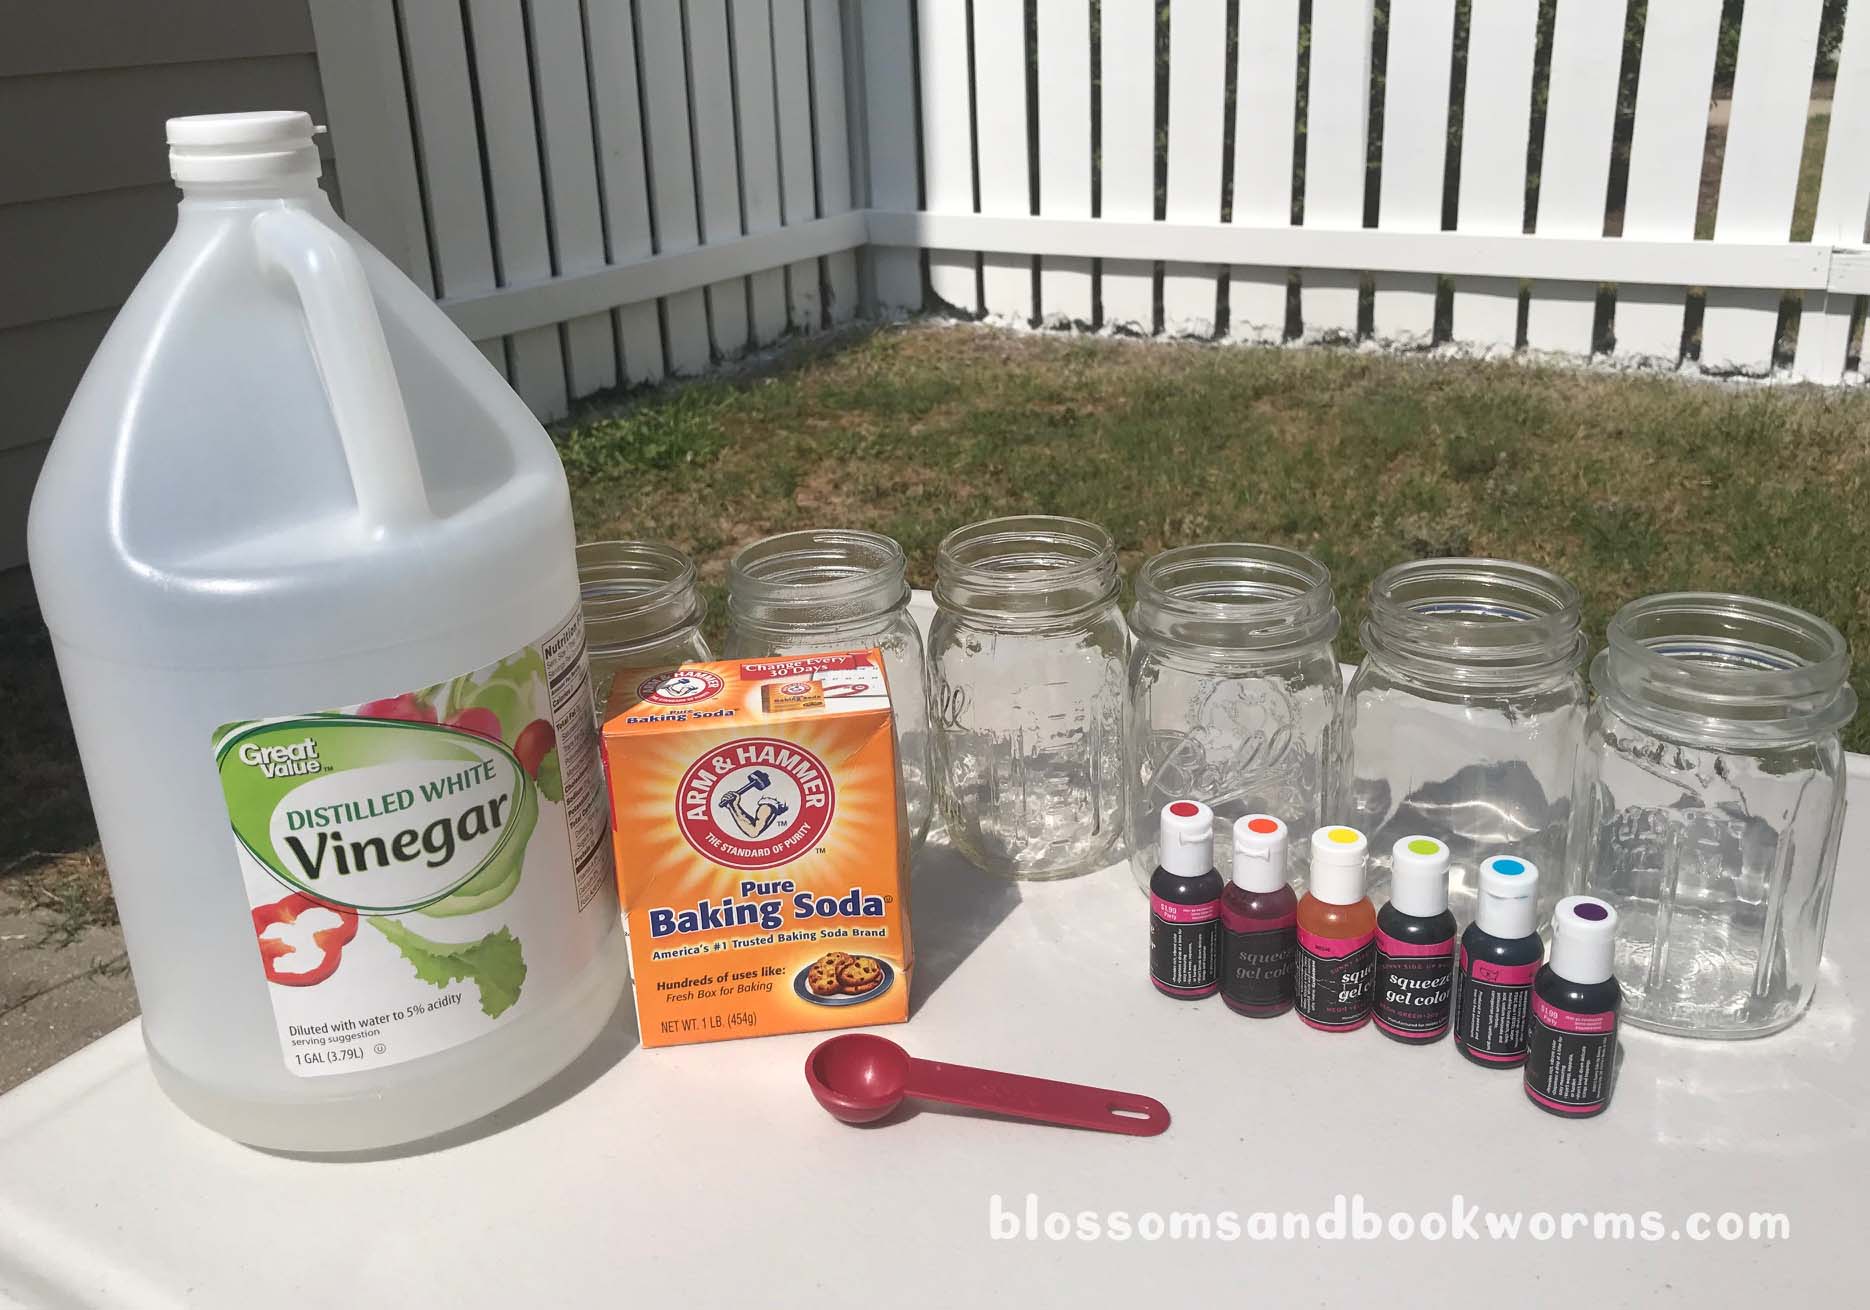
Ingredients:
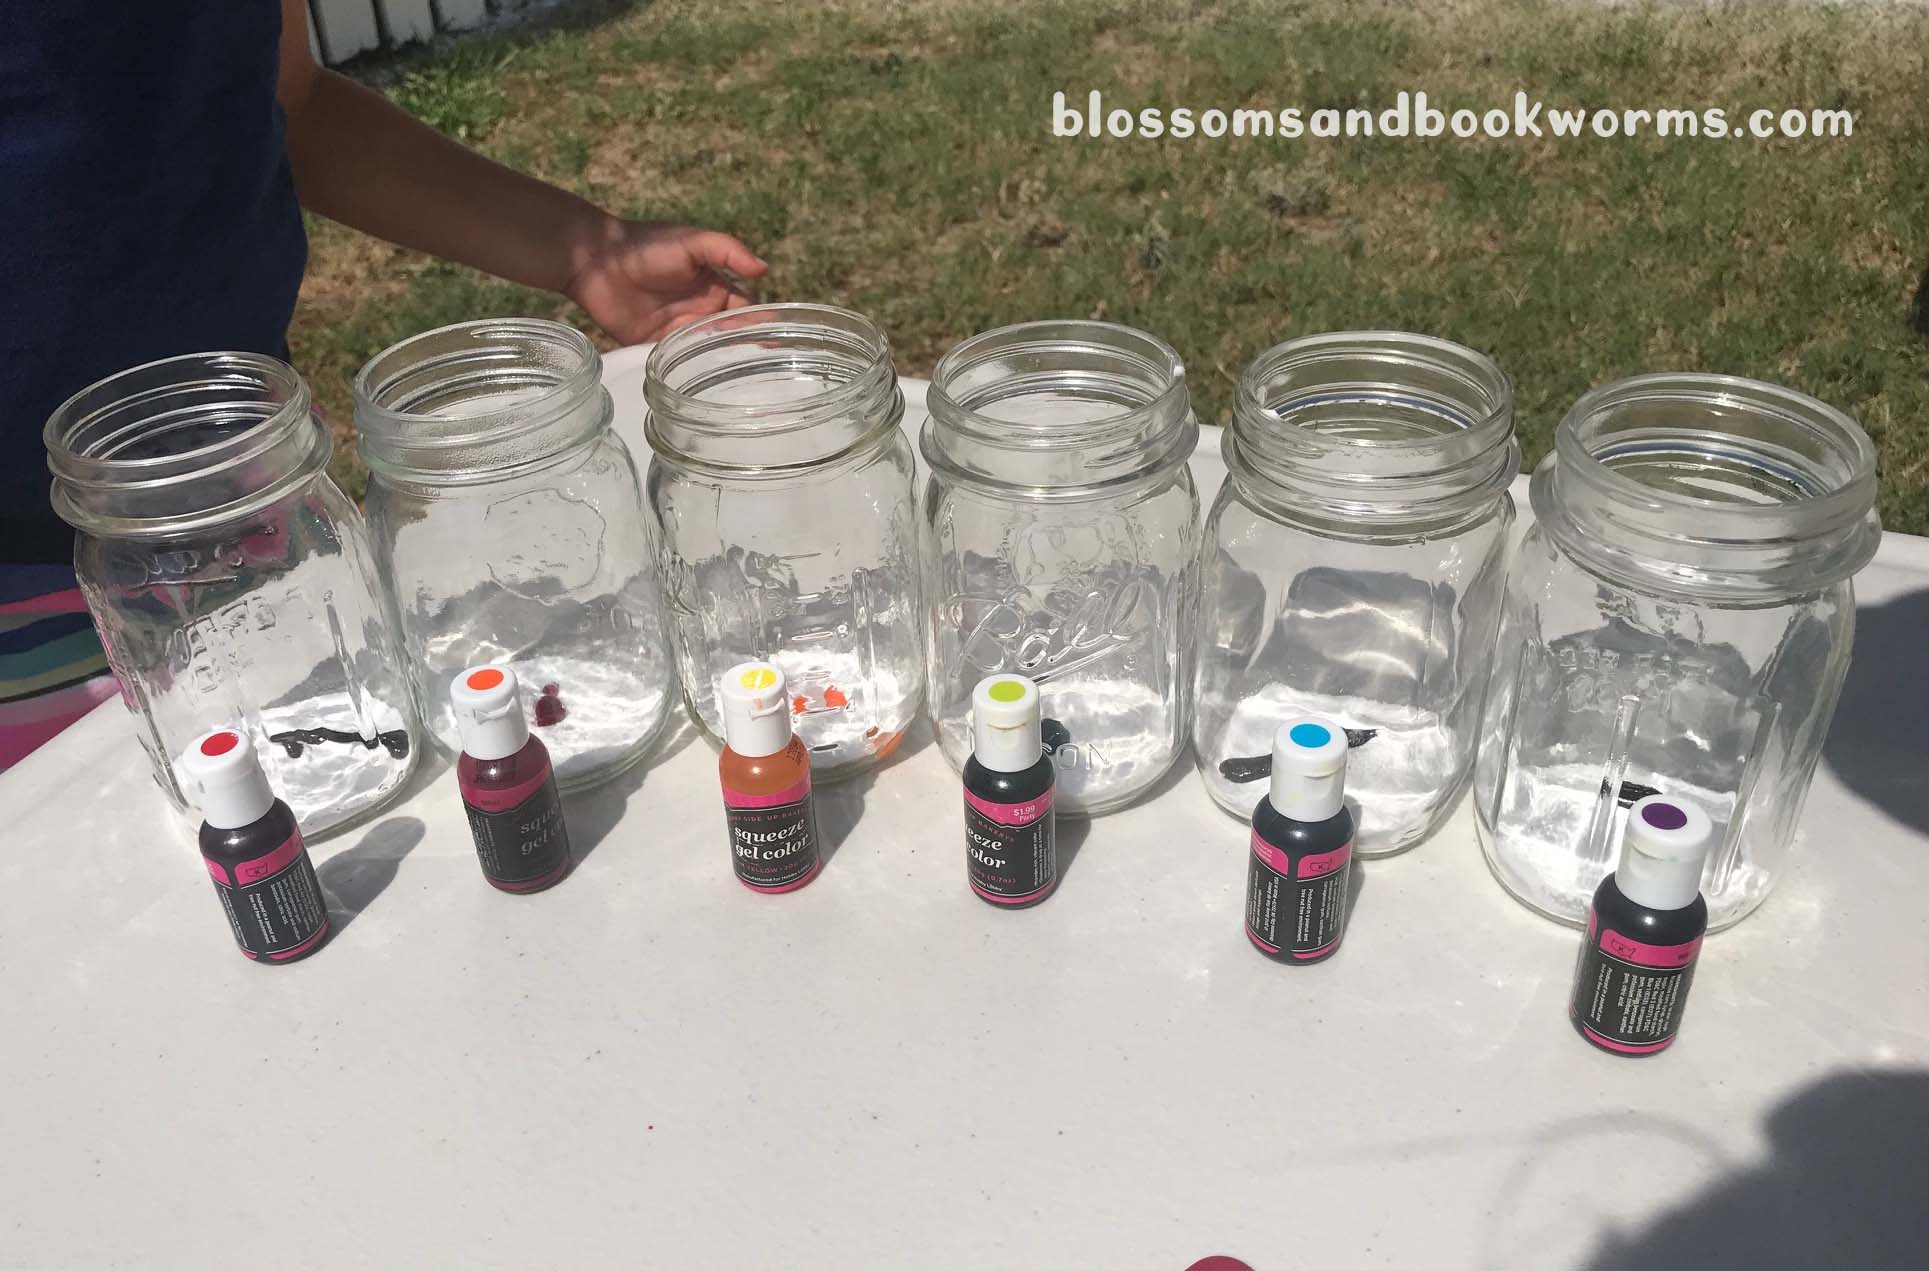
Mason Jars (or glasses)
Baking Soda
Vinegar
Measuring spoon
Food Coloring (optional for the reaction, required for the rainbow fun!)
First, measure the baking soda into the glasses. We used about 2TBS in each glass jar.
Then add 5-10 drops of food coloring to each one. Note – I didn’t have regular food coloring on hand so I used gel colors. The gel has a more potent color so you need much less.
And my son just reminded me that we should have had one more jar for indigo so it wasn’t really a true rainbow after all. 🤣
Now check the book to see if you are doing it right so far… 🤣 My son is all about doing things “correctly”. He read this book in his free time a few weeks back and was so ecstatic to show me you could really make a “bubbling potion”. His excitement after just reading about the reaction was why I added this activity to our #ScienceWeek list. It is a childhood must!
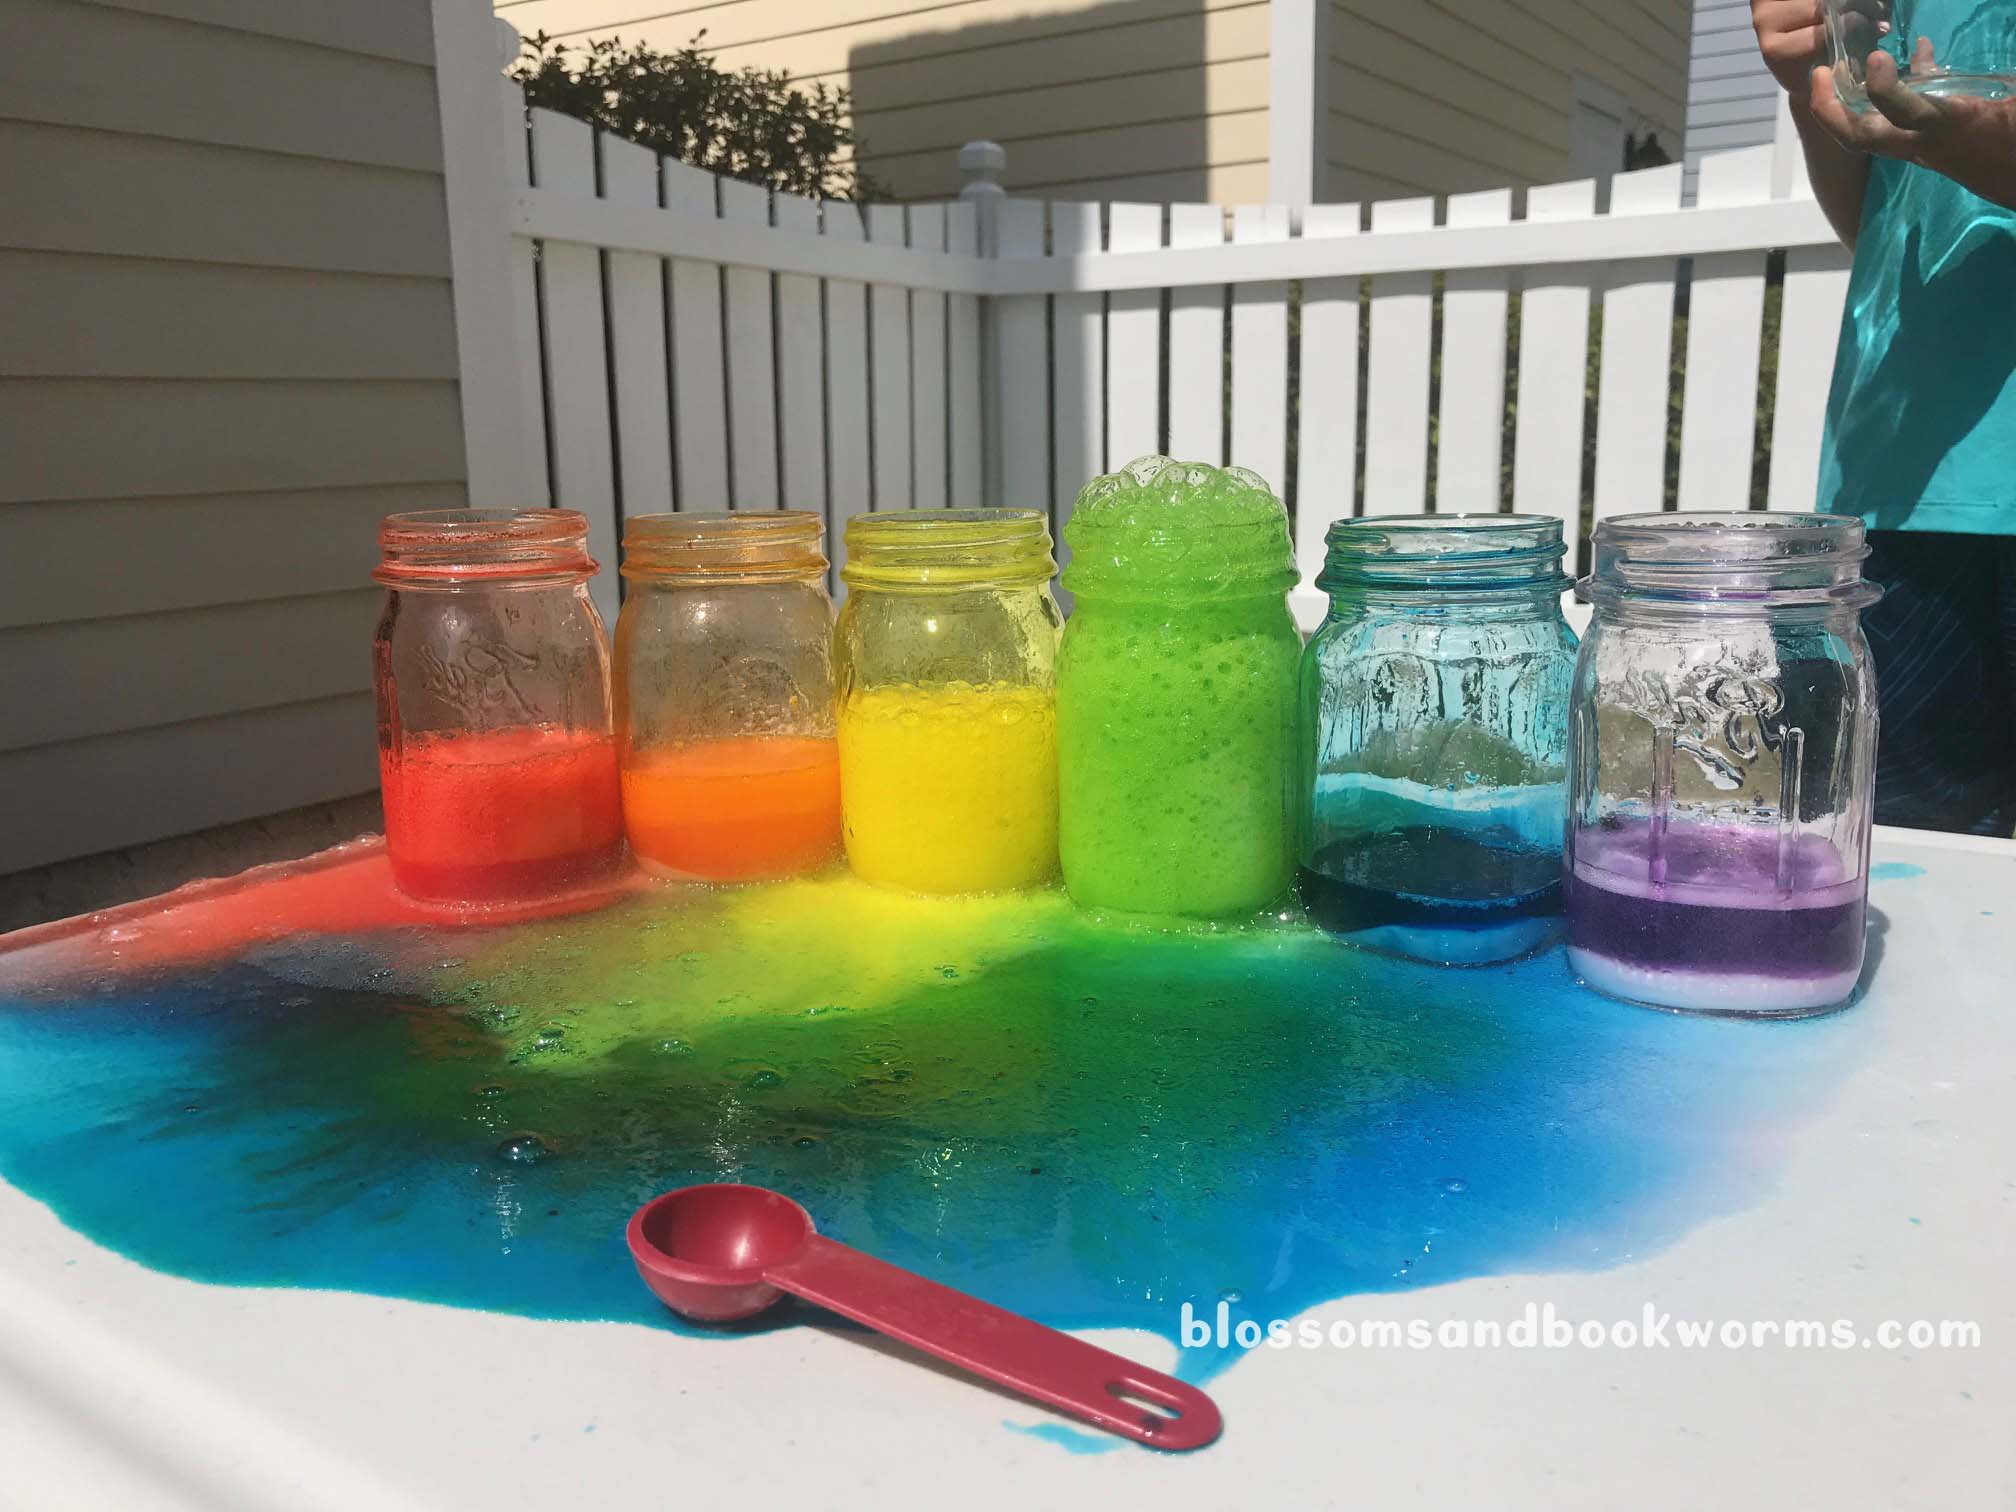
Now back to the experiment…. 😉 Measure out the vinegar into an easily pourable container. We used 2 2-cup measuring cups so that each kiddo could pour at the same time. The reaction happens super quickly! You will want to pour in a line down the center of the jars rather quickly to see them all bubble up at the same time.
Check out those fun bright colors!
Of course, my kiddos were a bit disappointed that the reaction didn’t last longer… but they had a blast pouring and mixing colors before clean up time.
Also, check out the epic mess. Do yourself a favor, do not try this inside your house, unless you have the jars inside a bin to catch the overflow. No one wants to be cleaning vinegar and food coloring off your nice white rug!
This was a perfect experiment for a sunny and warm summer day! Simple prep. Easy clean up with a hose. Bright fun colors. Impressed kiddos who talked about “bubbling potions” for the rest of the day!