
We have done a lot of “stained glass” projects in the last couple years, but the finished product of this one might be my absolute favorite (so far 😉). The colors are vibrant, translucent, and it seems to glow as the sunlight streams through! I am already thinking of ways to change the color palette and incorporate different scenes in the future…
To be fair this activity takes a bit more prep than I usually go for. If you have older kiddos who are good with scissors they can totally help with the prep. My younger kiddos waited until I had everything prepped and then jumped in to create the “stained glass” effect.
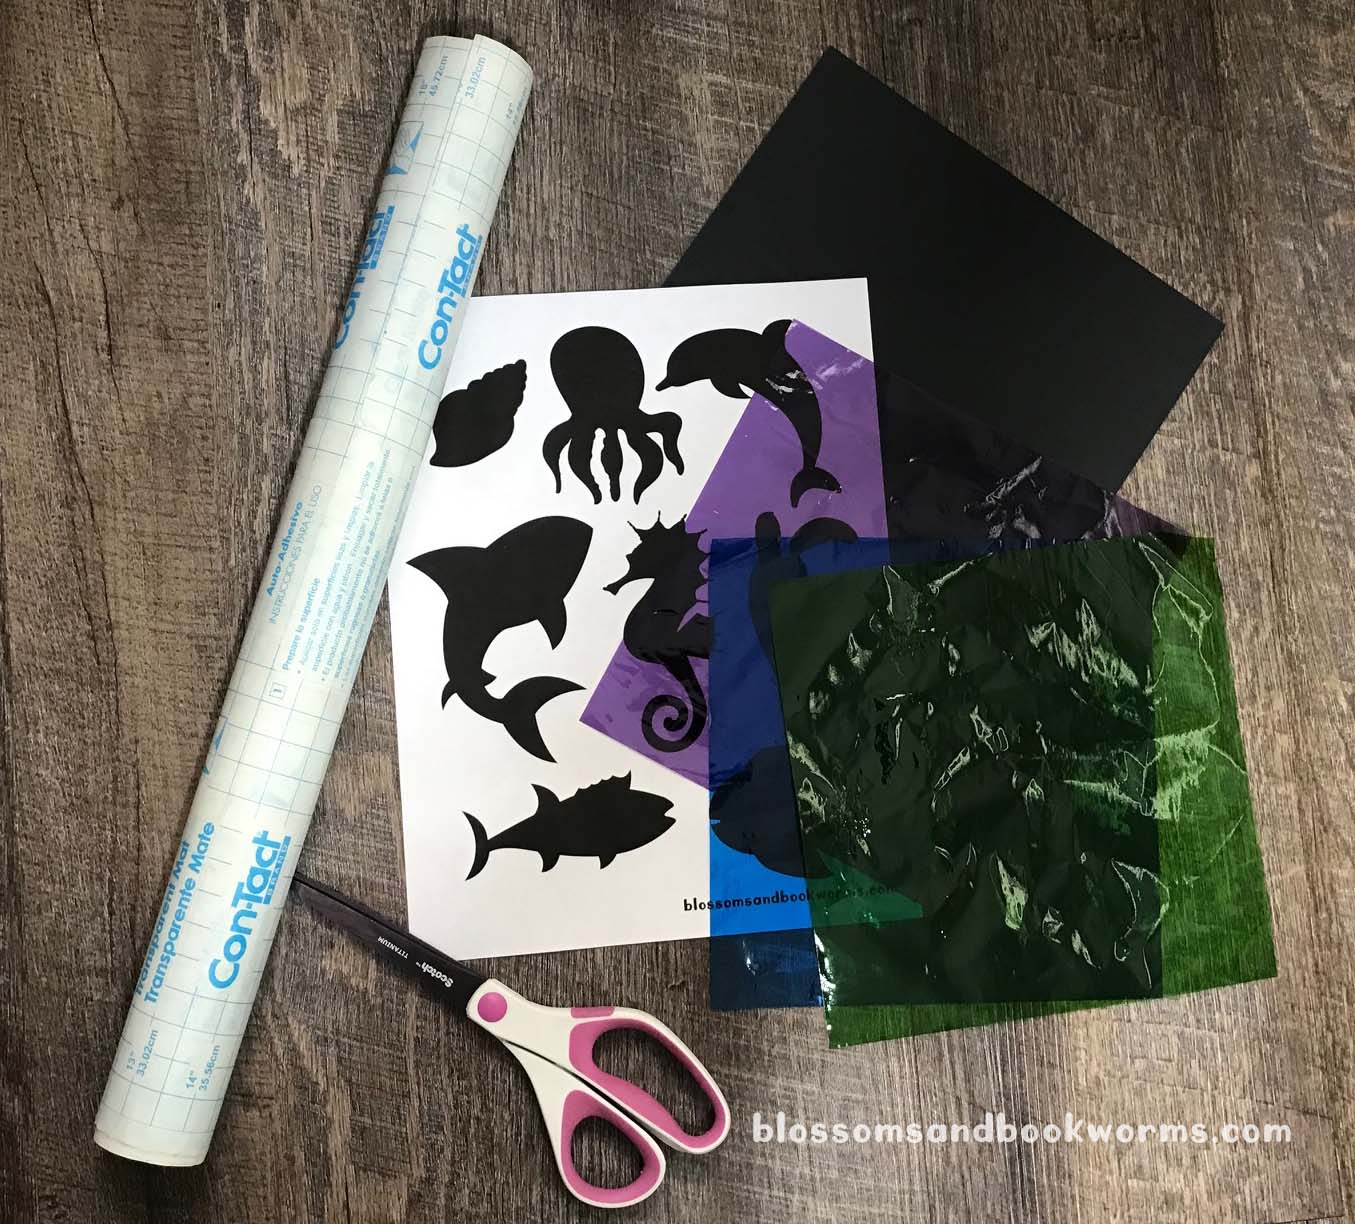
Materials:
- Black Cardstock
- Colored Cellophane – I love the look the cellophane gave, but you can totally do this with tissue paper too!
- Under the Sea Creatures – FREE Printable HERE
- Contact Paper
- Scissors
- Glue Stick or Scotch Tape to affix the sea creatures at the end.

Start by grabbing the free printable with the ocean creatures. Print the sheet and cut out the creatures you want to use.

Next, cut cellophane into small squares. We used mostly 1 inch squares but random shapes and sizes makes it even more interesting!
Precision is not required in this step. However, if small children are going to arrange the stained glass color part then make sure your pieces of cellophane are big enough for them to grab.
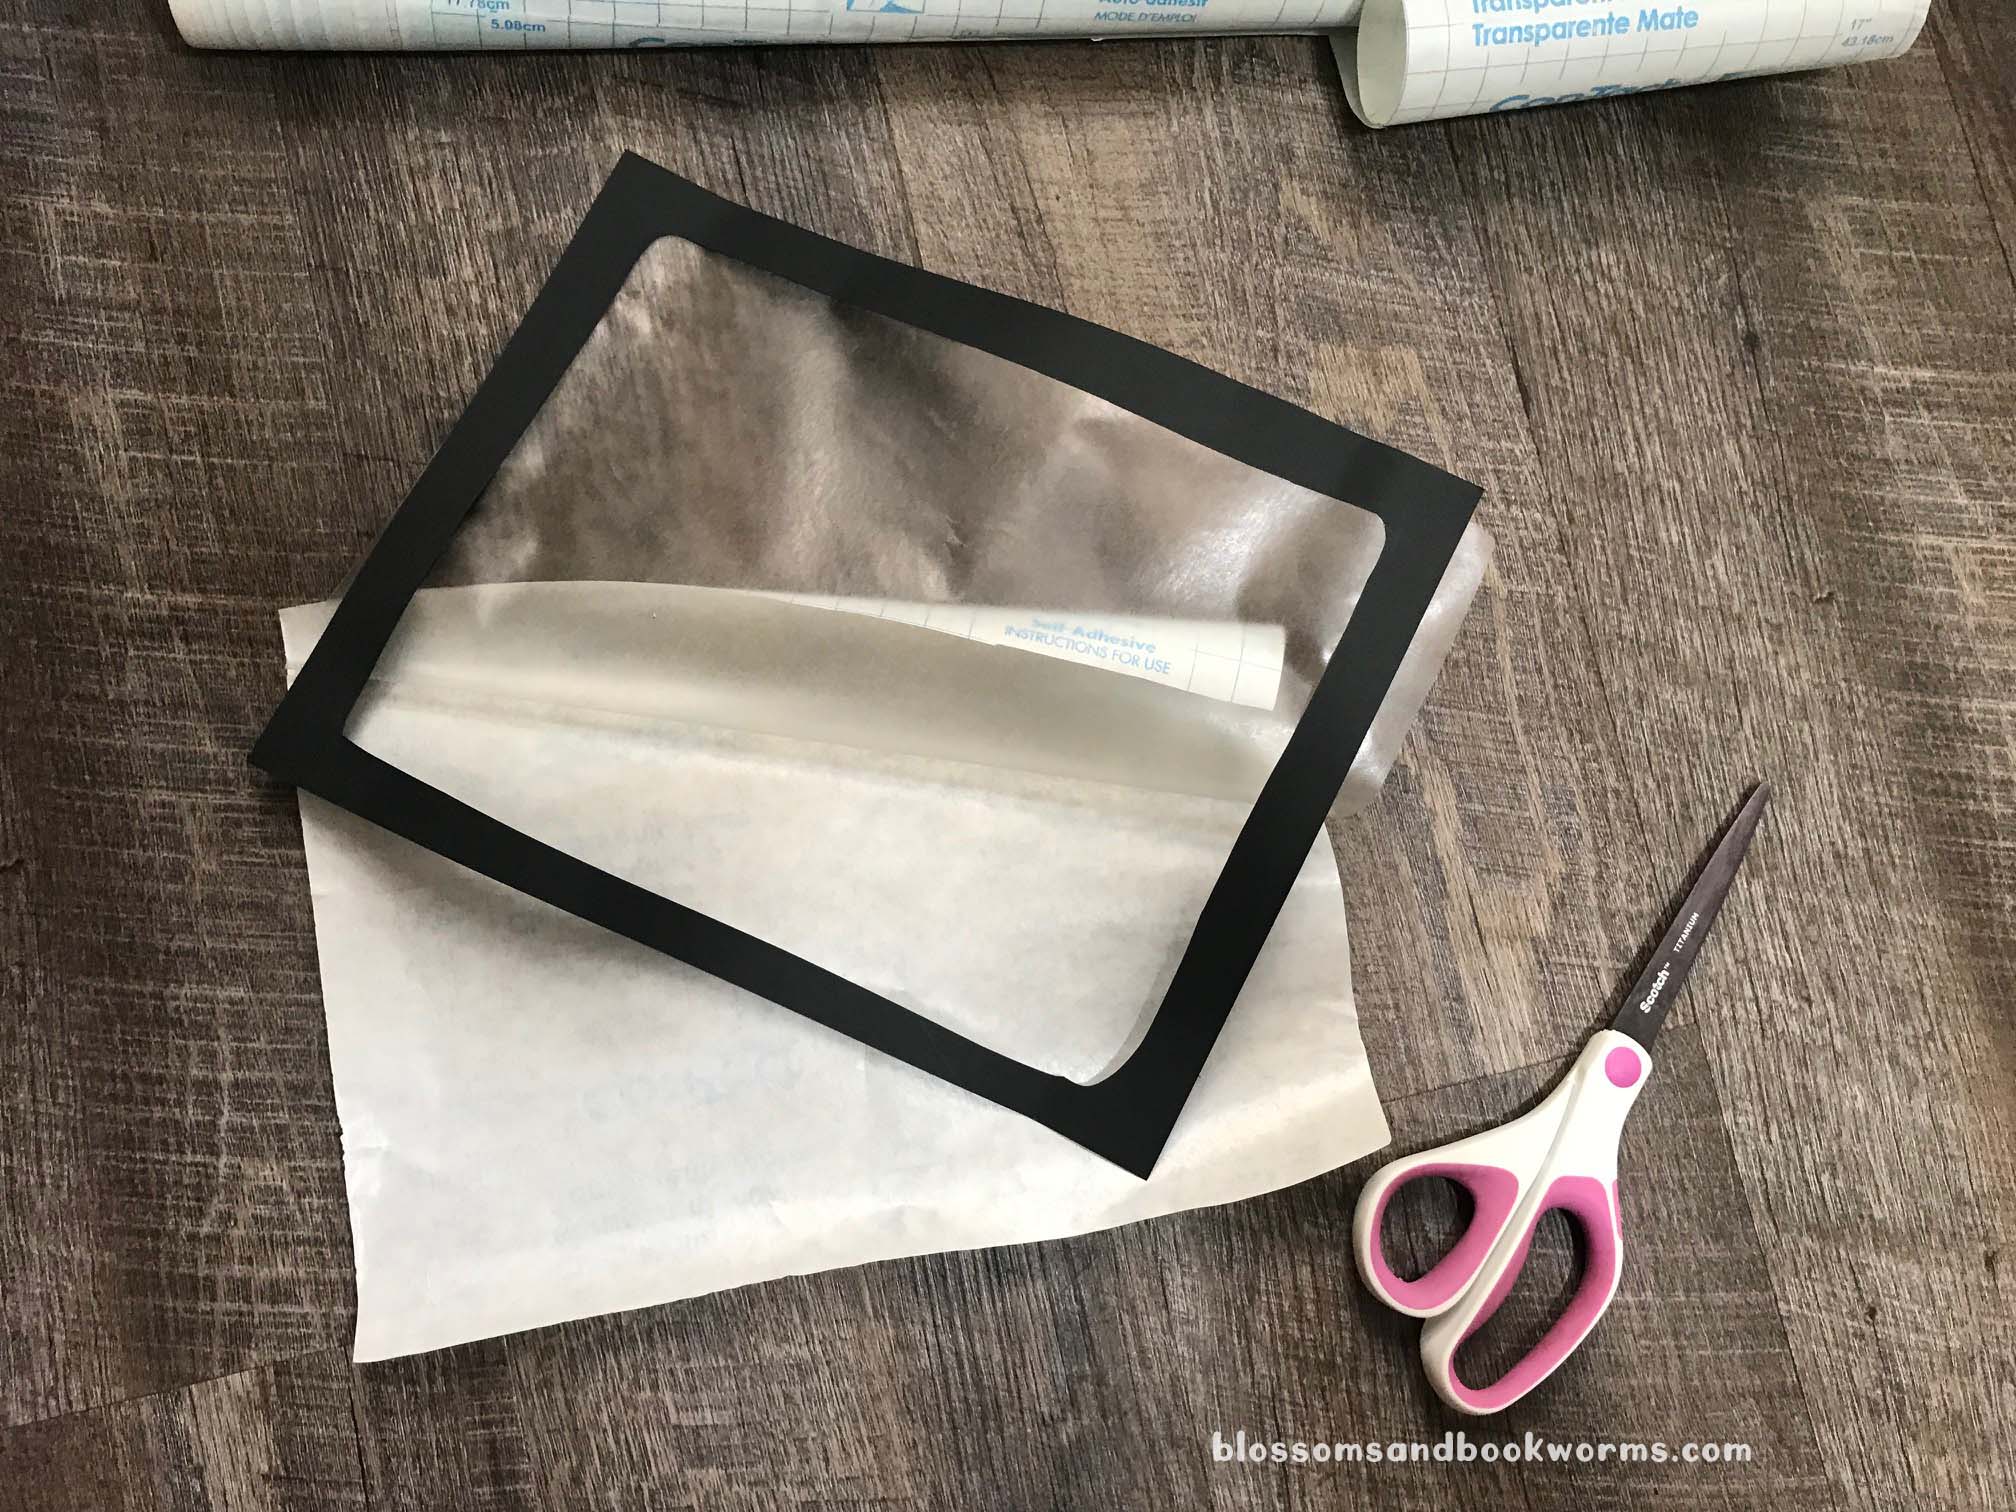
Next prep step – cut a frame out of the black card stock. The card stock is more durable than regular paper and it will give your final piece some stability.
Then cut a square of contact paper to the same size as the frame. Pull off the backing and adhere the contact paper to the back of the frame. Don’t worry if it wasn’t a perfect match. You can trim off any excess!
Lay the frame with the sticky part of the contact paper up!
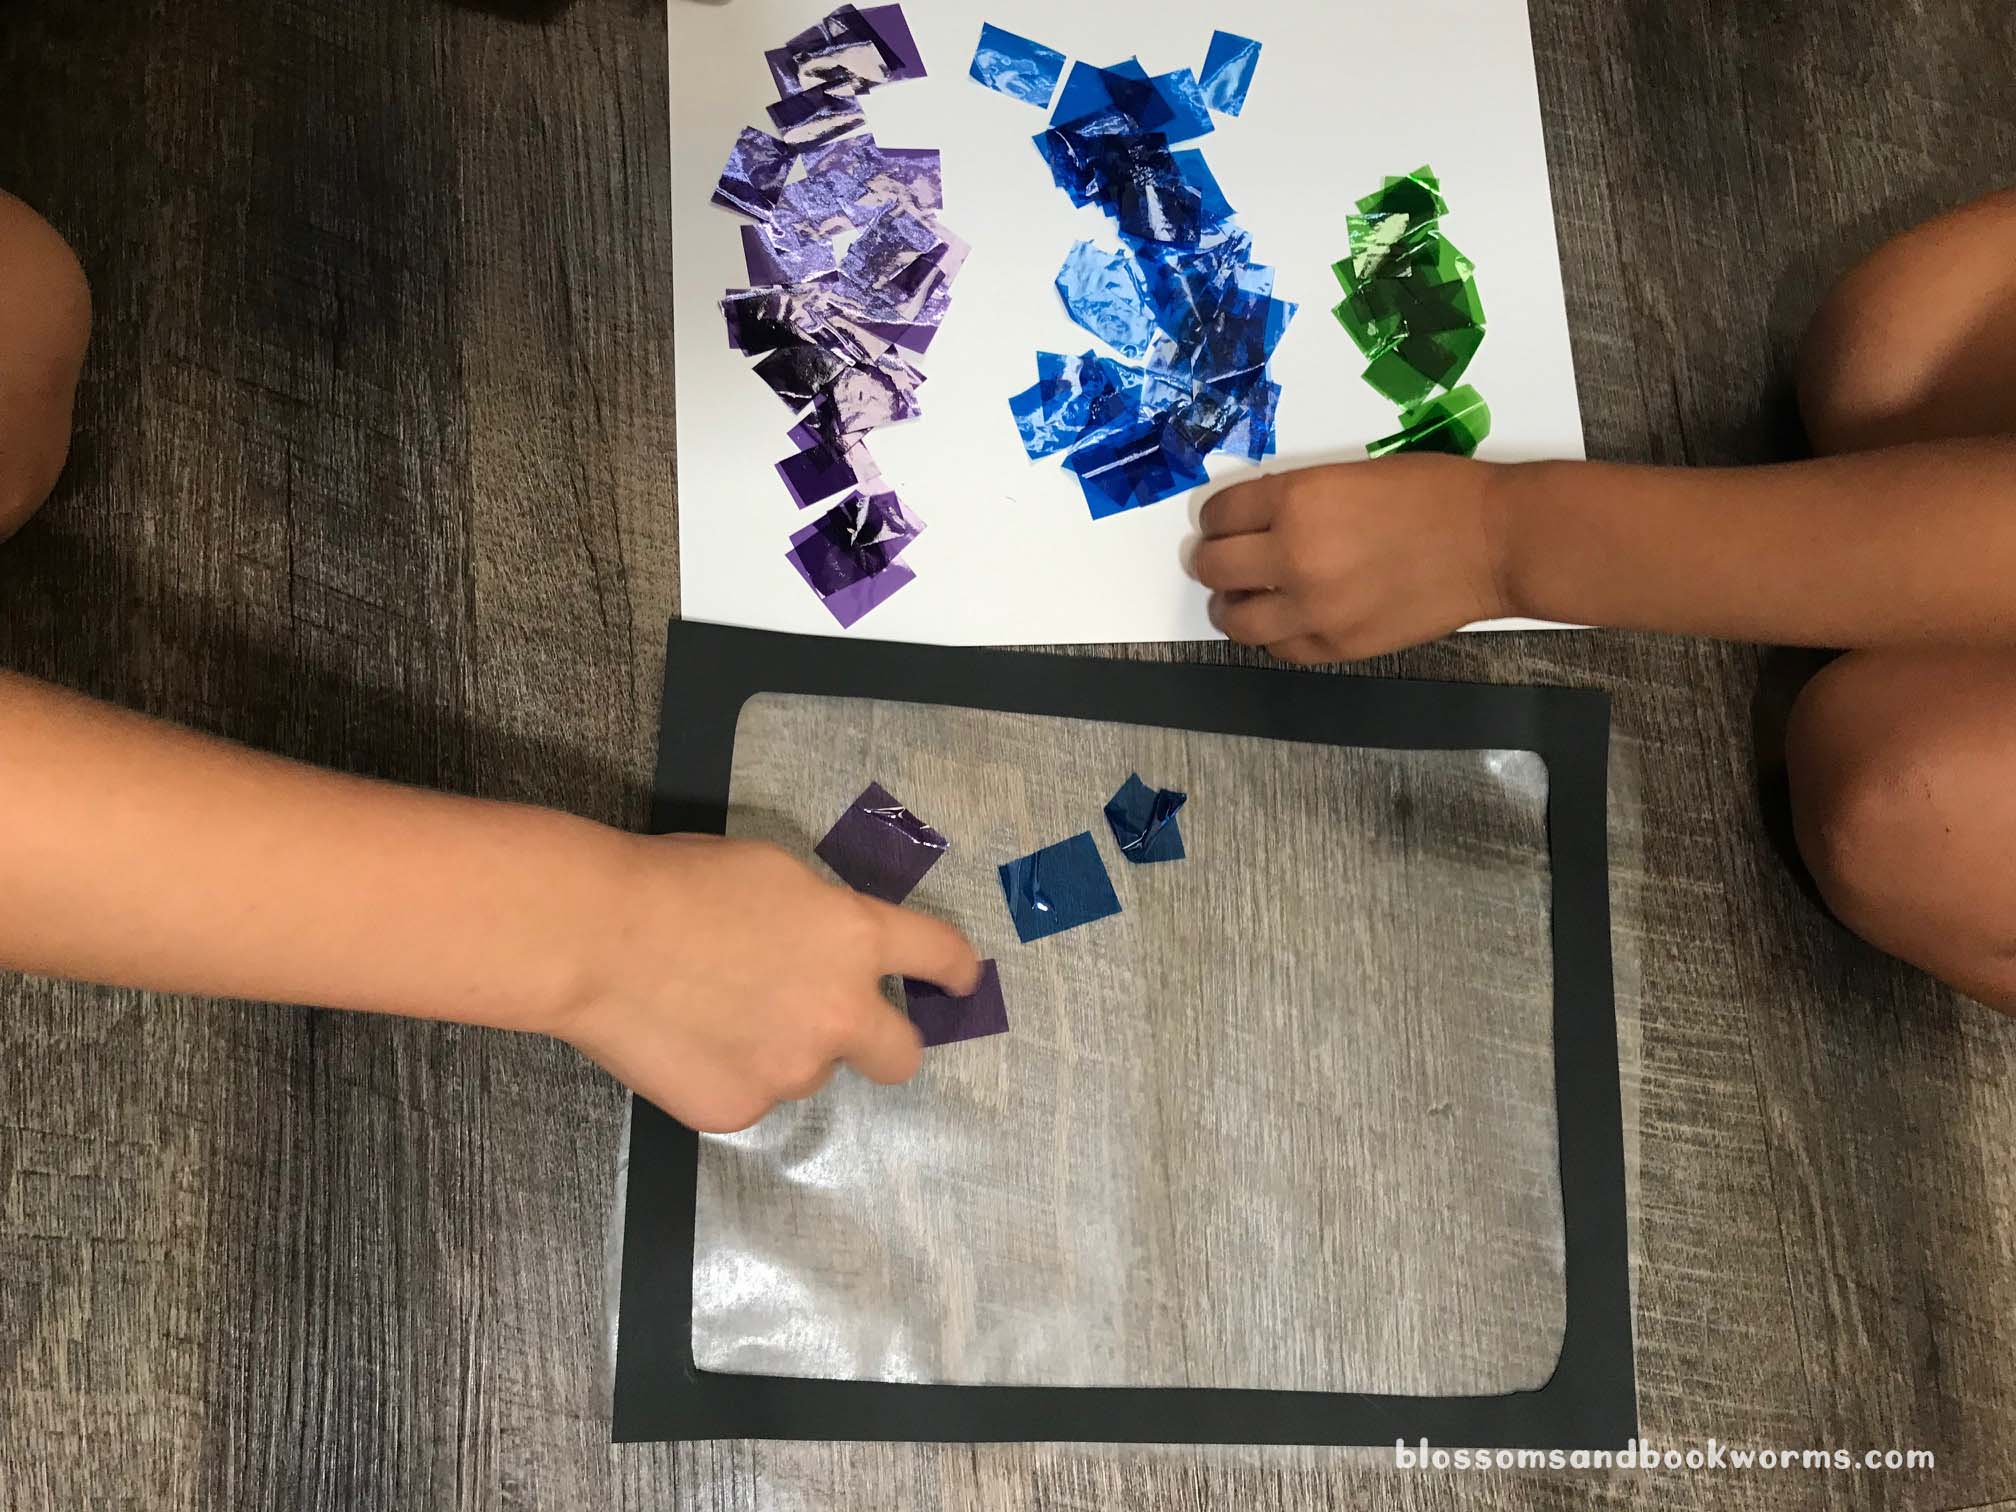
Now let those little kiddos jump in to help!
I let them arrange the cellophane as they chose. The goal is to cover all the sticky space inside the frame. There will be pieces that overlap and touch – that is totally okay! In fact, it is desired! This will give your final design depth of color and variation, making it a truly unique masterpiece.
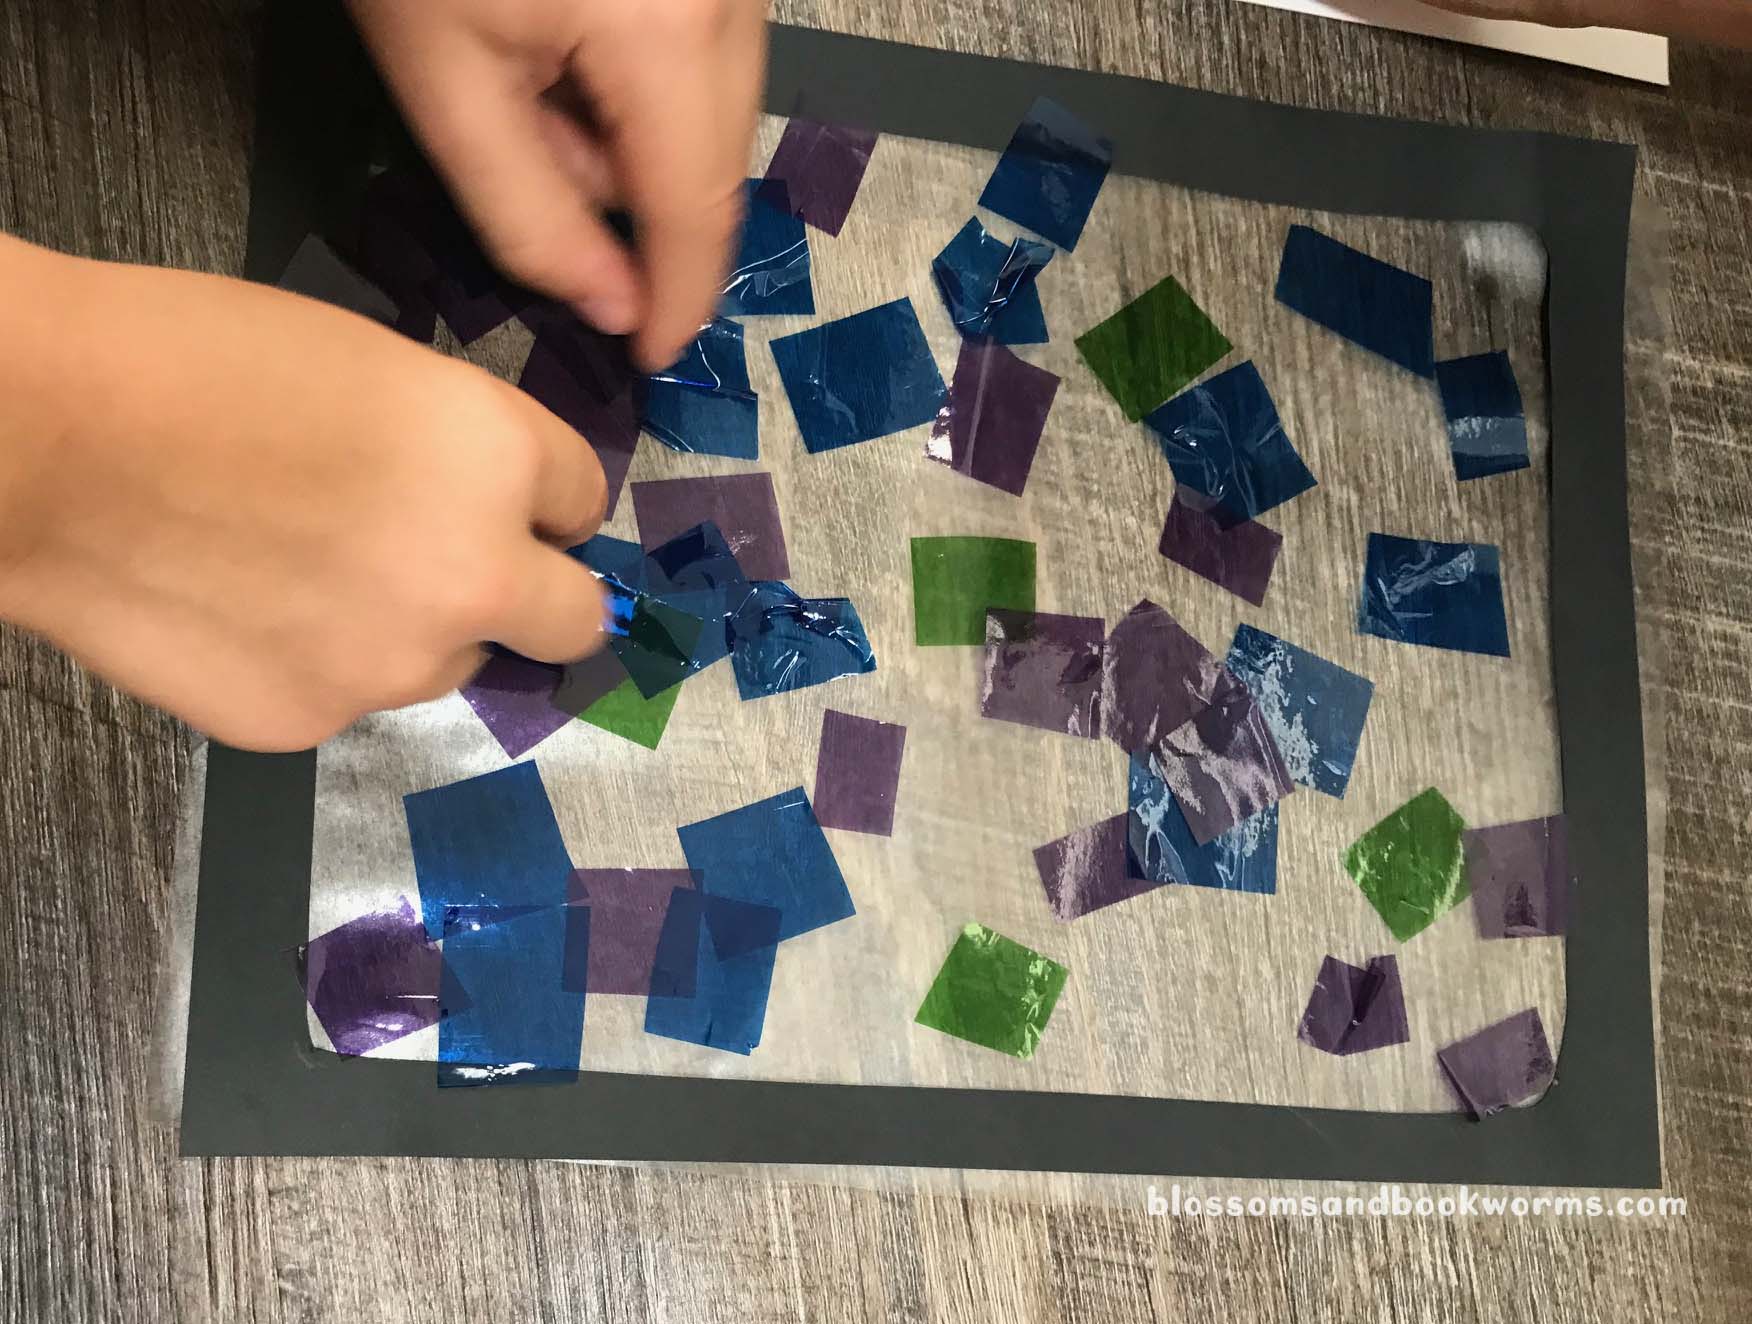


Now grab a cup of coffee because they are going to be sticking for quite a while… 😂
You could absolutely have each kiddo make their own stained glass panel but my kids would have given up before it was finished. Working together on one beautiful stained glass piece was quite enough for us! 😁

Once all the sticky contact paper is covered – you may need to go back and make sure they got all the little bits – you will adhere your under the sea creatures. You can do this step with a glue stick or with Scotch tape. I found rolling tape and letting my little ones stick the pieces down was the best approach for us.
We didn’t put quite all the creatures on our final design, but we did end up hanging the rest on the window around the piece.

I love how vibrant the colors are!
As the sun and light changed throughout the day, the stained glass seemed to glow! I absolutely love the final effect and I cannot wait to see how yours turns out!
Happy Creating!

